Advertisement
Table of Contents
- 1 Meter Description
- 2 Introduction
- 3 Operation
- 4 Getting Started
- 5 Automatic Time Setting
- 6 Manual Time Setting
- 7 Daily Alarm Setting
- 8 Snooze Alarm
- 9 12/24 Hour Display Mode
- 10 Thermometer and Relative Humidity Displays
- 11 Important Notes
- 12 Battery Replacement
- 13 Specifications
- Download this manual
Advertisement
Table of Contents

Subscribe to Our Youtube Channel
Summary of Contents for Extech Instruments CTH10A
- Page 1 USER MANUAL Radio Controlled Clock with Temperature & Humidity Model CTH10A ...
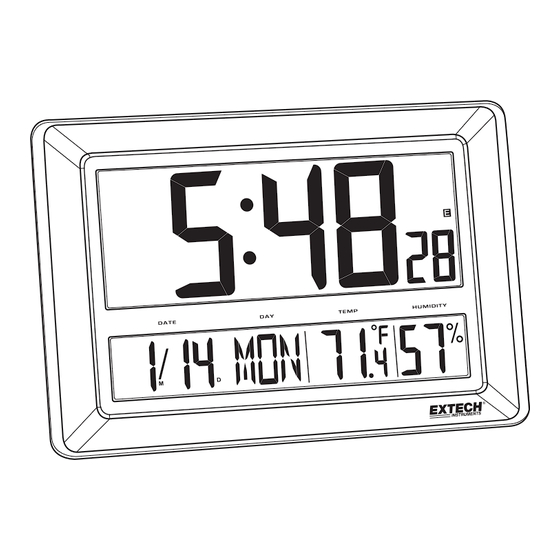
- Page 2 EXTECH INSTRUMENTS Introduction Thank you for selecting the Extech Model CTH10A Radio Controlled Clock with Hygro‐ Thermometer displays. The CTH10A is a real‐time calendar Clock (12/24 hour) that also displays temperature and relative humidity measurements taken from its internal environmental sensors. The clock can be set manually or automatically using the RC‐WWVB time signal. The CTH10A includes an audible/visible daily alarm function with ‘snooze’ mode. This device is shipped fully tested and calibrated and, with proper use, will provide years of reliable service. Please visit our website (www.extech.com) to check for the latest version of this User Guide, Product Updates, Product Registration, and Customer Support. Meter Description A1: RC‐WWVB time signal Icon A2: Time Display A3: Date A4: Day of Week A5: Indoor Humidity A6: Indoor Temperature B1: ‘Snooze’ Button B2: ‘MODE/SET’ Button B3: ‘+ 12/24’ Button B4: ‘‐ C/F ’ Button B5: ‘RESET’ Button B6: ‘AL ON/OFF’ Button C1: Wall Mount Hole C2: Battery compartment C3: Tilt Stand CTH10A‐en‐GB_V2.3 10/15 ...
- Page 3 The clock automatically synchronizes with the WWVB radio signal every day at 2am to maintain accurate time. If synchronization with the signal fails, the signal icon disappears; the clock then attempts to synchronize with the WWVB signal at 3, 4, and 5am. The clock can be set to scan the time signal manually by holding the button (B4) for 3 seconds. Note: If a manual scan is attempted with the signal icon showing, the signal icon will disappear and the manual scan will have to be attempted again. Each reception takes about 5 minutes. If reception fails, scanning stops and the signal icon disappears; the scan then repeats on the next full hour (e.g. if a scan failed at 8:20am a scan will be tried again at 9am). Stop scanning by holding “ ” button (B4) for 3 seconds. Note: Buttons will not function while scanning for the WWVB time signal. Manual Time Setting In the time display mode, hold the “MODE” button (B2) for 3 seconds to enter the Clock/Calendar setting Mode. Press “+” (B3) or “‐” (B4) button to adjust the setting and press the “MODE” button (B2) to confirm each setting and move to the next setting. The setting sequence is as follows: Hour, Minute, Second, Year, Month/Day sequence, Month, Day, DST. Notes: 1. All setting modes will automatically exit after 15 seconds of inactivity. 2. Press and hold the plus or minus button for faster scrolling of digits while editing. 3. For Time Zones: The default setting is zone “P”. Hold “+” (B2) button for 3 seconds to change to another zone “P” “M” “C” or “E” Pacific, Mountain, Central, and Eastern. 4. DST: When the DST function is activated (Daylight Saving Mode) “DST” will be shown on the LCD. Set ‘DST’ as described in the Manual Time Setting section above. CTH10A‐en‐GB_V2.3 10/15 ...
- Page 4 Press the “SNOOZE” (B1) button when the alarm tone sounds. The alarm snoozes for approx. 5 minutes, after which time it alerts again. “ ” flashes on the LCD during the snooze time. This process can be repeated 7 times. Except for the “SNOOZE” button, any button can be pressed to stop the snooze alarm. Otherwise, the alarm signal sounds for 2 minutes, then stops automatically. 12/24 Hour Display Mode Press the “12/24” (B3) button to select the 12 or 24 hour mode. Thermometer and Relative Humidity Displays The CTH10A includes internal temperature and relative humidity sensors. Temperature and relative humidity measurements are displayed on the lower right side of the clock. Press the “°C/°F” (B4) button to select C: Celsius or F: Fahrenheit units. If the temperature exceeds the measurable range, LL.L (beyond the minimum temperature) or HH.H (beyond the maximum temperature) will be shown on the LCD. Important Notes The clock loses time information when the batteries are removed. ...
-
Page 5: Specifications
R.H. Measurement range 20~99% Relative Humidity R.H Accuracy 20% to 40% RH: ±8% RH (@25°C) 41% to 70% RH: ±6% RH (@25°C) 71% to 90% RH: ±8% RH (@25°C) Power supply Three (3) ‘C’ type batteries Dimensions 29 x 43 x 3.8 cm (11.4 x 17 x 1.5 in.) Weight 1.25 kg (2.75 lbs.) Copyright © 2015 FLIR Systems, Inc. All rights reserved including the right of reproduction in whole or in part in any form ISO‐9001 Certified www.extech.com CTH10A‐en‐GB_V2.3 10/15 ...


Need help?
Do you have a question about the CTH10A and is the answer not in the manual?
Questions and answers