Table of Contents
Advertisement
Quick Links
Advertisement
Table of Contents

Related Manuals for TRIUMPH BOARD 8592580111891


Summary of Contents for TRIUMPH BOARD 8592580111891
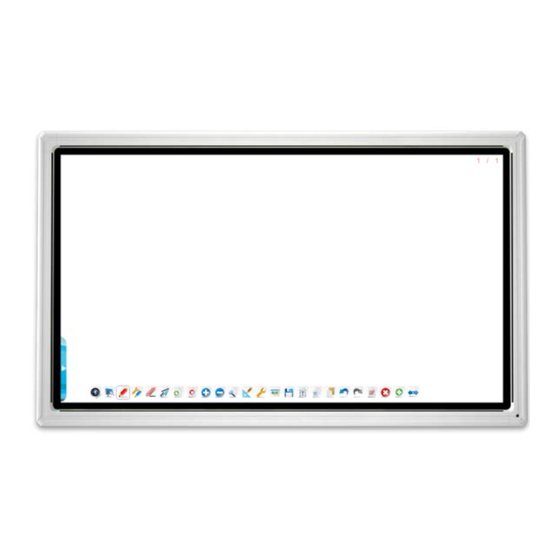
- Page 1 User Manual v 2.3 MULTI Touch LED LCD 55”/ 65”/ 70”/ 84” July 2015...
-
Page 2: Table Of Contents
External Computer and Touch Connection .................. 17 Audio and video equipment ......................18 AV ..............................18 HDMI1 / HDMI2 / HDMI3 (MHL) / HDMI4 (4K2K)* *TRIUMPH BOARD 84” LED LCD ..18 Coaxial connection ......................... 19 Video output connection ........................ 19 VGA output connection ......................19 USB Equipment connection ...................... - Page 3 8. Menu Operation ....................22 One Touch menu operation ......................22 Settings menu ..........................22 Input setting ..........................22 Brightness setting ........................23 Volume setting ..........................23 Zoom setting ..........................24 Screen setting ..........................25 9. More Settings (advanced settings) ..............26 Advanced settings menu .......................
-
Page 4: Product Description
BOARD LED LCD MULTI Touch Series. TRIUMPH BOARD MINI PC6A / 7A is equipped with Intel i5 / 7 processor, integrated / independent graphics and 4 / 8 GB RAM, which ensures high power for running current software. 500 / 1000 GB hard disk provides sufficient capacity for saving and storing user data. -
Page 5: Technical Specifications
2. Technical Specifications TRIUMPH BOARD 55” MULTI Touch LED LCD EAN: 8592580111891 Screen Type: TFT LCD/ A Standard/ LED backlight Resolution: 1920 x1080 Refresh rate: 6 ms, 60 Hz, 1400:1 Display Area: 1209.6(H) × 680.4(V) Outline Dimensions: 1369 x 828 x 102 mm... - Page 6 TRIUMPH BOARD 84” MULTI Touch LED LCD EAN: 8592580111853 Screen Type: TFT LCD/ A Standard/ LED backlight Resolution: 3840 x 2160 Refresh rate: 8 ms, 120 Hz, 1600:1 Display Area: 1860.48 (H) x 1046.52 (V) Outline Dimensions: 2006 x 1192 x 107 mm...
- Page 7 USB 3.0: LAN (RJ45) AC IN: Power: only TRIUMPH BOARD 65”, 4K and 84”, 4K LED LCD Sound System Power Amplification: 2x10W Sound: Surround Power Power Requirements: 100 – 240 V AC 50/60 Hz Overall Power Consumption: < 200 - 500 W Standby Power Consumption: <...
- Page 8 TRIUMPH BOARD MINI PC7A for MULTI Touch LED LCD Series EAN: 8592580111860 Processor: Intel i7 Graphics: Independent Graphics GT745M Sound Card: Integrated High Definition Audio Stereo Networking: Integrated 10/100/1000 Mbps adapted Memory: 8 GB DDRIII Hard Drive: 1000 GB SATA WIFI: 802.11 a/b/g/n, 2x2, dual-band WiFi 2,4/5 GHz...
-
Page 9: Safety Warning
3. Safety Warning Before using the device, please read the instructions carefully. Placement Do not put the device on surfaces that are unstable, easy to tilt or which can fall. Do not put the device in places with direct sunlight, or near sources of heat, such as electric heaters or strong light sources. -
Page 10: Ventilation
Ventilation Please place the machine in ventilated places, and ensure machine's good heat dissipation. Please ensure ventilation spaces 10 cm on the sides and back, and 20 cm on the top of the machine. Headphones Extended use of headphones at high volumes may damage hearing.. If external headphones/earbuds is needed, please turn down the machine volume in advance. -
Page 11: Preparing For Installation
4. Preparing for Installation Unpacking Accessories Quick start guide, styluses, batteries, remote control, power cords (UK, US, EU), VGA cable, touch OUT USB, headphone cable, AV cable, USB Flash Drive and VC Camera Bracket. 2x Stylus Batteries Remote control Quick Start Guide USB Cable Headphone Cable Power Cord (US, UK, EU) -
Page 12: Control Panel
Control Panel Number Item Function Description Power on/off HOME HOME button: back to main interface BACK Return button: return to previous level menu MENU Menu button: call up function menu VOL - Volume down button: turn volume down VOL + Volume up button: turn volume up MUTE Mute button: mute volume... -
Page 13: Terminal Interface
HDMI IN device and can also implement touch function (HDMI3 can implement MHL function, HDMI4* can implement 4K/2K) only TRIUMPH BOARD 65”, 4K and 84”, 4K LED LCD VGA OUT Connected to display devices with VGA input function AUDIO IN... -
Page 14: Remote Control
6. Remote control Remote control button instructions... -
Page 15: Detailed Function Description Of Remote Control Buttons
Detailed function description of remote control buttons Press this button to enter standby mode when power is on; Click this button to switch on in standby mode LCD: Press this button to control your LED LCD screen. Note: Your Remote control has been set-up automatically for the function of your LED LCD. -
Page 16: Remote Control Use Instructions
Remote control use instructions Install Batteries 1 Open back cover of battery compartment on the back of remote control 2 Install AAA type batteries according to the corresponding electrode, make sure battery positive and negative poles are correctly placed ("+"to"+", "-" to "-"), please do not mix old and new batteries 3 After batteries are installed, close the back cover of battery compartment, and snap the clip fastener shut against the bottom of the remote. -
Page 17: Connection And Settings
7. Connection and Setting CAUTION For the safety of you and the device, please do not connect any power cord before the external device has been prepared. External Computer and Touch Connection USB Cable Audio Cable VGA Cable Computer (1) Use VGA line to connect to VGA output port of external computer, and meanwhile use headphone audio line to connect to external computer audio output interface. -
Page 18: Audio And Video Equipment
Press (4) Press INPUT key to switch to CVBS port HDMI1 / HDMI2 / HDMI3 (MHL) / HDMI4 (4K2K)* * only TRIUMPH BOARD 65”, 4K and 84”, 4K LED LCD (MHL) DVD Disc Player HDMI cable (1).Use HDMI line to connect audio and video equipment with HDMI output... -
Page 19: Coaxial Connection
Coaxial connection (1).Use coaxial line to connect audio device with coaxial input (2). After line connection, plug in power cord, and switch power to On (3).Press to turn equipment on Video output connection VGA output connection Computer Computer (1). Use VGA line to connect display devices with VGA input, and use headphone line to connect sound output (2). -
Page 20: Usb Equipment Connection
USB Equipment connection Network cable connection Microphone connection WAN connection NOTE: If the user wants the built-in computer and android system to connect to the Internet at the same time, Connect item 6 and item 8 at the same time... -
Page 21: Usb Equipment Connection
USB equipment connection Serial port line Computer After using the serial port line to connect central control equipment and the device, certain functions of the device can be controlled via the central control device, such as: device ON/OFF, and adjustment of sound volume, etc. -
Page 22: Menu Operation
Press return key on remote control, or click blank area outside menu to exit menu. Note: PC channel will only display when you connect the built-in computer. HDMI 4K channel will only display in the panels that support the 4K2K function ( only TRIUMPH BOARD 65”, 4K and 84”, 4K LED LCD... -
Page 23: Brightness Setting
Brightness setting Press INPUT button on remote control or via touch A method to call up Input Setting menu; Press button on remote control or click “ ” icon to enter Brightness setting menu; Press button on remote control or drag brightness adjustment progress bar to adjust brightness;... -
Page 24: Zoom Setting
Zoom setting Press INPUT button on remote control or via touch use method A to call up the Settings menu; Press button on remote control under Settings menu or click “ ”icon with touch pen to enter the Settings menu; button on remote control or click directly to select and adjust each option;... -
Page 25: Screen Setting
Screen setting Under channels other than Android, press Menu button on remote control or via touch A method to call up settings menu; Press button on remote control or click “ ” icon directly. Press Menu on remote control to enter advanced settings menu;... -
Page 26: More Settings (Advanced Settings)
9. More Settings (Advanced settings) Advanced settings menu Under Apps menu, click on Settings call up Advanced settings menu; Press button on remote control or click directly to select each option; Press return key on remote control or front panel of equipment to exit menu. Ethernet Checking View the current network connection status and the network parameters of the device. -
Page 27: Annotation Menu
Annotation menu Fig.1 Fig.2 Place two fingers on the screen (about 20~50mm apart) and keep in position more than two seconds under any channel to call up annotation menu (Figure 1); In annotation, menu is shown in Figure 2. In annotation , input only using your fingers; stylus and remote control cannot perform annotation. -
Page 28: Android System Interface
10. Android System Interface Main Interface Switch to Android channel to display main interface as shown above; Press key on remote control to select icon below, and press Enter key to enter corresponding program, or click on the associated icon directly to enter the program; In any program, press Home button on the remote control or <Home key>... -
Page 29: Browser
1. Storage device display Click with touch pen to enter corresponding storage devices area 2. Menu/exit menu Click menu icon with touch pen to pop up menu options {order (type/size/time)} Click exit icon with touch pen to directly exit resource browse. -
Page 30: Pip
Enter channel browse to pop up picture-in-picture interface in displayed image; Press button on remote control or click directly picture-in-picture display interface point, to pop up channel selection list of picture-in-picture, press button on remote control to move selection cursor into channel list, then press button to select corresponding channels. -
Page 31: Settings
Apps Caution! Please note that you cannot install your own applications into Apps section! Each application must be suitable for screen resolution and hardware specifications, as some apps may have display or performance problems! Browser See page 29 Settings See page 22 TB Comenius Lite See page 31 TB Comenius Lite... -
Page 32: Tb Comenius Lite
can click or check to select Brush icon Click to write, press long for three seconds to enter setting screen, to set brush color and thickness Eraser icon Click to erase writing symbols, can be erased by box selection Undo icon Click to cancel previous step Redo icon Click to restore previous step... -
Page 33: Audio Play
Audio play Close current audio file Play previous audio Play/pause file Play next audio file Playlist Loop play Random play Single play Video play Close current video file playing Play previous video File Fast backward Play/pause Fast Forward Play next audio file Playlist... -
Page 34: Vc Camera Bracket Installation
12. VC Camera Bracket installation Note: You need to have TRIUMPH BOARD Videoconferencing System before you start. VC system is not included in the accessories Please install the bracket on LED LCD when you unpack the unit, before wall mounting. -
Page 35: Troubleshooting
13. Troubleshooting Board fails to work normally 1. Check whether there are other objects between remote control and television remote control receiving window, blocking signal transmission and thus leading to failure of remote control. Remote control failure 2. Check whether the battery terminal in the remote control is correctly connected. 3. -
Page 36: Software Protocols
14. Software protocols This document describes the hardware interface specification and software protocols of RS232 interface communication between LED LCD and PC or other control unit with RS232 protocol. 14.1 Description Hardware specification LED LCD communication port is on the rear bottom side (1) Connector type: DSUB 9 Pin Male (2) Pin Assignment Male DSUB 9Pin... - Page 37 Serial port communication setting: Baud Rate Select: 9600bps (fixed) Data bits: 8bits (fixed) Parity: None (fixed) Stop Bits: 1(fixed) Protocols Command Format Content Description Remar 0xAA fixed value Head 0xBB fixed value 0xCC fixed value Main command subcommand 0x00...
- Page 38 Point to AA BB CC 08 07 00 0F DD EE FF point channels ATV 00-99 AA BB CC 05 00 XX ** DD EE FF Power of PC ON AA BB CC 09 01 00 0A DD EE FF AA BB CC 09 00 00 09 DD EE FF Mode Code...
- Page 39 Refresh AA BB CC 07 4C 00 53 DD EE FF Input AA BB CC 07 07 00 0E DD EE FF Home AA BB CC 07 48 00 4F DD EE FF Menu AA BB CC 07 0D 00 14 DD EE FF Delete AA BB CC 07 40 00 47 DD EE FF Energy...
- Page 40 Status Check Codes: Function Search Code Reply Code Status Example Check AA BB CC 01 02 AA BB CC 80 00 00 80 DD EE FF Power 00 03 DD EE FF AA BB CC 80 01 00 81 DD EE FF Status Check AA BB CC 03 02...
-
Page 41: Maintenance
15. Maintenance Proper maintenance can prevent many early defects; regular, careful cleaning can keep the device like brand new. Please unplug power plug before cleaning and maintenance, to prevent electric shock. Clean screen Mix a small amount of fabric softener or dishwashing detergent with warm water. -
Page 42: Display Mode
Please contact your local supplier regarding warranty and technical service or find all warranty conditions and service partners on our website www.triumphboard.com. If you have any questions please email us at info@triumphboard.com TRIUMPH BOARD a.s. Neklanova 122/15 128 00 Prague 2 Czech Republic...
Need help?
Do you have a question about the 8592580111891 and is the answer not in the manual?
Questions and answers