Table of Contents

Related Manuals for Craig CCR9029

Summary of Contents for Craig CCR9029
- Page 1 DIGITAL CAMCORDER WITH CAMERA DIGITAL CAMCORDER WITH CAMERA HD 1080P Action Camera & Video Recorder HD 1080P Action Camera & Video Recorder Owner's Manual PLEASE READ BEFORE OPERATING THIS EQUIPMENT. Model: CCR9029 Size: 148.5(W) x 210(H)mm (A5)
- Page 2 FCC INFORMATION: This equipment meets the limits for a class B digital device. Pursuant to Part 15 of FCC rules. Only the cable supplied with the camcorder should be used. Operation with other cables is likely to result in interference to radio and TV reception and could void the user's authorization to operate this equipment.
- Page 3 could void the user's authority to operate the equipment. Never try to take pictures when operating a motor vehicle or while walking. Never try to open the case of the camcorder or attempt your own repairs. Always leave service to authorized repair facilities. Physical damage and malfunction of this unit can cause the image data stored in its memory to be deleted.
-
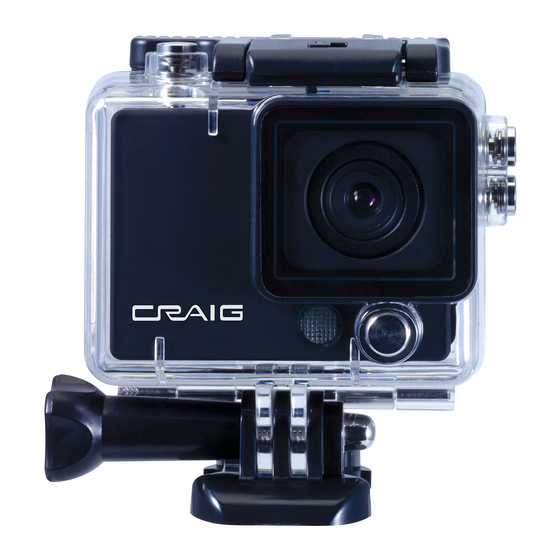
Page 4: Location Of Controls
Location of controls: Mini USB Port: For built-in rechargeable battery recharging; files upload; webcam. Micro HDMI Port: To connect to Television. Micro SD Card Slot: To insert an external Micro SD Card for extension memory. (Shutter/Power on-off) Button: Press to power on the unit. To power off, press and hold the button approximate 3 seconds until “Bye-Bye”... - Page 5 In the setting menu, press to return to previous menu. Press repeatedly until all menu disappear on the display to exit. Buttons: In capture mode, press repeatedly to zoom in or out. In setting menu, press to move the cursor on it up or down. In playback mode, press to skip file forward or backward.
- Page 6 Open the cabinet: Fig. A Fig. B Fig. C Install the battery as the figures below, then replace the cabinet: Fig. D Fig. E Fig. F 2. Recharge: Recharge the battery in first time use or when battery low indicator “low battery” appear on the display as below: Connect the small plug from the supplied USB connection cable to the Mini USB Port on the unit.
- Page 7 storing it. A. Recharge and store the battery within the temperature range of 5°C~35°C (40°F~95°F). B. Do not over charge (longer than 24 hours). Excessive charging or discharging may shorten the battery's life. C. Battery life naturally shortens slowly over time. 3.
- Page 8 4. Replace the unit into the water proof case as the figures below: Fig. 1 Fig. 2 Fig. 3 Note: For the best result of water proof, always put the unit into the water case and make sure it is completely closed and locked. 5.
- Page 9 Fig. 5 Mount the camera on the handle of bicycle/motorcycle with the supplied assembly’s kit as the figures below: (Take out the unit from the water proof case as the previous procedures before assemble.) Fig. 1 Fig. 2 Fig. 3 Fig.
- Page 10 Video Recording mode Picture Capture Mode Playback Mode In Video recording mode, press the (Up or Down) Button to zoom in or out. Press the Button to start recording. Press again to stop. In Picture capture mode, press the (Up or Down) Button to zoom in or out. Press the Button to capture.
- Page 11 To set or reset the picture size of video to: 1080p: 1920 x 1080 pixels x 25fps (Note: Only operate with Class 4 and faster Micro SD card. If the recording speed of the card is lower, it will auto set to 720p) 720p: 1280 x 720 pixels x 30 fps VGA:...
- Page 12 Date Stamp: Set to On or Off as desire. If set to On, the Date Stamp will record in the bottom right corner of the video. Picture: 1. Power on the unit and enter to picture capture mode as previous procedures. 2.
- Page 13 ~ 2M (1600 X 1200 pixels) ~ 1.3M (1280 X 960 pixels) Quality: To set or rest the quality of the picture to Super Fine; Fine or Normal as desire. Sharpness: To set or rest the sharpness of the picture to Sharp; Normal or Soft as desire. Exposure: To set or reset the exposure as desire.
- Page 14 Playback-Video files: 1. Power on the unit and enter to playback mode as previous procedures. 2. In video file playback mode, touch the display, the function selection menu will appear as below: 3. Touch the “ ” Button on the screen in , the setting menu will appear on the screen as follows.
- Page 15 2. In picture file playback mode, touch the display, the function selection menu will appear as below: 3. Touch the “ ” Button on the screen in , the setting menu will appear on the screen as follows: 4. Touch the correspondence button on the display or press the buttons on the unit to set or reset the settings as on screen instructions as below: Delete:...
- Page 16 2. In picture file or video playback mode, touch the display, the function selection menu will appear as below: 3. Touch the “ ” Button on the screen in , the setting menu will appear on the screen as follows: 4.
- Page 17 Slide up and down the digits to set the time. Auto Power Off: Set or reset the Auto Power Off timer and turn it On or Off. Beep Sound: To turn On/Off beep sound when press the Buttons. Language: To set or reset the language of the OSD (on screen display). Frequency: To set or reset the frequency of the AC power to reduce interferes.
- Page 18 Note: Compatible computer system: Windows XP; Vista; 7 & 8. Web Camera: The unit can use as a web-camera as below: 1. Press the Power Button to power on the unit, the display will light. 2. Press and hold the Mode Button, connected the unit to any Computer using follows operation system, release the Mode Button, “PC Camera”...
- Page 19 procedures, double click the icon of on your computer’s desktop to open and enter to webcam mode. Monitoring and/or record the videos as the on screen instruction as desire. Micro HDMI: To read/watch the photo/video from your TV: 1. Connect the unit to the TV by a Micro HDMI—HDMI Connection Cable (Not supplied). 2.
- Page 20 3M, 2048 x 1536 pixels, 2M, 1600 x 1200 pixels, 1.3M, 1280 x 960 pixels Lens: f = 2.8mm, F = 2.4 Focus range: 1.2m (4 feet) ~ infinity Storage media: Micro SD card (Up to 32GB, class 4; not included) File format: JPG/AVI Power Source:...
- Page 21 1 x Mount Adapter 2 x Pivot Arms 1 x Bicycle Handlebar Mount 1 x Helmet Flat Mount 1 x Helmet Curved Mount 1 x Waterproof Case 1 x PC Camera Software CD (Suitable for: Windows 8; Windows 7; Windows Vista; Windows SPECIFICATIONS ARE SUBJECT TO CHANGE WITHOUT NOTICE...
- Page 22 Under no circumstance shall Craig be liable for any loss or consequential damage arising out of the use of this product. This warranty gives specific legal rights. However, you may have other rights which may vary from state to state.
Need help?
Do you have a question about the CCR9029 and is the answer not in the manual?
Questions and answers