Table of Contents
Advertisement
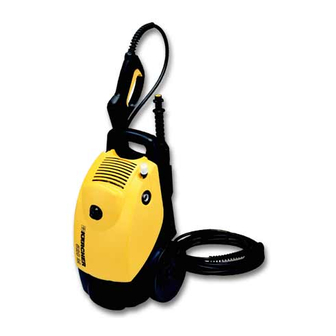
Model K 520 M
High Pressure Washer Operator Manual
Overview ................................................................................... 2
Precautions ............................................................................ 2-4
Assembly Instructions .............................................................. 4
Operating Instructions .............................................................. 5
Using the Accessories .............................................................. 6
Working with Detergents .......................................................... 7
Shut Down and Clean-Up ........................................................ 8
Taking a Break .......................................................................... 8
Winterizing and Long-Term Storage ........................................ 8
Cleaning Tips ....................................................................... 9-10
Optional Cleaning Accessories .............................................. 10
Troubleshooting .................................................................11-12
Specifications
Max. Pressure
Max. Water volume
Voltage
Amp draw
Please keep the original box, packaging and receipt.
Before operating this unit, please read this manual
thoroughly and retain it for future reference.
1500
PSI
1.8 GPM
120 V
13 AMPS
5.959-948 02.01
Advertisement
Table of Contents
Troubleshooting

Related Manuals for Kärcher K 520 M


Summary of Contents for Kärcher K 520 M
-
Page 1: Table Of Contents
Model K 520 M High Pressure Washer Operator Manual Overview ................... 2 Precautions ................2-4 Assembly Instructions .............. 4 Operating Instructions .............. 5 Using the Accessories .............. 6 Working with Detergents ............7 Shut Down and Clean-Up ............8 Taking a Break ................8 Winterizing and Long-Term Storage ........ -
Page 2: Overview
OVERVIEW High Pressure Washer Machine includes 7 Water inlet 1 Quick connect adapter male/female 8 Retractable Handle 2 Vario spray wand 9 Detergent filter and suction tube 3 Cleaning brush 10 High pressure outlet (not pictured) 4 Trigger gun 11 On/Off switch 5 Trigger gun safety lock 12 Power cord (not pictured) 6 High pressure hose... -
Page 3: Precautions
IMPORTANT PRECAUTIONS – Read First! GROUNDING INSTRUCTIONS Safety Warnings This product must be grounded. If it should When using this product basic precautions malfunction or breakdown, grounding should always be followed: provides a path of least resistance for electric • Read all the instructions before using the current to reduce the risk of electric shock. -
Page 4: Assembly Instructions
IMPORTANT PRECAUTIONS – continued Water Supply (Cold Water Only) • Water hose must be at least 3/4 inch in • Never use the pressure washer to draw diameter. in water contaminated with solvents, e.g. paint thinners, gasoline, oil, etc. • Flow rate of water supply must not fall below 2 GPM (gallons per minute). -
Page 5: Operating Instructions
OPERATING INSTRUCTIONS Step 1 Connect the high pressure hose to the Step 2 Insert the spray wand into unit’s high pressure outlet. the trigger gun. Press in against the spring tension and twist into the locked position. Step 3 Connect garden hose to unit’s water Step 4 Connect garden hose to the inlet using the quick connect adapter. -
Page 6: Using The Accessories
USING THE ACCESSORIES Vario spray wand The Vario spray wand allows you to adjust the cleaning pressure. To clean at maximum pressure, the Vario wand must be positioned to the high pressure setting (+). To apply detergent, the wand must be positioned to the low pressure setting (-). For higher pressure turn wand collar in the plus (+) direction. -
Page 7: Working With Detergents
The special formula won´t clog the suction tube filter and will protect the internal parts of the pressure washer for a longer life. For Karcher Detergents, check your retailer or call: 1-800-465-4980 The following Karcher detergents are available: •... -
Page 8: Shut Down And Clean-Up
SHUTTING DOWN & CLEAN-UP Step 1 Step 2 Step 3 Step 4 Remove detergent suction Turn the switch to Turn off the water Press trigger to tube from jug and insert off (O) position and source. release water into 1 gallon of fresh water. unplug cord from pressure. -
Page 9: Cleaning Tips
CLEANING TIPS Deck Cleaning Cement Patios, (with or without Karcher Pressure Wash Detergent) Brick and Stone Pre-rinse deck and surrounding area with (with or without detergent) fresh water. If using Pressure Wash, place Pre-rinse cleaning surface with fresh water. detergent suction tube directly into cleaning... -
Page 10: Optional Cleaning Accessories
• Pipe Drain Cleaner KARCHER 2 YEAR WARRANTY KARCHER CANADA INC. warrants to the original owner that this product shall be free from defects in material and workmanship for two years from the date of its original purchase. If such a defect appears during the warranty period, upon presentation of proof of purchase, KARCHER CANADA INC. -
Page 11: Troubleshooting
TROUBLESHOOTING Disconnect the machine from the power source before making any repair. Symptom Cause Solution Motor will not start On/Off switch is in the “OFF” (O) Turn switch to the “ON” (I) position position. Power cord is not plugged in. Plug in power cord. -
Page 12: Troubleshooting
TROUBLESHOOTING – continued Symptom Cause Solution No detergent. Detergent suction tube not properly Check connection. connected to the machine. Detergent is too thick. Dilute detergent. Filter on detergent suction tube is Run warm water through filter to clogged. remove debris. Damaged or clogged detergent Remove obstruction or replace suction tube.
Need help?
Do you have a question about the K 520 M and is the answer not in the manual?
Questions and answers
what is q value for 501m pressure washer
The Q value (water volume) for the Kärcher K 520 M pressure washer is 1.8 GPM (gallons per minute).
This answer is automatically generated
when was the removable pipe fitted to the trigger
The removable pipe (spray wand) is fitted to the trigger gun in Step 2 of the operating instructions. You insert the spray wand into the trigger gun, press in against the spring tension, and twist it into the locked position.
This answer is automatically generated