
Subscribe to Our Youtube Channel
Related Manuals for Nexcom MRC 2100

Summary of Contents for Nexcom MRC 2100
- Page 1 NEXCOM International Co., Ltd. Mobile Computing Solutions Mobile Rugged Computer MRC 2100 User Manual NEXCOM International Co., Ltd. www.nexcom.com V1.1 Revised March 2009...
-
Page 2: Table Of Contents
Replacing the Battery Pack ..............27 Stopping the Tablet PC .................6 Battery Low Signals and Actions ............27 Using the Quick Buttons ...............7 Power Management ................27 Programmable function keys ..............7 Copyright © 2009 NEXCOM International Co., Ltd. All Rights Reserved. MRC 2100 User Manual... - Page 3 4. Product Repairing ................36 5. Out Of Warranty Service ..............37 6. Extended Warranty Program .............37 7. Product End of Support ..............38 8. NEXCOM RMA Service Information ...........38 Copyright © 2009 NEXCOM International Co., Ltd. All Rights Reserved. MRC 2100 User Manual...
-
Page 4: Copyright
The product(s) described in this manual complies with all applicable Euro- pean Union (CE) directives if it has a CE marking. For computer systems to MRC 2100 is a trademark of NEXCOM International Co., Ltd. All other remain CE compliant, only CE-compliant parts may be used. Maintaining product names mentioned herein are registered trademarks of their respec- CE compliance also requires proper cable and cabling techniques. - Page 5 0.1% or 1,000ppm, and Polybrominated diphenyl Ethers (PBDE) < 0.1% or 1,000ppm. In order to meet the RoHS compliant directives, NEXCOM has established an engineering and manufacturing task force in to implement the introduction of green products. The task force will ensure that we follow the standard...
- Page 6 Replace with 3rd party products if needed. Customers can send back the faulty products with or without acces- If RMA goods can not be repaired, NEXCOM will return it to the cus- sories (manuals, cable, etc.) and any components from the card, such as tomer without any charge.
-
Page 7: Safety Information
Preface ▪ If RMA goods can not be repaired, NEXCOM will return it to the cus- The computer is provided with a battery-powered real-time clock circuit. There is a danger of explosion if battery is incorrectly replaced. Replace tomer without any charge. -
Page 8: Safety Precautions
11. All cautions and warnings on the equipment should be noted. 19. The computer is provided with CD drives that comply with the ap- propriate safety standards including IEC 60825. viii Copyright © 2009 NEXCOM International Co., Ltd. All Rights Reserved. MRC 2100 User Manual... - Page 9 Technical Support and Assistance Conventions Used in this Manual Warning: Information about certain situations, which if not 1. For the most updated information of NEXCOM products, visit NEX- observed, can cause personal injury. This will prevent injury to COM’s website at www.nexcom.com.
- Page 10 Z.I. des Amandiers, 17, Rue des entrepreneurs Tel: +44-1908-267121 78420 Carrières sur Seine, France Fax: +44-1908-262042 Tel: +33 (0)1 71 51 10 20 http://www.nexcom.eu Fax: +33 (0)1 71 51 10 21 http://www.nexcom.eu Copyright © 2009 NEXCOM International Co., Ltd. All Rights Reserved. MRC 2100 User Manual...
- Page 11 Room 1206, Hongde Building, No. 20 Yunnan Rd. Nanjing, 210018, China Tel: +86-25-8324-9606 Fax: +86-25-8324-9685 http://www.nexcom.cn Japan 10F, Nakagin-Shiroyama Building, 8-16-13. Ginza Chuou-ku, Tokyo 104-0061, Japan Tel: +81-3-3524-4250 Fax: +81-3-3524-4252 http://www.nexcom-jp.com Copyright © 2009 NEXCOM International Co., Ltd. All Rights Reserved. MRC 2100 User Manual...
-
Page 12: Package Contents
Preface Package Contents Before continuing, verify that the MRC 2100 package that you received is complete. Your MRC 2100 package should have all the items listed in the follow- ing table. • 1x MRC2100 (P/N: 10U00210001X0) with Protection Rubber •... -
Page 13: Ordering Information
Windows XP embedded (P/N:6014400798X00) /8GB SSD/1GB Memory/Sunlight Readable Touch Screen MRC2100 Power Adapter (P/N:7400065005X00) POWER CABLE (US) (P/N:60233POW38X00) POWER CABLE (EU) (P/N:60233POW39X00) POWER CABLE (UK) (P/N:60233POW40X00) xiii Copyright © 2009 NEXCOM International Co., Ltd. All Rights Reserved. MRC 2100 User Manual... -
Page 14: Chapter 1: Getting Started
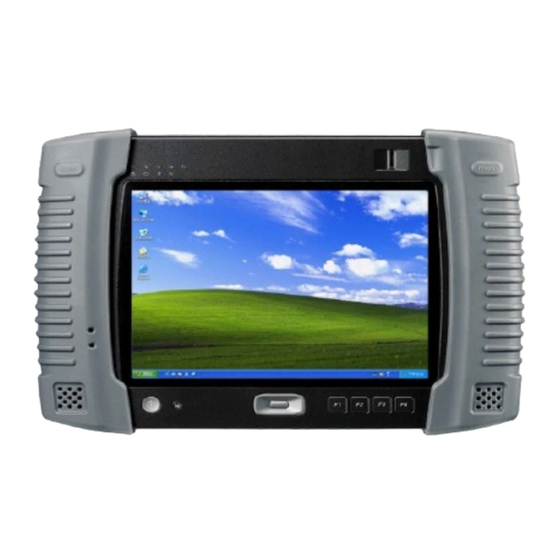
Featuring Intel® Atom™ • 1x Protection Rubber Left (P/N: 5044440120X00) processor up to 1.6 GHz with 512 KB on-die L2 cache, the MRC 2100 • 1x Protection Rubber Right (P/N: 5044440112X00) provides a powerful mobile computing platform with an 8.4 inch TFT color LCD and daylight readable touch screen. -
Page 15: Inserting Sim Card
3. Insert the SIM card to the slot. 2. Secure the screws on left side. 4. Push in the SIM card until it is locked, push the card again to eject. Copyright © 2009 NEXCOM International Co., Ltd. All Rights Reserved. MRC 2100 User Manual... -
Page 16: Turning On The Mrc2100
4. Flip the device to face up, connect the AC power adapter. 2. The MRC2100 is booted to Windows XP. 3. Use the Navigation buttons to control the cursor. 4. Congratulation, your MRC2100 is ready to use. Copyright © 2009 NEXCOM International Co., Ltd. All Rights Reserved. MRC 2100 User Manual... -
Page 17: Taking A Look At Mrc 2100
Indicate the battery status (Green) LED Indicators Indicate the HDD status (Green) Indicate the Wireless status (Orange) Light Sensor Barcode/ RFID Key Programmable Function key for Barcode / RFID Copyright © 2009 NEXCOM International Co., Ltd. All Rights Reserved. MRC 2100 User Manual... - Page 18 2600mAh battery pack Docking Connector 1 x 32-Pin Po Go connector for docking station 1 x USB2.0 MIC-in 3.5 mm MIC-in jack Line-out 3.5 mm Line-out jack Copyright © 2009 NEXCOM International Co., Ltd. All Rights Reserved. MRC 2100 User Manual...
-
Page 19: Chapter 2: Operating Your Tablet Pc
PC. (See “Managing Power” in Chapter 3 for more informa- tion.) Copyright © 2009 NEXCOM International Co., Ltd. All Rights Reserved. MRC 2100 User Manual... -
Page 20: Using The Quick Buttons
Windows. Pressing down F2 key for 3 seconds to activate Screen Rotation • F3 button is the LCD brightness control up key. • F4 button is the LCD brightness control down key. Copyright © 2009 NEXCOM International Co., Ltd. All Rights Reserved. MRC 2100 User Manual... - Page 21 3. Take front button 1 as example. The button properties windows display the hotkey’s current setting and from the drop down menu, you can select the desired options. 6. Re-boot OS. Copyright © 2009 NEXCOM International Co., Ltd. All Rights Reserved. MRC 2100 User Manual...
- Page 22 5 Screen keyboard. 5-5 OK 6 WordPad. 4. Choose the one you would like and then click ‘’Modify’’ and then OK 6. The window shows your setting Copyright © 2009 NEXCOM International Co., Ltd. All Rights Reserved. MRC 2100 User Manual...
-
Page 23: Using The Fingerprint Feature
(fingerprint only, fingerprint and a smart card etc.). Accessing Main Features The Biomenu The Biomenu gives you a quick access to Protector Suite QL’s features, such Copyright © 2009 NEXCOM International Co., Ltd. All Rights Reserved. MRC 2100 User Manual... -
Page 24: Using The On-Screen Keyboard
Copyright © 2009 NEXCOM International Co., Ltd. All Rights Reserved. MRC 2100 User Manual... -
Page 25: Using The Video Features
Launch the CMOS Camera 1. Double click <Dorgem> icon from Desktop. 2. In Dorgem pop-up window, it displays the basic camera setting. Copyright © 2009 NEXCOM International Co., Ltd. All Rights Reserved. MRC 2100 User Manual... - Page 26 5. Click OK and file store settings window shows below. 4. Click Add and choose storage type. 6. Fill in name of this setting and browser the URL you would like to put. Copyright © 2009 NEXCOM International Co., Ltd. All Rights Reserved. MRC 2100 User Manual...
-
Page 27: Using The Communication Features
8. The preview window displays the current capture screen. Aim at the Modulation OFDM DSSS/OFDM OFDM target and press the <PHOTO> button at the top right of the MRC 2100. Security Au- WPA and WPA2, 802.1 X, LEAP, EAP-TLS, PEAP-TLS, thentication and PEAP-MSCHAPv2 Encryption CKIP, TKIP, 64-bit and 128-bit WEP (for 802.11a/... -
Page 28: Using The Bluetooth Wireless Feature
3. Choose a wireless network to connect, click <Connect>, and follow the Refer to Windows Help for more detail. Windows instruction to complete the network setup. Copyright © 2009 NEXCOM International Co., Ltd. All Rights Reserved. MRC 2100 User Manual... -
Page 29: Using The Gps Feature
WAAS/EGNOS and power saving mode. 1.Go to Device Manager to ensure the device is installed correctly. 3. Follow the given instructions to complete the installation. Copyright © 2009 NEXCOM International Co., Ltd. All Rights Reserved. MRC 2100 User Manual... - Page 30 “VTG check box” - Some navigation or map software requires to receive VTG data output for during operation. Check the box to activate the VTG data output. Copyright © 2009 NEXCOM International Co., Ltd. All Rights Reserved. MRC 2100 User Manual...
- Page 31 “Longitude” – Display current longitude in E/W (East/West Hemisphere) Blue circle indicates that is being tracked and is being used in the cur- • Time (hhmmss) rent position. Copyright © 2009 NEXCOM International Co., Ltd. All Rights Reserved. MRC 2100 User Manual...
-
Page 32: Using The 3.5G Feature
To use the 3G feature on your tablet PC, you need to install the 3G SIM card, subscribe 3G service from your service provider, or network operator. Note: To install the SIM card, refer to Inserting SIM card section in CH1. Copyright © 2009 NEXCOM International Co., Ltd. All Rights Reserved. MRC 2100 User Manual... - Page 33 5. System found the new hardware. agreement”, and press <Install>. 6. Go to device manager to ensure the device has been property installed. 4. The installation is completed, press <Finish>. Copyright © 2009 NEXCOM International Co., Ltd. All Rights Reserved. MRC 2100 User Manual...
- Page 34 2. Connecting to the Internet. 4. To place a telephone call, select <VOICE>, enter the phone number from on-screen numeric key pad. Be sure to connect MIC and Head- phone. Copyright © 2009 NEXCOM International Co., Ltd. All Rights Reserved. MRC 2100 User Manual...
-
Page 35: Using Barcode Scanner Features (Optional)
Setup and using MRC2100 Barcode MDL-2000 1. Go to Device Manager to ensure the device is installed correctly. 6. Select the help topics for detail. 2. Launch <Tscan.exe> in C:\Utility\Barcode-MDL-21--_Utility. Copyright © 2009 NEXCOM International Co., Ltd. All Rights Reserved. MRC 2100 User Manual... - Page 36 7.The barcode number is shown at the bottom of the screen. 4. Set Baud rate to 9600, and 8 DatBits; No parity; 1 Stop Bit under COM3. Copyright © 2009 NEXCOM International Co., Ltd. All Rights Reserved. MRC 2100 User Manual...
-
Page 37: Using Rfid Features (Optional)
2. Place the RFID test card nearby the RFID reader. The reader is located on top left side of the unit. 5. Click <LOOP SELECT> again to stop the test. Copyright © 2009 NEXCOM International Co., Ltd. All Rights Reserved. MRC 2100 User Manual... -
Page 38: Chapter 3: Managing Power
When dis- connecting the AC adapter, begin disconnecting from the electrical outlet and then disconnect from the tablet PC. A reverse procedure may cause Copyright © 2009 NEXCOM International Co., Ltd. All Rights Reserved. MRC 2100 User Manual... -
Page 39: Charging The Battery Pack
Failure to charge the battery at least once a month may reduce Control Panel> Power Options> Power Meter. The Power meter icon could the battery’s ability to charge/re-charge. be set to Taskbar for easy access. Copyright © 2009 NEXCOM International Co., Ltd. All Rights Reserved. MRC 2100 User Manual... -
Page 40: Replacing The Battery Pack
Respond to the Battery Low signal by taking one of the following actions:Place tablet PC on Standby or Hibernation mode Turn off the tablet PC Connect the tablet PC with AC adapter. Copyright © 2009 NEXCOM International Co., Ltd. All Rights Reserved. MRC 2100 User Manual... -
Page 41: Hibernation
Deactivate Bluetooth wireless function when it is not in use. (see Chap- ter 2). 10. Turn off the tablet PC when it is not in use. Copyright © 2009 NEXCOM International Co., Ltd. All Rights Reserved. MRC 2100 User Manual... -
Page 42: Chapter 4: Expanding Your Tablet Pc
480 MB/s for USB 2.0 devices. Your tablet PC has one mini USB (client) port for USB connection of PC or Laptop to transfer data and update information. Copyright © 2009 NEXCOM International Co., Ltd. All Rights Reserved. MRC 2100 User Manual... -
Page 43: Chapter 5: Using Bios Setup And System
When redefining the communication ports to prevent any conflicts • When making changes to the Power Management configuration • When changing the password or making other changes to the secu- • rity setup Copyright © 2009 NEXCOM International Co., Ltd. All Rights Reserved. MRC 2100 User Manual... -
Page 44: Moving Around And Making Selections
You can always return to the Main setup screen by selecting the Select Item Main tab. The Main BIOS Setup screen is shown below. Change Field General Help Save and Exit Exit Copyright © 2009 NEXCOM International Co., Ltd. All Rights Reserved. MRC 2100 User Manual... -
Page 45: System Overview
Advanced BIOS Setup option by highlighting it using the <Arrow> keys. Backlight Configuration: The Advanced BIOS Setup screen is shown below. Select the options to enable/disable auto backlight sensor. Copyright © 2009 NEXCOM International Co., Ltd. All Rights Reserved. MRC 2100 User Manual... -
Page 46: Boot Menu
If there are changes to hard drive, the boot device will be onboard USB ports. set to “None”. Hard Disk Drives: Boot Menu Display the Hard Disk information connected to the system. Copyright © 2009 NEXCOM International Co., Ltd. All Rights Reserved. MRC 2100 User Manual... -
Page 47: Security Menu
Select the options to enable the protection feature to protect the Master Boot Record (MBR) from virus infection. Load Optional Defaults Save Setup data to CMOS Copyright © 2009 NEXCOM International Co., Ltd. All Rights Reserved. MRC 2100 User Manual... -
Page 48: Warranty Period
2.4 Product will be treated as “Out of Warranty” if except for 2.4.1 It expires the warranted period. 2.4.2 It had been altered by persons other than an authorized NEXCOM Copyright © 2009 NEXCOM International Co., Ltd. All Rights Reserved. MRC 2100 User Manual... -
Page 49: Rma Procedure
RMA that NEXCOM has determined not to be covered by the warranty will request form. be charged the NEXCOM standard repair fee for the repairing. If a RMA is determined to be not repairable, customer will be notified and product(s) may be returned to customer at their request;... -
Page 50: Out Of Warranty Service
LCD Panel, Battery Pack, Mount, Hold-Arm and so on. fault after the RMA process, NEXCOM reserves the right to claim for a All the fees are listed in the NEXCOM RMA Service Charge Table posted on NDF/NTF (No Defect/Trouble Found) Service Charge. -
Page 51: Product End Of Support
3rd-year 4th-year 5th-year ing, and characterize issues in an attempt to provide solution and work- Period around for the product; when it reaches its EOS Day, NEXCOM will only Main-Board Free Free provide limited support on a commercial effort basis. - Page 52 CD-ROM to HDD then install from 1. Chipset INF here. Do not install drivers directly from the CD-ROM. NEXCOM is continuously working with IntelR and will update drivers 2. Chipset USB_Client (Must be installed from a local HDD) when solutions are delivered 3.
- Page 53 1. From Desktop, right click your mouse, select <Properties>. 4. In USB Device Properties, select <Update Driver…> 2. From the menu tab, select <Hardware>, then <Device Manager>. Copyright © 2009 NEXCOM International Co., Ltd. All Rights Reserved. MRC 2100 User Manual...
- Page 54 8.In Hardware Installation, select <Continue Anyway> twice. 6. In Hardware Update Wizard for install software for USB Device, select <Install from a list or specific location (advanced)). Copyright © 2009 NEXCOM International Co., Ltd. All Rights Reserved. MRC 2100 User Manual...
- Page 55 11. In Hardware Installation, select <Continue Anyway>. 10. Found New Hardware Wizard will find 4 COM ports, need to install Drivers. Select <Next> to continue. 12.Click <Finish> to complete. Copyright © 2009 NEXCOM International Co., Ltd. All Rights Reserved. MRC 2100 User Manual...
- Page 56 13. Repeat 4 times from Step 3 to Step 12 to install other serial ports. 14. In Device Manager, shows all 4 COM ports have been installed suc- cessfully. 15. USB to COM driver installation complete. Copyright © 2009 NEXCOM International Co., Ltd. All Rights Reserved. MRC 2100 User Manual...
Need help?
Do you have a question about the MRC 2100 and is the answer not in the manual?
Questions and answers