
Related Manuals for Sun Seeker Eco-Tad SX

Summary of Contents for Sun Seeker Eco-Tad SX
- Page 1 Eco-Tad Supplemental Owner’s Manual Revised Date 1/2015 Go to www.sunseeker.bike for more information 1 ...
- Page 2 Congratulations and welcome to the Sun Seeker Recumbent family! You have selected one of the most comfortable and advanced recumbents on the market. Please read this manual before riding your Sun Seeker Recumbent. In this manual you will find that we cover the basics for setting up and understanding your new recumbent.
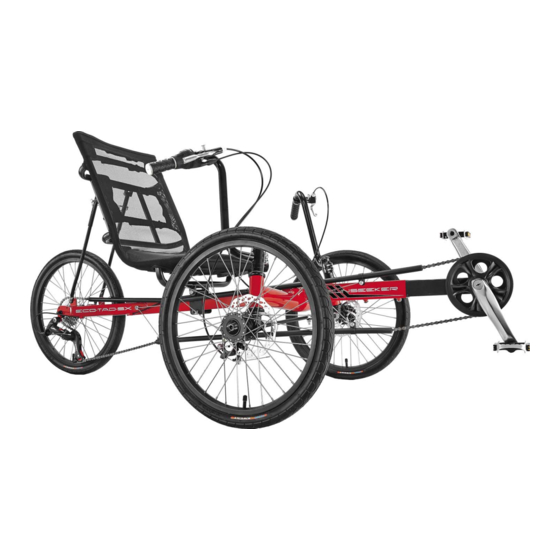
- Page 3 Eco-Tad Reference Views Side View Top View 3 ...
- Page 4 Eco-Tad Assembly Reference ECO-TAD PARTS LIST ITEM DESCRIPTION QUANTITY Main Frame Crank Boom Assembly Right Front Wheel Assembly Left Front Wheel Assembly Rear Wheel Assembly Chain Tube Assembly Steering Linkage Assembly Right Handlebar Assembly Left Handlebar Assembly Seat Frame Assembly (Not Pictured Above) Seat Mesh Upper Seat Strut 5/8"x 150mm Lower Seat Strut 1/2"x 400mm...
-
Page 5: Assembly Guide
Assembly Guide Front Wheel and Handlebar Installation 1. Install #3 Right Front Wheel Assembly Assemble #19 Bearing (lubricate bearing with grease) #21 Seal and onto steer tube of the #3 Right Front Wheel Assembly. Insert steer tube into head tube. See Figure A. Assemble #19 Bearing (lubricate bearing with grease), #21 Seal, #23 Adjust Cone, #22 Compression Ring and (2) of #20 Spacers onto the remaining top portion of the steer tube. - Page 6 Steering Linkage Installation 1. Install #7 Steering Linkage Assembly Assemble #7 Steering Linkage with supplied hardware onto the Steering Arm Tab holes located closest to wheel. See Figure C-E. Rear Wheel and Derailleur Installation 1. Install #5 Rear Wheel Assembly Assemble #5 Rear Wheel onto the rear frame drop outs.
- Page 7 Setting Front Wheel Toe-In Angle Setting Toe In For Tadpole Trikes (0mm to 3mm recommended): With the trike on the ground and wheels fixed in the straight ahead position, measure from the front of the left wheel centerline across to the right wheel centerline.
- Page 8 Crank Boom Installation 1. Install #2 Crank Boom Assembly Insert #2 Crank Boom into the front on the frame. For now, insert midway and secure boom bolts. See Figure K. NOTE: DO NOT extend Crank Boom Assembly past the safety line. See Figure L. 8 ...
- Page 9 Chain and Chain Tube Installation 1. Thread Chain Into Chain Tubes Insert the chain into the chain tubes. Position the longer chain tubes above the front axle and the shorter one below with the ends of the chain to the rear of the trike. Also make sure the “Y” spring brackets are pointed toward the rear of the trike. 2.
- Page 10 Seat Assembly Installation 1. Install Seat Frame Assembly Install #10 Seat Frame Assembly onto frame and secure with #17 Quick Release Seat Pin M8*95mm. See Figure O. 2. Install Upper Struts Install 2 #12 Upper Seat Struts and ½ moon washers to the seat frame using the provided hardware. See Figure P. 3.
- Page 11 Cable Guide Installation 1. Installing Cable Tie Thread #25 Cable Tie over the #17 Quick Release Seat Pin and zip it onto the pin. Trim the tie and route the derailleur cable through the eye of the cable tie. See Figure R. Pedal Installation 1.
- Page 12 Fit Adjustment 1. Adjusting Seat and Boom The goal is for your seat (and therefore your weight) to be as far back as possible when your set up is complete. Loosen and slide the #10 Seat Frame Assembly rearward on the Main Frame until in a comfortable seating position. Adjust the seat angle by removing and reinstalling the #27 Strut Pins into a new position on the Seat Struts if necessary.
Need help?
Do you have a question about the Eco-Tad SX and is the answer not in the manual?
Questions and answers