
Related Manuals for Digiplex DGP-NE96


Summary of Contents for Digiplex DGP-NE96
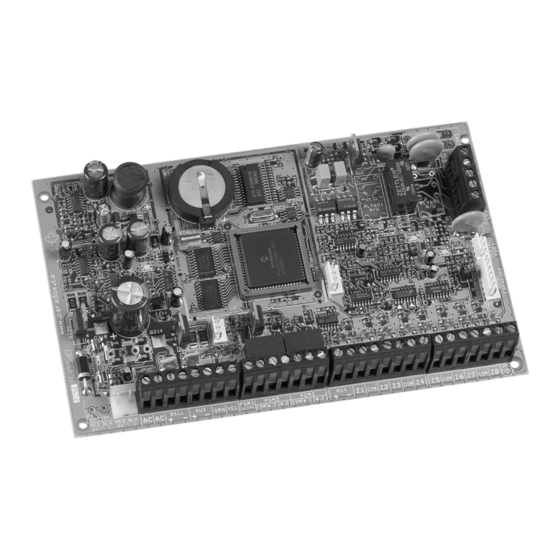
- Page 1 DigiplexNE Control Panel - V1.4 Sabotage-Proof High-Security System DGP-NE96 Reference and Installation Manual www.paradox.ca...
-
Page 3: Table Of Contents
TABLE OF CONTENTS INTRODUCTION ............... 4 Auto Zone Shutdown ..............15 Bypass Zones ................15 Features ................... 4 Stay Zones..................16 Specifications ................4 Force Zones................... 16 Keypad Specifications.............. 4 Alarm Types................... 16 Intellizone..................16 INSTALLATION ............... 5 Delay Before Alarm Transmission ..........16 Recommended Installation Procedure ........ - Page 4 Police Code Timer ..............22 PGM1 Becomes a 2-wire Smoke Detector Input....31 Tamper Recognition Options ..........22 PGM Test Mode ..............31 Tamper Bypass Options ..............23 Keypad Panic Options ............23 SYSTEM SETTINGS & COMMANDS......32 Hardware Reset ..............32 EVENT REPORTING ............
- Page 5 Log Door Forced Open Restore In Event Buffer ......40 WINLOAD SOFTWARE ..........41 Panel Identifier ............... 41 PC Password ................. 41 PC Telephone Number ............41 Call Back Feature..............41 Call WinLoad................41 Answer WinLoad ..............41 Answering Machine Override Delay........41 Ring Counter ................
-
Page 6: Introduction
Specifications may change without prior notice. • Provides constant power, supervision and two-way communication between the control panel and all its modules UL Note: The DGP-NE96 control panel has only been tested with the LCD • Supports up to 127 modules Keypad (DGP2-641) •... -
Page 7: Installation
Step 7: Connect an LCD Keypad at various points farthest from the control panel and use the keypad’s built-in Voltmeter to verify the combus’s 2.7 B SIREN UTPUT voltage (refer to the Digiplex/DigiplexNE LCD Keypad Reference & Installation Manual). + and - terminals power bells and/or other warning devices BELL BELL that require a steady voltage output during an alarm. - Page 8 3 years. PLEASE NOTE: When powering up the DGP-NE96 control panel (V1.02 or higher), the panel will begin a module scan to verify if all the modules connected to the panel are operational. The scanning process will take between 30 and 120 seconds to complete depending on the number of modules connected to the control panel.
-
Page 9: Calculating Power Requirements
2.11 C ALCULATING OWER EQUIREMENTS Table 1: Power Unit Consumption Table Description QTY. PU used by each Total PU _______ __________ PU LCD Keypad (DGP2-641): 60PU = _______ __________ PU Access Control Module (DGP2-ACM1P): 165PU = _______ __________ PU Addressable Digital Motion Detectors (DGP2-50/60/70): 16PU = _______ __________ PU... -
Page 10: Keypad Zone Connections
Figure 2-4: Sample Power Requirement Calculations Figure 2-5: External Power Supply Connections As indicated in Table 2 on page 7, this run of wire can support 700PU. Total PU on this run of wire: (A) 40PU + (B) 40PU = 80PU<700PU = OK Do not use the same transformer for the control panel and the external power supplies. -
Page 11: Double Zone Connections
Figure 2-6: Single Zone Input Connections 2.14 D OUBLE ONNECTIONS Enabling the ATZ feature (see section 4.2) allows you to install two detection devices per input terminal. Connect the devices as shown in Figure 2-7. Devices connected to input terminals must be assigned to a zone and the zone's parameters must be defined (see Zone Programming on page 13). -
Page 12: Combus Connections
2.16 C 2.17.3 Smoke Detector Installation (4-Wire) OMBUS ONNECTIONS Recommended: System Sensor model Figure 2-9: 4-Wire Detectors Modules can connect anywhere on the 4-wire combus, which can support 2112/24D smoke detectors. Connect the up to 127 modules. Connect in a star and/or daisy chain configuration as 4-wire smoke detectors and a relay as shown in Figure 2-3 on page 6. -
Page 13: Built-In Rtc
For TBR-21 compliance, please note the following: The DGP-NE96 can be connected to the telephone network via an RJ- 11 connector. The Maximum Dialing Attempts cannot exceed 15 attempts (page 28). 2.19 B UILT The DigiplexNE incorporates an RTC directly on the PC board. The RTC will save the DigiplexNE’s internal clock when both the AC and battery... -
Page 14: Programming Methods
PROGRAMMING METHODS DigiplexNE can be programmed using the following methods: 3.4 P ROGRAMMING HROUGH A EYPAD Use the Programming Guide to record how the sections were programmed. 3.1 W PLOADING OWNLOADING OFTWARE To enter programming mode: We highly recommend programming the control panel with WinLoad as it Press and hold the [0] key greatly simplifies the process and reduces potential data errors. -
Page 15: Zone Programming
ZONE PROGRAMMING All detection devices connected to the control panel, keypads and zone expansion modules must be assigned to a zone and that zone must be defined as described in this section. Figure 4-1: Zone Programming Press & hold the Zone Definitions [0] key 0- Disabled (Default) -
Page 16: Clearing A Zone's Numbering
4.1.1 Clearing a Zone’s Numbering Partition 3 Partition 7 Entry Delay 1 Timer: [3311] Entry Delay 1 Timer: [3711] For LCD Keypads: Entry Delay 2 Timer: [3312] Entry Delay 2 Timer: [3712] Enter a section number between [0001] to [0096]. Press [0] and then [ ] to save and exit. -
Page 17: 24Hr Water Zones
4.3.10 24Hr Water Zones* 4.3.13 Standard 24Hr Fire Zone [0101] [0196]: F [0101] [0196]: F ECTIONS IRST DIGIT ECTIONS IRST DIGIT When a 24Hr Water zone opens, whether it is armed or disarmed, the A zone programmed as Fire becomes normally open (will not function as control panel will immediately generate an alarm. -
Page 18: Stay Zones
4.5.3 Stay Zones Set the Input Speed (001 to 255 X 30ms, default = 600msec.): [0101] [0196]: O ECTIONS PTION Section Input Section Only zones with option [3] enabled will be bypassed when the partition is [0961] Input 01 [0973] Input 13 (ATZ of Input 01) Stay Armed (see section 15.2) or Instant Armed (see section 15.3). -
Page 19: Keyswitch Programming
KEYSWITCH PROGRAMMING The DigiplexNE control panel can support up to 32 keyswitch zones in addition to the 96 standard zones. A keyswitch allows a user to arm or disarm a system by pressing a key or by toggling a keyswitch. A keyswitch can also be used to generate a Utility Key event which can then be used to activate or deactivate the control panel’s PGM outputs. -
Page 20: Generates A Utility Key Event On Open
5.2.4 Generates a Utility Key Event on Open 5.4.4 Stay Arming (Keyswitch) [0601] [0632]: F [0601] [0632]: O ECTIONS IRST DIGIT ECTIONS PTION When option [3] is enabled, a Utility Key Event will be generated whenever Activating the keyswitch will bypass any zones defined as Stay Zones (see the keyswitch input is opened. -
Page 21: Arming & Disarming Options
ARMING & DISARMING OPTIONS 6.1 A 6.4 R AC F RMING OLLOWS ARTITION ESTRICT RMING ON AILURE [3035]: O (Default = disabled) A partition can be set to follow the arming and ECTION PTION disarming status of one or more partitions. If a partition is set to follow more (Default = disabled) When option [1] is enabled, the control panel can than one partition, the partition will arm when all the selected partitions are prevent arming if it detects a loss of AC power. -
Page 22: Auto-Arm Timer
6.9.1 Auto-Arm Timer Partition 1: [3123] Option [8] Partition 5: [3523] Option [8] When Timed Auto-Arming is enabled (see section 6.9), the control panel Partition 2: [3223] Option [8] Partition 6: [3623] Option [8] will attempt to arm the system at the time set by the Auto-Arm Timer. For example, to Auto-Arm partition 2 everyday at 6:15PM, enable option [1] Partition 3: [3323] Option [8] Partition 7: [3723] Option [8]... -
Page 23: No Exit Delay On Remote Arm
Figure 6-1: Example of Exit Delay Termination Emits 1 squawk upon arming and 2 squawks Remote Arming/ upon disarming with a remote control (using Disarming the Omnia Wireless System, OMN-RCV3 (default = enabled) . 6.19 R BACK After disarming the system, the control panel can warn the user that there was an alarm and that it may be dangerous to enter by having the keypad beep 10 times and/or by squawking the bell 10 times. -
Page 24: Alarm Options
ALARM OPTIONS 7.1 B The control panel displays Zone Fault in the ALARM UTPUT Trouble Only Trouble Display and transmits the defined ON OFF (Default = only option [1] enabled) When an alarm condition is detected in a report code (see section 8.2). partition, the control panel can toggle the on-board output enabling BELL... -
Page 25: Tamper Bypass Options
7.5.1 Tamper Bypass Options [3034]: O ECTION PTION (Default = enabled) With option [7] enabled in section [3034], the control panel will ignore the zone’s bypass definition and will follow the option set in section 7.5 if a tamper or wire fault occurs on a bypassed zone. With option [7] disabled, Tamper Recognition follows the zone’s bypass definition. -
Page 26: Event Reporting
EVENT REPORTING Figure 8-1: Event Reporting Dialing Enabled/Disabled Reporting Account Number 1 Related Features Partition 1 Section [3036] 3 or 4 digits (0-F) in Section [3061] Delay Before Alarm Transmission: [3055] Option [3] Reporting Account Number 2 Pager Format Delay Transmission: [3057] Partition 2 3 or 4 digits (0-F) in Section [3062] Recent Closing Delay... -
Page 27: Reporting Enabled
8.1 R 8.2.5 Access Codes Arming EPORTING NABLED [2001] [2099] ECTIONS [3036]: O ECTION PTION A report code can be programmed individually for each User Access Code (Default = disabled) With option [3] ON in section [3036], Event Reporting is from 01 to 98 in sections [2001] to [2098]. -
Page 28: Special Disarming Report Codes
Duress enabled access code is keyed in [3977] Future Use [3988] Module Auxiliary Restored [3936] Duress (refer to the Digiplex/DigiplexNE LCD [3978] Future Use [3989] Future Use Keypad Reference & Installation Manual) Wireless Transmitter Battery too many invalid codes entered... -
Page 29: Arming And Disarming Report Schedules
8.3.2), the control panel will send the corresponding report code Early to Access Codes with Add Tolerance Windows to Schedules enabled (refer to Close [3916], Late to Close [3917], Early to Open [3926] or Late to Open the System Manager’s Manual) have the number of minutes programmed [3927]. -
Page 30: Reporting Formats
** UL Note: For UL Listed systems, the maximum dialing attempts must be needs. To manually program the report codes, use the 2-digit hexadecimal set to 5 to 10 attempts between the DGP-NE96’s two telephone lines. values from the Contact ID Report Codes List in the Programming Guide. -
Page 31: Pager Delay
after the Maximum Dialing Attempts (see section 8.8.1) to one Monitoring disarmed following an alarm. Select the section that corresponds to the Station Telephone Number fail. desired partition and enable or disable option [7]: Partition 1: [3123] Partition 3: [3323] Partition 5: [3523] Partition 7: [3723] 8.9 P AGER ELAY... -
Page 32: Dialer Options
DIALER OPTIONS 9.1 T 9.5 S ELEPHONE ONITORING WITCH ULSE [3036]: O [3036]: O ECTION PTIONS ECTION PTION When enabled, the system verifies the existence of the main telephone line (Default = disabled) When option [7] is enabled, the control panel switches once every second. -
Page 33: Programmable Outputs
PROGRAMMABLE OUTPUTS A PGM is a programmable output that toggles to its opposite state (i.e. a 10.4 PGM D EACTIVATION VENT normally open PGM will close) when a specific event occurs in the system. The PGM Deactivation Event determines which event will return the PGM For example, a PGM can be used to reset smoke detectors, activate strobe to its original state. -
Page 34: System Settings & Commands
SYSTEM SETTINGS & COMMANDS 11.1 H 11.5 B ARDWARE ESET ATTERY HARGE URRENT [3030]: O A Hardware Reset sets sections [0001] to [3991] to default, including the ECTION PTION Installer and System Master Codes. Only the Panel ID, PC Password, PC When option [5] is enabled, the battery’s charge current is 700mA (min. -
Page 35: Panel Partition Assignment
independently set for each partition such as Event Reporting, Entry/Exit 11.12 M ODULE ESET Delay, Bell Squawk, One-touch Arming, Panic Alarms and many more. All [4001] ECTION zones, keyswitch zones, user codes and system modules are assigned to To reset a module connected to the combus to its default values, key in the specific partitions, making this a true partitioned system. -
Page 36: System Date & Time
11.17 C 11.23 M LOCK OMPENSATION ALUE ULTIPLE CTION EATURE [3050] [3033]: O ECTION ECTION PTION (Default = Disabled) When the DigiplexNE’s clock is inaccurate, a clock (Default = disabled) When option [1] is enabled, users will remain in the compensation value can be entered into section [3050] to correct the time User Menu after entering their access code. - Page 37 Table 8: Special Characters Catalogue Table 11: Hebrew Special Characters Catalogue Table 12: Russian Special Characters Catalogue Table 9: Hebrew Keypad Letter Assignment Table 10: Russian Keypad Letter Assignment NE C IGIPLEX ONTROL ANEL...
-
Page 38: Access Codes
ACCESS CODES 12.1 I Figure 12-1: Programming User Access Codes NSTALLER [1000] ECTION (Default: 000000) The Installer Code is used to enter the control panel's programming mode, which allows you to program all the features, options and commands of the control panel and any modules on the combus. The Installer Code is six digits in length where each digit can be any value from 0 to 9. -
Page 39: Partition Assignment
User Access Code. The Access Card is activated by assigning its serial number to the User Access Code. Digiplex NE supports 26-bit Wiegand proximity cards and readers (recommended: Position Technology’s CR-R880-A reader and CR- R700 Series cards). Enter the serial number manually or present the Access Card to the keypad’s reader and its serial number will register automatically. -
Page 40: Access Control: System Features
Other features and options are explained in authorized times. For details on connecting these devices, refer to the the Access Control Module Reference & Installation Manual. The following Digiplex/DigiplexNE Access Control Module Reference & Installation is the MINIMUM required to program Access Control: Manual. -
Page 41: Backup Schedules
Start Time and End Time during the holidays. An Interval cannot cross into extended by 1 hour before and 1 hour after their assigned Schedule (see another day (overnight). Schedules are assigned to the users through their Figure 13-2). User Access Codes (refer to the System Manager’s Manual). Figure 13-2: Example of a Schedule Tolerance Window For example, program Schedule 001 in section [2401]: A = Start time 09:00, End time 17:00, options 2, 3, 4, 5, and 6 enabled... -
Page 42: Skip Exit Delay When Arming With Access Card
Door Left Open Interval outside the partition so the partition(s) can be armed immediately. (refer to the Digiplex/DigiplexNE Access Control Module Reference & Installation Manual). When option [3] is enabled, the Door Left Open... -
Page 43: Winload Software
WINLOAD SOFTWARE 14.1 P 14.7 A ANEL DENTIFIER NSWERING ACHINE VERRIDE ELAY [3011] [3052] ECTION ECTION (Default = 0000) The Panel Identifier identifies the control panel to WinLoad (Default = 008) If WinLoad will be used to communicate with an installation before initiating upload or download. -
Page 44: User Features
USER FEATURES 15.1 R Using the scroll keys, highlight the desired arming method (see EGULAR RMING Table 13 on page 42) and then press the center action key (Ok). If the This method is used for the everyday arming of the system. All zones within users have access to more than one partition, proceed to step 3. -
Page 45: Chime Zones
Using the scroll keys, highlight Bypass and then press the center For LED Keypads: action key (Ok). Modify Backlight only: Highlight the zone that you wish to bypass and then press the left Enter an [ ACCESS CODE action key (Bypass). Repeat this step for any additional zone. Press the [6] key. -
Page 46: Trouble Latch
Step 3: If more than one Trouble Group appears, highlight the desired Trouble Description group before pressing the center action key (View) to view the A smoke detector is experiencing a wiring specific trouble. problem, needs to be cleaned, or a Press [7] to display zone(s) wireless device is no longer communicating Trouble... -
Page 47: Appendix 1: Pgm Programming Table
APPENDIX 1: PGM PROGRAMMING TABLE Event Group Event Feature Group Feature Start # End # Zone is OK 001 to 096 001 to 096 Zone is Open 001 to 096 001 to 096 Zone Numbers 255 = any Zone # Zone is Tampered 001 to 096 001 to 096... - Page 48 Event Group Event Feature Group Feature Start # End # No Movement Arming Partial Arming One-touch Arming Future Use 012 (cont’d) Special Arming Future Use (InTouch) Voice Module Arming Any special arming event Not Used Not Used User Codes 001 to 255 001 to 255 001 to 255 User Codes 256 to 511...
- Page 49 Event Group Event Feature Group Feature Start # End # (InTouch) Voice Module Disarming 022 (cont’d) Special Disarming Any Special Disarming Event Not Used Not Used Zone Bypassed 001 to 096 001 to 096 Zone in Alarm 001 to 096 001 to 096 Fire Alarm Zone Numbers...
- Page 50 Event Group Event Feature Group Feature Start # End # Combus Fault Module Tamper ROM/RAM error TLM Trouble Fail to Communicate Module Trouble Printer Fault AC Failure Battery Failure Auxiliary Failure Any Module Trouble Event Not Used Not Used Combus Fault Module Tamper ROM/RAM error TLM Trouble...
- Page 51 Event Group Event Feature Group Feature Start # End # Keyswitch Input 10* Keyswitch Input 11* Keyswitch Input 12* Keyswitch Input 13* Keyswitch Input 14* Keyswitch Input 15* Keyswitch Input 16* Keyswitch Input 17* Keyswitch Input 18* Keyswitch Input 19* Keyswitch Input 20* Keyswitch Input 21* Keyswitch Input 22*...
- Page 52 Event Group Event Feature Group Feature Start # End # Ready Exit Delay Entry Delay See NOTE 1 System in Trouble Status 2 on page 51 Alarm in Memory Zones Bypassed Bypass, Master, Installer Programming Keypad Lockout Intellizone Engaged (see NOTE 4 on page 51) Fire Delay Engaged Auto Arm See NOTE 1...
- Page 53 Event Group Event Feature Group Feature Start # End # Missing Module Future Use 130 to 132 130 to 132 067 (cont’d) Special Status Global Combus Failure Combus Overload Combus Fail to Communicate Clock Hour Minutes NOTE 1: 000 = Occurs in all partitions enabled in the system (see section [3031]). 001 = Partition 1 003 = Partition 3 005 = Partition 5...
-
Page 54: Appendix 2: Automatic Report Code List
APPENDIX 2: AUTOMATIC REPORT CODE LIST Default Contact ID Report Code Default SIA Report Code System Event for sections [4032] to [4037] for sections [4032] to [4037] Arming with Master Code (##) 3 4A1 - Close by user CL - Closing Report Arming with User Code (##) 3 4A1 - Close by user CL - Closing Report... - Page 55 Default Contact ID Report Code Default SIA Report Code System Event for sections [4032] to [4037] for sections [4032] to [4037] AC Failure restore 3 3A1 - AC loss restore AR - AC Restoral Battery Failure restore 3 3A9 - Battery test restore YR - System Battery Restoral Auxiliary supply trouble restore 3 3AA - System trouble restore...
-
Page 56: Appendix 3: Contact Id Report Code List
APPENDIX 3: CONTACT ID REPORT CODE LIST Prog. Prog. Prog. CID# Reporting Code CID# Reporting Code CID# Reporting Code Value Value Value MEDICAL ALARMS - 100 SYSTEM TROUBLES - 300 & 310 REMOTE ACCESS - 410 Medical Alarm System Trouble Callback Request Made Personal Emergency AC Loss... -
Page 57: Index
INDEX 3050 ................34 Sections 3051 ................41 0001 to 0096 ..............13 3052 ................41 0101 to 0196 ..............14 3053 ................30 0201 to 0296 ..............25 3054 ................28 0301 to 0396 ..............34 3055 ................16 0501 to 0532 .............. - Page 58 3215 ................21 3421 ................. 19, 20 3216 ................22 3422 ............... 19, 20, 21, 27 3217 ................22 3423 ................. 23, 29 3218 ................22 3424 ................21 3221 .................19, 20 3425 ................. 20, 21 3222 ............... 19, 20, 21, 27 3427 ................
- Page 59 3625 .................20, 21 3900 to 3909 ..............25 3627 ................28 3910 to 3919 ..............25 3628 ................28 3913 ................20 3629 ................28 3920 to 3928 ..............26 3700 ................34 3930 to 3936 ..............26 3701 ................20 3940 to 3968 ..............
- Page 60 Delinquency Timer, Closing ........... 29 Burglar Alarm ..............38 Dial Tone Delay ..............30 Burglar Alarm on Door Left Open ........... 40 Digiplex Memory Key. See Paradox Memory Key Burglar Alarm On Forced Door ..........40 Disabled Burglary Zones ..............14 Wireless Transmitter Supervision ........
- Page 61 Disarming Report Schedule ..........27 Heat Zones ..............14 Display “Bypass” If Armed ............ 21 Hold-up Zones ..............14 Door Access Mode ............39 Holiday Programming ............39 Door Forced Open Restore event ........... 40 Hourly Test Transmission ............. 29 Door Labels ..............
- Page 62 Record REX events ............40 Recycle Alarm ..............22 No AC Fail Display ............34 Recycle Delay ..............22 No Bell Cut-Off on Fire Alarm ..........22 Regular Arming ..............42 No Exit Delay on Remote Arm ..........21 Report Only ..............16 Noisy Environments ............
- Page 63 Switch To Pulse ..............30 24Hr Water zone ............15 Alarm Transmission Delay ..........16 Switch To Stay Arming ............20 Bypass ..............15 System Date and Time ............34 Connections ..............8 System Event ..............52 Definition ..............14 System Labels ..............34 Delayed 24Hr Fire Zone ..........
-
Page 64: Warnings
This equipment complies with Part 68 of the FCC rules subpart D and CS-03. Inside The control panel (DGP-NE96) and LCD Keypad (DGP2-641) are UL listed in the cover of this equipment is a label that contains, among other information, the FCC accordance with standard UL1023 (Household Burglar -- Alarm Systems Units), registration number of this equipment. - Page 65 Grade B Central Station (Level 0) ATTACHMENT LIMITATION NOTICE Same as Household Grade A Burglar alarm system unit except: The Industry Canada label identifies certified equipment. This certification means that • The ringback feature shall be enabled (section [3037] option [5]; page 30). the equipment meets certain telecommunications network protective, operational and •...
- Page 66 NOTES...
- Page 68 Printed in Canada - 09/2003 DGPNE96-EI05...
Need help?
Do you have a question about the DGP-NE96 and is the answer not in the manual?
Questions and answers