
Related Manuals for Niles WS100R


Summary of Contents for Niles WS100R
- Page 1 I N S T A L L A T I O N & O P E R A T I O N G U I D E WS100R WS100R WALL-MOUNT INFRARED SENSOR ® L E N D I N G...
-
Page 2: Table Of Contents
Niles TS100, MS100, MS200, MVC100IR and CS100 sensors or the IntelliPad ® The WS100R is just one part of the three building blocks necessary to complete a Niles IR repeating system: • IR Main System Unit—Models MSU140, MSU250, MSU480 and MSU440Z. -
Page 3: Features And Benefits
IR sensors. • Plasma-proof performance— allows placement of the WS100R near plasma displays. • CFL interference resistant— expands installation flexi- bility to areas with fluorescent lighting. • Works under most lighting conditions, including indi- rect sunlight—... -
Page 4: Installation Considerations
N F R A R E D E N S O R Installation Considerations The WS100R is a Decora-style module and is designed to use standard Decora-style cover plates and mounting hardware. Decora cover plates (up to 6-gang) with color-matched plate screws are available from your Niles dealer. - Page 5 110 volt devices, provided a “low-voltage partition” is used between the devices. We do not recommend this. The cable connected to the WS100R can act as an “antenna” for elec- trical noise. Locating the WS100R cable too close to a light dimmer or switch may interfere with the WS100R.
- Page 6 A L L O U N T N F R A R E D E N S O R Niles IR Flasher Stereo Receiver 12V DC power supply (supplied with the MSU250 Main System Unit) plugged into an unswitched AC outlet powers the system 3-30V AC/DC...
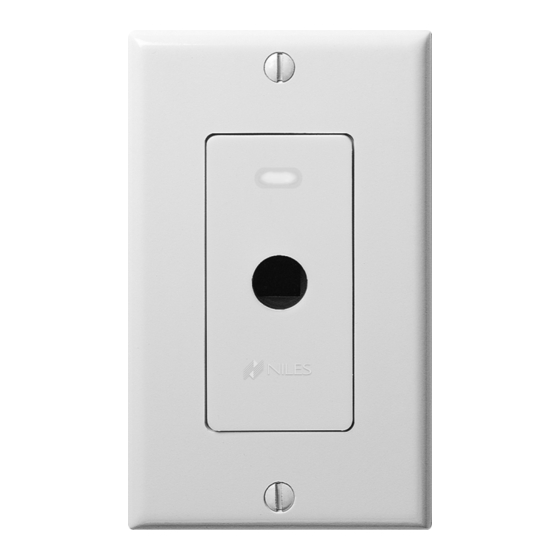
- Page 7 (c) WS100 IR Receiver (supplied) (d) Snap-on Color Insert (supplied) (e) Device Screws (2 supplied) (f) Decora Faceplate (supplied) (g) Faceplate Screws (2 supplied) N F R A R E D E N S O R Figure 2 WS100R Parts Guide...
- Page 8 Inserts are mounting tabs. available in a variety of colors. If you need to change the color of the WS100R: 1. Obtain the WS100R Decora-style insert in the desired color from your Niles dealer.
- Page 9 A L L Hold the WS100R as shown in (Figure 3). Locate the two plastic mounting tabs at the top rear of the Decora-style insert. Using two fingers, simultaneously press both tabs down (towards the center of the insert) and forward (away from you) until the insert pops free from its mounting slots.
-
Page 10: Installation
(Figure 5) 5. Use the shorter plate screws to fasten the Decora cover plate to the WS100R. DO NOT OVER-TIGHTEN THE PLATE SCREWS OR YOU MAY DAMAGE THE COVER PLATE. Line up all the screws in the same direction for a finished look. - Page 11 A L L O U N T N F R A R E D E N S O R Figure 5 Installing the Connector NOTE: Certain “old work” or “retro-fit” boxes, such as the Carlon B225R, have a plastic “lip” which interferes with the Decora plate screws.
-
Page 12: Operation
Operation Operation of the WS100R is simple. Stand within the operational range of your WS100R. Aim your hand-held remote at the WS100R and press the button for the desired command. Your IR command is instantly repeated to your A/V equipment. -
Page 13: Troubleshooting
Niles infrared extender system, please refer to the instruction manual included with your Niles IR main system unit (MSU140, MSU250, MSU480 MSU440Z, IntelliControl The bi-color blue/green LED on the front of the WS100R is a useful troubleshooting aid. The led should light solid green when status is detected. - Page 14 A L L Eliminating optical feedback In some installations, two conditions combine to optical feedback loop. Symptoms can include: poor range, intermittent operation or no operation. The conditions which sometimes combine to create a feed- back loop are: 1. Both a sensor and a flasher are located within the same room.
- Page 15 “flickers”, and the WS100R functions normally, there is no cause for concern. If the WS100R does not work, and the LED does not light at all: Test the remote control(s) by operating the A/V equipment directly. Replace the batteries if needed. Double check the cable connections on all WS100R’s Main System...
- Page 16 A L L Move the sensor or the sensor cable away from the EMI source or move the source of the EMI away from the sensor or the cable. 2. Connect the Sensor’s GND terminal to true earth ground (if this isn’t feasible use the main system unit’s GND terminal).
-
Page 17: Specifications
Decora wall plate; 2-3/4" wide x 4-1/2" high. O U N T N F R A R E D Contents WS100R Sensor x1 Decora Insert x1 Decora faceplate x 1 Removable connector x 1 Device Mounting Screws x 2 Faceplate Spaces x 2... - Page 18 A L L O U N T N F R A R E D E N S O R Notes...
- Page 19 A L L O U N T N F R A R E D E N S O R Notes...
- Page 20 12331 S.W. 130 Street ©2004 Niles Audio Corporation. All rights reserved. Niles, the Niles logo, IntelliPad and Blending High Fidelity and Miami, Florida 33186 Architecture are registered trademarks of Niles Audio Corporation. MicroFlasher is a trademark of Niles Audio Tel: (305) 238-4373 Corporation.