Table of Contents
Advertisement
Available languages
Available languages
Advertisement
Table of Contents

Subscribe to Our Youtube Channel
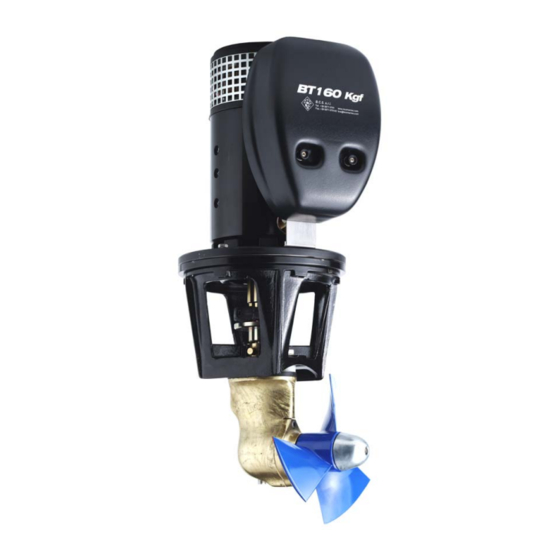
Summary of Contents for BCS BT160Kgf
- Page 1 ISBOW034 B.C.S. S.r.l. Via E. e P. Salani,1 50050 Limite S/Arno Firenze—Italy Tel. 0571/9791—Fax 0571/979143 http://www.bcsmarine.com e-Mail bcs@bcsmarine.com BOW THRUSTER BT160Kgf Manuale di istallazione e d’uso Operating and Installation Manual Ed. 03/05...
-
Page 2: Table Of Contents
BOW THRUSTER BT160Kgf ITALIANO PREFAZIONE ......................................2 NORME GENERALI DI SICUREZZA................................2 INTRODUZIONE ......................................3 1 CARATTERISTICHE TECNICHE ................................3 2 RACCOMANDAZIONI PER L’INSTALLAZIONE............................3 2.1 COLLOCAZIONE DEL TUNNEL.................................4 2.2 COLLOCAZIONE DEL BOW THRUSTER NEL TUNNEL ........................4 2.2 COLLOCAZIONE DEL BOW THRUSTER NEL TUNNEL ........................5 2.3 MONTAGGIO DEL TUNNEL NELLO SCAFO.............................5... -
Page 3: Prefazione
Per eventuali chiarimenti o problemi che si potessero presentare vogliate contattare: B.C.S. S.r.l. Via E. e P. Salani, 1 – 50050 LIMITE SULL’ARNO (FI) ITALY Tel. 0571-9791 – Telefax 0571 –979143 bcs@bcsmarine.com tecnico@bcsmarine.com NORMATIVA CEE – ISO LE ISTRUZIONI CONTENUTE IN QUESTO MANUALE SONO DESTINATE AGLI INSTALLATORI PER FACILITARE IL MONTAGGIO E AGLI UTILIZZATORI PER L’USO E LA MANUTENZIONE. -
Page 4: Introduzione
BOW THRUSTER BT160Kgf INTRODUZIONE La qualità della istallazione è determinante per l’affidabilità dell’elica di prua. Quasi tutti i problemi che si verificano sono da ricondurre ad errori o inaccuratezze nell’istallazione. E’ perciò della massima importanza seguire e controllare, durante la procedura di istallazione, tutti i punti presenti nella presente istruzione per l’istallazione. -
Page 5: Collocazione Del Tunnel
2.1 COLLOCAZIONE DEL TUNNEL Punto di rotazione dell’imbarcazione B = 9 mt A = 10 mt Fig. 2 Tunnel Fig. 1 Fig. 5 Per ottenere un risultato ottimale, collocare il tunnel La posizione del tunnel deve essere la più profonda possibile del bow thruster il più... -
Page 6: Collocazione Del Bow Thruster Nel Tunnel
BOW THRUSTER BT160Kgf 2.2 COLLOCAZIONE DEL BOW THRUSTER NEL TUNNEL Bow-thruster Bow-thruster Supporto Fig. 8 Fig. 9 Al momento di determinare l’esatta posizione dell’elica nel Il motore può essere montato in diverse posizioni. Se il motore tunnel è necessario tenere presente che il piede NON deve è... - Page 7 • ATTENZIONE ! Trovata la posizione nella barca in accordo con le informazioni Raccomandiamo che il montaggio del tunnel venga date nei paragrafi precedenti, praticare 2 fori nello scafo per eseguito da personale esperto. Le presenti individuare il centro del tunnel (Fig. 15). istruzioni sono solo generali, e non spiegano in •...
-
Page 8: Montaggio Del Piede E Della Flangia Motore
BOW THRUSTER BT160Kgf 2.4 MONTAGGIO DEL PIEDE E DELLA FLANGIA MOTORE Fig. 21 Fig. 20 Fig. 20 Fig. 22 Fig. 24 Fig. 25 Fig. 23 Contrassegnare la mezzeria del tunnel e la mezzeria della Lubrificare il foro nella flangia intermedia e montarla al suo imbarcazione. -
Page 9: Montaggio Dell'elica E Del Serbatoio Dell'olio
2.5 MONTAGGIO DELL’ELICA E DEL SERBATOIO DELL’OLIO Distanza elica/tunnel Tunnel Fig. 26 Tunnel Fig. 28 Fig. 27 Fig. 30 Fig. 29 Controllare ancora una volta la dimensione H (Fig. 26). con dell'olio per motori fuoribordo e montare il motore elettrico sulla flangia intermedia. -
Page 10: Installazione Elettrica
BOW THRUSTER BT160Kgf 3 INSTALLAZIONE ELETTRICA Batteria Bulloni 15Nm/11lbft Fusibile (B) Interruttore generale (A) Fig. 32 ATTENZIONE ! Inoltre c’è il pericolo che uno dei due o entrambi i La durata massima di azionamento e la seguenti collegamenti dell’albero vengano... - Page 11 PANNELLO DI COMANDO E ACCESSORI DISPOSITIVO DI RITARDO Fig. 33 PANNELLI DI COMANDO Motore elettrico MODELLO DESCRIZIONE CODICE BTJOY Pannello di comando bow-thruster con joy-stick 15726 BTINT Pannello di comando bow-thruster con pulsante 15727 BTRIT/12 Kit ritardo elettrico a 12V 12214 BTRIT/24 Kit ritardo elettrico a 24V...
-
Page 12: Funzionamento
Limitare le perdite di tensione lungo i cavi della batteria massima oraria di azionamento, è per il utilizzando un diametro sufficiente. BT160Kgf - 24Vdc di 3min a 500 A. • Il modo in cui il tunnel è collegato allo scafo. -
Page 13: Manutenzione
5 MANUTENZIONE Tappo Serbatoio dell’olio Fig. 36 • Controllare regolarmente il livello dell’olio nel serbatoio. Togliere il tappo dal serbatoio dell'olio. All’inizio il livello scenderà un po’, finché il piede non sarà • Togliere il tappo di spurgo del piedino. riempito completamente d’olio. -
Page 14: Risoluzione Dei Problemi
BOW THRUSTER BT160Kgf 5.1 RISOLUZIONE DEI PROBLEMI Problema Soluzione 1) Il motore elettrico gira ma non c’è spinta La spina di sicurezza tra il motore e l’albero di comando all’interno Sostituire la spina di sicurezza e controllare l’istallazione del dell’imbarcazione potrebbe essere rotta. -
Page 15: Parti Di Ricambio Bow Thruster Elettrico Bt-160
6 PARTI DI RICAMBIO BOW THRUSTER ELETTRICO BT-160 POSIZIONE DESCRIZIONE CODICE ANODO BOW-THRUSTER PER BT-160 12116 ELICA 3 PALE d.245 x 350 mm PER BT-160 16319 PIEDE BOW THRUSTER 160Kgf - d.250 mm PER BT-160 23223 GIUNTO ELASTICO PER BT-160 16320 KIT DI INGRASSAGGIO PIEDE BOW THRUSTER PER BT-160 10393... -
Page 16: Condizioni Di Garanzia
BOW THRUSTER BT160Kgf CONDIZIONI DI GARANZIA 1. La B.C.S garantisce che il prodotto venduto è privo di qualsiasi difetto di fabbricazione o di altro difetto risultante da progettazione, materie prime, fabbricazione o costruzione, nei termini e nei limiti sotto indicati. -
Page 17: Foreword
For any clarifications or problems that might present contact: B.C.S. S.r.l. Via E. e P. Salani, 1 – 50050 LIMITE SULL’ARNO (FI) ITALY Tel. 0571-9791 – Telefax 0571 –979143 bcs@bcsmarine.com tecnico@bcsmarine.com STANDARD CEE – ISO THE INSTRUCTIONS IN THIS MANUAL ARE ADDRESSED TO THE INSTALLERS TO SIMPLIFY THE INSTALLATION AND FOR THE OPERATORS FOR THE USE AND MAINTENANCE. -
Page 18: Introduction
BOW THRUSTER BT160Kgf INTRODUCTION The installation quality is detriment for the efficiency and reliability of the bow thruster. Nearly all the problems encountered result from errors or improper installations. Therefore is highly suggested to follow and check, during the installation, all the points present in the installation manual. -
Page 19: Tunnel Location
2.1 TUNNEL LOCATION Point of Boat Rotation B = 9 mt A = 10 mt Fig. 2 Tunnel Fig. 1 Fig. 5 To obtain the best result, locate the tunnel of the bow The position of the tunnel has to be as low as possible for the thruster as close as possible to the bow of the boat following reasons (Fig. -
Page 20: Locating The Bow Thruster In The Tunnel
BOW THRUSTER BT160Kgf 2.2 LOCATING THE BOW THRUSTER IN THE TUNNEL Bow-thruster Bow-thruster Support Fig. 8 Fig. 9 At the moment of locating the position of the propeller in the The motor could be mounted in various positions. If the motor tunnel is necessary to keep present that the tail piece should is located horizontally, or at a degree larger than 30°respect to... - Page 21 • ATTENTION! Located the position on the boat according to the information We recommend that a professional person do the submitted in the previous paragraphs, drill two holes in the hull tunnel installation. These instructions are only to locate the centre of the tunnel (Fig. 15). general, and do not explain in details the fibreglass •...
-
Page 22: Assembling The Tail Piece And The Motor Flange
BOW THRUSTER BT160Kgf 2.4 ASSEMBLING THE TAIL PIECE AND THE MOTOR FLANGE Fig. 21 Fig. 20 Fig. 20 Fig. 22 Fig. 24 Fig. 25 Fig. 23 Mark the centre of the tunnel and the centre of the boat. Grease the hole of the intermediate flange and position this flange. -
Page 23: Assembling Of The Propeller And The Oil Reservoir
2.5 ASSEMBLING OF THE PROPELLER AND THE OIL RESERVOIR Distance propeller/tunnel Tunnel Fig. 26 Tunnel Fig. 28 Fig. 27 Fig. 30 Fig. 29 Check again dimension `H`. (Fig. 26). Grease the shaft of the electric motor with an installation compound, like Molykote ® G-n plus. Grease the threads of Make sure that the key is properly positioned in the key way of the fastenings bolts with ‘outboard gear grease’... -
Page 24: Electrical Installation
BOW THRUSTER BT160Kgf 3 ELECTRICAL INSTALLATION Battery Screws 15Nm/11lbft Fuse (B) Main switch (A) Fig. 31 ATTENTION! Also there is the danger that one or both shafts coupling The maximum duration of operation and the get damaged permanently: • thrust indicated in the technical data are based... - Page 25 CONTROL PANEL AND ACCESSORIES DELAY SWITCH Fig. 33 CONTROL PANEL MODEL DESCRIPTION CODE Electric Motor BTJOY Bow thruster Control panel with Joy Stick 15726 BTINT Bow thruster control panel with switch 15727 BTRIT/12 Delay switch kit 12V 12214 BTRIT/24 Delay switch kit 24 v 12215 BTINT BTJOY...
-
Page 26: Function
Limit voltage drop along the battery cables utilizing The maximum duration of operation, that is also the maximum sufficient diameter. hour duration of operation, is for BT160Kgf-24Vdc 3min a 500A. • The way the tunnel is connected to the hull. -
Page 27: Maintenance
5 MAINTENANCE Filler Cap Oil reservoir Fig. 36 • Check regularly the oil level in the reservoir. In the beginning Remove the filler cap from the tank. the level will go down a little, until the tail piece is filled •... -
Page 28: Trouble Shooting
BOW THRUSTER BT160Kgf 5.1 TROUBLE SHOOTING Problem Solution 1) The electromotor runs, but there is no thrust If the shearpin between the motor and driveshaft inside the boat is Replace shearpin and check the motor installation to ensure broken correct connection of the shearpin before re-fitting the electromotor Is the propeller in the tunnel fastened correctly on the prop-shaft Re-fasten or replace the propeller and/or drivepin. -
Page 29: Spare Parts For Electric Bow Thruster Bt-160
6 SPARE PARTS FOR ELECTRIC BOW THRUSTER BT-160 POSIZIONE DESCRIZIONE CODICE ANODE BOW-THRUSTER PER BT-160 12116 PROPELLER 3 BLADE d.245 x 359 mm PER BT-160 16319 TAIL-PIECE BOW THRUSTER 160Kgf - d.250 mm FOR BT-160 23223 MOTOR COUPLING FOR BOW THRUSTER FOR BT-160 16320 GREASING KIT FOR BT-160 TAIL-PIECE BOW THRUSTER 10393... -
Page 30: Warranty Conditions
(claim number) The returned items shall be sent together with a packing list reporting BCS part numbers and possibly the reference of B.C.S. invoice or shipping document. - Page 31 NOTES...
- Page 32 Rua Joerg Bruder 117 - Vila Sao Francisco Ph:+20 (12) 7959096 Fax:+20 (3) 4252179 ITALIA/ITALY 04710-200 Sao Paulo - Brazil e-mail: sales@dolphin-maririe.net BCS s.r.l. Ph:+ 55 (11) 51827166 Fax:+ 55 (11) 51833636 http://www.dolphin-marine.net via E. P. Salani 1 - 50050 Limite sull'Arno - Firenze e-mail: pedroarruda@marinexpress.com.br...
Need help?
Do you have a question about the BT160Kgf and is the answer not in the manual?
Questions and answers