Table of Contents
Advertisement
Available languages
Available languages
Serial number |
Número de serie
See rating Label on unit for serial number.
El número de serie se encuentra en la etiqueta de
especificaciones de la unidad.
Date purchased | Fecha de compra
If you have questions or need assistance
during assembly, please call 1-800-241-7548
Si tiene alguna pregunta o si Necesita
ayuda durante el Ensamblado, llámenos Al
1-800-241-7548
Tools Required for Assembly:
#2 Phillips or Standard Flat blade Screwdriver (Not Provided)
Small Adjustable Wrench (Not Provided)
7/16" Combination Wrench (Not Provided)
Herramientas necesarias para el armado:
Destornillador No. 2, Philips o de hoja plana (que no viene incluido)
Llave inglesa pequeña (que no viene incluida)
Llave mixta de 7/16" (que no viene incluida)
11/07/14 • 42804875
15202032
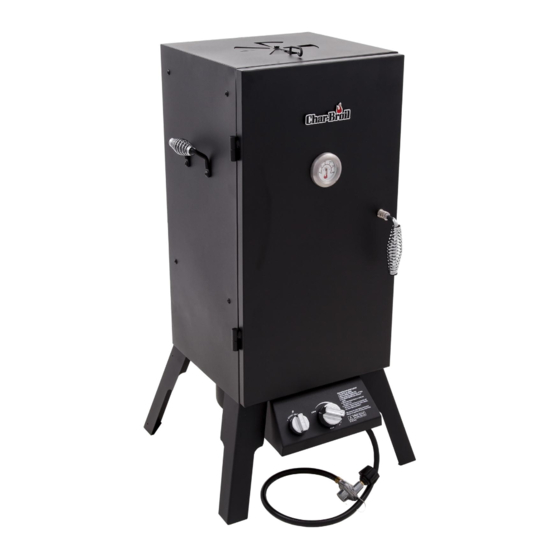
VERTICAL GAS
SMOKER 600
Advertisement
Table of Contents
Troubleshooting

Related Manuals for Char-Broil 15202032


Summary of Contents for Char-Broil 15202032
-
Page 1: Product Record Information
VERTICAL GAS 15202032 SMOKER 600 Serial number | Número de serie See rating Label on unit for serial number. El número de serie se encuentra en la etiqueta de especificaciones de la unidad. Date purchased | Fecha de compra If you have questions or need assistance... -
Page 2: Table Of Contents
THIS APPLIANCE IS FOR OUTDOOR TABLE OF CONTENTS USE ONLY. Product Record Information..........1 For Your Safety..............2 DANGER Safety Symbols ..............2 Installation Safety Precautions......... 3 If you smell gas: Food Safety..............4 1. Shut off gas to the appliance. Use and Care...............4-10 2. -
Page 3: Installation Safety Precautions
Installation Safety Precautions WARNING • Use your appliance, as purchased, only with LP (propane) gas and the regulator/valve assembly supplied. Failure to follow all manufacturer’s instructions could result • The appliance installation must conform with local codes, or in in serious personal injury and/or property damage. their absence of local codes, with either the National Fuel Gas Code, ANSI Z223.1/ NFPA 54, Natural Gas and Propane Installation Code, CSA B149.1, and Propane Storage and... -
Page 4: Food Safety
Food Safety USE AND CARE Food safety is a very important part of enjoying the outdoor cooking experience. To keep food safe from harmful bacteria, follow these four basic steps: DANGER Clean: Wash hands, utensils, and surfaces with hot soapy water before and after handling raw meat and poultry. - Page 5 LP Cylinder Exchange LP (Liquefied Petroleum Gas) •Many retailers that sell units offer you the option of replacing • LP gas is nontoxic, odorless and colorless when produced. your empty LP cylinder through an exchange service. Use only For Your Safety, LP gas has been given an odor (similar to those reputable exchange companies that inspect, precision fill, rotten cabbage) so that it can be smelled.
- Page 6 Connecting Regulator to the LP Cylinder WARNING 1.LP cylinder must be located on the ground, 24” away from unit. 2.Turn all control knobs to the OFF position. • Do not use unit until leak-tested. • If a leak is detected at any time, STOP! Turn off gas at 3.Turn LP cylinder OFF by turning hand-wheel clockwise to a full source and correct leak.
-
Page 7: Safety Tips
• Apartment Dwellers: WARNING Check with management to learn the requirements and fire codes for using an LP gas appliance in your apartment complex. If allowed, use outside on the ground floor with a • Outdoor gas appliance is not intended to be installed in or on three (3) foot clearance from walls or rails. -
Page 8: Ignitor Check
Burner Flame Check Ignitor Lighting • Do not lean over appliance while lighting. • Light burner, rotate knob from HIGH to LOW. Looking through 1. Turn ON LP gas cylinder. the match light holes underneath the appliance, you should see 2. -
Page 9: Spider Alert
8. Check burner for damage, due to normal wear and corrosion CAUTION some holes may become enlarged. If any large cracks or holes are found replace burner. Reverse steps for re-assembly. SPIDER ALERT! VERY IMPORTANT: Burner tube must re-engage over valve opening. - Page 10 Setup Instructions Meats that require extended cooking time to reach Using Wood Chips or Chunks doneness may require additional water. Check water level periodically and add more hot water as necessary. • Dried aromatic wood chips or chunks need to be saturated with water, so that when placed in the water pan, a smoldering smoke will result.
-
Page 11: Limited Warranty
LIMITED WARRANTY This warranty only applies to units purchased from an authorized retailer. Manufacturer warrants to the original consumer-purchaser only that this product shall be free from defects in workmanship and materials after correct assembly and under normal and reasonable home use for the periods indicated below beginning on the date of purchase*. - Page 12 ÍNDICE DE MATERIAS ESTA APARATO SOLO SE PUEDE USAR EN EXTERIORES. Información de inscripción de la garantía ......1 Por su propia seguridad..........12 PELIGRO Símbolos de seguridad..........13 Seguridad para la instalación........13 Si siente olor a gas: Seguridad con los alimentos........14 1.
- Page 13 Medidas de seguridad para la instalación ADVERTENCIA • Use su aparato, tal como lo compró, únicamente con gas propano y con la unidad de regulador/válvula suministrada. • La instalación de su aparato se debe realizar de conformidad El no cumplir con todas instrucciones del fabricante con los códigos locales o, en su defecto, ya sea con la norma ANSI Z223.1/NFPA 54 del Código nacional sobre gases puede ocasionar graves y/o daños materials.
- Page 14 Seguridad con los alimentos USO Y MANTENIMIENTO La seguridad con los alimentos es una parte muy importante del disfrute de su parrillada al aire libre. Siga estos cuatro pasos básicos para proteger a los alimentos contra las bacterias nocivas: PELIGRO Limpieza:Lávese las manos, lave los utensilios y las superficies con agua jabonosa caliente, antes y después de manipular carnes y aves crudas.
- Page 15 Cambio del tanque de gas El gas propano (GLP) • Muchos comerciantes minoristas que venden unidades, le • Es atóxico, inodoro e incoloro en el momento en que se ofrecen la opción de cambiar su tanque de gas vacío produce. Para su seguridad , al gas propano se le ha mediante un servicio de recambio.
- Page 16 ADVERTENCIA Como conectar el regulador al tanque de gas propano 1. Tanque de gas debe estar situado en la planta, 24 "de la unidad. • No use la unidad sin antes haber verificado que no tenga fugas. 2. Gire todas las perillas de control a la posición APAGADO (OFF). •...
-
Page 17: Consejos De Seguridad
ADVERTENCIA ADVERTENCIA • NUNCA trate de encender el quemador con la tapa • El aparato a gas para uso al aire libre no ha sido diseñado cerrada. Las acumulaciones de gas no encendido en para ser instalado en embarcaciones. los aparatos cerrados son peligrosas. •... -
Page 18: Limpieza General
Control de la llama del quemador Cómo usar el encendedor • Para encender el quemador, gire la perilla de la graduación • No se incline sobre la freidora cuando la esté encendiendo. ALTA (HIGH) a BAJA (LOW). Por el orificio de encendido con 1. - Page 19 8. Examine el quemador para detectar daños; algunos orificios ADVERTENCIA pueden alargarse debido al desgaste normal y a la corrosión. Si observa grietas u orificios grandes, cambie el quemador. 9. Para volver a armar el quemador, siga los mismos pasos en orden inverso ¡ALERTA CONTRA LAS ARAÑAS!
- Page 20 Instrucciones de preparación Las carnes que requieren tiempo de cocción prolongada para Uso de astillas o de trocitos de madera alcanzar el punto de cocción pueden requerir agua adicional. • Es necesario saturar con agua las astillas o los trocitos de madera aromática seca, de manera que cuando se coloquen Revise el nivel de agua periódicamente y añadir más agua sobre el recipiente de agua se produzca un fuego latente...
- Page 21 GARANTÍA LIMITADA Esta garantía es válida únicamente para las unidades adquiridas de los distribuidores autorizados. El fabricante le garantiza únicamente al consumidor- comprador original, que este producto no presentará defectos de mano de obra ni de materiales por el período indicado a continuación, contado desde la fecha de compra*, si se arma correctamente y se usa en el hogar, en condiciones normales y razonables.
-
Page 22: Parts Diagram
DIAGRAMA DE PIEZAS PARTS DIAGRAM... -
Page 23: Parts List
PARTS LIST Description SMOKER CHAMBER DOOR, SMOKER CHAMBER BURNER HOUSING CONTROL PANEL BURNER DAMPER ASSEMBLY, TOP GRATE, COOKING PAN, WATER HOSE VALVE REGULATOR HANDLE HANDLE SPRING KNOB, CONTROL DOOR HANDLE KIT IGNITOR, ROTARY KNOB, IGNITOR TEMPERATURE GAUGE LOGO PLATE WIRE RACK, SMOKER CHAMBER WIRE, ELECTRODE DOOR HANDLE SPRING …... - Page 24 PRIMAVERA DE MANGO PERILLA DE CONTROL MANGO DE PUERTA EL KIT UNIDAD DEL ENCENDEDOR GIRATORIO PERILLA DEL ENCENDEDOR TERMÓMETRO PLACA DEL LOGOTIPO CHAR-BROIL SOPORTES PARA REJILLAS, CÁMARA DE AHUMADO CABLE DEL ELECTRODO MANGO DE LA PUERTA DE PRIMAVERA … BOLSA DE HERRAJES …...
-
Page 25: Assembly Steps
ASSEMBLY ARMADO • Carefully remove the door from the unit by swinging it open and lifting it up and away from the smoker chamber. Lay the door aside. • Place the Smoker Chamber on it’s back with the door opening facing up. CAUTION: This unit is heavy! •... - Page 26 • Install Burner Housing to Smoker Chamber using three 1/4-20x1/2” screws. Install all screws hand tight, then tighten with a #2 phillips screwdriver. (not provided) • NOTE: The venturi tube MUST face up (towards the door opening). • Instale el recinto del quemador en la cámara de ahumado con tres tornillo de 1/4-20 x 1/2”. Apriete a mano todos los tornillos que instale, luego apriételos con un destornillador Phillips No.
- Page 27 • Place Control Panel Assembly onto Smoker Chamber by placing tabs under the front edge of the Smoker Chamber, shown A. • From the inside of the Smoker Chamber, install 2 #10-24x3/8” screws through the smoker chamber and through the Control panel tabs as shown.
- Page 28 • Be sure the electrode wire exits the hole UNDER the venturi tube hole. DO NOT route the wire through the same hole as the burner venturi tube. • Install Ignitor Wire by pushing the round connector onto the Ignitor as shown. •...
- Page 29 • Install legs by placing 3 - 1/4-20x1/2” Hex Head Bolts through the smoker body and through each leg as shown. Thread the bolts into the nut welded to the underside of each leg. Tighten bolts by hand. Using an adjustable wrench (not provided), tighten each bolt securely.
- Page 30 • With the assistance of a helper - stand the unit upright on its legs. CAUTION: THIS UNIT IS HEAVY! • Con la ayuda de otra persona, ponga la unidad sobre sus patas. ADVERTENCIA: ¡ESTA UNIDAD ES PESADA! CAUTION: This unit is HEAVY! Do not attempt this step without assistance! ADVERTENCIA: ¡Esta unidad es pesada!
- Page 31 • Insert 1/4-20x1/2” Hex Head Bolt and flat washer through the top smoker body, in the center of the damper holes as shown.(A) • Insert the damper as shown. (B) • Place the 1/4” flat washer onto bolt and thread the 1/4-20 reversible lock nut on to the bolt. Tighten the nut sufficiently to allow the damper to move.
- Page 32 • Install the side handles with 1/4-20X3/4” screws and 1/4-20 Keps nuts as shown. • NOTE: If the handle springs are not installed on the handle rod, install them per inset. • Instale las asas laterales con tornillos de 1/4-20 x3/4” y tuercas Keps 1/4-20, como se ilustra en D. •...
- Page 33 • Slide Water Pan into the Smoker body. Coloque con el recipiente para el agua, en el cuerpo del ahumador. • • Insert the 3 Cooking Grates into the smoker body. • Coloque las tres rejillas de cocción en el cuerpo del ahumador. Water Pan Recipiente para el agua Cooking Grates (3)
- Page 34 • Carefully place the door back onto the Smoker Body hinges. 9 10 • Con cuidado, vuelva a instalar la puerta en las bisagras del cuerpo del ahumador. • Remove wing nut from temperature gauge, insert temperature gauge through the hole in the door from the front, reinstall the wing nut to the temperature gauge.
-
Page 35: Troubleshooting
EMERGENCIES: If a gas leak cannot be stopped, or a fire occurs due to gas leakage, call the fire department. Prevention/Solution Possible Cause Emergencies • Turn off gas at LP cylinder or at source on natural gas systems. If hose is cut or Gas leaking from •... -
Page 36: Troubleshooting
Troubleshooting (continued) Possible Cause Problem Prevention/Solution Burner will not light using • Replace knob. • Rotary knob rotates without clicking. ignitor. • Inspect wire insulation and proper connection. Replace wire if insulation is broken. • Sparking between ignitor and electrode. •... - Page 37 EMERGENCIAS: Si no se puede detener una fuga de gas, o si ocurre un incendio debido a una fuga de gas, llame a los bomberos. Medidas de prevención / solución Causas probables Emergencias • Manguera dañada. • Cierre el gas en el cilindro o en la fuente de los sistemas de gas natural. Si la Fugas de gas de mangueras manguera está...
- Page 38 Resolución de problemas (continuación) Problema Causas probables Medidas de prevención / solución El quemador no se enciende • La perilla giratoria gira sin hacer clic. • Vuelva a colocar la perilla. al usar el encendedor. • Hay chispas entre el encendedor y el electrodo. •...
-
Page 39: Registration Card
FOR US ONLY Text “Register” to “GRILLS” (474557) Envíe un mensaje de texto con la palabra “Register” a “GRILLS” (474557) - Page 40 ©2014 Char-Broil, LLC. Columbus, GA, 31902. Printed in China. Impreso en China. ©2014 Assembly instructions. ©2014 Instrucciones de ensamblado.
Need help?
Do you have a question about the 15202032 and is the answer not in the manual?
Questions and answers