Table of Contents
Advertisement
Important Information
-- This manual is designed to help you to install, operate and maintain Perfect Binding Machine
PB2000. Read, understand and keep this manual in a safe and convenient place.
-- Do not operate PB2000 until you read and understand the instructions in this manual.
GB-6210
-- E-P Equipment Co., Ltd. should not be liable for incidental consequential damages resulting
from : improper or inadequate maintenance by customer; unauthorized modification or misuse;
operation outside of the environment specifications for the product.
-- EP Equipment Co.,Ltd pursues a policy of continuing improvement in design and performance
of the product. Therefore, the product design and specifications are subject to change without
prior notice and without our legal obligation.
-- All rights are reserved. No part of the manual may be photocopied, reproduced or translated to
another language without the prior written consent of EP Equipment Co.,Ltd.
Advertisement
Table of Contents

Summary of Contents for EP Equipment PB2000
- Page 1 -- This manual is designed to help you to install, operate and maintain Perfect Binding Machine PB2000. Read, understand and keep this manual in a safe and convenient place. -- Do not operate PB2000 until you read and understand the instructions in this manual. GB-6210 -- E-P Equipment Co., Ltd.
-
Page 2: Table Of Contents
GB-6210 Manual Contents 1. Specifications 1-1 Major Specifications ..................2 1-2 Accessories ...................... 3 2. Guide to Components 2-1 Main Frame ...................... 4 3-2 Control Panel ....................5 3. Before Operation 3-1 Installation Precautions ................... 7 3-2 Operating Precautions ..................7 3-3. -
Page 3: Specifications
GB-6210 Manual 1. Specifications 1-1 Major Specifications Model PB2000 Maximum Spine Length 330 mm (12.4’’) Maximum Binding Thickness 38 mm (1.5’’), 380 Sheets Minimum Binding Thickness 3 Sheets Cover Weight range 70 to 180 gsm (Paper only) Production Speed 1 Book / 35s, Up to 100 books/hour... -
Page 4: Accessories
GB-6210 Manual 1-2 Accessories Name Quantity Hot melt Glue 2 KG Fuse 1 PC Waste Box 1 PC Power Cord 1 PC Hexagonal wrench 1 PC Hexagonal wrench 1 PC ( 3 ) -
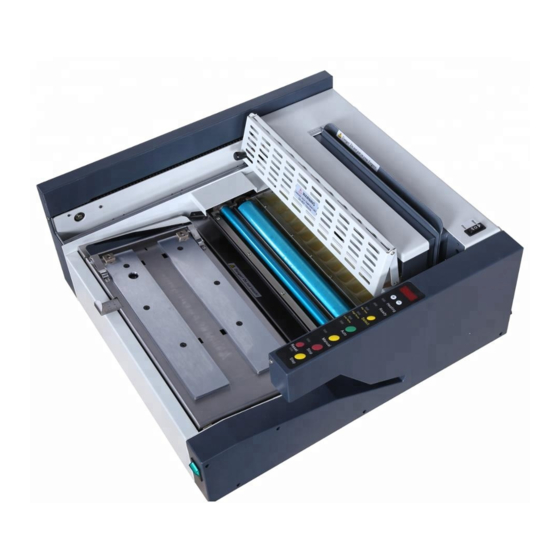
Page 5: Guide To Components
GB-6210 Manual 2. Guide to Components 2-1 Main Frame Name Function This clamps sheets to be bound and carries to the Roughing 2-1-1 Clamper cutter and the melt tank Clamper Open/ 2-1-2 Used to open / close the clamper, used only in Hand mode Close Switch 2-1-3 Control Panel... -
Page 6: Control Panel
GB-6210 Manual 2-2 Control Panel ( 5 ) - Page 7 GB-6210 Manual Name Function 2-2-1 Nipping Time Display Shows the length of nipping time Nipping Time Control 2-2-2 Depress +/- button to set the length of nipping time Button 2-2-3 Start Lamp This Lamp turns on when the machine is ready to bind 2-2-4 Preparation Lamp This Lamp turns on when glue is not melted for binding...
-
Page 8: Before Operation
GB-6210 Manual 3. Before Operation 3-1 Installation Precautions 3-1-1. Place the machine in a flat space. Avoid places where table and foundation are unstable. 3-1-2. Keep the machine away from direct sun light. 3-1-3. Keep the machine away from high temperature and humidity. 3-1-4. -
Page 9: Knowledge Of How To Bind A Good Book
GB-6210 Manual 3-3. Knowledge of how to bind a good book 3-3-1 It is very important that the book stock should be trued up before binding. Good and strong binding depends on spine-alignment of stock. To apply glue on spine equally, all sheet must touch the level plate. -
Page 10: Operation Procedure
GB-6210 Manual 4. Operation Procedure 4-1 Preadjustments for operation Make adjustments to ensure good binding quality when turn on the machine. 4-1-1 Turn on the machine 4-1-2 Warming Up - Plug the power cord to outlet. - Warming up time is about 20 minute. - Turn on the main switch. - Page 11 GB-6210 Manual 4-1-5 Rolling the glue. - Keep depress Reset Button for about 5 seconds, clamper moves forward and stop at nipper position. - Depress Reset Button, clamper return home position. - Please repeat this step twice. Glue in melt tank is rolling to get even temperature.
-
Page 12: Auto Mode
GB-6210 Manual 4-2 Auto Mode 4-2-1 Select auto mode 4-2-2 Pull out the cover gauge Cover Gauge Cover Gauge - Depress Auto Button to select auto mode, Auto mode Lamp turns on. 4-2-3 Place the cover 4-2-4 Align the cover gauge to cover Cover Gauge Cover Cover Gauge... - Page 13 Cover-set-guide Cover-set-guide Arrow Mark GB-6210 Manual Arrow Mark Cover Gauge Nail Cover Gauge Nail 4-2-5 Place Book into the clamper 4-2-6 Push book to the left and bind Cover Gauge Cover-set-guide Arrow Mark Cover Gauge Nail - Please book in the right hand side of clamper. - Set left hand side edge of book against left -True up book in spine fully in the right hand side of the clamper.
-
Page 14: Manual Mode
GB-6210 Manual 4-3. Manual Mode 4-3-1 Choose Manual Mode 4-3-2 Choose Manual Mode Cover Gauge Cover Gauge - Depress Hand Button when you want to use Manual Mode. Hand Lamp turns on. [NOTE] Manual mode is used for beginners or testing purpose. - Page 15 Cover-set-guide Cover-set-guide Arrow Mark Arrow Mark Cover Gauge Nail GB-6210 Manual Cover Gauge Nail 4-3-5 Place Book into the clamper 4-3-6 Push book to the left and bind - Please book in the right hand side of clamper. - Set left hand side edge of book against left -True up book in spine fully in the right hand side of the clamper.
- Page 16 GB-6210 Manual 4-3-8 Return the clamper 4-3-8 Turn off the power OFF! Auto Mode - Depress the Step Button, Clamper returns to After you finish the binding job home position ready for next bind. - Turn off the main switch. - Detach the power cord from outlet.
-
Page 17: Maintenance
GB-6210 Manual 5. Maintenance 5-1 Glue supply When the glue in the melt tank is not enough, please supply glue in time. Warning! Do not touch the melt tank or the application roller. High temperature will cause severe personal injury. -Turn on the machine, make sure the glue is - Place the glue into the melt tank. -
Page 18: Clear The Waste Tank
GB-6210 Manual 5-2 Clear the Waste tank When there is too much dust and waste paper in the waste Tank, Please clear the tank. -- Pull out the Waste Tank in the back of machine - Clean the Tank -- Insert the waste tank back into the machine ( 17 ) -
Page 19: Unload Glue
We recommend you to unload the glue in the melt tank and supply the new glue in to keep good binding quality. We have Stand Cabinet (Optional accessory) available for empty the glue. Place PB2000 on the machine in the following way. Then place a container to get drained glue. GB-6210 ( 18 ) - Page 20 GB-6210 Manual 5-3-1 Turn on the machine 5-3-2 Melt glue - Plug the power cord to outlet. - Warming up time is about 20 minute. - Turn on the main switch. - When Start lamp turns on, keep waiting 10 - The Heat Preparation Lamp turns on, the more minutes so that the glue in the melt tank machine is heating the glue in the melt tank.
- Page 21 GB-6210 Manual 5-3-5 Melt tank and roughening cutter 5-3-6 Loosen the screw - We can see the melt tank and roughing - Use Hexagonal wrench (See 1-2) to loosen cutter the screw in the left hand side of melt tank. - The glue in the melt tank leaks into the Stand [Warning] Cabinet.
- Page 22 GB-6210 Manual 5-3-9 Secure the screw 5-3-10 Install the back cover - When leaking finish, secure the screw. - Install the back cover . 5-3-11 Turn on the main switch 5-3-12 Supply glue into Melt Tank - Turn on the switch. - Supply new glue into melt tank.
-
Page 23: Troubleshooting
GB-6210 Manual 6. Trouble Shooting 6-1 When turn on the machine, the lamps do not turns on Countermeasure: (1) Please check whether the power cord have been plug to the outlet. (2) please check whether the fuse is good. 6-2 When you want to stop the binding process Countermeasure: (1) Depress Stop Button.
Need help?
Do you have a question about the PB2000 and is the answer not in the manual?
Questions and answers