
Summary of Contents for SSR SR150
- Page 1 authorized Dealer GokartsUSA.com 2442 Estand Way Pleasant Hill, CA (800) 603-1437 925) 691-0330 Sales, Parts, Service...
- Page 2 (800) 603-1437 On the covers: SR150R at Milestone Ranch MX Park (Riverside, CA), ridden by professional racer Jeff Willoh, a member of the SSR Motorsports competition team...
-
Page 3: Forward
SSR pit bike and to maximize your enjoyment and biking safety. Thoroughly read this manual before riding your SSR pit bike for the first time. Be certain that you under- stand how to operate the bike and that you are familiar with the locations of each control, what it does and how it operates. -
Page 4: Table Of Contents
CONTENTS FORWARD..............................3 TABLE OF CONTENTS..........................4 COMPONENT LOCATIONS........................8 CONTROLS, BRAKES Front Brake Lever, Rear Brake Pedal....................10 CONTROLS, CLUTCH AND TRANSMISSION Clutch Lever, Gearshift Lever........................11 CONTROLS, MISCELLANEOUS AND HANDLEBAR Kick-Starter............................13 Manual Choke and Fuel Petcock......................13 Throttle..............................14 Engine On/Off Switches ........................15 Side Stand............................16 OPERATION Before Riding, Riding Safely.........................17... - Page 5 Engine Oil.............................21 Fuel..............................22 Drive Chain............................23 Cables..............................24 Nuts and Bolts............................25 Spark Plug and Ignition Wire........................25 Throttle..............................26 Brakes..............................27 Starting and Riding..........................28 Starting the Engine..........................28 Shifting Gears............................30 Braking..............................30 Stopping and Parking...........................32 Post-Ride Inspection..........................32 SERVICE MAINTENANCE, LUBRICATION AND ADJUSTMENTS Why Proper Maintenance Is Important....................33 Breaking-in the Engine.........................33 Safety Precautions..........................34 Recommended Service and Maintenance Schedule................35...
- Page 6 CONTENTS (cont.) Suspension Inspection, Front and Rear....................46 Suspension Adjustments, Front and Rear....................48 Brakes, Front and Rear........................50 Brakes, Wear, Inspections and Lubrication..................51 Wheels, Inspection..........................52 Wheel Removal, Front.........................53 Tires and Tubes, Air Pressure, Inspection, Replacing................53 Side Stand............................56 Drive Chain, Inspection and Adjustment....................57 Drive Chain, Lubrication, Removal, Cleaning and Re-installing, and Replacement......60 Cleaning Your Pit Bike...........................63 Transporting Your Pit Bike........................65...
- Page 7 Vehicle Identification Numbers.......................75 High Altitude Carburetor Adjustment.....................76 Emission Control Systems........................76 Warranty Compliance..........................76 Sources of Emissions..........................77 Exhaust Emission Control System......................77 Crankcase Emission Control System....................77 Noise Emission Control System......................77 Problems That May Affect Motorcycle Emissions..................78 Oxygenated Fuels and Your SSR Pit Bike.....................79...
-
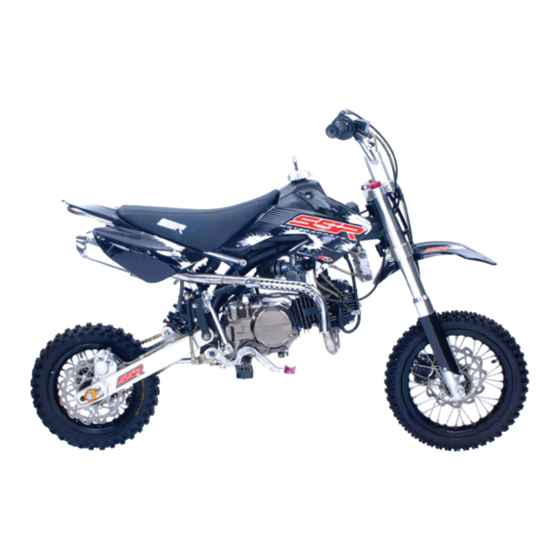
Page 8: Component Locations
COMPOMENT LOCATIONS LEFT SIDE (6) Rear Sprocket (1) Clutch Lever (12) Engine and Stator Cover (7) Chain Adjuster Block (2) Carburetor (13) Gearshift Lever (8) Chain Guide (3) Fuel Petcock (14) Engine Skidplate (9) Chain Slider (4) Air Filter (15) Front Brake Caliper (10) Chain Roller (5) Drive Chain (16) Front Brake Rotor... - Page 9 COMPOMENT LOCATIONS RIGHT SIDE (11) Rear Brake Pedal and Lever (1) Rear Brake Rotor (6) Throttle (12) Foot Peg (2) Rear Brake Caliper (7) Front Brake Lever (13) Oil Filler Cap and Dipstick (3) Muffler (8) Front Brake Master Cylinder (14) Kick Starter (4) Fuel Filler Cap (9) Auxiliary Oil Cooler...
-
Page 10: Controls, Brakes
CONTROLS, BRAKES Front Brake Lever Rear Brake Pedal The front brake lever is located on the right side of The brake pedal, which is located on the right side the handlebar and operates the front brake only. It a few inches forward and slightly inboard of the is operated by the fingers of the right hand, by pull- right foot peg, operates the rear brake only, by ing the lever to the rear. -
Page 11: Controls, Clutch And Transmission
The gear shift ing the lever in against the handlebar grip. After pattern on nearly all SSR models is “one down/ shifting gears the clutch is re-engaged by slowly three up” and neutral is between 1st and 2nd gears;... - Page 12 CONTROLS, CLUTCH AND 1st or down from 2nd. TRANSMISSION (cont.) Bikes with a “four up” gear shift pattern are operat- ed the same as “one down/three up” models except for the 1st gear location being above neutral in the shift pattern. To start any “one down/three up”...
-
Page 13: Controls, Miscellaneous And Handlebar
(fully “ON” or fully All SSR pit bikes are kick-start only, with the excep- “OFF”), the choke on several models is attached to tion of the SR125-AUTO model, which is equipped... -
Page 14: Throttle
CONTROLS, HANDLEBAR & MISCELLANEOUS (cont.) Throttle Throttle Closed Throttle Open The throttle controls the engine speed (RPM) and is to reduce engine (and vehicle) speed rotate the grip operated by rotating the hand grip on the right side forward away from the rider. The throttle is spring- of the handlebar. -
Page 15: Engine On/Off Switches
Engine ON/OFF Switches Engine OFF (Kill) Switch Two Position ON/OFF Switch SSR pit bikes are equipped with one of two types The second type of switch is a two-position ON/ of on/off or engine-off switches. The first is a simple OFF rocker-style switch;... -
Page 16: Side Stand
CONTROLS, HANDLEBAR & MISCELLANEOUS (cont.) Side Stand Side Stand Down Side Stand Up The side stand is used to support the bike in an below the left foot peg. The side stand is raised or upright, slightly leaning position while parked. The lowered with the left foot. -
Page 17: Operation
Before each ride be certain that both you and your should wear a face shield or, preferably, high SSR pit bike are ready to ride. Make sure that you quality goggles designed for off-road use. Off- are in good physical and mental condition, that you... - Page 18 OPERATION (cont.) include a tool kit, tire repair material and tools, and spare front and rear tire and tubes. Naturally, bring along an extra, approved can or two of gasoline. Before Riding (cont.) What you take along on the ride depends on the A safe and enjoyable ride begins with good plan- kind of terrain, how long you expect to ride, how ning and preparation.
-
Page 19: Pre-Ride Inspection
Pre-Ride Inspection Check the following items before every ride: Tires. Use a quality tire pressure gauge to check the air pressure when the tires are cold (before riding) and add or remove air as necessary to meet Wheels and spokes. Inspect the wheel rims for the manufacturer’s recommended cold tire air pres- damage. -
Page 20: Leaks
OPERATION (cont.) Pre-Ride Inspection (cont.) Engine Oil Drain Plug Leaks. Inspect the engine/transmission case and the fuel tank for leaks. Look beneath the bike for signs of leaking fluids. If the bike has an auxiliary oil cooler check lines and fittings to be sure that there is no leakage. -
Page 21: Engine Oil
Dipstick Location Engine oil. Check oil level using the dipstick on For more information see “Engine Oil, Checking the right side of the engine/transmission case, and and Adding” in the “SERVICE MAINTENANCE, add oil if necessary. Be sure to use the correct type LUBRICATION AND ADJUSTMENTS”... -
Page 22: Fuel
OPERATION (cont.) Pre-Ride Inspection (cont.) Filler Neck & Fuel Cap Fuel Cap, Breather Tube & Cap Fuel. Check the fuel level and add more if neces- Make certain that the fuel filler cap is securely fas- sary, filling to the bottom of the filler neck. Be sure tened and that the breather tube is properly seated to use 90 (or higher) octane unleaded pump gaso- on the cap and in good condition. -
Page 23: Drive Chain
Chain Slider & Roller Drive Chain Check the chain slider (located on the forward por- Drive Chain. Check the chain for condition and tion of the left side of the swing arm) for excessive correct tension (“slack”). The chain may break if too wear and replace if necessary. -
Page 24: Cables
OPERATION (cont.) Pre-Ride Inspection (cont.) Clutch Cable at Handlebar Clutch Cable at Transmission Case Throttle Cable Cables. The clutch and throttle are actuated by If a cable does not operate freely it may need to be cables from the handlebar levers. Check the cable lubricated. -
Page 25: Nuts And Bolts
Nuts and bolts. Using appropriate-size wrenches, be sure that all accessible nuts and bolts are tight. And tighten if necessary. Spark Plug Spark Plug Spark plug and ignition wire. Make sure that Be certain that the ignition wire terminals fit secure- spark plug is not loose in cylinder head;... -
Page 26: Throttle
OPERATION (cont.) Pre-Ride Inspection (cont.) Throttle Closed Throttle Open Throttle. Check the throttle control for free play and adjust if necessary. -
Page 27: Brakes
Front Brake Control Rear Brake Control Brakes. Test front and rear brake controls for nor- Adjust mechanical free play in front and rear levers mal operation. If either feels soft check the appro- and linkages, if necessary. priate master cylinder fluid reservoir and add DOT 3 or 4 fluid as needed to fill. -
Page 28: Starting And Riding
OPERATION (cont.) Starting and Riding Starting the engine. Be sure the transmission is in neutral and that (if applicable) the two-position on/off switch is in the ride (on) position. Turn the three position fuel petcock to the “ON” position. If the bike’s engine is cold, lift the choke lever up to the fully “ON”... - Page 29 approximately 15 seconds after it starts then push the choke lever all the way down to the fully “OFF” position. If the bike has the three-position choke on the right side of the carburetor push the choke lever down part way to the “DETENT” position im- mediately after the engine starts and, after about 15 seconds, push the choke lever the rest of the way down to the fully “OFF”...
-
Page 30: Shifting Gears
OPERATION (cont.) Braking. To slow or stop the bike apply the front and rear brakes smoothly while downshifting to match the engine speed to the bike’s forward Starting and Riding (cont.) speed. Gradually increase braking pressure as you slow down. As the bike slows to a stop put your left the instructions for a warm engine or high tempera- foot down then, when you are through using the ture start. - Page 31 All riders except those who are experienced, with expert-level skills, should reduce speed and finish braking before entering a turn. Riders should avoid braking or closing the throttle abruptly while turning; either action can cause one or both wheels to lose traction, and a loss of traction at either wheel will cause a reduced or complete loss of control.
-
Page 32: Stopping And Parking
OPERATION (cont.) Starting and Riding (cont.) Stopping and parking. After coming to a com- Post-ride inspection. After completing a day of plete stop lower the side stand. Shut off the engine. riding clean the bike as thoroughly as conditions Depending on how your specific bike is equipped allow. -
Page 33: Service Maintenance, Lubrication And Adjustments Why Proper Maintenance Is Important
Breaking-in the engine. While the engine in your process you will probably have used at least one new SSR pit bike does not require a formal “break- and maybe as much as two gallons of gasoline. in” procedure, we recommend you follow the follow-... -
Page 34: Safety Precautions
SERVICE MAINTENANCE, cause serious and painful burns – let the engine and exhaust cool before touching. LUBRICATION AND Read all instructions before beginning any mainte- ADJUSTMENTS (cont.) nance or adjustment procedures. Be sure you have the necessary tools, skills and experience to suc- Why Proper Maintenance cessfully complete whatever work you start. -
Page 35: Recommended Service And Maintenance Schedule
T – Tighten to proper torque X -- Perform *Inspect and service your SSR Pit Bike more frequently if ridden hard or in dusty, hot, or other extreme con- ditions. Regardless of hours of riding, always perform all service operations prior to storage or annually. - Page 36 T – Tighten to proper torque X -- Perform *Inspect and service your SSR Pit Bike more frequently if ridden hard or in dusty, hot, or other extreme con- ditions. Regardless of hours of riding, always perform all service operations prior to storage or annually.
-
Page 37: Fuel Recommendations
Use of a lower than recommended gasoline can Fuel Recommendations. For optimum perfor- cause “pinging,” which is also called “spark knock” mance run unleaded pump gasoline with an R+M /2 or “pre-ignition,” (an occasionally loud rapping or (US standard) octane rating of at least 90. To meet rattling noise) which can, if severe or persistent, clean air standards, much of the gasoline used can lead to extensive engine damage. -
Page 38: Engine Oil, Checking And Adding, Changing, Recommendations
SERVICE MAINTENANCE, Oil Recommendation API Classification SF or SG LUBRICATION AND Viscosity (weight) SAE 10W-40* ADJUSTMENTS (cont.) Suggested Oil 4-stroke oil (USA & Canada) or equivalent** Safety Precautions (cont.) *For continued use with ambient air temperatures Engine oil. Using the proper oil, plus regularly above 90-95-degrees F, and not dropping below checking the oil level, adding additional oil if need- 50-degrees F, use SAE 20W-50 viscosity SF or SG... - Page 39 Checking & Adding Oil Lower (1) and Upper (2) Oil Level Marks Dipstick / Oil Filler Cap Location Park your motorcycle on a firm, level surface. Re- If the oil is below or near the lower level mark (see move the oil cap/dipstick and check the oil level. photo) add oil of the recommended specifications If the oil is at or near the upper level mark (see until it reaches the upper level mark.
- Page 40 SERVICE MAINTENANCE, 3. Remove the oil filler cap/dipstick. LUBRICATION AND 4. Place a drain pan under the crankcase. ADJUSTMENTS (cont.) 5. Remove the oil drain bolt. 6. After most of the oil is drained, gently tilt the motorcycle from side to drain the remaining oil. Changing Engine Oil 7.
-
Page 41: Throttle Control Free Play
More About Engine Oil Whenever you buy oil for your bike, check the label on the container to make sure it matches recom- mended specifications. Engine oil has a major influence on both the perfor- mance and the service life of the engine. Non-detergent, vegetable or castor-based racing oils are not recommended. -
Page 42: Engine Idle Speed
The engine must be at normal operating tempera- ture in order to make accurate idle speed adjust- Note: SSR pit bikes are equipped with a variety of ments. Ten-minutes of stop-and-go riding should be different carburetors depending on the models. The sufficient. -
Page 43: Air Filter
Air Filter Soak the filter element in foam/paper filter oil or Inspect the air filter regularly. When it becomes clean machine oil (15W/40Q is recommended), dirty or contaminated discard it and replace with squeeze out excess oil in an absorbent cloth and an equivalent new part. -
Page 44: Spark Plug; Specifications, Removing And Replacing
SERVICE MAINTENANCE, LUBRICATION AND ADJUSTMENTS (cont.) Spark Plug Spark Plug Recommendation The recommended standard spark plug is satisfac- tory for most riding conditions. However, If you plan to ride for extended periods at high speeds or near maximum power (high engine rpm) in hot climates, or plan extended riding in cold cli- mates, a “colder”... - Page 45 Removing or Replacing the Spark Plug 1. Before removing the spark plug clean any dirt 7. Tighten the spark plug about 1/8 to1/4 turn after from around the spark plug base. it seats, if the old plug is good, or about 1/2 2.
-
Page 46: Suspension Inspection, Front And Rear
SERVICE MAINTENANCE, Front Suspension Inspection LUBRICATION AND 1. Check fork operation. Pull the front brake lever in to lock the brake. Then push up and down ADJUSTMENTS (cont.) on the fork legs several times. The suspension should function smoothly. There should be no Suspension oil leakage. - Page 47 Rear Suspension Inspection (1) Swing arm bushing (2) Shock absorber attachment points 1. Place the bike on a maintenance stand. Either (3) Shock absorber bushing strap securely in place or have a helper hold the 3. Check that the shock absorber bushings (3) are bike while you push hard against the side of the not worn, check for oil leaks in the shock rear wheel and feel for any free play which...
-
Page 48: Suspension Adjustments, Front And Rear
(clockwise); to decrease Shock absorber bushings compression turn the adjusting screws outward (counter-clockwise). Front Suspension Adjustments Some SSR pit bikes are equipped with adjustable front and/or rear suspensions. The simplest adjustable front suspensions are forks that are adjustable for rebound. - Page 49 Rear Suspension Adjustments The suspension on “entry level” pit bikes uses a coilover shock absorber with adjustable preload. This shock absorber will have a notched collar that allows the rider to adjust the rear suspension from soft to firm. One-Way Adjustable Shock Absorber Two-way or double-adjustable coilover shocks have separate adjustments for both compression and rebound.
-
Page 50: Brakes, Front And Rear
SERVICE MAINTENANCE, 1. Check free play by pulling in slowly on the front LUBRICATION AND brake lever (1) until the brake starts to engage. Free play should be between approximately 3/8- ADJUSTMENTS (cont.) to 13/16-inch (10-20mm). 2. If necessary, adjust to the specified range. To do Brakes this find the brake adjusting nut on the lower portion of the brake caliper. -
Page 51: Brakes, Wear, Inspections And Lubrication
Rear Brake Pedal Free Play Brake Wear Inspection The front and rear brakes should be checked for wear after every 15-hours of riding. We recommend that this inspection be performed by your dealer. Other Inspections & Lubrication Check that the front lever and rear pedal assem- blies are positioned properly and that all fasteners are tight. -
Page 52: Wheels, Inspection
SERVICE MAINTENANCE, LUBRICATION AND ADJUSTMENTS (cont.) Wheels Maintaining correct spoke tension and trueness (roundness) of the wheels is critical to safe motor- cycle operation. During the first hour or two, spokes will loosen rapidly due to the initial “seating” of the parts. Ex- cessively loose spokes may result in instability at moderate and high speeds leading to a possible loss of control. -
Page 53: Wheel Removal, Front
FRONT WHEEL REMOVAL TIRES and TUBES Removal To safely operate your pit bike, the tires must be of the proper type (for off-road use only) and size, in 1. Raise the front wheel off the ground by placing a good condition with adequate tread, no cuts or oth- maintenance stand or support block under er visible signs of damage, and correctly inflated. - Page 54 SERVICE MAINTENANCE, been ridden for a few miles. If you let air out of warm or hot tires to match the recommended cold LUBRICATION AND air pressures, the tires will be under-inflated. Make sure the valve stem caps are secure. If a cap is ADJUSTMENTS (cont.) damaged or missing install a new cap.
-
Page 55: Tire Replacement
Tire Replacement Measure the tread depth. Replace the tire before tread depth at the center is 1/8- inch (3mm) or less, The tires that came on your pit bike were engi- or any time you begin to notice a reduction in trac- neered to provide the optimum combination of tion. -
Page 56: Side Stand
3. If the side stand is stiff or squeaky, clean the pivot area and Iubricate the pivot bolt with a few drops of clean engine oil. NOTE: Most SSR Motorsports competition model pit bikes are NOT equipped with a side stand. (1) Side Stand... -
Page 57: Drive Chain, Inspection And Adjustment
Drive Chain If it isn’t, some links may be kinked and binding. Lubricating the chain will often eliminate binding The service life of the chain depends on proper and kinking. lubrication and adjustment. Poor maintenance can cause premature wear or damage to the drive chain or sprockets. - Page 58 SERVICE MAINTENANCE, Inspect the drive chain for damaged rollers, dry or rusted links, excessive wear, kinked or binding LUBRICATION AND links, or loose pins. ADJUSTMENTS (cont.) If the drive chain has damaged rollers, loose pins, or kinks that cannot be freed the chain should be Drive Chain Inspection (cont.) replaced.
- Page 59 Check the chain slider for wear. If the ridge in the 3. Turn the adjusting nuts (1) on the right and left center of the slider is worn, have your dealer chain adjusters an equal number of turns to replace the chain slider. increase or decrease chain slack.
-
Page 60: Drive Chain, Lubrication, Removal, Cleaning And Re-Installing, And Replacement
SERVICE MAINTENANCE, LUBRICATION AND ADJUSTMENTS (cont.) Lubricating the Drive Chain Lubricate the drive chain after every three hours of riding, sooner if the chain appears dry. Raise the rear wheel off the ground using a maintenance stand. Slowly turn the rear wheel by hand and satu- rate each drive chain link joint so that the lubricant penetrates between the link plates, pins, bushings (1) Master Link Retaining Clip... - Page 61 4. Inspect the sprocket teeth for wear or damage. To check the chain’s service limit, remove the drive We recommend replacing the sprocket chain. Then measure the distance between a span whenever a new chain is installed. of 100 pins, from pin center to pin center. If the distance exceeds the service limit, the drive chain 5.
- Page 62 SERVICE MAINTENANCE, More About the Drive Chain LUBRICATION AND The master link is the most critical element of drive chain security. Master links are reusable, ADJUSTMENTS (cont.) as long as they remain in excellent condition. We recommend installing a new master link Replacing the Drive Chain (cont.) retaining clip whenever the drive chain is disas- sembled and reassembled.
-
Page 63: Cleaning Your Pit Bike
Cleaning Your Pit Bike Avoid all products that contain harsh detergents chemical solvents or abrasives; these cleansers Frequent cleaning and polishing will keep your new could damage the metal, paint, and plastic finishes pit bike looking like new for a long time. on your bike. - Page 64 SERVICE MAINTENANCE, 5. Thoroughly dry your motorcycle with a chamois (real or synthetic) or a soft towel. LUBRICATION AND 6. Lubricate the drive chain to prevent rusting. ADJUSTMENTS (cont.) 7. Start the engine and let it idle for several Washing Your Motorcycle minutes.
-
Page 65: Transporting Your Pit Bike
Transporting Your Pit Bike 5. Check that the tie-down straps do not contact any control cables or electrical wiring. If you use a truck or a motorcycle trailer to transport your motorcycle, we recommend that you 6. Tighten both straps until the front suspension is follow these guidelines: compressed about half-way. -
Page 66: Storing Your Pit Bike
SERVICE MAINTENANCE, 3. Drain the carburetor into an approved gasoline container and dispose of it in an approved LUBRICATION AND manner or pour into the fuel tank. ADJUSTMENTS (cont.) 4. Fill the fuel tank and make certain that the cap is properly fitted and completely closed. -
Page 67: Removal From Storage
Removal from Storage 5. Wash and dry your motorcycle. 6. Lubricate the drive chain. 1. Uncover and clean your motorcycle. 7. Inflate the tires to the recommended air 2. If your motorcycle has been stored for more pressure. than four months, change the engine oil. 8. -
Page 68: Troubleshooting
TROUBLESHOOTING 3. Carburetor is not adjusted correctly. 4. Fuel tank vent is plugged or the fuel line to the Engine Does Not Start carburetor is closed off, restricting fuel flow. 1. Fuel tank is empty. 5. Carburetor flooded by excessive “pumping” of 2. -
Page 69: Engine Detonates (Pings Or Knocks), Overheats
Spark Plug Fouls Repeatedly Engine Leaks Oil 1. Excessive use of choke. 1. Loose parts. Check for loose bolts and nuts, or see your dealer. 2. Fuel mixture is too rich. 2. Bad seal(s) and/or gaskets. 3. Incorrect spark plug. Pre-ignition or Detonation Excessive Vibration (Knocks or Pings) -
Page 70: Transmission Shifts Hard Or Jumps Out Of Gear, Clutch Slips
TROUBLESHOOTING (cont.) Brakes Do Not Hold Normally 1. Front or rear master cylinder(s) low on fluid. Transmission Shifts Hard or Jumps Out Check for visible leaks. Add fluid if no leaks of Gear found. 1. Clutch controls not adjusted correctly. 2. -
Page 71: You And The Environment
You & The Environment Owning and riding a motorcycle can be enjoyable, Choose Sensible Cleaners. Use a biodegradable but you must do your part to protect nature. detergent when you wash your motorcycle. Avoid When you show respect for the land, wildlife, and aerosol spray cleaners that contain chlorofluoro- other people, you also help preserve the sport of carbons (CFCs) which damage the atmosphere’s... -
Page 72: Being Prepared For The Unexpected
Being Prepared For The repair, you may be able to fix it on the trail and con- tinue riding. Or, you may be able to make a tem- Unexpected porary repair that allows you to slowly ride back to your base where you can make a permanent repair With all the challenges you can encounter off-road, or get help. -
Page 73: If Your Engine Quits Or Won't Start
Being Prepared For The ignition system. Also see ‘Troubleshooting’ page 68-69. Unexpected (cont.) If you cannot identify or correct the problem, you will have to push your motorcycle back to If Your Engine Quits or Won’t Start your base or get some help. If the engine wasn’t making any unusual noises If You Get a Flat Tire before it quit running, and it feels normal when... -
Page 74: If You Crash
If you are unable to repair a flat tire on the trail, you you find. Also, be sure to have your dealer check will need to push the motorcycle back to your base the frame and suspension after any serious crash. or send for help. -
Page 75: Technical Information
Technical Information The engine number is stamped on the left side of the engine. This section contains dimensions, capacities, and other technical data, plus information on government requirements and how to break-in your motorcycle. Vehicle Identification Numbers The frame (PIN - Product Identification Number, or VIN - Vehicle Identification Number) and engine serial numbers are required when you register your motorcycle. -
Page 76: High Altitude Carburetor Adjustment
The car- Warranty Compliance buretor can be modified to compensate for this high Compliance with the terms of the SSR altitude richness. However, the carburetor must be Motorsports Factory Limited Warranty for the returned to standard factory specifications when Motorcycle Emission Control Systems is necessary lower altitude riding is desired. -
Page 77: Sources Of Emissions
Carbon monoxide does not react in the same way, but it is toxic. SSR Motorsports (1) The removal or rendering inoperative by any utilizes very exacting carburetor jetting and other... -
Page 78: Problems That May Affect Motorcycle Emissions
Technical Information (cont) Problems That May Affect Motorcycle Emissions Emission Control Systems (cont.) If you are aware of any of the following symptoms, have the vehicle inspected and repaired by AMONG THOSE ACTS PRESUMED TO CONSTI- your local Motorcycle Dealer: TUTE TAMPERING ARE THE ACTS LISTED BELOW: (1) Hard starting or stalling after starting. -
Page 79: Oxygenated Fuels And Your Ssr Pit Bike
Oxygenated Fuels and MTBE (Methyl Tertiary Butyl Ether) 15% by volume. You may use gasoline containing up to 15% MTBE Your SSR Pit Bike by volume. Some conventional gasolines are being blended METHANOL (methyl or wood alcohol) 5% by with alcohol or an ether compound. These volume. - Page 80 Authorized Dealer GoKartsUSA. 2442 Estand Way Pleasant Hill, CA 94523 (800) 603-1437 (925) 691-0330 GokartsUSA.com Sales, Parts, Service...
Need help?
Do you have a question about the SR150 and is the answer not in the manual?
Questions and answers