Table of Contents
Advertisement
Advertisement
Table of Contents

Summary of Contents for Adance ADE-2022-C
- Page 1 Maintenance Manual Blast Chiller ADE- 2022-C Page 1 of 50...
-
Page 2: Table Of Contents
Contents Contents Contents Contents Page Page Page Page ® 1 1 1 1 What is the Adande System ® 2 2 2 2 Adande Technology Explained 3 3 3 3 EC Declaration of Conformity 4 4 4 4 Storage of Product ®... - Page 3 2 2 2 2 1 1 1 1 Condenser Fan Replacement 2 2 2 2 2 2 2 2 Electrical components 2 2 2 2 3 3 3 3 Electrical Control System 23.1 23.1 Wiring Diagram for Dixell XB570L Controller 23.1 23.1 2 2 2 2 4 4 4 4...
-
Page 4: What Is The Adande
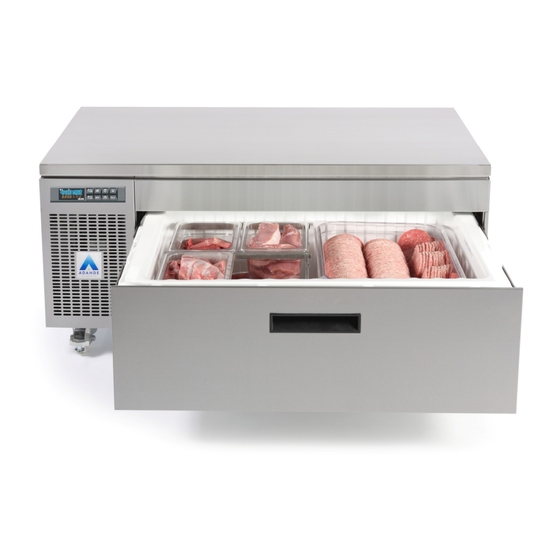
® ® ® ® Welcome to Adande Welcome to Adande Refrigeration Refrigeration Welcome to Adande Welcome to Adande Refrigeration Refrigeration What is Adande® What is Adande® What is Adande® What is Adande® 1 1 1 1 ® Adande is a new method of cold storage developed as a series of refrigerated drawers that offer storage temperature flexibility in 1ºC increments between –22ºC and +15ºC. -
Page 5: Ec Declaration Of Conformity
3 3 3 3 EC Declaration of Conformit EC Declaration of Conformit EC Declaration of Conformit EC Declaration of Conformity y y y We declare that the following machinery complies with the essential health and safety requirements of the :- The Machinery Directive 2006/42/EC. -
Page 6: Storage Of Product
4 4 4 4 Storage of Product Storage of Product Storage of Product Storage of Product For the drawer to operate at full efficiency the heated seal should be maintained in good condition. It is essential that the product is not stored above the “MAX FILL “MAX FILL “MAX FILL “MAX FILL... - Page 7 To Blast Chill To Blast Chill To Blast Chill To Blast Chill 1. To stop the cycle push and hold the START/ STOP button until the yellow light turns off. 2. Push and release the button until the desired cycle is selected. The cycle number selected will be highlighted.
-
Page 8: Defrost
Defrost Defrost Defrost Defrost The refrigeration system automatically defrosts. If a manual defrost is required then press the manual defrost button/temperature up button for 3 seconds. 5. 5. 5. 5.3 3 3 3 Drawer Alarm Drawer Alarm Drawer Alarm Drawer Alarm If the drawer is open for more than 10 minutes, the display in the control panel changes to “... -
Page 9: Electrical Connection
Electrical Connection Electrical Connection Electrical Connection Electrical Connection ® The Adande drawer should be connected to a 230V, single phase, 50 Hz, standard socket outlet supply. The drawer is connected to the mains supply with a detachable supply lead, one end of which is fitted with a standard 13 amp 3 pin plug (fused at 13A). The other end of the supply lead, fitted with an appliance plug, is connected to the ®... -
Page 10: Location And Stability
Location and Stability Location and Stability Location and Stability Location and Stability ® It is important that the Adande drawer is installed and maintained on a flat, clean and level surface level surface to ensure correct operation. level surface level surface The room should be dry and sufficiently ventilated. -
Page 11: Insulated Container Removal
6 6 6 6 Insulated Insulated Insulated Insulated Container Container Container Container Removal Removal Removal Removal For many of the maintenance procedures the insulated container will need to be removed to allow for access. To remove the insulated container, first pull the drawer out fully so that the rear edge of the container clears the front and the runners are (figure 7) fully extended. -
Page 12: Worktop Removal
Worktop Re Worktop Re Worktop Re Worktop Removal moval moval moval To remove the worktop, first remove the 4 off M5 X10 bolts from the rear of the drawer, lift the rear of the worktop and push slightly forward to slide over and clear (figure 8) from the front retaining slots . -
Page 13: Left Hand Panel Removal
9 9 9 9 Left Hand Panel Removal Left Hand Panel Removal Left Hand Panel Removal Left Hand Panel Removal To gain access to the compressor, the left hand panel must be removed from the drawer, to remove this panel the 4 off M5 X 8 ST/ST screws on the side of the drawer figure and 2 off M5 X 8 bolts from the rear of the drawer must be removed as shown in , then slide the panel down and out. -
Page 14: Drawer Front Removal
1 1 1 1 1 1 1 1 Drawer Front Removal Drawer Front Removal Drawer Front Removal Drawer Front Removal To remove the drawer front you will need to remove the 4 off M5 Br.Zn.Pd. Nyloc nuts figure 13 and 4 off M5 X 10 St/Steel bolts as shown in below. -
Page 15: Drawer Switch Replacement
1 1 1 1 2 2 2 2 Drawer Switch Drawer Switch Replacement Replacement Drawer Switch Drawer Switch Replacement Replacement To gain access and/or replace the drawer switch, remove either the insulated container and worktop (Chapter 6 and 7) or the Insulated container and side panel (Chapters 6 and 9). -
Page 16: Removing The Diffuser
1 1 1 1 3 3 3 3 Removing the Diffuser Removing the Diffuser Removing the Diffuser Removing the Diffuser To remove the diffuser the Insulated container will first need removing to allow access (Chapter 6). To remove the diffuser from the lid the 4 off plastic pozi screws and 4 off figure 17. -
Page 17: Evaporator Fan Replacement
1 1 1 1 4 4 4 4 Evaporator Fan Replacement Evaporator Fan Replacement Evaporator Fan Replacement Evaporator Fan Replacement Once the diffuser is removed, the small evaporator fans can be removed first by cutting the wires at the FAN FAN end and use these to pull through the wires attached to the new fan. -
Page 18: Secondary Blast Chill Fan Replacement
Secondary Blast Chill Fan Replacement. Secondary Blast Chill Fan Replacement. Secondary Blast Chill Fan Replacement. Secondary Blast Chill Fan Replacement. Once the diffuser is removed, the secondary blast chill fans can be accessed for removal first by cutting the wires at the F F F F an an end and use these to pull through the wires attached to the new fan. -
Page 19: Drain Tray And Defrost Heater Removal And Replacement
1 1 1 1 6 6 6 6 Drain Tray Drain Tray Drain Tray Drain Tray and and Defrost Heater Defrost Heater Defrost Heater Defrost Heater Removal Removal Removal a a a a nd Removal nd Replacement Replacement Replacement Replacement To remove the drain tray the insulated container, rear panel and diffuser will need to be removed. -
Page 20: Evaporator Temperature Probes Replacement
1 1 1 1 7 7 7 7 Evaporator Temperature Probes Evaporator Temperature Probes Evaporator Temperature Probes Evaporator Temperature Probes Replacement Replacement Replacement Replacement To replace a faulty temperature probe the insulated container, diffuser and drain tray will need to be removed. (Refer to chapters 6, 13 & 15) to gain access to the evaporator coil. -
Page 21: Lid Heated Seal Replacement
1 1 1 1 8 8 8 8 Heated Seal Replacement Heated Seal Replacement Heated Seal Replacement Heated Seal Replacement To replace the seal first remove the insulated container (Chapter 6). Then pull the heated seals wires through the inner wall from the compressor housing into the drawer cavity and disconnect the Bullet connecters;... -
Page 22: Seal Height Adjustment
1 1 1 1 9 9 9 9 Seal Height Adjustment Seal Height Adjustment Seal Height Adjustment Seal Height Adjustment The seal and lid height is critical to ensure: • The correct closure and opening of the drawer • To prevent the insulated container icing closed •... -
Page 23: Runner Replacement
Runner Replacement Runner Replacement Runner Replacement Runner Replacement To replace a drawer runner the Insulated container and drawer front will need to be removed to gain access (Chapters 6 & 9). First remove the container support from the failed runner by removing the M5 X 6 (figure 23) ST/ST countersink screw and the four off M5x8 (two off on right hand side... - Page 24 The runner can now be removed from the drawer, extend the runner slightly, and with a firm grip twist the runner toward the middle of the drawer, this will allow the front of the runner to be lifted clearing the front fastenings, pull the runner forward to clear the rear fixing.
-
Page 25: Condenser Fan Replacement
2 2 2 2 1 1 1 1 Condenser Fan Replacement Condenser Fan Replacement Condenser Fan Replacement Condenser Fan Replacement Both the condenser fans should run whenever the compressor is running. To replace either of the 2 condenser fans the front grille will need to be removed (Chapter 8). -
Page 26: Electrical Components
2 2 2 2 2 2 2 2 Electrical components Electrical components Electrical components Electrical components Each Adande drawer is fitted with a Each Adande drawer is fitted with a Each Adande drawer is fitted with a Each Adande drawer is fitted with a 6.3 6.3amp fuse in the 240v mains supply to the amp fuse in the 240v mains supply to the amp fuse in the 240v mains supply to the... - Page 27 Dixell Dixell Dixell Dixell XB570L Blast Chill XB570L Blast Chill XB570L Blast Chill XB570L Blast Chill Controller Controller Controller Controller 1 1 1 1 2 2 2 2 3 3 3 3 230 volt live to12 volt power supply 4 4 4 4 230 volt neutral to12 volt power supply 5 5 5 5 230 volt live to Defrost heater...
-
Page 28: Wiring Diagram For Dixell Xb570L Controller
23.1 23.1 23.1 23.1 Wiring D Wiring D Wiring D Wiring Diagram for Dixell XB570L Blast Chill Controller iagram for Dixell XB570L Blast Chill Controller iagram for Dixell XB570L Blast Chill Controller iagram for Dixell XB570L Blast Chill Controller Wiring Diagram for Dixell XB570L Blast Chill Controller Not used Dixell XB570L Controller Spare Spare... -
Page 29: How To Enter Setting On Dixell Xb570L Blast Chill Controller
2 2 2 2 4 4 4 4 How to enter How to enter Settings How to enter How to enter Settings Settings Settings on on Dixell XB570L Dixell XB570L Dixell XB570L Dixell XB570L Blast Chill Blast Chill Blast Chill Controller Blast Chill Controller Controller... -
Page 30: Settings For Dixell Xb570L Blast Chill Controller
24.2 24.2 24.2 24.2 Settings for Dixell XB570L Blast C Settings for Dixell XB570L Blast C Settings for Dixell XB570L Blast Chill Controller Settings for Dixell XB570L Blast C hill Controller hill Controller hill Controller Variable Variable Variable Variable Value Value Value Value... - Page 31 Variable Variable Variable Variable Value Value Value Value Units Units Units Units Description Description Description Description Digital imputs Digital imputs Digital imputs Digital imputs Drawer switch polarity Open drawer control Open drawer alarm delay Stop count down of running cycle Regulation restart after door open alarm Second digital input function Second digital input polarity...
- Page 32 Variable Variable Variable Variable Value Value Value Value Units Units Units Units Description Description Description Description Temperature alarms Temperature alarms Temperature alarms Temperature alarms Maximum temperature alarm Minimum temperature alarm Temperature alarm delay Temperature alarm delay at end of defrost Silencing alarm relay Other Other...
- Page 33 Variable Variable Value Value Units Units Description Description Variable Variable Value Value Units Units Description Description Cy2 - - - - Hard Chill (90 minutes) Hard Chill (90 minutes) Hard Chill (90 minutes) Hard Chill (90 minutes) Cycle 2 settings Cycle 2 settings Cycle 2 settings Cycle 2 settings...
-
Page 34: Refrigeration Maintenance
2 2 2 2 5 5 5 5 Refrigeration maintenance Refrigeration maintenance Refrigeration maintenance Refrigeration maintenance A standard hermetically sealed R404a vapour compression refrigeration circuit is used ® in the Adande drawer system and should need minimum maintenance. Figure 28: Refrigeration circuit diagram The unique design for airflow over the condenser means that the majority of any airborne contaminants are deposited on the easily cleaned surfaces of the drawer cabinet and the insulated container. -
Page 35: Drawer Configurations
Drawer Drawer Drawer Drawer configuration configuration configuration configuration ® Any drawer of the Adande Side Engine Drawer Fridge (VCS) can be configured as a blast chiller. Below are some examples of single, two and three drawer options. VCS1HCHS VCS1HCHS VCS1HCHS VCS1HCHS •... - Page 36 VCS2CM VCS2CM VCS2CM VCS2CM Two drawer Castor base Microwave station (Optional can opener) Blast chiller drawer Lockable drawer front ADE- 2022-C Page 36 of 50...
-
Page 37: Fault Finding
2 2 2 2 7 7 7 7 Fault Finding Fault Finding Fault Finding Fault Finding 2 2 2 2 7 7 7 7 .1 .1 .1 .1 Drawers not operating correctly Drawers not operating correctly Drawers not operating correctly Drawers not operating correctly Possible Cause Possible Cause... -
Page 38: The Drawer Does Not Power Up
2 2 2 2 7 7 7 7 ..4 4 4 4 The The drawer drawer drawer drawer does not power up does not power up does not power up does not power up Possible Cause Possible Cause Possible Cause Possible Cause... -
Page 39: Exploded Diagrams
2 2 2 2 8 8 8 8 Exploded diagrams Exploded diagrams Exploded diagrams Exploded diagrams 2 2 2 2 8 8 8 8 .1 .1 .1 .1 Housing spare parts Housing spare parts Housing spare parts Housing spare parts ADE- 2022-C Page 39 of 50... -
Page 40: Fridge Electrical System And Drawer Parts
28.2 28.2 Fridge, Electrical System and drawer 28.2 28.2 Fridge, Electrical System and drawer Fridge, Electrical System and drawer Fridge, Electrical System and drawer parts parts parts parts ADE- 2022-C Page 40 of 50... -
Page 41: Insulated Lid Parts
28.3 28.3 Insulated Lid (part No. 103013 28.3 28.3 Insulated Lid (part No. 103013 Insulated Lid (part No. 103013 Insulated Lid (part No. 103013 – – – – Complete Assembly Complete Assembly Complete Assembly Complete Assembly ADE- 2022-C Page 41 of 50... -
Page 42: Base With Standard Castors Parts
2 2 2 2 8 8 8 8 .4 .4 .4 .4 C C C C - - - - BASE BASE - - - - Stand Standard Castors (Part No. 102992 ard Castors (Part No. 102992 – – – – complete assembly) complete assembly) BASE BASE... -
Page 43: High Castor Base Parts
2 2 2 2 8 8 8 8 .5 .5 .5 .5 HC HC – – – – BASE BASE - - - - High Castors (Part No. High Castors (Part No. 103506 103506– – – – complete assembly) complete assembly) BASE BASE High Castors (Part No. -
Page 44: Small Castor Base Parts
2 2 2 2 8 8 8 8 .6 .6 .6 .6 SC SC – – – – BASE BASE - - - - Small Castors (Part No. 103 Small Castors (Part No. 103535 535– – – – complete assembly) complete assembly) BASE BASE... -
Page 45: Double Wheel Castor Base Parts
2 2 2 2 8 8 8 8 ..7 7 7 7 DC DC- - - - BASE BASE - - - - Double Castor with Adapter (Part No. 103465 Double Castor with Adapter (Part No. 103465 – – – – co complete mplete BASE... -
Page 46: Large Rollers And Feet Base Parts
2 2 2 2 8 8 8 8 ..8 8 8 8 R R R R – – – – BASE BASE - - - - Rol Rollers rear, Feet front (Part No. 102993 lers rear, Feet front (Part No. 102993 – – – – complete assembly) complete assembly) BASE BASE... -
Page 47: Small Rollers And Feet Base Parts
2 2 2 2 8 8 8 8 ..9 9 9 9 SR SR – – – – BASE BASE BASE BASE - - - - Small Rollers rear, Small Rollers rear, Small Rollers rear, Small Feet front (Part No. 103393 Small Rollers rear, Small Feet front (Part No. -
Page 48: Top Cover
2 2 2 2 8 8 8 8 ..10 10 T T T T - - - - Top cover Top cover Top cover Top cover Item Item Part No. Part Description Description Item Item Part Part Description Description... -
Page 49: Worktop And Upstand
28.1 .1 .1 .11 1 1 1 W W W W - - - - Worktop (shown with optional 50mm Worktop (shown with optional 50mm up stand up stand) ) ) ) Worktop (shown with optional 50mm Worktop (shown with optional 50mm up stand up stand Item Part No. -
Page 50: Ade- 2022-C
2 2 2 2 8 8 8 8 .1 .1 .1 .12 2 2 2 HS HS - - - - Heat shield top Heat shield top Heat shield top Heat shield top Item Part No. Description 103570 HEAT SHIELD TOP ADE- 2022-C Page 50 of 50...
Need help?
Do you have a question about the ADE-2022-C and is the answer not in the manual?
Questions and answers