
Related Manuals for Damani DOFF6.3SS

Summary of Contents for Damani DOFF6.3SS
- Page 1 USE AN D M AI N TEN AN CE I N STRUCTI ON S FOR BUI LT- I N OVEN S DOFF6.3SS DOFF6.3W DO64FS DO67MS DO67MW DO69MS...
- Page 2 Dear Customer, Congratulations on purchasing your new product from Think Appliances. To register your parts and labour warranty (some conditions apply please refer to your warranty card for more details) please contact out Customer Care team on: 1800 444 357 Our Customer Care centre is there to ensure you get the most out of your appliance.
- Page 3 Thank you for choosing one of our products. We hope you will get the very best performance from this appliance. Before using this appliance, carefully read the warnings contained in this instruction manual, since these are important instructions for its safe installation, use and maintenance. Carefully conserve this manual for future consultation.
- Page 4 GENERAL WARNINGS - INSTALLATION / REPAIRS THE MANUFACTURER DECLINES ALL RESPONSIBILITY FOR ANY DAMAGE TO PEOPLE OR ITEMS CAUSED BY INCORRECT INSTALLATION OR IMPROPER, WRONG OR ABSURD USE OF THE APPLIANCE. o Warning: earth connection is required by law. o HOOK-UP: check that the operating specifications on the label correspond with those in the place of installation.
- Page 5 o Do not touch the appliance with damp or wet hands or feet. o Do not pull on the power supply cable, or the appliance itself, to remove the plug from the mains power socket. o Hot grease and fat catch fire easily. Be careful. Never try to put out burning oil or fat with water (danger of explosion);...
-
Page 6: Installation
Before hooking-up to the mains supply, make sure that: - the socket has a ground connection and complies with legal regulations; - the socket is able to withstand the oven's maximum power capacity indicated on the features typeplate (see below); - The power supply voltage is within the values listed in the electrical characteristics label (see below);... -
Page 7: Installation Scheme
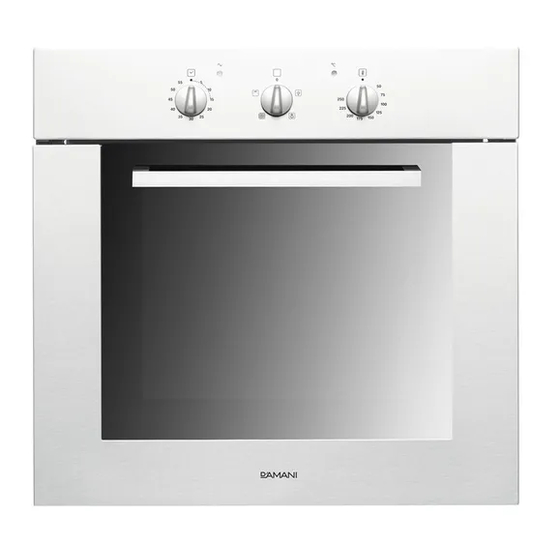
INSTALLATION SCHEME... - Page 8 PROGRAM M ERS AN D COOKI N G FUN CTI ON S: 1. Oven funct ions select or 2. Elect ronic program m er 3. Cent ral oven t em perat ure t herm ost at 4. Oven power light ( green light ) 5.
- Page 9 M ECH AN I CAL 6 0 - M I N UTE TI M ER ( DOFF6.3SS, DOFF6.3W) M e cha nica l 6 0 - m in ut e t im e r The t im er can be set t o a m axim um period of one hour.
-
Page 10: Electronic Programmer
Electronic programmer (DO64FS, DO67MS, DO67MW, DO69MS) The electronic programmer includes the following functions: 24-hour clock with illuminated display Timer (up to 23 hours 59 minutes) Programme to automatically start and stop cooking Programme for semi-automatic cooking (possibility of programming only start and end time) Description of buttons Time Cooking Time... - Page 11 Semi-automatic cooking A. Programming the cooking time. B. Programming the end of cooking time. A) Set the desired cooking time using the “2” button. Cooking will start immediately, and the display will show the «AUTO» and “2” symbols. When the programmed time has expired, cooking will stop, and an intermittent signal will sound. You can stop the signal as described above.
-
Page 12: Cooking Functions
COOKI N G FUN CTI ON S OVEN LI GH T ( All m odels except DO67MS-MW) Only act ivat es t he funct ion of t he light in t he cooking cham ber. I deal t o quickly check t he cham ber wit hout st art ing a cooking cycle. - Page 13 D OUBLE GRI LL ( DO67MS-MW, DO69MS) Select t he chosen t em perat ure from bet ween 50°C and 200 °C, using t he t herm ost at , keeping t he oven door closed. I n t his last case, it is necessary t o use a deflect or. This t ype of cooking is especially suit ed for subst ant ial foods t hat require t he act ion of t he grill over t heir ent ire surface.
- Page 14 Cooking suggestions COOKI NG COOKI NG COOKI NG GUI DE DI SH FUNCTI ON TEMP. °C TI ME LEVEL Cannelloni VENTI LATED 180° 00h.45’ TRADI TI ONAL Flans: Lasagne WI TH FAN 160° 00h.50’ ASSI ST Quiches Vent ilat ed 180°...
-
Page 15: Oven Bulb Replacement
DI SASSEMBLY OF SI DE GRI LLS ON OVENS WI TH SMOOTH SI DES Rem ove, one at a t im e, t he side grills G from t heir m ount ing holes. REASSEMBLY OF SI DE GRI LLS I nsert t he grills one at a t im e. -
Page 16: Oven Door Di Sassembly
OVEN DOOR DI SASSEMBLY I t is possible t o rem ove t he door by operat ing on t he hinges in t he following way: The hinges, A, have t wo m oving levers, B. I f lever B is raised, t he hinge com es out of it s housing. I n t his case, t he door can be lift ed upwards and t aken off by m aking it slide out wards;... - Page 17 The door can be disassem bled t o enable t he glass t o be cleaned, it is possible t o t ake off t he upper part by using a coin, please see t he figure below. Aft er having ext ract ed t he upper part , slide out t he glass, please see t he figure below, and re- inst all it by reversing t he procedure.
- Page 20 12300139461...
Need help?
Do you have a question about the DOFF6.3SS and is the answer not in the manual?
Questions and answers