
Subscribe to Our Youtube Channel
Related Manuals for Revo K2


Summary of Contents for Revo K2
- Page 1 Version 1.0 TOWER AUDIO SYSTEM With docking for iPod, iPhone and iPad DAB | DAB+ | FM | Internet Radio | Audio Streaming Owner’s Manual Bedienungsanleitung Manuel de l’utilisateur Manuale dell’utente...
-
Page 2: Technical Support
TECHNICAL SUPPORT WARRANTY Should you encounter problems using this product, please refer to the Revo Technologies Ltd warrants to the end user that this product will troubleshooting section on page 38 of this owner’s guide. be free from defects in materials and workmanship in the course of Alternatively, call Revo technical support on : normal use for a period of one year from the date of purchase. -
Page 3: Table Of Contents
CONTENTS WELCOME Thank you for purchasing our K2 radio, we are sure that it will Technical Support provide you with many years of enjoyment and reliable service. This guide has been designed to quickly get you up-and-running Environmental Info with your radio, offer guidance on the more complex features of... -
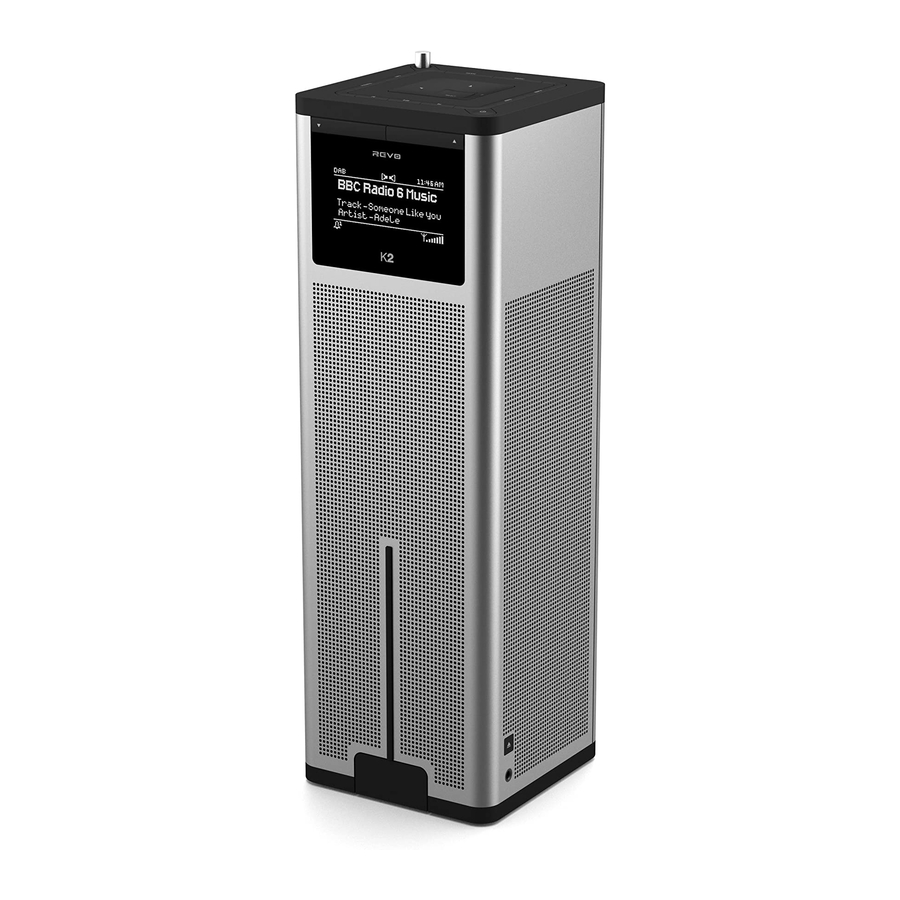
Page 4: Anatomy
ANATOMY OF K2 Telescopic Antenna Volume Down Volume Up OLED Digital Optical Out Ethernet LAN Connector iPod Video Ouput Stereo RCA Connectors Aux-In DC Power Socket Kensington Lock Slot Dock Open/Close 3.5 Headphone iPod / iPhone / iPad Dock Connector... -
Page 5: Remote Control
18 - Skip Forward (Fast Forward) 19 - Feedback (Love/Ban) BATTERY REPLACEMENT The K2 remote control is powered by a single 3V lithium battery. Depending on usage, the battery should happily run for between 1 and 2 years. Replace the battery when button presses seem sluggish, or when the operating range appears to have reduced significantly. -
Page 6: Power Supply
Using the PSU supplied, connect one end to the DC power socket found on the Fully extend the antenna for DAB or FM operation rear of K2, then plug the opposite end into the mains socket on the wall. Press the STANDBY button once to start the initialisation process. -
Page 7: Controlling K2 / Menu Structure
‘playing screen’ that you just left. MODE BUTTON Pressing the MODE button will sequentially cycle through each of K2’s modes of operation. It is also possible to move between modes of operation via the MAIN MENU (see below). -
Page 8: Dab Mode
MAIN MENU, $%&'( then DAB from menu option list. !"#$$%$& On power-up, K2 will automatically perform a full scan to see what !'#'%($)*+*,- stations are being broadcast in your area, before storing them alpha- !"#$$%$& betically in the radio’s memory. -
Page 9: Dab Radio Mode
RECALLING A PRESET To recall a preset, press PRESET on K2’s top panel then using the up and down arrows to choose your desired station from the preset list. Now press SELECT to confirm your choice. Alternatively, press the preset number corresponding to your desired station on K2’s remote... -
Page 10: Dab Mode Menu Options
DAB MODE MENU OPTIONS STATION INFO In DAB MODE, K2 is capable of displaying various pieces of information on its screen. By pressing the button, you can sequentially cycle through the fol- lowing types of information. ++,#-'./"#01&2/3 STANDARD DAB SCREEN Shows scrolling text info from broadcaster 4 "... - Page 11 DAB MODE MENU OPTIONS DYNAMIC RANGE COMPRESSION (DRC) If you are listening to music with a high dynamic range in a noisy !"# environment (for example, classical music while cooking), you may !"#$%&' wish to compress the audio’s dynamic range. This has the effect of !"#$()*+ !"#$,--$$$$$$$$$$$$$$$$$$$$$$$$$$$$$$$$$$$$$$$$$$$$$.
-
Page 12: Fm Mode
MAIN MENU, #$%&' then FM from menu option list. If this is the first time that K2 has been used in FM MODE, !"#$%&'() scanning will start at the beginning of the frequency range - otherwise K2 will default to the station you were listening to last. -
Page 13: Fm Mode / Aux-In Mode
MP3 player) through your radio. To do so, connect your external audio source to the 3.5mm AUX IN connector on the rear of K2. Turn the volume down low on both K2 and, if adjustable, the external device. Now press until the AUX IN screen is displayed, alternatively !"1$2$)3*&4 '5". -
Page 14: Ipod Mode
K2’s iPod dock is located in a motorised drawer on the front panel of the radio. To dock your iPod, iPhone or iPad, simply press button on the right hand side of K2 and the dock will extend. Once the dock has fully extended, place your device on the dock connector. - Page 15 Pressing and holding will fast-rewind. Alternatively, your iPod/iPhone can be operated using the K2 remote control, which offers advanced control of menus etc. Lastly, it is possible to control the iPod/iPhone by using the controls on the iPod/iPhone itself.
- Page 16 (if this information is stored on your iPod/iPhone). K2 is capable of displaying various pieces of information about the current track and the iPod/iPhone that is connected. By pressing the button, it is possible to sequentially cycle through the following types of information.
- Page 17 INTERNET SETUP USING THE INTERNET RADIO SETUP WIZARD The first time you use K2 in INTERNET RADIO MODE, you will be asked whether you would like to run the SETUP WIZARD. The ‘WIZARD’ will run through a series of questions, and is the simplest way to get internet radio up and running on your device.
-
Page 18: Internet Setup
6 2 . 7 password, select OK. J&)&$&K&L&M&*&N&O&P&Q&"&+&R&S %&-&#&1&T&U&5&3&V&:&6&9&W&< 9:;9<, X&Y&Z&!&[&2&,&0&;&8&7&\ Select (back space) if you have entered an incorrect !" # $ character. K2 will save the password into its memory. There will be no need to re-enter the password again. -
Page 19: Internet Radio Mode
INTERNET RADIO MODE GETTING STARTED To enter INTERNET RADIO MODE, press the button until the INTERNET RADIO MODE intro screen is displayed, alternatively press !"#$%"$# %&'() then select MAIN MENU, then INTERNET RADIO from the menu option list. The INTERNET RADIO MENU comprises of the following options: My Favourites: Used to navigate to your favourite stations. - Page 20 *(A79%2#>-%-'(0,# #######################. $R";5 B1C#>-%-'(0,# #######################. T)EFUVHWXY##J!"Z !;>* ?1-#%++1,,#+(&1 S5?I/M;83BR*[$> If you searched for a keyword, K2 will list all the stations found that Q:\GDL] !!" J++1,,#+(&1######## contain that particular keyword. Scroll through the list and select "JB"S8 IS!]3T]########## !!"#$%&'(#)#####################################. your station.
- Page 21 To store a station as a favourite, press and hold the select button until >1%2+@#>-%-'(0,################ To store the current station as a preset using K2’s remote control, simply *(A79%2#>-%-'(0,# #######################. FAVOURITE ADDED appears on the screen. The chosen station will !!"...
- Page 22 ;122%0<P############################################. B(2-@#>1%#"9%,,'+#2(+O##############. >-%-'(0, $(+O#53###############################################. Q%O1(612#$%&'(##############################. $R";5 Q@1#J22(C#########################################. T)EFUVHWXY##J!"Z INTERNET RADIO MODE !;>* S5?I/M;83BR*[$> Q:\GDL] !!" "JB"S8 !!"#$%&'(#)#####################################. !!"#$%&'(#)D-2%##########################. HELP !!"#$%&'(#E#####################################. ?1-#%++1,,#+(&1 !!"#$%&'(#F#####################################. J++1,,#+(&1######## !!"#$%&'(#F#####################################. The HELP option can be found in the STATIONS LIST MENU. Under HELP , IS!]3T]########## you will find the ACCESS CODE that you require to register your radio 8%,-#8',-101&...
-
Page 23: Internet Radio Portal
INTERNET RADIO PORTAL ACCESSING ADDITIONAL FEATURES Some of K2’s more advanced internet radio features can only be accessed by visiting the Frontier Silicon Radio Portal. In order to access these features you must first register your radio. REGISTERING YOUR RADIO In order to register your radio, you will need your radio’s unique... -
Page 24: Setting Up A Music Server
SETTING UP A MUSIC SERVER In order for K2 to be able to play music files from a connected computer, the computer must first be set up for media sharing. UPnP media sharing allows devices like K2 to play music from a shared media library, navigating through tag menus such as Artist, Album or Genre. - Page 25 SETTING UP A MUSIC SERVER SHARING MEDIA WITH A MAC In order to connect K2 to your Apple Mac, a third party UPnP server application is required. There are a number of applications available to download from the Internet. One such application is EyeConnect. This is an easy to install media sharing application that enables K2 to stream audio.
-
Page 26: Music Player Mode
MUSIC PLAYER MODE PLAYING AUDIO TRACKS IN THE MUSIC PLAYER MUSIC PLAYER MODE allows you to play audio files such as MP3s, AACs, WMAs or FLACs directly from a computer or music server on your local network. To enter MUSIC PLAYER MODE, press until the MUSIC PLAYER MODE intro screen is displayed, alternatively press then select... - Page 27 !"#$%& & &&&&&&&&&&&&&&&&&&&&&.& server (typically Windows Media Player). The first menu shows a list of A((&A,-$#-#&&&&&&&&&&&& & &. media types, for example music, video, pictures and playlists. K2 can B<8-,$F"-$8;&A,-$#-#& &.& 3?K()'-<'0&A"5$< A(F"6&A,-$#-#&&& &&&&&&&&&&&&&&&&&&&&&.& only play music and playlists. !"#$%&...
- Page 28 MUSIC PLAYER MODE PLAYLISTS K2 is capable of holding a queue of up to 500 tracks in its playlist. Playlist tracks can be mixed from multiple and UPnP servers devices. To manage the playlist, select MY PLAYLIST from the MUSIC PLAYER MENU.
-
Page 29: Last.fm Mode
To turn SCROBBLING ON or OFF, select LAST.FM SETUP , then ,#)-(.//0*1$#((((((((((((((((((((((((((((((2 3/-04456178(01 SCROBBLING, now select ON or OFF. Note: if you intend to let other people use K2 in LAST.FM MODE, you may want to turn SCROBBLING OFF. Alternatively, you could switch to another account. - Page 30 A-@-,-1-?-9-"-[-J-;-2-4-%-*-\ &-#-$-+-H-M-]-'-^-0-D-5-/-< 50K5<C _-`-!-a-b-N-C-B-K-O-:-c C)#$612-#,$+* LAST.FM MODE E#,&-0AA%+4$#------------------------------F =A&%..;"4?G-%4 While listening to LAST.FM you can choose to LOVE or BAN tracks (which SCROBBLES them even if SCROBBLING is set to OFF). Telling LAST.FM that you LOVE a track will add that particular track to your C)#$612 YOUR LOVED TRACKS list, allowing playback at a future time.
- Page 31 LAST.FM MODE PLAYING MUSIC (continued) ARTIST RADIO Plays a selection of tracks by a certain artist, together with tracks by !"#$%#&"'($) !"#$%&' artists that have a similar musical style. Pick an artist by entering their *+,&-)..$/0&1#)/,%& & &&& ()*++,-. -)..$/0&1#)/,%& &...
-
Page 32: Alarm Clock
ALARM CLOCK SETTING AN ALARM K2 is able to store two individual alarm settings. To set or change an !"#$%& !"#$%'2)'*++',-3)//!01 alarm, either press the button, or select MENU, then MAIN MENU, !"#$%'()'*++',-.)/-!01 then ALARM. Select which of the ALARM SETTINGS (Alarm 1 or Alarm 2) you would like to modify or enable. - Page 33 ALARM CLOCK SLEEP MODE By using the SLEEP function, you can set K2 to automatically switch itself into STANDBY mode. The SLEEP mode can be engaged in one of two ways: '() #*+(( ,#) -. ( The quickest method is via the SNOOZE BUTTON. Simply tap the SNOOZE BUTTON to cycle through a range of pre-set SLEEP durations, !"#$%&'...
-
Page 34: System Settings
01-!2-,)+3&%(-'(4#,- Simply select your preference from the list by highlighting your option and pressing the select button. K2 will now store this setting in its memory. For reference, the current EQ setting is highlighted by an asterisk (*) in the EQ list. - Page 35 Used to setup a PIN number which the radio will request when the iPod / iPhone Revo Radio Control App is first used. NETWORK PROFILE : Shows the names of the last four wireless networks K2 has been connected to. KEEP NETWORK CONNECTED: Allows you to specify whether Wi-Fi should remain active while in Standby or in non Wi-Fi modes.
- Page 36 Takes time/date from your internet connection. BRIGHTNESS K2 allows a degree of control over the brightness of its OLED display, meaning that both its STANDBY and POWER ON brightness levels can be independently set to either HIGH, MEDIUM or LOW brightness levels.
- Page 37 Software updates are carried out ‘over-the-air’, via your broadband connection. K2 will to check for software updates each time it is switched on, and if an update is available, will ask you to confirm that you’d like to go ahead and commence the download.
- Page 38 To manually check for updates, select CHECK NOW from the SOFTWARE UPDATES menu. CAUTION: Before commencing a software upgrade, ensure that K2 is plugged into a stable mains power connection. Disconnecting power during a software update may permanently !"#$%&'#%$$()*# damage your radio.
-
Page 39: Troubleshooting
MAC addresses. WORK > VIEW SETTINGS and add to router list NOTE: K2 has separate MAC addresses for wired and wireless networks; only the current network adaptor method address is displayed, but the other address can be obtained by changing the first pair of digits between ‘00’... - Page 40 TROUBLESHOOTING PROBLEM CAUSE SOLUTIONS Cannot connect to Internet Internet connection down Check that the Internet is working for a computer connected to the same network. Firewall preventing access Check the following ports are open: UDP and TCP ports 80 and 123 DNS port 53.
-
Page 41: Error Messages
No UPnP media found No UPnP servers found. Service not available (DAB) No DAB reception. Unauthorised Access not grated by UPnP server. Allow access for K2 in UPnP server settings. Update failed Software upgrade failed. Network not ready problem with connection to router. - Page 42 NOTES...
- Page 44 TECHNICAL SUPPORT TEL - + 44 (0) 1555 666161 E-MAIL - support@revo.co.uk WEB - www.revo.co.uk/support “Made for iPod,” “Made for iPhone,” and “Made for iPad” mean that an electronic accessory has been designed to connect specifically to iPod, iPhone, or iPad, respectively, and has been...
Need help?
Do you have a question about the K2 and is the answer not in the manual?
Questions and answers