Sony Trinitron KV-VF21M77 Operating Instructions Manual
Color video tv
Hide thumbs
Also See for Trinitron KV-VF21M77:
- Service manual (116 pages) ,
- Service manual (9 pages) ,
- Service manual (9 pages)
Table of Contents
Advertisement
Quick Links
Advertisement
Table of Contents

Subscribe to Our Youtube Channel
Related Manuals for Sony Trinitron KV-VF21M77


Summary of Contents for Sony Trinitron KV-VF21M77
- Page 1 3-866-053-12 (2) Trinitron Color Video TV Operating Instructions Before operating the unit, please read this manual thoroughly and retain it for future reference. !" !"#$%& '()*+,-./01234 - ® PAL NTSC KV-VF21M77 KV-VF14M77 ©1999 by Sony Corporation...
-
Page 2: Safety Information
WARNING To prevent fire or shock hazard, do not About moisture expose the unit to rain or moisture. condensation Dangerously high voltages are present If the unit is brought directly from a inside the set. Do not open the cabinet. cold place to a warm place, moisture Refer servicing to qualified personnel may condense on the video head drum. -
Page 3: Table Of Contents
Adjusting the picture for rental Recording TV programs ....19 tapes ..........44 Recording TV programs ....19 When connecting to a Sony VCR . 45 Recording using QUICK-TIMER .. 22 Setting the color system ....46 Recording TV programs using the Selecting a bilingual program .. -
Page 4: Getting Started
Getting Started Step 1: Preparation Check the supplied accessories When you have taken everything out of the carton, check that you have these items: • Remote control • Two R6 (size AA) batteries • Stabilizer band (KV-VF21M77 only) • Two clamps (KV-VF21M77 only) •... -
Page 5: Step 2: Securing The Video Tv (Kv-Vf21M77 Only)
Step 2: Securing the video TV (KV-VF21M77 only) To prevent the video TV from falling, secure it using one of the following methods: With the supplied screws, attach the stabilizer band to the TV stand and to the rear of the video TV using the existing hole. Pass a cord or chain through the clamps and secure them to the rear of the video TV and a wall or pillar. -
Page 6: Step 3: Connecting The Antenna
Step 3: Connecting the antenna For better TV reception and clear recordings, connect an outdoor antenna to your video TV. Connecting an outdoor antenna To connect a VHF antenna or a combination VHF/UHF antenna—75-ohm coaxial cable (round) Attach an IEC antenna connector to the 75-ohm coaxial cable. Plug the connector into the 8 (antenna) socket of the video TV. -
Page 7: Step 4: Selecting The Language
Step 4: Selecting the language You can change the menu and on-screen information language to Chinese. EJECT PIC MODE TIMER REC G-CODE ON/OFF TAPE SPEED zREC INDEX > X PAUSE M/,/m/</ PLAY ENTER ENTER x STOP MENU COUNTER RESET MENU GAME Press ?/1 to turn on the video TV. - Page 8 Step 4: Selecting the language (continued) Press M or m to select LANGUAGE/ , then SET UP TV SET UP press ENTER. PLAY PLAY VIDEO SET UP ENTER ENTER LANGUAGE/ :ENGLISH The selected item turns red. SELECT ENTER Press M or m to select , then press ENTER.
-
Page 9: Step 5: Setting The Clock
Step 5: Setting EJECT the clock PIC MODE TIMER REC G-CODE ON/OFF TAPE SPEED You need to set the clock to use timer zREC INDEX recording, Quick-Timer recording and > X PAUSE on-timer functions. M/,/m/</ PLAY ENTER ENTER x STOP MENU COUNTER RESET MENU... - Page 10 Step 5: Setting the clock (continued) Press M, m or , to set the month, year, hour and minutes in the same way as in step 5, then press ENTER. The clock starts working. To return to the normal screen Press MENU.
-
Page 11: Step 6: Setting The Channels
Step 6: Setting the channels Presetting channels EJECT automatically You can preset up to 100 channels. PIC MODE TIMER REC G-CODE ON/OFF TAPE SPEED Automatic presetting is the easiest way zREC INDEX > to setup your video TV if you want to X PAUSE preset all receivable channels at once. - Page 12 Step 6: Setting the channels (continued) Press M or m to select AUTO PROGRAM, then AUTO PROGRAM PR : 01 press ENTER. TV SYS : B/G PLAY PLAY CH : 01 ENTER ENTER ENTER Presetting starts from program position 1. The preset program and channel numbers are displayed on the screen in sequence.
- Page 13 Press ?/1 to turn on the video TV. When the TV is in standby mode (the 1 indicator on the video TV is lit in red), press ?/1 , PROGR +/– or a number button on the remote control. Press TUNER PRESET ON/OFF with a pointed object. Do not use an item (such as a pencil) that might break off when inserted.
-
Page 14: Basic Operations
Basic Operations Watching the TV EJECT This section explains various functions used while watching the TV. Most PIC MODE operations can be done using the remote PIC MODE TIMER REC G-CODE ON/OFF TAPE SPEED control. zREC INDEX > X PAUSE PLAY ENTER x STOP... - Page 15 Additional tasks Press Turn off temporarily ?/1 on the remote control. The 1 indicator on the video TV lights up in red. Turn off the main power ?/1 on the video TV. The w indicator on the video TV lights up in orange. Adjust the volume 2 +/–.
-
Page 16: Playing A Tape
Playing a tape This section shows you how to play a tape. Other convenient functions you can use while playing a tape are explained in “Additional Operations.” EJECTZ EJECT PIC MODE TIMER REC G-CODE ON/OFF TAPE SPEED zREC INDEX > PAUSEX X PAUSE PLAY... - Page 17 Additional tasks Press stop playback STOP x. The video TV goes back to the normal TV picture. stop playback for a moment PAUSE X. Press PAUSE X again or press PLAY N to resume playback. If you leave your video TV in pause mode, normal playback resumes after about 5 minutes to prevent tape damage.
-
Page 18: Displaying On-Screen Information
Playing a tape (continued) Displaying on-screen information Press to display the following on-screen information. To show only the amount of remaining tape and the linear tape counter on the screen, press again. To make the information disappear, press until no information is displayed on the screen. -
Page 19: Recording Tv Programs
Recording TV programs EJECT PIC MODE Recording TV programs TAPE SPEED TIMER REC G-CODE ON/OFF TAPE SPEED RECz zREC INDEX > X PAUSE PAUSEX PLAY ENTER STOPx x STOP MENU COUNTER RESET GAME Number buttons -/-- STOP – PLAY – PAUSE PROGR PROGR+/–... - Page 20 Recording TV programs (continued) Press REC z. zREC The REC indicator lights up and recording begins. Note • You can also select the channel number directly with the number buttons. Press C (once for regular channels, twice for cable channels), then the desired number buttons.
- Page 21 Selecting the tape speed The chart below shows the recording/playback time available in each mode. PAL, MESECAM Tape speed setting Cassette tape SP mode LP mode E-30 30 min. 1 hr. E-60 1 hr. 2 hrs. E-90 1 hr 30 min. 3 hrs.
-
Page 22: Recording Using Quick-Timer
Recording TV programs (continued) Recording using QUICK-TIMER The Quick-Timer recording function allows you to preset your video TV to record one program within a 24-hour period. For setting the Quick-Timer, use QUICK TIMER on the video TV. Before you begin •... - Page 23 Turn QUICK TIMER to set QUICK TIMER QUICK TIMER the hour of the start time, then press QUICK TIMER. The hour is set and the PUSH PUSH minute of the start time turns red. Turn QUICK TIMER to set the minute of the start time, then press QUICK TIMER.
- Page 24 Recording TV programs (continued) The QUICK TIMER button changes the following when turned clockwise or counterclockwise • When setting the start time: The hour increases or decreases by one hour. The minutes increase or decrease by one minute. • The recording time period: Increases or decreases by 15 minutes.
- Page 25 Changing or canceling the Quick Timer settings Press QUICK TIMER. QUICK TIMER 27 SAT 20:00 QUICK TIMER Programmed as below The QUICK TIMER display START PROG appears. 23:15 TAPE SPEED : SP A / B : MAIN PUSH CHANGE CLEAR SELECT ENTER Change the settings:...
-
Page 26: Recording Tv Programs Using The G-Code System
Recording TV programs (continued) Recording TV programs using the G-CODE system The G-CODE system allows you to simplify the task of program- ming your video TV to make recordings with the timer. Whenever you want to record a TV program, all you need to do is look up the program’s G-CODE number, a number assigned to each program published in the TV section of most newspapers and cable TV listings. - Page 27 Press MENU. Press M or m to select , then press ENTER. Make sure TV SET UP is selected, then press ENTER. Press M or m to select MANUAL PROGRAM, then MANUAL PROGRAM PR : 01 press ENTER. TV SYS : B/G PLAY PLAY CH : C08...
- Page 28 Recording TV programs (continued) Recording TV programs using the G-CODE system Before you begin • When the TV is in standby mode (the 1 indicator on the video TV is lit in red), press ?/1 , PROGR +/– or a number button on the remote control.
- Page 29 Press TAPE SPEED to select the tape speed, SP or LP. EP cannot be selected when making timer recordings. Press the number buttons G–CODE 27 SAT 20:00 to enter the program’s G- G–CODE NO TAPE SPEED [1 2 3 1 9 – – – –] [SP] CODE number.
-
Page 30: Recording Tv Programs Using The Timer
Recording TV programs (continued) Recording TV programs using the timer You can preset up to five programs within a one-month period using both the G-CODE setting and the timer setting. Before you begin • When the TV is in standby mode (the 1 indicator on the video TV is lit in red), press ?/1 , PROGR +/–... - Page 31 Set the recording start time, recording stop time, program position/input (1 or 2), tape speed and sound mode in the same way as in step 2. Press ENTER. PROGRAM LIST 27 SAT 20:00 DATE START STOP PRG A/B The cursor appears at OK. 28 SUN 21:00 22:00 6SP MAIN PLAY...
-
Page 32: Settings
Recording TV programs (continued) PIC MODE Checking/adding/ TIMER REC TIMER REC G-CODE ON/OFF TAPE SPEED changing/canceling zREC INDEX > X PAUSE the timer or G-CODE settings M/,/m/</ENTER PLAY ENTER x STOP MENU COUNTER RESET Press TIMER REC. PROGRAM LIST 27 SAT 20:00 Programmed as below To exit the PROGRAM DATE START STOP PRG A/B... -
Page 33: Additional Operations
Additional Operations Adjusting the TV EJECT PIC MODE TIMER REC G-CODE ON/OFF TAPE SPEED zREC INDEX > X PAUSE M/,/m/</ENTER PLAY ENTER x STOP MENU COUNTER RESET MENU GAME Adjusting the volume — INTELLIGENT VOL Some programs are broadcast at different volume levels. By setting this function to ON, the volume level is stabilized and sudden changes in volume can be prevented. -
Page 34: Presetting Channels Manually
Adjusting the TV (continued) Presetting channels manually Preset the channels manually if you want to select channels that were not set automatically or if you want to allocate program numbers to channels one by one. Press MENU. Press M or m to select , then press ENTER. - Page 35 If the sound of the desired channel is abnormal, select the appropriate TV system. (1) Press M or m to select TV SYS, then press ENTER. (2) Press M or m until the sound becomes normal, then press ENTER. If you are not satisfied with the picture and sound quality, you may be able to improve them by using the FINE tuning feature.
-
Page 36: Skipping Program Positions
Adjusting the TV (continued) Skipping program positions You can skip unused program positions when selecting a program with the PROGR +/– buttons. However, the skipped programs may still be called up when you select them with the number buttons. Press MENU. Press M or m to select , then press ENTER. -
Page 37: Adjusting The Tv System
Adjusting the TV system If the sound of some channels is abnormal, select the appropriate TV system for your area. Press MENU. Press M or m to select , then press ENTER. Make sure TV SET UP is selected, then press ENTER. Press M or m to select TV SYS, then press ENTER. -
Page 38: Adjusting The Color System
Adjusting the TV (continued) Adjusting the color system Normally set the color system to AUTO. However, when the picture has no color, manually select the appropriate color system for your area. Press MENU. Press M or m to select , then press ENTER. Make sure TV SET UP is selected, then press ENTER. -
Page 39: Changing The Picture Mode Setting
Changing the PICTURE MODE setting The PICTURE MODE menu allows you to adjust the picture quality. Press MENU. Press M or m to select then press ENTER. PICTURE MODE · DYNAMIC · STANDARD · PLAY PLAY SOFT · PERSONAL ENTER ENTER ADJUST SELECT... -
Page 40: Adjusting The Alignment Of The Picture (Kv-Vf21M77 Only)
Adjusting the TV (continued) Adjusting the alignment of the picture EJECT (KV-VF21M77 only) The picture may be out of alignment due PIC MODE TIMER REC G-CODE ON/OFF TAPE SPEED to influence from the earth’s magnetic zREC INDEX field in relation to the position of the TV. >... -
Page 41: Adjusting The Tracking
Tape options Adjusting the tracking Adjusting the tracking automatically The tracking condition is automatically adjusted when this function is set to AUTO. Adjusting the tracking manually If streaks or snow noise appear during normal playback, adjust the tracking. Press MENU in playback mode. Press M or m to select , then press ENTER. -
Page 42: Adjusting With Adaptive Picture Control (Apc)
Tape options (continued) Adjusting with Adaptive Picture Control (APC) This function allows you to improve playback and recording quality automatically according to the condition of the video tape. This function is set to ON at the factory. To maintain better picture quality, it is advisable to leave the function on. -
Page 43: Playing A Tape Repeatedly
Playing a tape repeatedly You can play the recorded portion of a tape repeatedly. Press MENU. Press M or m to select , then press ENTER. Press M or m to select VIDEO SET UP, then press ENTER. Press M or m to select AUTO REPEAT, then press VIDEO SET UP TRACKING : AUTO... -
Page 44: Tapes
Tape options (continued) Adjusting the picture for rental tapes If you are not satisfied with the picture quality while playing a tape, even when APC is on, set RENTAL to ON. It is recommended to use this function when watching rental tapes. Press MENU. -
Page 45: When Connecting To A Sony Vcr
When connecting to a Sony VCR If you use this video TV with another Sony VCR, the remote control may accidentally operate both the video TV and VCR at the same time. To prevent this from happening, set VHS to SONY so that the remote control operates only this video TV. -
Page 46: Setting The Color System
Tape options (continued) Setting the color system Normally set COL SYS in the menu to AUTO. If streaks appear during playback, set COL SYS to correspond to the system that the tape was recorded in. Press MENU. Press M or m to select , then press ENTER. -
Page 47: Selecting A Bilingual Program
Selecting a bilingual program EJECT PIC MODE You can listen to the sub-channel of TIMER REC G-CODE ON/OFF TAPE SPEED NICAM bilingual I system programs. zREC INDEX > X PAUSE Press A/B repeatedly until you receive the sound mode you want. PLAY ENTER The on-screen display changes to show... -
Page 48: Switching Off Automatically -Sleep
Switching off automatically EJECT —SLEEP PIC MODE TIMER REC G-CODE ON/OFF TAPE SPEED zREC INDEX > You can automatically switch the video X PAUSE TV into standby mode after a selected time period. PLAY ENTER x STOP MENU COUNTER RESET GAME Press With each press, the time... -
Page 49: Switching On Automatically
Switching on automatically EJECT — ON TIMER PIC MODE TIMER REC G-CODE ON/OFF TAPE SPEED zREC INDEX You can preset your video TV to > X PAUSE automatically switch on at a desired time. You can select the TV program, M/,/m/</ENTER PLAY video playback or input source to be... - Page 50 Switching on automatically - ON TIMER (continued) Press M or m to set the source to be switched on, then press ENTER. The SOURCE changes as follows. TV PROG t VCR N (video playback) If you select TV PROG, press M or m to change the channel numbers.
-
Page 51: Searching Using The Index Function
Searching using EJECT the index function PIC MODE TIMER REC G-CODE ON/OFF TAPE SPEED zREC INDEX INDEX ./> > X PAUSE The video TV marks the tape with an index signal at the point where each PLAY recording begins. Use these signals as ENTER references to find a specific recording. -
Page 52: Connecting Optional Equipment
Connecting optional equipment Watching and recording the picture input from optional equipment To connect a video camera to audio to video output output t 2/GAME IN 9 t 2/GAME VMC-710M/720M (not supplied) To connect a VCR to video to audio output output t 1/... - Page 53 To watch the video input signal Press t so that t1 or t2 appears on the screen. EJECT PIC MODE TIMER REC G-CODE ON/OFF TAPE SPEED zREC INDEX > X PAUSE PLAY ENTER x STOP MENU COUNTER RESET GAME continued Additional Operations...
- Page 54 Connecting optional equipment (continued) To connect a video game t 2/GAME IN 9 t 2/GAME To display the video game screen Press GAME when the video TV is in standby mode. EJECT GAME PIC MODE TIMER REC G-CODE ON/OFF TAPE SPEED zREC INDEX >...
-
Page 55: Additional Information
Count the number of times the indicator flashes. Press ?/1 to turn off your video TV. Inform your nearest Sony service facility about the number of times the indicator flashes. Be sure to note the model name and serial number located on the rear of your video TV. -
Page 56: Troubleshooting
(COL SYS) setting. (page 38) The antenna direction, Adjust the antenna direction, position and angle need position and angle. Contact a Sony adjustment. dealer for advice. Double images or “ghosts” Broadcast signals are Use a highly directional antenna. - Page 57 The antenna type is Check the antenna type (VHF/ inappropriate. UHF). Contact a Sony dealer for advice. The antenna direction, Adjust the antenna direction, position and angle need position and angle. Contact a Sony adjustment.
- Page 58 (a standard service fee will be charged). Do not use any commercially available liquid type cleaning cassettes other than Sony’s, as it may damage the video heads. The video heads may be The video heads may have to be replaced.
- Page 59 Symptom Possible cause Solutions Recording section Cover the safety tab hole with The cassette is ejected The safety tab of the cassette has adhesive tape, or use another when you press REC been removed. cassette with its safety tab intact. No cassette has been inserted.
-
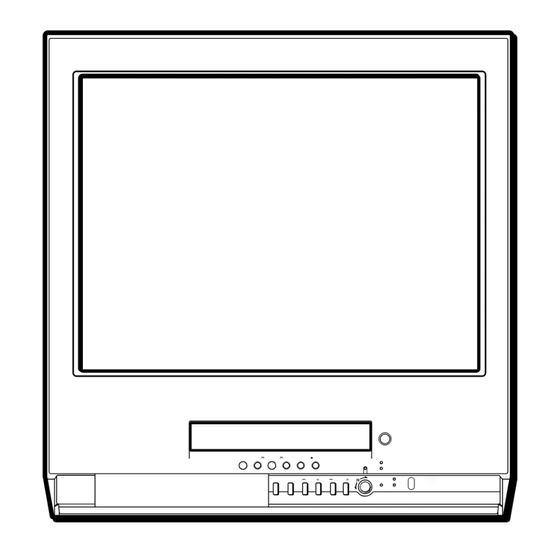
Page 60: Identifying Parts And Controls
Identifying parts and controls Refer to the pages indicated in parentheses ( ) for details. Front panel EJECT STOP –PLAY– PAUSE 1 i (headphones) jack 4 Tape transport buttons STOP x button (17, 20) 2 t2/GAME IN jacks ( (video)/9 REW m/ button (17) (audio)) (52, 53) - Page 61 PLAY PAUSE TIMER REC QUICK TIMER PROGR GAME PUSH qs qd qf qg qf 1/aa (standby/bilingual) indicator 7 GAME button (13, 54) (14) 8 t (input select) button (53) qg Remote control sensor 9 2 (volume) +/– buttons (15) qh TIMER REC (recording) indicator q;...
-
Page 62: Remote Control
Identifying parts and controls (continued) Remote control EJECT EJECT PIC MODE PIC MODE TIMER REC G-CODE ON/OFF TAPE SPEED TIMER REC G-CODE ON/OFF TAPE SPEED zREC INDEX zREC INDEX > > X PAUSE X PAUSE PLAY PLAY ENTER ENTER x STOP x STOP MENU COUNTER RESET... -
Page 63: Specifications
Specifications KV-VF14M77 KV-VF21M77 Note TV Section Television system B/G, I, D/K, M Color system PAL/SECAM and NTSC3.58/NTSC4.43 Bilingual system NICAM bilingual I Channel coverage See “Receivable channels and channels display” on page 64 Picture tube 14 in. 21 in. Tube size (cm) Measured diagonally Screen size (cm) Measured diagonally... - Page 64 Receivable channels and channel display System Area Channel coverage Channel display Middle East/Asia E-2 to E-12 C02 to C12 E-21 to E-69 C21 to C69 Indonesia 2 to 11 C03 to C12 CATV S-01 to S-05 S42 to S46 S-1 to S-41 S01 to S41 Hong Kong B-21 to B-69...
- Page 65 Additional Information...
- Page 66 PAL MESECAM NTSC !"- !"#$ G-CODE Gemstar Development !"# 110 !" • !"#$%&'() Corporation G-CODE system Gemstar !"#!$%&'()*+,- • !"# Development Corporation !"#$- !"#$%&'()*+,-. • !"#$ % #&- !"#$ %& '()*+ 4/4/05, 10:02 AM 02/p02_KV-VF21MF77-Ct.C65 Sony KV-VF21M77 (GB/ )_3-866-053-12 (2)
- Page 67 KKKKKKKKKKKKKKKKKKKKKKKKKKKKKKKKKKKKKKKKKKKK 42 !"# KKKKKKKKKKKKKKKKKKKKKKKKKKKKKKKKKKKK 18 !"#$ KKKKKKKKKKKKKKKKKKKKKKKKKKKKKKK 43 !" KKKKKKKKKKKKKKKKKKKKKKKKKKKKKKKKKKKKKKKKKKKKK 19 !"#$%& KKKKKKKKKKKKKKKKKKKKKKK 44 !" KKKKKKKKKKKKKKKKKKKKKKKKKKKKKKKKKKKKKKKK 19 ! KKKKKKKKKKKKKKKKKKKKKK 45 SONY !"#$%&'()* KKKKKK 22 !"# KKKKKKKKKKKKKKKKKKKKKKKKKKKKKKKKKKKK 46 !"#$!%&'( KKKKKKKKKK 26 !"#$ KKKKKKKKKKKKKKKKKKKKKKKKKKKKKKKKKKKK 47 !"#$%&' KKKKKKKKKKKKKKKKKKK 30 ! ! KKKKKKKKKKKKKKKKKKKKKKKKKK 48 !"...
- Page 68 !"# !" !"#$%&'() • !" • R6 AA • =KV-VF21M77 !"#$%=KV-VF21M77 • !"#$%&=KV-VF21M77 • !"#$ • !"#$% !"#$%&!'()*+#$- •...
- Page 69 !"#$%& =hsJscONjTT !"#$%&'()*+,-./01234!"#$%5 !"#$%&'()!*+,-.'/0123456012789:;<= !"#$%&'() *+&'(,-./0123456789:8!; 3.8 mm...
- Page 70 !"# !"#$%&'()*+,#-./01&23456-. !"# !"=secLrec= !"# =sec= TRΩ !"#$%& IEC !"- 75Ω !"#$%&'()*=8 !"#- secLrec !"=sec= =rec= !"#$%& VHF/UHF !"#$%&'- !"#$%&'()*=8 !"#- rec= sec= !" PMMΩ TRΩ secLrec= !"#...
- Page 71 !"# !"#$%&'()*+,- EJECT PIC MODE TIMER REC G-CODE ON/OFF TAPE SPEED zREC INDEX > X PAUSE M/,/m/</ PLAY ENTER ENTER x STOP MENU COUNTER RESET MENU GAME !"#$%/ =?L1= !"#$%&'() !"# 1= !"#$%&'() ?L1= PROGR +/– =jbkr= / PICTURE MODE ·...
- Page 72 !"#$%&'( =M= =m= i^kdr^db SET UP TV SET UP =bkqbo= / VIDEO SET UP PLAY PLAY LANGUAGE/ :ENGLISH ENTER ENTER !"#$%/ SELECT ENTER =bkqbo= / =M= =m= !"#$%- !"#$% MENU...
- Page 73 !"# EJECT !"#$%&'"#()*+ PIC MODE TIMER REC G-CODE ON/OFF TAPE SPEED !"#$%&'(- zREC INDEX > X PAUSE M/,/m/</ PLAY ENTER ENTER x STOP MENU COUNTER RESET MENU GAME =jbkr= / MENU =M= =m= bkqbo= / PLAY PLAY ENTER ENTER !"#"$ =M= =m= =bkqbo= / PLAY...
- Page 74 !"#$%&'( !"#=M m= =,= !"#"$%&'()* =bkqbo= / !"#$- !"#$% MENU !"#"$% !"#$%&'(=M= =m= !"#$%&'( =<= ,= - !"#$%&'(#)*+,-./0123- •...
- Page 75 !"# !"# EJECT !"#$ 100 PIC MODE TIMER REC G-CODE ON/OFF TAPE SPEED !"#$%&'()*+, zREC INDEX !"#$%&'()*+,-./ > X PAUSE M/,/m/</ PLAY !"#$%&'()* 34 ENTER ENTER x STOP MENU COUNTER RESET MENU GAME =jbkr= / MENU =M= =m= bkqbo= / PLAY PLAY ENTER...
- Page 76 !"#$%&'( !"#$ !"=bkqbo= / PLAY PLAY ENTER ENTER !" 1 !"#$%&'()*+,-.- !"#$% 1 !"#$%&'()*+#,-./- !"#$%&'()*+=MENU • !"#$%=qrkbo=mobpbq=lkLlcc= !" STOP –PLAY– PAUSE TIMER REC QUICK TIMER PROGR GAME PUSH TUNER PRESET GAME ON/OFF...
- Page 77 !"#$%/ =?L1= !"#$%&'()* !+,=1= !" #$%& !"=?L1= PROGR +/– !"=qrkbo=mobpbq=lkLlcc= / !"#$%&'()*+,-./0- !"#$%& !"/ =d^jb= / GAME !" 1 !"#$%&'()*+,- !"#$% 1 !"#$%&'()*+#,...
- Page 78 -/-- PROGR+/– ?/1 2+/– PROGR PROGR+/– 2+/– !"#$%/ =?/1= !"#$%&'() !"#=1= !" !"#$%&' ?/1 ! " =moldo=HL–= !"/ PROGR !"#$%&'() !"# $%& -/-- ! -/-- -/-- !"#$%&'()*+,- • !"#$%&'() *"#$+,'(-)./ 01234 4/4/05, 1:16 PM 05/p14-18_KV-VF21MF77-Ct.C65 Sony KV-VF21M77 (GB/ )_3-866-053-12 (2)
- Page 79 !"# - 2 +/– %= - !"# ! 53 !"#$%&'( !"#$%&'(=t= - !" !"# !"#$%&'()*+,- PIC MODE !"#$%&- !"#$%&- !"#$%&- !"#$%&' ()$*%+,-' !./01 !"#- !"# !"#$%&- !"#$!%&'()*+, !"#$%&'(= !"#$%&'()*+,- !"# !"#$% 4/4/05, 1:18 PM 05/p14-18_KV-VF21MF77-Ct.C65 Sony KV-VF21M77 (GB/ )_3-866-053-12 (2)
- Page 80 STOP – PLAY – PAUSE COUNTER RESET GAME STOPx PLAYN PAUSEX ?/1 EJECTZ REWm !"#$%/ !"#$%&'()* !+,=1= !"# $%&'()*+- !"/ !"#$%&'()*"+,-./01234- =mi^v=N= / !"#$ PLAY ENTER !"#LP !"# MESECAM !"#$%&'()*+ • 4/4/05, 1:18 PM 05/p14-18_KV-VF21MF77-Ct.C65 Sony KV-VF21M77 (GB/ )_3-866-053-12 (2)
- Page 81 REW m !"#$%&' PLAY N !" ! FF M STOP x !" ! REW m STOP x !"#$%&'() !"#$%=REW m= !"#$- FF M !"#$%&'()*+,- !" EJECT Z !"#$%&'()*- !"#$%& !"#$%&'()*+,-- !"#$%&'()&'*+,-(./0#$123- 4/4/05, 1:19 PM 05/p14-18_KV-VF21MF77-Ct.C65 Sony KV-VF21M77 (GB/ )_3-866-053-12 (2)
- Page 82 !"#$%&' !"# !"#$%&- !"#$%&'()*+,- !"#$%$&'()*= !"#$%&'(= !"#$%&'()*+,- !"# !"# !"# !"#$ !"#$% !"# !" !"#$%&' !"#$%&'()*+,-./- !"#$%&' ! COUNTER RESET !"#$%0:00:00 - !"#$% &'()*+- !"#$%&'()*+ !"- !"#$%&'()&*+,#$-./01- 4/4/05, 1:20 PM 05/p14-18_KV-VF21MF77-Ct.C65 Sony KV-VF21M77 (GB/ )_3-866-053-12 (2)
- Page 83 PROGR+/– PROGR+/– STOPx PAUSEX RECz !"#$%/ =?/1= !"#$%&'()* !+,=1= !"# $%&'( !"#$%&'()*+, -- !"#$%&'(/ ! " =moldo=HL–= PROGR !"#$%&'() !"# $%& -/-- -/-- ! -/-- !" =q^mb=pmbba= TAPE SPEED !"#$%&'( !"#$%&' 4/4/05, 1:29 PM 06/p19-32_KV-VF21MF77-Ct.C65 Sony KV-VF21M77 (GB/ )_3-866-053-12 (2)
- Page 84 STOP x !"#$%&' ()*+,- !./01%'23 !"#$%&$'()*+,-.- !"# !"#$%&'()*+,-- !"#$% &#'() PAUSE X !"#$%&'()* PAUSE X !"#$%- !" 1 !"#$%&'(- !"#$%& 5 !"#$%&'()*"#+,* !"- ! "#$%&'()*+, !"#$%=?/1= - !" #$%&'w= !"- !"#$ 4/4/05, 1:30 PM 06/p19-32_KV-VF21MF77-Ct.C65 Sony KV-VF21M77 (GB/ )_3-866-053-12 (2)
- Page 85 !"#$ !"#$%&'()*+,-./- m^iI=jbpb`^j !"#$ E-30 E-60 E-90 E-120 E-150 E-180 E-195 E-210 E-240 kqp` !"#$ T-30 T-60 T-120 T-160 T-180 !"#$%&'()*+LP !"EP • !"#$% NTSC !"#$%&!"#'()*!" • !" #$%&'- 4/4/05, 1:31 PM 06/p19-32_KV-VF21MF77-Ct.C65 Sony KV-VF21M77 (GB/ )_3-866-053-12 (2)
- Page 86 X PAUSE PLAY ENTER x STOP MENU COUNTER RESET QUICK TIMER GAME =nrf`h=qfjbo QUICK TIMER !"#$%&'() !"# 1 !" PUSH !"#$%&'(- !" =q^mb=pmbba= !"= im TAPE SPEED = pm ! "#$%=EP 4/4/05, 5:05 PM 06/p19-32_KV-VF21MF77-Ct.C65 Sony KV-VF21M77 (GB/ )_3-866-053-12 (2)
- Page 87 PUSH PUSH !"#$% !&' !"#$%&'( !)*+=nrf`h =nrf`h=qfjbo= qfjbo= !"#$%=nrf`h=qfjbo= !"#$%&' !"#$ = ^ L _ = !"#$/ !"#$%&' 47 !"#$%&'(- !"#$%lh !=nrf`h=qfjbo =nrf`h=qfjbo= !"#$%&'()*+,-./0()1234- QUICK TIMER QUICK TIMER PUSH PUSH 4/4/05, 1:33 PM 06/p19-32_KV-VF21MF77-Ct.C65 Sony KV-VF21M77 (GB/ )_3-866-053-12 (2)
- Page 88 1... y 8... y 12... y t1 y t2 y 0 y 1 =nrf`h=qfjbo= !"#$%& • !"#$%&'(- !"#$%& • !"#$%&'(- !"!# • !"#$%&- !"#$%OK !"#$%&'!()* • QUICK TIMER !"#$%&'()*- !"#$%&'()*+- !"#$% !&'(- – !"#$%&'()*%&+,-- – !"#$%& !'(- – !" !#$%& !#'() QUICK TIMER 4/4/05, 1:33 PM 06/p19-32_KV-VF21MF77-Ct.C65 Sony KV-VF21M77 (GB/ )_3-866-053-12 (2)
- Page 89 !"#$%&'( =nrf`h=qfjbo= QUICK TIMER !"#$%&'- PUSH !"#$%&'()*+ QUICK QUICK TIMER TIMER !"#$%&'()*+,-./ 0 =2 7= !"#$% !"#$%&'()*+ QUICK QUICK TIMER TIMER !"#$%&'()*+- • 4/4/05, 1:34 PM 06/p19-32_KV-VF21MF77-Ct.C65 Sony KV-VF21M77 (GB/ )_3-866-053-12 (2)
- Page 90 !+,=1= !"# $%& • !"#=?/1= PROGR +/– EJECT PIC MODE TIMER REC G-CODE ON/OFF TAPE SPEED zREC INDEX > X PAUSE M/,/m/</ENTER PLAY ENTER x STOP MENU COUNTER RESET MENU GAME 4/4/05, 1:34 PM 06/p19-32_KV-VF21MF77-Ct.C65 Sony KV-VF21M77 (GB/ )_3-866-053-12 (2)
- Page 91 !"#$# %&'()'*+,=bkqbo= / =M= =m= !"#$%&'()=bkqbo= / =M= =m= !"#$% =M= =m= !"#!$%&'( bkqbo= / PLAY PLAY ENTER ENTER !"#$%&'=bkqbo= !"#=6 8= =M= =m= !"#$ !%/ !"#$% MENU !"#$%&'()*+,- • !"#$%&'()*+,-./ 34 !"#$%&'(- 4/4/05, 1:36 PM 06/p19-32_KV-VF21MF77-Ct.C65 Sony KV-VF21M77 (GB/ )_3-866-053-12 (2)
- Page 92 TIMER EJECT PIC MODE TIMER REC G-CODE ON/OFF TAPE SPEED G-CODE ON/OFF zREC INDEX > TAPE SPEED X PAUSE PLAY ENTER x STOP MENU COUNTER RESET GAME -/-- =dJ`lab= / G-CODE 4/4/05, 1:36 PM 06/p19-32_KV-VF21MF77-Ct.C65 Sony KV-VF21M77 (GB/ )_3-866-053-12 (2)
- Page 93 !"#$%&' 47 !"#$%&'(- !=2 4= !"#/ !"#$#%&"#'()*+,-./0 5 =bkqbo= / !"#$% T I M E R PLAY !"#$%&' ENTER !"#$%&'(- !"#$" ON/OFF !"#$%& !"#$%&'(- =<= !"#$%&'()"#*+,! ! 31 !"#!$%!&'()*() ! 32 4/4/05, 1:38 PM 06/p19-32_KV-VF21MF77-Ct.C65 Sony KV-VF21M77 (GB/ )_3-866-053-12 (2)
- Page 94 TIMER REC TAPE SPEED zREC INDEX ON/OFF > X PAUSE M/,/m/</ENTER PLAY ENTER x STOP MENU COUNTER RESET =qfjbo=ob`= / TIMER REC !"#$% =M= =m= ,= / PLAY PLAY ENTER ENTER 4/4/05, 1:39 PM 06/p19-32_KV-VF21MF77-Ct.C65 Sony KV-VF21M77 (GB/ )_3-866-053-12 (2)
- Page 95 =2= =m= !"#$%&'()*+,-- !"#$%&'()*+ !" – t – – =t !" t ... t !" t 26 !"..!"#$" ON/OFF !"#$%&' !()*+ !"#$%&'( TIMER REC ON/OFF !"#$%&'()*+,-. ON/OFF TIMER REC !"- 4/4/05, 1:40 PM 06/p19-32_KV-VF21MF77-Ct.C65 Sony KV-VF21M77 (GB/ )_3-866-053-12 (2)
- Page 96 !"#$%&'()*+,-./ ENTER =M= =m= !"##$%&' () 2 4- !"# !"#$%&'()*+,-./ ENTER =M= =m= !"#$%-- !"#$lh !=bkqbo= / =<= =,= !"#$%&'(&)*+,-./012&'*+345 !"#$- !"#$- TIMER REC ! "# !"#$% &'(- !"#$% &!"#'()*+, !"#$%&'()*+,!- 1*2,3- 4/4/05, 1:41 PM 06/p19-32_KV-VF21MF77-Ct.C65 Sony KV-VF21M77 (GB/ )_3-866-053-12 (2)
- Page 97 !" EJECT PIC MODE TIMER REC G-CODE ON/OFF TAPE SPEED zREC INDEX > X PAUSE M/,/m/</ENTER PLAY ENTER x STOP MENU COUNTER RESET MENU GAME !== !"#$%&'()*+- !"#$%&'()*+ !"#$%&'()*+,-./- =jbkr= / =bkqbo= / =M= =m= !"#$%&'()*+,-.=bkqbo= / !"#$ =M= =m= !"=bkqbo= / PLAY PLAY...
- Page 98 !"#$%&' !"# !"#$%&'()*+ ,-./)*012345%& =jbkr= / =bkqbo= / =M= =m= !"#$%&'()*+,-.=bkqbo= / !"#$ !"=bkqbo= / PLAY PLAY ENTER ENTER !"#$%&'()'/ !"#$"%&'()* ENTER !"#$%&'()*+,-./ ENTER =M= =m= !" PROGR +/– ! "#$%- !"#$/ !"#$%&' ENTER =M= =m= !"#$%&'()*+,- ENTER =M= =m= !"#$%&'()*+- !"#$%&'() *"#$+,'(-./0123 ! ENTER...
- Page 99 !"#!$%&'()*+,-!./01/ !"#$%&'() ENTER =M= =m= !"#$%&' ENTER =M= =m= !" #$%&'()*+,-./$0$1234/ !" =M= =m= !" ENTER PLAY PLAY !"#$%- ENTER ENTER !" =M= =m= !" ENTER !"# =M= =m= ! "#$ ENTER PLAY PLAY ENTER ENTER !"#$ –15 !"#$%=dJ`lab= !"#$%&'( !"#$%&'()*+,-./"012 3- !"#$%&'() ENTER =M= =m=...
- Page 100 !"#$%&' !"#$%&'()*+ ,- !" PROGR +/– !"#$% &'()*- =jbkr= / =bkqbo= / =M= =m= !"#$%&'()*+,-.=bkqbo= / !"#$%&'=bkqbo= / =M= =m= !"#$%&'()*+,-./0=bkqbo= / =M= =m= !"#$% =M= =m= =bkqbo= / PLAY PLAY ENTER ENTER !"#=5= !"#$/ =bkqbo= !"#$% MENU...
- Page 101 !"# !"#$%&'()*+,-./012$3456- =jbkr= / =bkqbo= / =M= =m= !"#$%&'()*+,-.=bkqbo= / !"#$%&'()=bkqbo= / =M= =m= !"#$% =M= =m= ! " # $ % & ' ( bkqbo= / PLAY PLAY ENTER ENTER !"#$% MENU...
- Page 102 !"#$%&' !"# !"#$%&'()*- !"#$%&'()*+, !"#$%&- =jbkr= / =bkqbo= / =M= =m= !"#$%&'()*+,-.=bkqbo= / !"#$%&'()=bkqbo= / =M= =m= !"#$% =M= =m= ! " # $ % & ' ( bkqbo= / PLAY PLAY ENTER ENTER !"#$% MENU...
- Page 103 !"#$%& !"#$%&'()*+- =jbkr= / =bkqbo= / PLAY PLAY ENTER ENTER !"#$ = M= = m= =bkqbo= / PLAY PLAY ENTER ENTER !"#$%&'(=bkqbo= / =M= =m= !"#$%& '()*+,-$./- !"#$%& =bkqbo= / =m= =<= =M= =,= !"#$ !"#$ !"#$ !"#$ !" !" !"#!$ !"#!$ !"#...
- Page 104 !"#$%&' !"#$ EJECT =hsJscONjTT !"#$%&'()*+,- PIC MODE TIMER REC G-CODE ON/OFF TAPE SPEED !"#$%- !"#$%& zREC INDEX !"#$%&'()- > X PAUSE M/,/m/</ENTER PLAY ENTER x STOP MENU COUNTER RESET MENU GAME =jbkr= / =bkqbo= / =M= =m= !"#$ = M= = m= !"=bkqbo= / PLAY...
- Page 105 !"#$ =qo^`hfkd !=qo^`hfkd !"#$%&'()TRACKING !"#- !=qo^`hfkd !"#$%&'()*+,-./012345 TRACKING- !"#$=jbkr= / =bkqbo= / =M= =m= !"#$% =M= =m= !"=bkqbo= / PLAY PLAY ENTER ENTER !"#$%&=bkqbo= / qo^`hfkd !"#$ = M= = m= =bkqbo= / PLAY PLAY !"#$%- ENTER ENTER !"#$%&'=bkqbo= / =M m <= =,= !"#$% MENU...
- Page 106 !"#$%&'() !"#$%&'(^m` !" !"#$%&'()*+,-./0$%'12- !"#$%&'- !"#$%&'( )*+- !"#$%&'()*+,-.(/0123- !"# =jbkr= / =bkqbo= / =M= =m= !"#$%&'()*=bkqbo= / =M= =m= !^m` =M= =m= !"#$%&'"( =bkqbo= / PLAY PLAY ENTER ENTER !"#$%- !"#$% =M= =m= =bkqbo= / PLAY PLAY ENTER ENTER !"#$% MENU...
- Page 107 !"#$ !"#$%&'()*%&+,- =jbkr= / =bkqbo= / =M= =m= !"#$%&'()*=bkqbo= / =M= =m= !"#$ = M= = m= !"=bkqbo= / !"#$%- PLAY PLAY ENTER ENTER !"#$% =M= =m= =bkqbo= / PLAY PLAY ENTER ENTER !"#$/ =jbkr= =mi^v=N= / !"#$ PLAY !"#$%&!"' ENTER !"#$%&'(-...
- Page 108 !"#$%&'() !"#$%& !"#$%&'()*+ APC ! "#$%&' !"#$%&'()*+,"-'- !"#$%&'() =jbkr= / =bkqbo= / =M= =m= !"#$%&'()*=bkqbo= / =M= =m= !"#$ !"=bkqbo= / PLAY PLAY !"#$%- ENTER ENTER !"#$% =M= =m= =bkqbo= / PLAY PLAY ENTER ENTER !"#$% MENU...
- Page 109 =plkv= !"#$%&'()* SONY !"#$%&'() !"#$%&'()$%(- !"#$%&'() !"#$SONY !"#$%&'()*+,- =jbkr= / =bkqbo= / =M= =m= !"#$%&'()*=bkqbo= / =M= =m= !sep =bkqbo= / !"#$%- PLAY PLAY ENTER ENTER !plkv =M= =m= =bkqbo= / PLAY PLAY ENTER ENTER !"#$% MENU...
- Page 110 !"#$%&'() !"# !"#$%&'()*+,"-.'- !"#$%& !"#$%&'()*+,-./0-1()- =jbkr= / =bkqbo= / =M= =m= !"#$%&'()*=bkqbo= / =M= =m= !"#$%&'()=bkqbo= / =M= =m= !"#$%&'()*+=bkqbo= / =M= =m= !"#$!%&'( PLAY PLAY ENTER ENTER !"#$% MENU...
- Page 111 !"#$ EJECT !" NICAM PIC MODE TIMER REC G-CODE ON/OFF TAPE SPEED !"#$%&'- zREC INDEX > X PAUSE !"# !$%&'()* !"#$%&=1= !"# - PLAY ENTER x STOP MENU COUNTER RESET GAME !"#$%&'() NICAM !"#$% NICAM !"#$%- • !"#$%&'($- • !"#$%&'()*+,-'./0123 !"#$%&'()*+,- !"#$%&'()* A/B !"#$%&'()*...
- Page 112 !== EJECT !"#$%&'()*+,- !"#$%&'()*+- PIC MODE TIMER REC G-CODE ON/OFF TAPE SPEED zREC INDEX > X PAUSE PLAY ENTER x STOP MENU COUNTER RESET GAME !"#$%&'() !"#$%&'( !"#$%&'() !"#$%&'() !"#$%&1 !"#$" !"#$%=?/1= !"-...
- Page 113 !== EJECT !"#$%&'()*+,- !"#$%&'()* PIC MODE TIMER REC G-CODE ON/OFF TAPE SPEED !"#$%&- zREC INDEX > X PAUSE M/,/m/</ENTER PLAY ENTER x STOP MENU COUNTER RESET MENU GAME =jbkr= / =bkqbo= / =M= =m= !"#$!%&'()*+,-=bkqbo= / !"#$%&'(= !"=bkqbo= / !"#$%- =M m <= =,= !"#$%&'✓...
- Page 114 != !"#$% !"#$%&'()*+=bkqbo= / =m= =M= !"#$%&'- !"# !"#$%&'()=m= =M= !"#$%&'() ENTER !"#$%&'(=bkqbo= / =M= =m= !"#$%&'( )$*+,=bkqbo= / =M= =m= !"#$/ =jbkr= !"#$= !"- !"#$%" !"#$%&'( )$*+, ENTER =11= =M= =m= !"#$= !"-...
- Page 115 !"#$ EJECT !"#$% &'()*+ !"#$%- !"#$%& PIC MODE TIMER REC G-CODE ON/OFF TAPE SPEED !"#$%&'()*- zREC INDEX INDEX ./> !"#$%&'()*+ 99 > X PAUSE PLAY ENTER STOP x x STOP MENU COUNTER RESET GAME !"#$%&'(/ =fkabu=./>= !"#$%&'(& !"#$/ INDEX INDEX !"#$% INDEX SEARCH >...
- Page 116 !"# !"#$%&'()*+, !" !" !" t 2/GAME t 2/GAME IN 9 VMC-710M/720M !" !" !" !" t 1/ VMC-710M/720M t 1/9 !" !"...
- Page 117 !"#$%&' !"#- EJECT PIC MODE TIMER REC G-CODE ON/OFF TAPE SPEED zREC INDEX > X PAUSE PLAY ENTER x STOP MENU COUNTER RESET GAME...
- Page 118 !"#$ %&' !" t 2/GAME t 2/GAME IN 9 !"#$% !"#$%&'()*+ GAME EJECT PIC MODE GAME TIMER REC G-CODE ON/OFF TAPE SPEED zREC INDEX > X PAUSE PLAY ENTER x STOP MENU COUNTER RESET GAME GAME !"#$%& !"#$%&'()*+,- !"# PROGR +/– t= - !"#$% !"#$%...
- Page 119 !"# !"#$%&'()*+- !"#$%&'1= !" - !"#$%& '(!)*- !"#=P= !"#$%&'()*/ !"#$%&'/ !"#$%&#'/ =?L1= !"#$%&'()*+/ =plkv= !"#$%&'()*+,-./)0123456-...
- Page 120 !"#$%&'()*+,-./012"3456789 !"#$%&'()* SONY !"- !" !" #$%- !"#$%&$'()* ! "# !"#$- !"#$%=?/1= - !"1 !"#$%& =?/1= !"#- !"#$ =2=H= !"- !"#$- !"# !"#$%- !" #$%&' ( "# !"# $!%& '(- !"#$- !"#$- PIC MODE !"#$%&'- !"#$%&'()*+, !"#$%&'(- !"#$%&'() !"#$%&'()*- !"- SONY !"#$%&'()
- Page 121 !"#$%&'()*( !"#$%&'"#$ !"#$%&'()* !"#$%&'()* • !"#$%&'()*+ !"#$%&'(&)* !"#$% !"#&' !"#$%&'- !"#$%&"'()*+ !"#$% !"#- !"#$%"&'- !"#$%&'()*(+ !"#$ !%&'- !"#$- !"#$%VHF/UHF - !"- SONY !"#$%&'()*+- !"#$%&'()*- !"- SONY !"#$%&#'()#* !"#$%&'()*+ !"#$% • !"#$%- !"#- !"#$%&'()*+ • !"#$%- SONY !"#$ !"#$%&'()*+, !"#$%&'()*+, !"#$%=?/1= !"#$%"&...
- Page 122 ! " # $ % & ' ( ) * + !" !"#$%&'()*+ !"# !"- !=TRACKING- TRACKING !"#- Sony T-25CLD T25-CLDR !"# $ T-25CLW !"- !"#$%& !"#$% SONY !"#$%&'()- ! SONY !"#!$ !"#$%!"&'(- !"#$%&- !"#$%&- SONY !"#- !"#$- !"#- !"#$- !"- !"#$%&...
- Page 123 !"#$%&'()- !"#$%&'()*+, REC z !"#$%&'()"- !"- !"#- !"#$%&' - !"#- !"# !"- !"#$%&'- !"# !"#$%&'()- !"#$%&'()*+, ON/OFF !"#$%&'()"- !"- !"#- !"#$%&' - ON/OFF TIMER REC !"- !"#- !" #$- !"#$- 30 31 !"#$- • ON/OFF — !"- • !"#- !"#- !"#$- EJECT Z !"#$-...
- Page 124 !"#$% 2 t2/GAME IN !" 17 REW=m/ !"9 !" 17 PLAY=N 52 53 !" 17 FF=M/ 3 qrkbo=mobpbq=lkLlcc !" 17 20 PAUSE=X !"#$%12 13 !" 20 REC=z !" 17 6 EJECT=Z 4/4/05, 2:26 PM 11/p60-64_KV-VF21MF77-Ct.C65 Sony KV-VF21M77 (GB/ )_3-866-053-12 (2)
- Page 125 !"#$ 53 !" !+/–= !"#$%& qh TIMER REC !=+/–= 0 PROGR !"# qa QUICK TIMER !"#$ 20 qj REC 22 23 !"#$%& 14 qk ?/1 !"#$%&'() 49 !"#$% 20 qd w 4/4/05, 2:27 PM 11/p60-64_KV-VF21MF77-Ct.C65 Sony KV-VF21M77 (GB/ )_3-866-053-12 (2)
- Page 126 ENTER !" 54 !" 17 20 9 GAME PAUSE=X !" 17 REW=m/ !+/– !" 17 20 qa PROGR STOP=x !" 17 FF=M/ !" 17 PLAY=N !"#$%&' 48 !"# 47 wa A/B 4/4/05, 2:28 PM 11/p60-64_KV-VF21MF77-Ct.C65 Sony KV-VF21M77 (GB/ )_3-866-053-12 (2)
- Page 127 GAME IN !"#$%&'(1 Vp-p 75 !" !"#$%&'(500 mVrms 50 60 =110~240= 5°C ~ 40°C -20°C ~ 60°C =ñ= =ñ= 375 x 390 x 409 489 x 500 x 485 27.5 !"#$%&'()*+,-./- 4/4/05, 2:30 PM 11/p60-64_KV-VF21MF77-Ct.C65 Sony KV-VF21M77 (GB/ )_3-866-053-12 (2)
- Page 128 C21 C32 C-25 C-47 C38 C60 C-48 C-57 C61 C70 CATV S-1 S-39 S01 S39 CATV A-5 A-1 S95 S99 S14 S18 F W+28 S19 S64 W+29 W+58 S65 S94 Sony Corporation 4/4/05, 2:30 PM 11/p60-64_KV-VF21MF77-Ct.C65 Sony KV-VF21M77 (GB/ )_3-866-053-12 (2)
Need help?
Do you have a question about the Trinitron KV-VF21M77 and is the answer not in the manual?
Questions and answers