Table of Contents
Advertisement
Quick Links
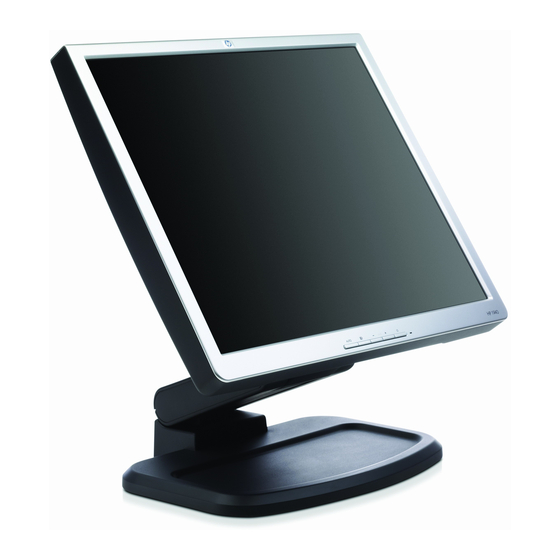
19" LCD Colour Monitor
Service
Service
Service
Description
Important Safety Notice---- ------------------------------ 2
Technical Data ------------------------------------------3~4
Instalation/On Screen Display------------------------5~6
Warning Message------------------------------------------7
Lock/unlock,Aging,Service/Factory mode------------8
Flat panel adjust--------------------------------------------9
Mechanical Instructions----------------------------10~11
Definition of pixel defects-------------------------------12
Electrical instruction--------------------------------13~14
DDC Instructions-------------------------------------15~21
Failure mode of panel------------------------------------22
ISP CABLE FOR CPU-------------------------------24~26
ANY PERSON ATTEMPTING TO SERVICE THIS CHASSIS MUST FAMILIARIZE HIMSELF WITH THE CHASSIS
AND BE AWARE OF THE NECESSARY SAFETY PRECAUTIONS TO BE USED WHEN SERVICING ELECTRONIC
EQUIPMENT CONTAINING HIGH VOLTAGES.
CAUTION: USE A SEPARATE ISOLATION TRANSFORMER FOR THIS UNIT WHEN SERVICING.
REFER TO BACK COVER FOR IMPORTANT SAFETY GUIDELINES
Published by BCU Monitors
Printed in Suzhou
TABLE OF CONTENTS
Page
Description
Repair tips ------------------------------------------------27
Color adjustment----------------------------------------28
Repair Flow chart/Trouble shooting-------------29~32
Block Diagram---------------------------------------33~34
Wiring Diagram -----------------------------------------35
Exploded View------------------------------------------- 48
Spare/recommended parts list------------------49~50
General product specification--------------------51~78
DDC DATA -------------------------------------------79~80
Different parts list----------------------------------------81
SAFETY NOTICE
Copyright reserved
Subject to modification K
SH4 HP L1940
EJ6B50/02
EJ6B50/69
EJ6B50/76
Horizontal frequencies
Oct. 15 2004
30 - 83 kHz
Page
GB
3138 106 10428
Advertisement
Table of Contents

Subscribe to Our Youtube Channel
Related Manuals for HP L1940


Summary of Contents for HP L1940
-
Page 1: Table Of Contents
19" LCD Colour Monitor SH4 HP L1940 Service Service EJ6B50/02 Service EJ6B50/69 EJ6B50/76 Horizontal frequencies 30 - 83 kHz TABLE OF CONTENTS Description Page Description Page Important Safety Notice---- ------------------------------ 2 Repair tips ------------------------------------------------27 Technical Data ------------------------------------------3~4 Color adjustment----------------------------------------28 Instalation/On Screen Display------------------------5~6... -
Page 2: Important Safety Notice
Accordingly, a servicer who uses a service procedure or tool which is not recommended by HP must first satisfy himself thoroughly that neither his safety nor the safe operation of the equipment will be jeopardized by the service method selected. -
Page 3: Technical Data
Technical Data HP L1940 Go to cover page LCD Panel Pin No. Description T.M.D.S data2- T.M.D.S data2+ Type NR. :LM190E02_A5 (LPL) Number of Pixels. : 1280 (H) x 1024 (V) T.M.D.S data2 shield No connect Physical Size. : 404.2(H)*330.0(V)*20.0(D) mm No connect Pixel Pitch. -
Page 4: Technical Data
Technical Data(Continued) HP L1940 Go to cover page Data Storage This monitor is ENERGY STAR compliant. Factory preset modes (15 modes) Resolution H-Frequency Pixel rate V-Frequency Comment this product meets the ENERGY STAR guidelines for energy (Hz) (MHz) (Hz) Efficiency 640X480 31.469K... - Page 5 Installation HP L1940 Go to cover page 4. Do not place anything on power cords or cables. Arrange them Connecting to PC so that no one may accidentally step on or trip over them. Do not pull on a cord or cable. When unplugging from the electrical outlet, grasp the cord by the plug.
-
Page 6: Instalation/On Screen Display
On Screen Display HP L1940 Go to cover page Advanced osd service mode configuration Analog Mode Menu Digital Mode Menu Menu Level 1 Menu Level 2 Menu Level 3 Factory Reset? Menu Level 1 Menu Level 2 Menu Level 3... -
Page 7: Warning Message
Warning Message HP L1940 Go to cover page Warning Message Table Item Attention Signals Display Time Condition Input Signal out of Range See power savertable No Input Signal See power savertable Going to Sleep See power savertable Adjusting..Auto key or OSD menu function... -
Page 8: Lock/Unlock,Aging,Service/Factory Mode
Lock/Unlock,Aging, Service/Factory Mode HP L1940 Go to cover page Front control panel Access Factory Mode Auto Adjust + (Plus) Power Menu -(Minus) 1). Turn off monitor. 2). [Push "Auto Adjust " and " +(plus)"and hold them at the same time ] + [Press power "Power "... -
Page 9: Flat Panel Adjust
Microsoft Windows XP 32-bit Professional DESCRIPTION : This CD contains the HP Auto-Adjustment utility, which is a single pattern program designed to help improve the picture quality of your HP flat panel monitor. Note : Do not use the following procedure if your flat panel monitor is using a DVI connector option. -
Page 10: Mechanical Instructions
Mechanical Instruction HP L1940 Go to cover page Front view Fig.4 Fig.1 Fig.5 Back view Fig.2 Fig.6 Fig.7 Step 1. Remove the stand. Remove the four screws as Fig.3 Fig.3 Fig.8 Fig.9 Step 3. Remove the Scaler and Power board. -
Page 11: Mechanical Instructions
Mechanical Instruction HP L1940 Go to cover page Step 4. Disconnect the control PCB, the scaler pcb and power pcb as Fig.11 Fig.11 Step 5 Remove the MAIN SHIELD ASSY as FIG.12 Fig.12 LPL panel In warranty, it is not allowed to disassembly the LCD panel, even the backlight unit defect. -
Page 12: Definition Of Pixel Defects
Nevertheless, the display may have cosmetic imperfections that appear as small bright or dark spots. This is common to all LCD displays used in products supplied by all vendors and is not specific to the HP LCD. These imperfections are caused by one or more defective pixels or sub-pixels. -
Page 13: Electrical Instruction
Electrical Instructions HP L1940 Go to cover page PRESET VIDEO RESOLUTION General points Resolution Pixel Comment H-Frequency V-Frequency rate (Hz) (Hz) During the test and measuring, supply a distortion free (MHz) AC mains voltage to the apparatus via an isolated 640X480 31.469K... - Page 14 Electrical Instructions HP L1940 Go to cover page EEPROM presetting (B) 2.4.2 Digital signal The input signals are applied to display through DVI-D After finishing all the adjustment, set: cable. 1. Menu = Basic Length: 1.8 M +/-50 mm (fixed) 2.
-
Page 15: Ddc Instructions
DDC Instructions HP L1940 Go to cover page General Note: The alignment box has already build-in a batteries socket for using batteries (8~12V) as power source. Pull out the socket by DDC Data Re-programming remove four screws at the rear of box. Please do not forget that In case the DDC data memory IC or main EEPROM which storage all remove batteries after programming. - Page 16 DDC Instructions HP L1940 Go to cover page Configuration and procedure 3. At the submenu, type the letter of your computer's hard disk drive followed by :EDID46 (for example, C:\EDID46, as shown in Fig. 6). There is no Hardware DDC (DDC IC) anymore. Main EEPROM stores all factory settings and DDC data (EDID code) which is also called Software DDC.
- Page 17 DDC Instructions HP L1940 Go to cover page Re-programming Analog DDC IC Step 1: After initialize alignment box, connecting all cables and box as shown in Fig. 10. 1=Power connector 2=D-SUB connector Fig. 13 DC Power 8-12V Step 3: Modify DDC data (verify EDID version, week,...
- Page 18 DDC Instructions HP L1940 Go to cover page Click Next , bring up Fig.16. Click Next , bring up Fig.19. Fig. 19 Fig. 16 Click Next , bring up Fig. 20. Click Next , bring up Fig.17. In this step, please confirm the Descriptor Data Type is Monitor Range Limits, and all the items are same as below.
- Page 19 DDC Instructions HP L1940 Go to cover page Click Next , bring up Fig. 22. - Click Finish to exit the Step window. 4). Click (Write EDID) icon from the tool bar to write DDC data. then - Serial number can be filled up at this moment (for example, the screen will be black for 5-10 seconds, when the screen TWP318Q001).
- Page 20 DDC Instructions HP L1940 Go to cover page Re-programming Digital DDC IC Step 1: After initialize alignment box, connecting all cables and box as shown in Fig. 27. 1=DVI-D connector 2=D-sub connector 3=Power Plug Select and fill out, If necessary.
- Page 21 DDC Instructions HP L1940 Go to cover page 4. Confirm Serial Number in User Mode 1) Press the "Power " button to turn off the monitor. Press the button Click Next , bring up Fig. 39. again to turn on the monitor.
-
Page 22: Failure Mode Of Panel
Failure Mode Of Panel HP L1940 Go to cover page Quick reference for failure mode of LCD panel this page presents problems that could be made by LCD panel. It is not necessary to repair circuit board. Simply follow the mechanical Polarizer has bubbles instruction on this manual to eliminate failure by replace LCD panel. -
Page 23: Safety Test Requirements
Safety Test Requirements HP L1940 Go to cover page 3. Equipments and Connection All units that are returned for service or repair must pass the original manufactures safety tests. Safety testing requires both testing. Hipot Ground Continuity 3.1. Equipments For example :... - Page 24 ISP CABLE for CPU HP L1940 Go to cover page Configuration and procedure ISP ( In System Program) software is provided by Genesis to upgrade the firmware of CPU. Fig.4 ISP cable is for the interface between "Parallel port of PC" and "15 pin-D-SUB connector of monitor.
-
Page 25: Isp Cable For Cpu
ISP CABLE FOR CPU HP L1940 Go to cover page Update the firmware Double click the Gprobe.exe icon ,then appears window as shown in Fig.5 Press the options then choose configure Pin as shown in Fig.5 From the menu that appears, choose the number 17 in "output pin and the number 12 in "... - Page 26 ISP CABLE FOR CPU HP L1940 Go to cover page Fig.11 click "OPEN" Shut of the AC power Click the "OK" button and then open the AC power, after the follow window appears, the update is completed.
-
Page 27: Repair Tips
Repair Tips HP L2025 HP L1940 HP L2025 HP L2025 Go to cover page 0. Warning preferably be equipped with a thermal control (soldering temperature: 225 to 250 C). All ICs and many other semi-conductors are susceptible to - The chip, once removed, must never be reused. -
Page 28: Color Adjustment
Go to cover page White Balance Adjustment Clear image Alignment procedure 1. Turn on HP L1940 LCD monitor. 2. Turn on the Timing/Pattern generator. See Fig. 1 Setting generator to provide CROSS-Hatch pattern at Resolution :640*480 Timing : H= 31.47kHz V= 60 Hz 3. - Page 29 Repair Flow Chart HP L2025 HP L1940 HP L2025 HP L2025 Go to cover page Preparation : make sure mains supply and video signal are well settled Preparation : dot alternation pattern or windows background.
- Page 30 Repair Flow Chat HP L1940 Go to cover page Preparation : before chassis debugging, first check all wire harness, remove intrusions, and find errors by visual...
- Page 31 Repair Flow Chart HP L2025 HP L1940 HP L2025 HP L2025 Go to cover page...
-
Page 32: Repair Flow Chart/Trouble Shooting
Troubleshooting HP L1940 Go to cover page Solving Common Problems The following table lists possible problems, the possible cause of each problem, and the recommended solutions. Problem Possible Cause Solution Screen is blank. Power cord is disconnected. Connect the power cord. -
Page 33: Block Diagram
Block Diagram-1 HP L1940 Go to cover page HP L1940 BLOCK FUNCTION EEPROM Control Key Function Board USB 2.0 D2+/D2- 3.3V GL 850 D1+/D1- R+-/G+-/B+-/CLK+- R/G/B D0+/D0- Schmitter HS/VS gate DSUB_CA Scaler ISPSCL,SDA RXEC+/- Gm5321 Write_enable R+-/G+-/B+-/CLK+- RXE3+/- RXE2+/- RXE1+/-... -
Page 34: Block Diagram
Block Diagram-2 HP L1940 Go to cover page 30pin/175mm LVDS/FFC Wire 150mm Power + Inverter 15pin Scaler Board /80mm Board 7pin/340mm Two Layer UP Stream D-sub Down stream Port Port 125mm Control Board 130mm... -
Page 35: Wiring Diagram
Wiring Diagram HP L1940 Go to cover page... -
Page 36: Scaler Diagram&C.b
Scaler Diagram-1 HP L1940 Go to cover page... - Page 37 Scaler Diagram-2 HP L1940 Go to cover page...
- Page 38 Scaler Diagram-3 HP L1940 Go to cover page...
- Page 39 Scaler Diagram-4 HP L1940 Go to cover page...
- Page 40 Scaler Diagram-5 HP L1940 Go to cover page...
- Page 41 Scaler Board C.B.A.-1 HP L1940 Go to cover page...
- Page 42 Scaler Board C.B.A.-2 HP L1940 Go to cover page...
-
Page 43: Control Diagram & C.b
Control Diagram & C.B.A HP L1940 Go to cover page... -
Page 44: Power Diagram & C.b
Power Diagram-1 HP L1940 Go to cover page... - Page 45 Power Diagram-2 HP L1940 Go to cover page...
- Page 46 Power Board C.B.A. HP L1940 Go to cover page...
- Page 47 Power Board C.B.A HP L1940 Go to cover page...
-
Page 48: Exploded View
Exploded view HP L1940 Go to cover page... -
Page 49: Spare/Recommended Parts List
LENS-POWER 2615 223878615649 CER2 0603 X7R 16V 100N PM10 2403 223878615649 CER2 0603 X7R 16V 100N PM10 313815161731 HP LOGO 7121 - 8115 2616 202001293721 ELCAP SM RV2 16V 10U PM20 2404 223878615649 CER2 0603 X7R 16V 100N PM10 313815414121... -
Page 50: Spare/Recommended Parts List
Spare/Recommended Parts List HP L1940 Go to cover page Recommended Parts List 6223 933742280215 DIO SIG SM BAT54 (PHSE) 3512 212211805669 RST SM 0603 RC0603 10K PM5 3514 232270296001 RST SM 0603 JUMP. MAX 0R05 6501 932216670682 DIO REC SB240... -
Page 51: General Product Specification
. FULL RANGE POWER SUPPLY 90 - 265 VAC . CE ENVIRONMENTAL POLICY . ANTI-GLARE TO REDUCE LIGHT REFLECTION . POWER MANAGEMENT CAPABILITY . TCO2003 . USB 2.0 HUB 19 inch LCD Monitor TYPE :EJ6B50/02 8639 000 15804 BRAND : HP L1940 2004-08-31 Jacky Lee 2004-08-31... - Page 52 Mechanical characteristics Controls Unit dimension / weight Tilt and swivel base Transportation packages 5.4.1 Shipping dimension / weight 5.4.2 Block unit / palletization 19 inch LCD Monitor TYPE : EJ6B50/02 8639 000 15804 BRAND : HP L1940 2004-08-31 Jacky Lee 2004-08-31...
- Page 53 This specification describes a 19" SXGA multi-scan color TFT LCD monitor with max resolution up to 1280*1024 /76 Hz non-interlaced. 2.0 PRODUCT PROFILE This display monitor unit is a color display monitor enclosed in HP styling cabinet, which has an integrated tilt and swivel base. Type NR.
- Page 54 (1) D-Sub analog R/G/B separate inputs, H/V sync separated (2) DVI-D digital Panel Link TMDS input (3) USB 2.0 HUB with one upstream port and two downstream port 19 inch LCD Monitor TYPE : EJ6B50/02 8639 000 15804 BRAND : HP L1940 2004-08-31 Jacky Lee 2004-08-31...
- Page 55 B-MARK (Poland), DEMKO (Nordic), FIMKO (Nordic), SISIR, CPA (Singapore), EZU (Czech) , MIC ( Korea) Compatibility PC2001, Windows 2000, Windows 98/Me, Windows XP, NSTL,USB-IF 19 inch LCD Monitor TYPE :EJ6B50/02 8639 000 15804 BRAND : HP L1940 2004-08-31 Jacky Lee 2004-08-31...
- Page 56 Red video GND Green video GND Blue video GND DDC +3.3V or +5V Serial data line (SDA) H-sync V-sync Data clock line (SCL) 19 inch LCD Monitor TYPE : EJ6B50/02 8639 000 15804 BRAND : HP L1940 2004-08-31 Jacky Lee 2004-08-31...
- Page 57 T.M.D.S. clock- 3.2.3 OSD Function Control Philips follow up HP s requirement to create OSD function and HP approve the OSD function. If any deviation between SHT590 and customer specification and really product, production should follow up really product. OSD (On Screen Display) function (1) Analog interface OSD: a.
- Page 58 - Digital - DVI Serial Number Display Monitor S/N Basic Menu Cancel Save and Return OSD Control Horizontal OSD Position ADJ Scale 19 inch LCD Monitor TYPE : EJ6B50/02 8639 000 15804 BRAND : HP L1940 2004-08-31 Jacky Lee 2004-08-31...
- Page 59 OSD Control Horizontal OSD Position ADJ Scale Vertical OSD Position ADJ Scale OSD Timeout ADJ Scale Cancel Save and Return Information Current Settings 19 inch LCD Monitor TYPE :EJ6B50/02 8639 000 15804 BRAND : HP L1940 2004-08-31 Jacky Lee 2004-08-31...
- Page 60 Serial Number Display Monitor S/N Basic Menu Cancel Save and Return OSD Control Horizontal OSD Position ADJ Scale Vertical OSD Position ADJ Scale 19 inch LCD Monitor TYPE : EJ6B50/02 8639 000 15804 BRAND : HP L1940 2004-08-31 Jacky Lee 2004-08-31...
- Page 61 Serial Number Display Monitor S/N Basic Menu Cancel Save and Return OSD Control Horizontal OSD Position ADJ Scale Vertical OSD Position ADJ Scale 19 inch LCD Monitor TYPE :EJ6B50/02 8639 000 15804 BRAND : HP L1940 2004-08-31 Jacky Lee 2004-08-31...
- Page 62 SEP . SYNC MODE NO. RESOLUTION 800 x 600 800 x 600 800 x 600 832 x 624 Dot clock(MHz) 49.498 57.28 19 inch LCD Monitor TYPE : EJ6B50/02 8639 000 15804 BRAND : HP L1940 2004-08-31 Jacky Lee 2004-08-31...
- Page 63 0.017 ( 1 line ) 0.043 ( 4 line ) SYNC. H/V - / - + / + - / - POLARITY SEP . SYNC 19 inch LCD Monitor TYPE :EJ6B50/02 8639 000 15804 BRAND : HP L1940 2004-08-31 Jacky Lee 2004-08-31...
- Page 64 Power input connection Power cord length : 1.8 M Power cord type : 3 leads power cord with protective earth plug. Power management 19 inch LCD Monitor TYPE : EJ6B50/02 8639 000 15804 BRAND : HP L1940 2004-08-31 Jacky Lee 2004-08-31...
- Page 65 Brightness:100% setting Color Temperature: 6500K Ambient Light: No ambient light (<10 lux) Meter: Microvision ss230 (or equivalent) Resolution Factory preset modes (15 modes) 19 inch LCD Monitor TYPE :EJ6B50/02 8639 000 15804 BRAND : HP L1940 2004-08-31 Jacky Lee 2004-08-31...
- Page 66 (position 5) with white pattern as Fig-1 Color Temperature Brightness control Contrast control Light output unit: nits 6500K 100% 100% >= 200 sRGB >=140 19 inch LCD Monitor TYPE : EJ6B50/02 8639 000 15804 BRAND : HP L1940 2004-08-31 Jacky Lee 2004-08-31...
- Page 67 200 nits with white pattern. The Brightness Variation shall be measured at the 9 center points by HP spec(at 10%, 50%, and 90%) called out in the Measurement Locations Figure 2 below. If Light Leakage is visible, the Maximum Dark Luminance shall be measured at all 11 points (9-points plus 4-points at the center of each edge).
- Page 68 Operating 0 to 12,000 feet [3,658 m]. Equivalent to 14.7 to 10.1 psia. Non-Operating 0 to 40,000 feet [12,192 m]. Equivalent to 14.7 to 4.4 psia 19 inch LCD Monitor TYPE : EJ6B50/02 8639 000 15804 BRAND : HP L1940 2004-08-31 Jacky Lee 2004-08-31...
- Page 69 6.2.2 Vibration and Shock Product shall meet the operating, non-operating and pack test requirements of HP s specification for Monitor Environmental and Reliability Testing (rev 6.0 of Oct. 21, 2002). Drop heights shall be determined by Compaq specification 109291.
- Page 70 0346 and must be checked with the check list UAT-0361. 10.0 Defects Both of HP & Philips agree to follow up panel specification as inspection condition in business kick off stage, if any deviation between Sheet590 and customer specification, should follow up panel specification.
- Page 71 Newton Rings Not Allowed Mottling Not Allowed ELECTRICAL DEFECTS: (See Notes) Bright Sub-Pixel (Electrical) N = 3 N > 3 (MVA/PVA/IPS panels normally dark) 19 inch LCD Monitor TYPE :EJ6B50/02 8639 000 15804 BRAND : HP L1940 2004-08-31 Jacky Lee 2004-08-31...
- Page 72 When viewed from directly in front of the monitor, the display shall not exhibit any non-uniformity’ s in color or luminance that are readily visible at 25% gray scale or brighter. Mura 19 inch LCD Monitor TYPE : EJ6B50/02 8639 000 15804 BRAND : HP L1940 2004-08-31 Jacky Lee 2004-08-31...
- Page 73 USB connections shall be established via 4-conductor USB cables. USB cables must be shielded in accordance with the USB specification for high speed devices. 19 inch LCD Monitor TYPE :EJ6B50/02 8639 000 15804 BRAND : HP L1940 2004-08-31 Jacky Lee 2004-08-31...
- Page 74 The USB device speed shall be 480 Mbit/sec. The maximum polling rate shall be every 256 Fig 1: Average Surface Brightness ,Position 5 = Screen center point L/10 W/10 Fig-2 HP Uniformity Test Pattern 19 inch LCD Monitor TYPE : EJ6B50/02...
- Page 75 H : 376.320 mm Active Area V : 301.056 mm @ H,V : Active Area Fig-4 CMO Uniformity Test Pattern Fig-5 AUO Uniformity Test Pattern 19 inch LCD Monitor TYPE :EJ6B50/02 8639 000 15804 BRAND : HP L1940 2004-08-31 Jacky Lee 2004-08-31...
- Page 76 GENERAL PRODUCT SPECIFICATION(Continued) HP L1940 Go to cover page Fig-6 HP Cross Talk Test Pattern VIEW AREA VIEW AREA 768,192 (896,384) Darkest gray (896,384) pattern 768,576 Where: In addition: Viewing Angle: q x = 90°, q y = 90° Y A = Initial luminance of measured area (cd/m 2 ) Ambient Temperature: 25 ±2°C...
- Page 77 V ID E O H O R IZ O N TA L F IG -4 T IM IN G C H A R T -1 19 inch LCD Monitor TYPE :EJ6B50/02 8639 000 15804 BRAND : HP L1940 2004-08-31 Jacky Lee 2004-08-31...
- Page 78 Go to cover page Fig-8 Timing Chart-2 VIDEO VERTICAL COMPOSITE SYNC. & VIDEO ( SYNC. ON GREEN ) HORIZONTAL VERTICAL FIG-5 TIMING CHART -2 19 inch LCD Monitor TYPE : EJ6B50/02 8639 000 15804 BRAND : HP L1940 2004-08-31 Jacky Lee 2004-08-31...
-
Page 79: Ddc Data
DDC Data HP L1940 Go to cover page Detailed Timing #1 (FOR HP L1940 DIGITAL FOR LPL PANEL) Pixel Clock (MHz) : 108 ********************************************************************* H Active (pixels) : 1280 EDID log file H Blanking (pixels) : 408 ********************************************************************* V Active (lines) -
Page 80: Ddc Data
DDC Data HP L1940 Go to cover page THE DISPLAY DATA CHANNEL (DDC_2B) CONTENT INCLUDING: Detailed Timing #1 (FOR HP L1940 ANALOG FOR LPL PANEL) Pixel Clock (MHz) : 108 ********************************************************************* H Active (pixels) : 1280 EDID log file H Blanking (pixels) -
Page 81: Different Parts List
Different Parts List HP L1940 Diversity of EJ6B50-69 comparing with EJ6B50-02 Diversity of EJ6B50-76 comparing with EJ6B50-02 Item 12NC Item 12NC Description Description 863900015805 EJ6B50-69 863900015801 EJ6B50-76 0101 313810440571 HOUSING COVER 0101 313810440571 HOUSING COVER 1157 313812874901 MAINSCORD 1157 313812874901... - Page 82 TELEVISION/MONITOR SAFFTY GUIDELINES FOR THE PROFESSIONAL SERVICE TECHNICIAN Safety Checks After the original service problem has been corrected,a complete safety check should be made. Be sure to check over the entire set, not just the areas 6. New picture tubes are specifically designed to withstand higher operathng where you have worked.
Need help?
Do you have a question about the L1940 and is the answer not in the manual?
Questions and answers