
Related Manuals for LG FB166


Summary of Contents for LG FB166
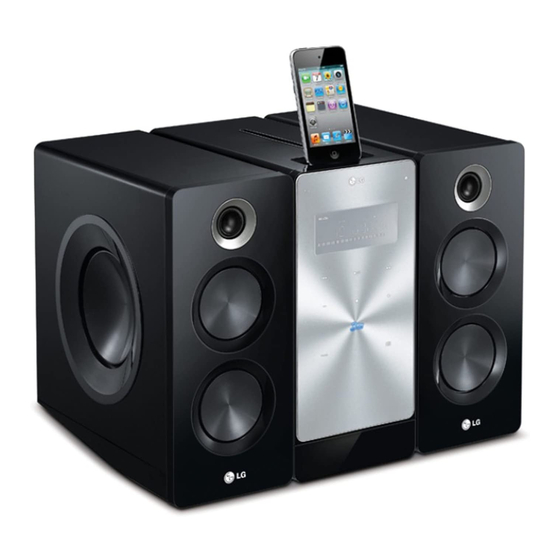
- Page 1 OWNER’S MANUAL DVD Micro Hi-Fi System Please read this manual carefully before operating your set and retain it for future reference. FB166 (FB166, FBS166V) P/NO : MFL67228272...
- Page 2 Getting Started Safety Information CAUTION CAUTION: This product employs a Laser System. RISK OF ELECTRIC SHOCK To ensure proper use of this product, please read DO NOT OPEN this owner’s manual carefully and retain it for future CAUTION: TO REDUCE THE RISK OF ELECTRIC reference.
- Page 3 This device is equipped with a portable battery or You have to set the disc format option to [Mastered] accumulator. in order to make the discs compatible with the LG players when formatting rewritable discs. When Safety way to remove the battery or the...
-
Page 4: Table Of Contents
Table of Contents System Setting Table of Contents Adjust the setup settings – OSD Initial language settings - Optional Getting Started – To display and exit the Setup menu – Language Safety Information – Display Unique Features – Audio – Portable In –... - Page 5 Table of Contents Operating Troubleshooting Using the Home Menu Troubleshooting Basic Operations Other Operations Appendix – Displaying Disc Information on-screen – To display the DVD Menu Area Code List – To xdisplay the DVD title Language code List – 1.5 times speed playback Trademarks and Licenses –...
-
Page 6: Getting Started
Getting Started Unique Features Accessories Please check and identify the supplied accessories. Portable In Listens to music from your portable device. (MP3, Notebook, etc) USB Direct Recording Remote control (1) Battery (1) Records music from CD to your USB device. Full HD up-scaling Views Full HD picture quality with simple setup. -
Page 7: Introduction
Getting Started Symbols Used in this Manual Introduction DVD-Video, DVD±R/RW in Video mode or VR mode and fi nalized Playable Discs Audio CDs This unit plays DVD±R/RW and CD-R/RW that contains audio titles, DivX, MP3, WMA and/or Video fi les contained in the JPEG fi les. -
Page 8: Playable Fi Le Requirement
Getting Started DivX fi le requirement Playable fi le DivX fi le compatibility with this unit is limited as Requirement follows: Available resolution: within 800 x 600 (W x H) pixels. MP3/ WMA music fi le requirement The fi le name of the DivX subtitle should be entered within 45 characters. -
Page 9: Remote Control
- You can control the sound lev displays. el, input source, and power PRESET +/-: Selects programme switching of LG TVs as well. of Radio. Hold POWER (TV) and press PR/ TUNING -/+: Tunes in the desired CH (+/-) button repeatedly until radio station. -
Page 10: Front Panel
Getting Started Front panel... - Page 11 Getting Started a Disc Slot h B (OPEN/CLOSE) Ejects or insert the disc from slot loader. b iPod dock i C/V (Skip/Search): c 1/! (POWER) Goes to next or previous fi le/track/chapter. Switches the unit ON or OFF. Searches backward or forward (Press and hold) d Display window Tunes in the desired radio station.
-
Page 12: Rear Panel
Getting Started Rear panel a OPTICAL IN e COMPONENT VIDEO (Y PB PR)OUTPUT Connects to optical audio equipment. (PROGRESSIVE SCAN) Connects to a TV with Y PB PR inputs. b HDMI OUT f Speakers connectors Connects to TV with HDMI inputs. (Interface for digital audio and video) Connects the speaker cables. -
Page 13: Connecting
Connecting Attaching the speakers Connections to Your to the unit To connect the cable to the unit, press each plastic Make one of the following connections, depending fi nger pad to open the connection terminals on the on the capabilities of your existing equipment. unit. -
Page 14: Component Video Connection
Connecting Component Video Connection HDMI Out Connection Connect the COMPONENT VIDEO OUTPUT If you have a HDMI TV or monitor, you can connect (PROGRESSIVE SCAN) jacks on the unit to the it to this unit using a HDMI cable (Type A, High corresponding input jacks on the TV using Speed HDMI™... -
Page 15: Video Connection
Connecting Note Video Connection If a connected HDMI device does not accept Connect the VIDEO OUT jack on the unit to the the audio output of the unit, the HDMI video in jack on the TV using a video cable. device’s audio sound may be distorted or You can hear the sound through the system’s may not output. -
Page 16: Resolution Setting
Connecting Resolution Setting Optional Equipment The unit provides several output resolutions for Connection HDMI OUT and COMPONENT VIDEO OUT jacks. You can change the resolution using [Setup] menu. 1. Press n HOME. AUDIO (PORT. IN) In 2. Use A/D to select the [Setup] and press b ENTER. -
Page 17: Usb Connection
Connecting USB Connection OPTICAL In connection Connect the USB port of USB Memory (or MP3 Connect an optical output of Unit (or Digital Device player, etc.) to the USB port on the front of the unit. etc) to the OPTICAL IN connector. Removing the USB Device from the unit 1. -
Page 18: Antenna Connection
Connecting Antenna Connection Playing the iPod Connect the supplied FM antenna for listening to You can enjoy the sound with your iPod. For details the radio. about iPod, refer to the iPod User Guide. Connect the FM Wire antenna to the FM antenna 1. -
Page 19: Compatible Ipod
Connecting Note Do this If this unit displays an error message, follow the message. An error message “ERROR”. ON UNIT ON REMOTE - Your iPod is not connected fi rmly. Pauses or - This unit recognizes your iPod as an restart unknown device. -
Page 20: System Setting
System Setting To display and exit the Setup Adjust the setup menu settings 1. Press n HOME. Displays the [Home Menu]. By using the Setup menu, you can make various adjustments to items such as picture and sound. You can also set a language for the subtitles and the Setup menu, among other things. -
Page 21: Language
System Setting Language Display Mode The Display Mode setting works only when the TV Aspect mode is set to 4:3. Menu Language Select a language for the Setup menu and then on [Letterbox] screen display. Displays a wide picture with bands on the upper and lower portions of the screen. -
Page 22: Audio
System Setting Audio Lock (Parental Control) DRC (Dynamic Range Control) Initial Setting the Area Code: Make the sound clear when the volume is turned When you use this unit for the fi rst time, you have down (Dolby Digital only). Set to [On] for this eff ect. to set the Area Code. -
Page 23: Others
System Setting Password Others You can enter or change password. DivX VOD 1. Select [Password] on the [Lock] menu and then press D. We provide you with the DivX® VOD (Video On 2. Press b ENTER. Demand) registration code that allows you to rent and purchase videos using the DivX®... -
Page 24: Operating
Operating Using the Home Menu Do this Stop Press Z STOP. 1. Press n HOME. Displays the [Home Menu]. Press d PLAY, MONO/ Playback STEREO. Pause Press M PAUSE/STEP. Press M PAUSE/STEP Frame-by- repeatedly to play title Frame- Frame playback by-Frame. -
Page 25: Other Operations
Operating To display the DVD title Other Operations When you play a DVD which contains several title, Displaying Disc Information you can select the title you want using the Menu. on-screen 1. Press TITLE. The disc’s title appears. You can display various information about the disc 2. -
Page 26: Resume Playback
Operating Resume playback Marked Playback ryut The mark function enables you to store your The unit records the point where you pressed the favourite fi les from any disc or USB device in the Z STOP depending on the disc. unit memory. -
Page 27: Viewing A Photo Fi Le
Operating About help menu in the [Photo] menu To delete a Marker Menu Buttons Operation 1. Use to select the track that you wish to erase from the marked fi le. d Slide Viewing a slide 2. Press MARKER. PLAY, MONO/ Show show. -
Page 28: Last Scene Memory
Operating Options while viewing a photo System Select - Optional You can use various options during viewing a You must select the appropriate system mode for photo in full screen. your TV system. Press and hold M PAUSE/STEP for more than fi ve seconds to be able to select a 1. -
Page 29: Setting The Clock
Operating Setting the Clock Sleep Timer Setting 1. Turn the unit on. Press SLEEP one or more times to select delay time between 10 and 180 minutes, after the unit will 2. Press CLOCK for at least 2 seconds. turn off . 3. -
Page 30: Radio Operations
Operating Deleting a saved station Radio Operations 1. Press PRESET - / + to Select a preset number you want to delete. Be sure that both FM aerials are connected. (Refer to the page 18.) 2. Press CLEAR, the preset number will blink in the display window. -
Page 31: Sound Adjustment
Operating Sound adjustment On Display Description You can enjoy more virtual VIRTUAL surround sound. Setting the surround mode You can enjoy the sound BYPASS This system has a number of pre-set surround without equalizer eff ect. sound fi elds. You can select a desired sound mode by using SOUND EFFECT. -
Page 32: Advanced Operations
Operating Note Advanced Operations You can check the recording percentage rate for the USB record on the screen during the recording. (Audio CD or MP3/ WMA CD Recording to USB only) During recording MP3/WMA, there is no You can record music or sound souce to USB device sound. -
Page 33: Troubleshooting
Troubleshooting Troubleshooting PROBLEM CORRECTION No power Plug the power cord into the wall outlet securely. Select the appropriate video input mode on the TV so the picture from the unit appears on the TV screen. No picture Connect the video cables securely to both the TV and unit. Select the correct input mode of the unit so you can hear the sound from the unit. -
Page 34: Appendix
Appendix Area Code List Choose an area code from this list. Area Code Area Code Area Code Area Code Afghanistan Fiji Monaco Singapore Argentina Finland Mongolia Slovak Republic Australia France Morocco Slovenia Austria Germany Nepal South Africa Belgium Great Britain Netherlands South Korea Bhutan... -
Page 35: Language Code List
Appendix Language code List Use this list to input your desired language for the following initial settings: [Disc Audio], [Disc Subtitle] and [Disc Menu]. Language Code Language Code Language Code Language Code Afar 6565 French 7082 Lithuanian 7684 Sindhi 8368 Afrikaans 6570 Frisian... -
Page 36: Trademarks And Licenses
Refer to the TV owner’s manual for the details Licensing Corporation. of SIMPLINK function. LG TV with SIMPLINK function has the logo as shown above. Use a higher version cable than High Speed Manufactured under license from Dolby HDMI™... -
Page 37: Specifi Cations
Appendix Specifi cations General Power requirements refer to main label Power consumption refer to main label Dimensions (W x H x D) 135 X 295 X 315 mm without foot Net Weight (Approx.) 3.45 kg Operating temperature 41 °F to 95 °F (5 °C to 35 °C) Operating humidity 5 % to 90 % Inputs/ Outputs... - Page 38 Appendix Front Speaker Type 3 Way 4 speaker Impedance Rated 4 Ω Input Power 80 W Max. Input Power 160 W Net Dimensions (W x H x D) 126 X 295 X 315 mm Net Weight 4.35 kg Design and specifi cations are subject to change without notice.
-
Page 39: Maintenance
Appendix Notes on Discs Maintenance Handling Discs Handling the Unit Do not touch the playback side of the disc. Hold the disc by the edges so that fi ngerprints do not get on the surface. Never stick paper or tape on the When shipping the unit disc.
Need help?
Do you have a question about the FB166 and is the answer not in the manual?
Questions and answers