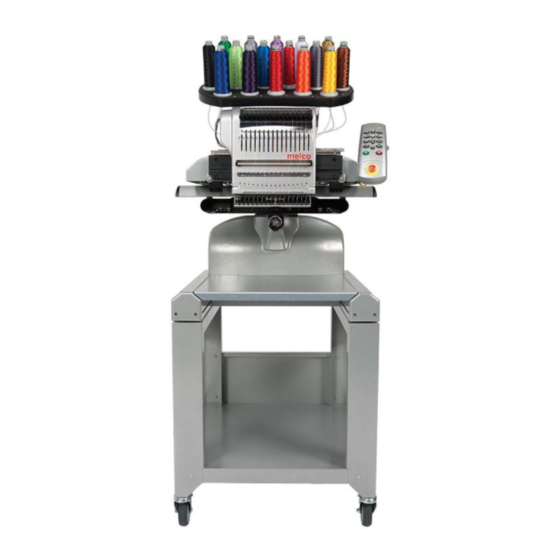
Summary of Contents for Melco EMT16
- Page 1 EMT16 & Melco OS V11 EMT16 & Melco OS V11 Classroom Notes & Quick Reference Guide EMT16 & Melco OS V11 Classroom Notes & Quick Reference Guide...
-
Page 2: Table Of Contents
EMT16 Keypad Loading Sequence Adjusting Presser Foot Hooping & Troubleshooting Machine Maintenance Applique & Color Sequence Commands Embroidery File Formats Cap Sewing Basics Puff Foam Embroidery Puff Foam Embroidery continued Moving through a design & EMT16 Laser Alignment EMT16_MOS_v11_EMT16_Handout.pub Rev: 080515... -
Page 3: Bobbins
We recommend continuous filament polyester bobbin thread. Cleaning the bobbin case Types of bobbins Threading up the bobbin case Testing the bobbin tension Adjusting the bobbin tension Reinserting the bobbin case Bobbin tail Thread Types of Thread Threading the EMT16 EMT16_MOS_v11_EMT16_Handout.pub Rev: 080515... - Page 4 Needles Needle Orientation Scarf Needle Sizes 65/9 75/11 100/16 Smaller Larger Needle Points Sharp Ball Needle Coatings Standard Titanium EMT16_MOS_v11_EMT16_Handout.pub Rev: 080515...
-
Page 5: Choosing A Needle
Choosing a Needle Choosing the appropriate needle for the job being run is extremely important to the success of the embroidery. Different fabrics and threads will determine what needle should be used. General Guidelines Ball Point needles are commonly used on knits. The idea behind this is for the slightly round- ed tip of the needle to move the threads of the material out of the way. -
Page 6: Changing Needles
1. Make sure the safety grabber blade is in the back position before changing a needle. If it is not, press the Adjustment and Center keys on the EMT16 keypad to move the grabber back. 2. Each needle has a needle clamp set screw that holds it in place. -
Page 7: Backings & Toppings
Backings and Toppings Standard Backings Cut Away Tear Away Specialty Backings Water Soluble Toppings and Backings Other Toppings and Backings EMT16_MOS_v11_EMT16_Handout.pub Rev: 080515... -
Page 8: Backing & Topping Information
More Backing and Topping Information Appropriate backing is essential for embroidering most fabrics. Without backing, fabrics can slip even when they are hooped tightly. Using the proper backing is directly linked to the produc- tion of consistently high quality embroidery. It is important to understand that many different embroiderers with identical criteria may choose completely different backing and topping for- mulas and still achieve successful embroidery results. -
Page 9: Emt16 Keypad
EMT16 Keypad Step Back Step Forward Move the hoop on the machine Center the Hoop on the machine Open/Close the Grabber Trim Immediate Trace the Design Within Selected Hoop E-Stop Change Sewing Speed Move Needle Case Hold to Turn on Laser EMT16_MOS_v11_EMT16_Handout.pub... - Page 10 Procedure to Run the EMT16 1. Load Design Screen Color Sequence Screen 3. Hoop Selection Screen 4. Garment Selection Screen 5. Set the Sewing Speed 6. Move & Rotate Screen (if need- 7. Center hoop (if needed) 8. Adjust Presser Foot Height Must have a garment loaded 9.
-
Page 11: Adjusting Presser Foot
Adjusting the Presser Foot The machine has an adjustable presser foot that can be set from 0.5mm to 3.5mm above the needle plate. The presser foot height should be changed when the thickness of the material you are sewing changes dramatically. To adjust the presser foot height, the software must be open, and your machine must be on and communicating with it. - Page 12 Slow down the EMT16. Make sure the piece is hooped properly. Adjust presser foot. Check bobbin tension. Check needle orientation. Oil the rotary hook. Bobbin pulled to top Check bobbin tension. Slow down the EMT16. Adjust presser foot. Registration loss Check hooping tension. Slow down the EMT16.
- Page 13 Maintenance EMT16_MOS_v11_EMT16_Handout.pub Rev: 080515...
- Page 14 Color Sequence Commands Appliqué Command Sequence for Sewing Appliqué 1. Locator Stitch 2. Place Appliqué 3. Tack-down Stitch 4. Cover Stitch Color 1 Appliqué Command Color 2 Pause Puff Micro Chenille Recursive EMT16_MOS_v11_EMT16_Handout.pub Rev: 080515...
-
Page 15: Embroidery File Formats
Embroidery File Formats Wire Frame (Outline) Files Stitch Files .cnd - older Melco condensed format .exp - Melco expanded stitch file .ofm - DesignShop and native format .dst - Tajima stitch file cnd & ofm Stitch files do not contain properties. They are ... - Page 16 Sewing Caps Load the Design Set the Color Sequence Select the Hoop (Driver color / Cap Frame) Set the Sewing Speed Select Hat as the Garment Type Measurements for Caps Set the Design Orientation X = Distance from bill to start of real curve Flip upside-down for caps.
- Page 17 3-D Foam Digitizing and Embroidering Help General tips: 1. The type of garment or finished product you’re working with should be evaluated for design with 3-D foam. Stay away from unstable fabrics such as pique. The more stable the fabric, the better.
- Page 18 1. Don’t tear off the foam until after the puff color is finished. If you get foam “crumbs” peeking through the embroidery, you can make them shrink away by using a heat gun. 2. Slow the machine to 900 SPM, or so for the puff color. 3.
- Page 19 EMT16 Laser Alignment EMT16 has a laser alignment feature. This feature allows you to line up an embroidery design to a mark, such as a stripe, on the garment. To do this, you use the hoop and the arrow keys to move the laser to your first reference point, like the top of stripe on the left side.


Need help?
Do you have a question about the EMT16 and is the answer not in the manual?
Questions and answers
what is the size of needle plate screw