Advertisement
Available languages
Available languages
Table of Contents
- 1 Installation on a PC
- 2 Introduction
- 3 Contents of the Pack
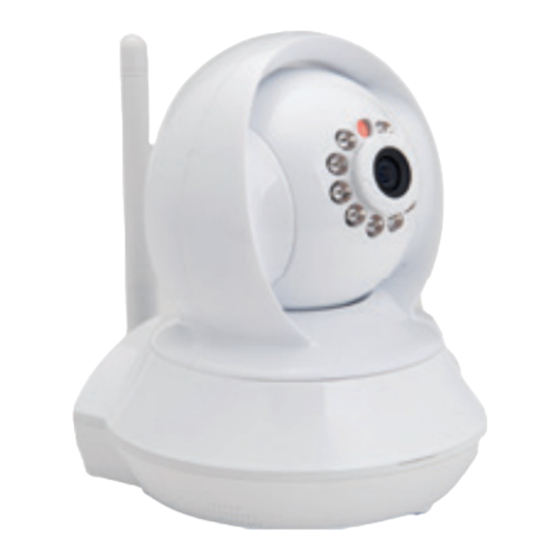
- 4 The Camera’s Start-Up
- 5 Software Setup
- 6 Setting the Wi-Fi Access
- 7 Access a Group of Cameras
- 8 Installation of an Iphone, Ipad or Android App
- 9 Installation on an Imac
- 10 Connect to a Group of Cameras
- 11 Declaration of Conformity
- Download this manual
See also:
Quick Installation Manual
QuickInstall Guide P2P
Manuel d'instructions
Manual de instrucciones
Gebruiksaanwijzing
Quick Install Guide
Advertisement
Table of Contents

Related Manuals for BlueStork P2P

Summary of Contents for BlueStork P2P
- Page 1 QuickInstall Guide P2P Manuel d’instructions Manual de instrucciones Gebruiksaanwijzing Quick Install Guide...
- Page 2 Français...
- Page 3 Introduction Les cameras P2P Bluestork disposent d’un logiciel avancé pour visualiser les images depuis un Smartphone, une tablette, un PC ou un MAC. Une fois la camera installée votre Smartphone pour voir apparaître les images ! La première étape consiste donc à...
- Page 4 Guide d’installation rapide des caméras Bluestork p2p (PC) Mise en route de la caméra : 1) Vissez l’antenne WIFI à l’arrière de la camera. 2) Branchez le bloc alimentation sur le secteur et sur la caméra. 3) Branchez votre caméra sur votre BOX ou sur votre routeur ADSL à l’aide du cordon réseau Ethernet RJ-45 fourni.
- Page 5 Guide d’installation rapide des caméras Bluestork p2p (PC) Installation du logiciel : Les étapes d’installation décrites ici concernent le logiciel compatible PC. 1) Insérez le CD dans le lecteur du PC, et lancez le programme appelé « BlueView P2P PC ».
- Page 6 Guide d’installation rapide des caméras Bluestork p2p (PC) 2) Cliquez sur « Next » : « Next » encore «Browse» ou «Parcourir».
- Page 7 Guide d’installation rapide des caméras Bluestork p2p (PC) 4) Si vous voulez un icone du programme de gestion des caméras sur votre bureau, cochez la première case. 5) Cliquez ensuite sur « Next »...
- Page 8 Guide d’installation rapide des caméras Bluestork p2p (PC) 6) Le logiciel est prêt à être installé. Cliquez sur « Install» pour accepter.
- Page 9 Guide d’installation rapide des caméras Bluestork p2p (PC) Une fois l’installation terminée, si l’écran suivant apparait : 7) Cliquez sur « Fermer » en bas à droite.
- Page 10 Guide d’installation rapide des caméras Bluestork p2p (PC) L’écran suivant apparait : Vos caméras apparaissent ici dans cette liste.
- Page 11 Guide d’installation rapide des caméras Bluestork p2p (PC) • cation est présent dans l’onglet « LAN » à droite de l’écran. (ici le numéro est BS000013) • Cliquez sur le numéro de la caméra, et sans relâcher, glissez-le vers la gauche, dans la zone principale à...
- Page 12 Guide d’installation rapide des caméras Bluestork p2p (PC) « Usage Distant » ou « WAN » cliquez sur l’onglet « WAN » à droite. L’écran suivant apparait : 2) Entrez le mot de passe (celui-ci est noté sur une étiquette sous la caméra avec la mention «login»...
- Page 13 Guide d’installation rapide des caméras Bluestork p2p (PC) L’écran suivant apparait : 6) Cocher l’option « Lancer réglage WIFI » puis cliquez sur « Scan ».
- Page 14 Guide d’installation rapide des caméras Bluestork p2p (PC) L’écran suivant apparait : 7) Choisissez votre réseau WIFI en le sélectionnant dans le menu déroulant, puis « Password » 8) Cliquez sur « OK »...
- Page 15 Guide d’installation rapide des caméras Bluestork p2p (PC) L’écran suivant apparait : Cliquez sur OK 9) Vous pouvez débrancher le cordon Ethernet RJ-45 de votre caméra. Celle-ci fonctionne dorénavant en WIFI. 10) Débranchez l’alimentation de la caméra, attendez 10 secondes, puis rebrancher l’alimentation.
- Page 16 Guide d’installation rapide des caméras Bluestork p2p (PC) Accès à un groupe de caméras : Si vous avez plusieurs caméras et que vous souhaitez accéder au groupe de toutes vos caméras avec un seul login vous pouvez créer un compte sur le serveur : 2) Inventez un identi ant et un mot de passe ;...
- Page 17 Guide d’installation rapide des caméras Bluestork p2p (PC) 5) L’écran ci-dessous apparaît :...
- Page 18 Guide d’installation rapide des caméras Bluestork p2p (iPhone, iPad, Android) Installation d’une application iPhone, iPad ou Android : • Allez sur l’App Store ou sur GooglePlay et chercher l’application « BlueView » et téléchargez là. • Ouvrez l’application installée sur votre écran d’accueil :...
- Page 19 Guide d’installation rapide des caméras Bluestork p2p (iPhone, iPad, Android) L’écran suivant apparaît :...
- Page 20 Guide d’installation rapide des caméras Bluestork p2p (iPhone, iPad, Android) Une fois l’application installée, appuyez sur « Scan » ou sur le bouton et scannez le...
- Page 21 Guide d’installation rapide des caméras Bluestork p2p (iPhone, iPad, Android) L’écran suivant apparaît : Cliquez sur “Connexion”...
- Page 22 Guide d’installation rapide des caméras Bluestork p2p (iPhone, iPad, Android) L’écran suivant apparait : BS000013 Votre caméra est alors installée en 3G, 4G et est fonctionnelle.
- Page 23 Guide d’installation rapide des caméras Bluestork p2p (iPhone, iPad, Android) Cliquez sur l’image pour la visualiser en plus grande taille : BS000013...
- Page 24 Guide d’installation rapide des caméras Bluestork p2p (iPhone,iPad,Android) Si le smartphone ou la tablette sont en position horizontale, l’image est en plein écran :...
- Page 25 Installation sur iMAC : Introduction Les cameras P2P Bluestork disposent d’un logiciel avancé pour visualiser les images depuis un Smartphone, une tablette, un PC ou un MAC. Une fois la camera installée votre Smartphone pour voir apparaître les images ! La première étape consiste donc à...
- Page 26 Guide d’installation rapide des caméras Bluestork p2p (iMAC) Mise en route de la caméra : 1) Vissez l’antenne WIFI à l’arrière de la camera. 2) Branchez le bloc alimentation sur le secteur et sur la caméra. 3) Branchez votre caméra sur BOX ou votre routeur ADSL à l’aide du cordon réseau Ethernet RJ-45 fourni.
- Page 27 Guide d’installation rapide des caméras Bluestork p2p (iMAC) Installation du logiciel : recherchez l’application suivante : « BlueView P2P Mac». L’écran suivant apparaît : BlueView P2P Mac Installez l’application Une fois l'application installée, vous avez maintenant cet écran :...
- Page 28 Guide d’installation rapide des caméras Bluestork p2p (iMAC) 4) En haut à droite, l’onglet « LAN » est en surbrillance bleu. La caméra BS000007 est en ligne. 5) Cliquez dessus, et son image apparait dans le premier quart d’écran en haut à...
- Page 29 Guide d’installation rapide des caméras Bluestork p2p (iMAC)
- Page 30 Guide d’installation rapide des caméras Bluestork p2p (iMAC) 7) L’écran suivant apparaît :...
- Page 31 Guide d’installation rapide des caméras Bluestork p2p (iMAC) 8) Cliquez en haut à droite sur l’onglet « WIFI », L’écran suivant apparaît : Cliquez sur « SCAN » et dans la fenêtre « Nom de réseaux (SSID)» choisissez le nom WIFi de votre BOX ou de votre routeur ADSL.
- Page 32 Guide d’installation rapide des caméras Bluestork p2p (iMAC) Entrez votre clef WEP ou mot de passe WIFI dans la fenêtre « PASSWORD » Cliquez sur «OK» Votre caméra est maintenant installée en WIFI. Vous pouvez débrancher le cordon Ethernet RJ-45 de votre caméra.
- Page 33 Guide d’installation rapide des caméras Bluestork p2p (iMAC) Accès à un groupe de caméras : Si vous avez plusieurs caméras et que vous souhaitez accéder au groupe de toutes vos caméras avec un seul login vous pouvez créer un compte sur le serveur : 2) Inventez un identi ant et un mot de passe ;...
- Page 34 Guide d’installation rapide des caméras Bluestork p2p (iMAC) 5) L’écran ci-dessous apparaît :...
- Page 35 Guide d’installation rapide des caméras Bluestork p2p (iPhone, iPad, Android) Installation d’une application iPhone, iPad ou Android : • Allez sur l’App Store ou sur GooglePlay et chercher l’application « BlueView » et téléchargez là. • Ouvrez l’application installée sur votre écran d’accueil :...
- Page 36 Guide d’installation rapide des caméras Bluestork p2p (iPhone, iPad, Android) L’écran suivant apparaît :...
- Page 37 Guide d’installation rapide des caméras Bluestork p2p (iPhone, iPad, Android) Une fois l’application installée, appuyez sur « Scan » ou sur le bouton et scannez le...
- Page 38 Guide d’installation rapide des caméras Bluestork p2p (iPhone, iPad, Android) L’écran suivant apparaît : Cliquez sur “Connexion”...
- Page 39 Guide d’installation rapide des caméras Bluestork p2p (iPhone, iPad, Android) L’écran suivant apparait : BS000013 Votre caméra est alors installée en 3G, 4G et est fonctionnelle.
- Page 40 Guide d’installation rapide des caméras Bluestork p2p (iPhone, iPad, Android) Cliquez sur l’image pour la visualiser en plus grande taille : BS000013...
- Page 41 Guide d’installation rapide des caméras Bluestork p2p (iPhone, iPad, Android) Si le smartphone est en position horizontale, l’image est en plein écran :...
- Page 42 Guide d’installation rapide des caméras Bluestork p2p Vous disposez d’une aide complète dans le logiciel (fourni) pour vous Nous vous souhaitons une bonne utilisation des caméras Bluestork p2p ! Pour contacter le support technique en cas de problèmes d’installation ou de fonctionnement :...
- Page 43 DECLARATION DE CONFORMITE Nous, Bluestork Industry France, sis au 300 Rue du Président Salvador Allende - 92700 Colombes, France Déclarons que les produits désignés ci-dessous : -Type de produit : IP Camera -Marque : BLUESTORK -Modèle : BS-CAM/DESK BS-CAM/R BS-CAM/DOME BS-CAM-OF BS-CAM-OR...
- Page 44 à la directive 1999/5/EC. l’alinéa (IV) de la directive 1999/5/EC a été conduite sous contrôle de l’organisme suivant : CE ( 0700) Documentation technique détenue par : Bluestork INDUSTRY France Disponible sur simple demande. Eric RAMPI Le 13 janvier 2014 Colombes, France 300 Rue du Président Salvador Allende –...
- Page 45 Español...
- Page 46 Guía de instalación rápida de las cámaras IP P2P Bluestork p2p (PC) INSTALACIÓN EN EL PC : Nota : Los menús de los pantallazos que aparecen a lo largo de esta guía es- tán en inglés y francés. Para estos últimos, se han mantenido los términos franceses con la traducción al español entre paréntesis.
- Page 47 Guía de instalación rápida de las cámaras IP P2P Bluestork p2p (PC) Puesta en marcha de la cámara : 1) Atornilla la antena WIFI en la parte trasera de la cámara. 2) Conecta el bloque de alimentación a la corriente y a la cámara.
- Page 48 Guía de instalación rápida de las cámaras IP P2P Bluestork p2p (PC) Instalación del software : Los pasos de instalación descritos aquí son para el software compatible con PC. 1) Inserta el CD en la disquetera del PC y lanza el programa llamado “BlueView P2P PC”.
- Page 49 Guía de instalación rápida de las cámaras IP P2P Bluestork p2p (PC) 2) Clica en « Next » :...
- Page 50 Guía de instalación rápida de las cámaras IP P2P Bluestork p2p (PC) 3) Si el destino de copia de los cheros te conviene, vuelve a clicar en « Next » o cambia esta ubicación con « Browse » o « Examinar » : 4) Si quieres un icono del programa de gestión de las cámaras en el escritorio, marca...
- Page 51 Guía de instalación rápida de las cámaras IP P2P Bluestork p2p (PC) 6) El programa está listo para ser instalado. Clica en « Install » para aceptar.
- Page 52 Guía de instalación rápida de las cámaras IP P2P Bluestork p2p (PC) Una vez terminada la instalación aparecerá la pantalla siguiente : 7) Clica en « Fermer » (Cerrar) abajo a la derecha.
- Page 53 Guía de instalación rápida de las cámaras IP P2P Bluestork p2p (PC) Aparece la pantalla siguiente : Tu cámara aparece aquí en la lista...
- Page 54 Guía de instalación rápida de las cámaras IP P2P Bluestork p2p (PC) • aparece en la pestaña « LAN » en la parte superior de la pantalla (en este ejem- plo el número es BS000013). • Clica en el Número de la cámara y, sin soltarlo, deslízalo hacia la izquierda hasta el área oscura y suéltalo...
- Page 55 Guía de instalación rápida de las cámaras IP P2P Bluestork p2p (PC) « WAN », clica en la pestaña « WAN » a la derecha. Aparece la siguiente pantalla : 2) Entra tu password (lo encontrarás en la etiqueta situada debajo de la cámara) llamado «...
- Page 56 Guía de instalación rápida de las cámaras IP P2P Bluestork p2p (PC) Aparece la siguiente pantalla : 6) «Iniciar ajuste WIFI” / (Iniciar ajuste WIFI ) y a continuación clica en « Scan ».
- Page 57 Guía de instalación rápida de las cámaras IP P2P Bluestork p2p (PC) Aparece la siguiente pantalla : 7) Elige tu red WIFI seleccionándola en el menú desplegable, y entra tu clave WiFi (WEP…) o tu « Password » 8) Clica en « OK »...
- Page 58 Guía de instalación rápida de las cámaras IP P2P Bluestork p2p (PC) Aparece la siguiente pantalla : Clica en «OK» 9) Puedes desconectar el cable Ethernet RJ-45 de tu cámara. Ésta funciona ahora en modo WIFI. 10) Desenchufa la alimentación de la cámara de la corriente, espera 10 segundos y vuelve a enchufarla.
- Page 59 Guía de instalación rápida de las cámaras IP P2P Bluestork p2p (PC) El acceso a un grupo de cámaras : Si tiene varias cámaras y desea tener acceso a todas sus cámaras con un solo login, se puede crear una cuenta en el servidor : 2) Cree un login y contraseña ;...
- Page 60 Guía de instalación rápida de las cámaras IP P2P Bluestork p2p (PC) 5) Aparece la pantalla siguiente :...
- Page 61 Guía de instalación rápida de las cámaras IP P2P Bluestork p2p (Aplicación) Installation d’une application iPhone, iPad ou Android : • Ve al App Store o al GooglePlay, busca la aplicación « BlueView », y descárgala. • Abra la aplicación instalada en su pantalla de inicio :...
- Page 62 Guía de instalación rápida de las cámaras IP P2P Bluestork p2p (Aplicación) Aparece la pantalla siguiente :...
- Page 63 Guía de instalación rápida de las cámaras IP P2P Bluestork p2p (Aplicación) Una vez instalada la aplicación, pulsa en « Scan » code que se encuentra en la etiqueta en la parte de abajo de la cámara :...
- Page 64 Guía de instalación rápida de las cámaras IP P2P Bluestork p2p (Aplicación) Aparece la pantalla siguiente : Haga clic en onnexion .
- Page 65 Guía de instalación rápida de las cámaras IP P2P Bluestork p2p (Aplicación) Aparece la pantalla siguiente : BS000013 Tu cámara está ahora instalada en 3G, 4G y está operativa.
- Page 66 Guía de instalación rápida de las cámaras IP P2P Bluestork p2p (Aplicación) Clica en la imagen para visualizarla en mayor tamaño : BS000013...
- Page 67 Guía de instalación rápida de las cámaras IP P2P Bluestork p2p (Aplicación) Si el smarphone está en posición horizontal, la imagen se ve en modo pantalla completa :...
- Page 68 Guía de instalación rápida de las cámaras IP P2P Bluestork p2p (iMAC) INSTALACIÓN EN EL iMAC : Introducción Las cámaras P2P Bluestork disponen de un software avanzado para visualizar las imágenes desde un Smartphone, una tablet, un PC o un MAC. Una vez instalada la cámara en tu red, ¡te bastará...
- Page 69 Guía de instalación rápida de las cámaras IP P2P Bluestork p2p (iMAC) Puesta en marcha de la cámara : 1) Atornilla la antena WIFI en la parte trasera de la cámara. 2) Conecta el bloque de alimentación a la corriente y a la cámara.
- Page 70 Guía de instalación rápida de las cámaras IP P2P Bluestork p2p (iMAC) Installation du logiciel : recherchez l’application suivante : « BlueView P2P Mac». L’écran suivant apparaît : BlueView P2P Mac Installez l’application Una vez instalada la aplicación, ahora tiene la siguiente pantalla :...
- Page 71 Guía de instalación rápida de las cámaras IP P2P Bluestork p2p (iMAC) 4) Arriba a la derecha, en la pestaña «LAN» se resalta en azul. La cámara BS000007 en línea. 5) Haga clic en él, y su imagen aparece en el primer cuarto de pantalla en la parte...
- Page 72 Guía de instalación rápida de las cámaras IP P2P Bluestork p2p (iMAC) 7) Aparece la siguiente pantalla :...
- Page 73 Guía de instalación rápida de las cámaras IP P2P Bluestork p2p (iMAC) 8) Haga clic en la parte superior derecha de la pestaña «WIFI» aparece la siguiente pantalla : Haga clic en «SCAN» y la ventana Ninguna red (SSID), seleccione el nombre...
- Page 74 Guía de instalación rápida de las cámaras IP P2P Bluestork p2p (iMAC) Introduzca su clave WEP o la contraseña password WIFI en la ventana de «PASSWORD» Haga clic en « OK » Su cámara está ahora instalado WIFI. Ahora puede desconectar el RJ-45 del cable Ethernet a la cámara.
- Page 75 Guía de instalación rápida de las cámaras IP P2P Bluestork p2p (Aplicación) Installation d’une application iPhone, iPad ou Android : • Ve al App Store o al GooglePlay, busca la aplicación « BlueView », y descárgala. • Abra la aplicación instalada en su pantalla de inicio :...
- Page 76 Guía de instalación rápida de las cámaras IP P2P Bluestork p2p (Aplicación) Aparece la pantalla siguiente :...
- Page 77 Guía de instalación rápida de las cámaras IP P2P Bluestork p2p (Aplicación) Una vez instalada la aplicación, pulsa en « Scan » code que se encuentra en la etiqueta en la parte de abajo de la cámara :...
- Page 78 Guía de instalación rápida de las cámaras IP P2P Bluestork p2p (Aplicación) Aparece la pantalla siguiente : Haga clic en onnexion .
- Page 79 Guía de instalación rápida de las cámaras IP P2P Bluestork p2p (Aplicación) Aparece la pantalla siguiente : BS000013 Tu cámara está ahora instalada en 3G, 4G y está operativa.
- Page 80 Guía de instalación rápida de las cámaras IP P2P Bluestork p2p (Aplicación) Clica en la imagen para visualizarla en mayor tamaño : BS000013...
- Page 81 Guía de instalación rápida de las cámaras IP P2P Bluestork p2p (Aplicación) Si el smarphone está en posición horizontal, la imagen se ve en modo pantalla completa :...
- Page 82 Guía de instalación rápida de las cámaras IP P2P Bluestork p2p Dispones de una ayuda completa dentro del programa para guiarte en la utilización de tus cámaras (en inglès). Deseamos que disfrute del manejo de las cámaras Bluestork p2p. Para contactar con el departamento de asistencia técnica en caso de problemas de instalación (en francés) :...
- Page 83 Netherlands Snelle installatiegids voor de IP p2p camera’s...
- Page 84 Inleiding De P2P Bluestork camera’s hebben een geavanceerde software om de beelden met een Smartphone, een tablet, een PC of een MAC te bekijken. Wanneer de camera eenmaal op uw netwerk geïnstalleerd is, hoeft u alleen maar de onder de camera ge- De eerste stap bestaat dus uit het installeren van de camera op uw netwerk.
- Page 85 Snelle installatiegids voor de Bluestork p2p camera’s (PC) Ingebruikname van de came : 1) Schroef de WIFI-antenne op de achterkant van de camera. 2) Sluit het voedingsblok aan op het spanningsnet en op de camera. 3) Sluit uw camera aan op de BOX of uw ADSL router met behulp van het meegele- verde Ethernet RJ-45 netsnoer.
- Page 86 Snelle installatiegids voor de Bluestork p2p camera’s (PC) Installatie van de software : software. 1) Steek de CD in de drive van de PC en start het opgeroepen programma « BlueView P2P PC ». Het volgende scherm wordt weergegeven :...
- Page 87 Snelle installatiegids voor de Bluestork p2p camera’s (PC) 2) Klik op « Next » :...
- Page 88 Snelle installatiegids voor de Bluestork p2p camera’s (PC) 3) Als de bestemming voor het kopiëren van de bestanden u bevalt, klik dan nog maals op « Next » Of u deze locatie te wijzigen met « Browse» : 4) Als u een icoon van het besturingsprogramma van de camera’s op uw desktop wilt, vink dan het eerste vakje aan.
- Page 89 Snelle installatiegids voor de Bluestork p2p camera’s (PC) 6) De software is klaar om geïnstalleerd te worden. Klik op « Install » om te accepteren.
- Page 90 Snelle installatiegids voor de Bluestork p2p camera’s (PC) Wanneer de installatie voltooid is, verschijnt het volgende beeldscherm :...
- Page 91 Snelle installatiegids voor de Bluestork p2p camera’s (PC) 7) Klik op « Fermer » of « Sluiten » rechtsonder : Het volgende beeldscherm verschijnt : Uw camera bevindt zich hier in de lijst...
- Page 92 Snelle installatiegids voor de Bluestork p2p camera’s (PC) • getoond in de tab « LAN » rechts op het beeldscherm. (hier is het nummer BS000013) • Klik op het nummer van de camera en schuif zonder dit los te laten naar links, in...
- Page 93 Snelle installatiegids voor de Bluestork p2p camera’s (PC) Instellingen van de WIFI toegang : « WAN » op de tab « WAN » rechts. Het volgende scherm wordt weergegeven : 2) Voer het wachtwoord in (dit staat vermeld op een etiket onder de camera).
- Page 94 Snelle installatiegids voor de Bluestork p2p camera’s (PC) Het volgende scherm wordt weergegeven : 6) Vink de optie « Lancer réglage WIFI » of « Stel de WIFI instellingen in » en klik vervolgens op « Scan ».
- Page 95 Snelle installatiegids voor de Bluestork p2p camera’s (PC) Het volgende scherm wordt weergegeven : 7) Kies uw WIFI-netwerk door dit te selecteren in het vervolgkeuzemenu en voer vervolgens uw WEP-sleutel of uw inlog-ID in het vakje « Password » of «...
- Page 96 Snelle installatiegids voor de Bluestork p2p camera’s (PC) Het volgende scherm wordt weergegeven : Klik op OK. 9) U kunt het Ethernet RJ-45 snoer losmaken van uw camera. Deze werkt nu in WIFI. 10) Maak het netsnoer van de camera los, wacht 10 seconden, alvorens het netsnoer weer aan te sluiten.
- Page 97 Snelle installatiegids voor de Bluestork p2p camera’s (PC) Toegang tot een groep camera’s : Als u meerdere camera’s heeft en u toegang wilt tot de groep van al uw camera’s met één login, dan kunt u een account aanmaken op de server : 2) Verzin een ID en een wachtwoord;...
- Page 98 Snelle installatiegids voor de Bluestork p2p camera’s (PC) 5) Onderstaand beeldscherm verschijnt :...
- Page 99 Snelle installatiegids voor de Bluestork p2p camera’s (iPhone, iPad, Android) Installatie van een iPhone, iPad of Android applicatie • Ga naar de App Store of naar GooglePlay en zoek de applicatie « BlueView » en download deze. • Open de geïnstalleerde applicatie op je startscherm :...
- Page 100 Snelle installatiegids voor de Bluestork p2p camera’s (iPhone, iPad, Android) Het volgende scherm verschijnt :...
- Page 101 Snelle installatiegids voor de Bluestork p2p camera’s (iPhone, iPad, Android) het etiket onder de camera :...
- Page 102 Snelle installatiegids voor de Bluestork p2p camera’s (iPhone, iPad, Android) Het volgende scherm verschijnt : Klik op Login en «Connexion»...
- Page 103 Snelle installatiegids voor de Bluestork p2p camera’s (iPhone, iPad, Android) Het volgende scherm verschijnt Uw camera is nu geïnstalleerd in 3G, 4G en is functioneel. BS000013...
- Page 104 Snelle installatiegids voor de Bluestork p2p camera’s (iPhone, iPad, Android) Op het beeld om dit te bekijken in een groter formaat : BS000013...
- Page 105 Snelle installatiegids voor de Bluestork p2p camera’s (iPhone, iPad, Android) Als de smartphone of tablet in horizontale stand staat, vult het beeld het hele beeldscherm :...
- Page 106 Installatie op iMAC : Inleiding De P2P Bluestork camera’s hebben een geavanceerde software om de beelden met een MAC te bekijken. Wanneer de camera eenmaal op uw netwerk geïnstalleerd is, hoeft u alleen maar de onder de camera geplaatste QRcode met behulp van uw De eerste stap bestaat dus uit het installeren van de camera op uw netwerk.
- Page 107 Snelle installatiegids voor de Bluestork p2p camera’s (iMAC) Ingebruikname van de came : 1) Schroef de WIFI-antenne op de achterkant van de camera. 2) Sluit het voedingsblok aan op het spanningsnet en op de camera. 3) Sluit uw camera aan op de BOX of uw ADSL router met behulp van het meegele- verde Ethernet RJ-45 netsnoer.
- Page 108 Installatie van de software : 1) Ga naar het installatiebestand op de bij de camera meegeleverde CD of op de Mac App Store en zoek de volgende applicatie : « BlueView P2P Mac » BlueView P2P Mac Installeer de applicatie...
- Page 109 Snelle installatiegids voor de Bluestork p2p camera’s (iMAC) 4) Rechtsboven is de tab « LAN » blauw gemarkeerd. De camera BS000007 is online 5) Klik er op en zijn beeld verschijnt in het eerste schermgedeelte linksboven :...
- Page 110 Snelle installatiegids voor de Bluestork p2p camera’s (iMAC) het netwerk »...
- Page 111 Snelle installatiegids voor de Bluestork p2p camera’s (iMAC) 7) Het volgende beeldscherm verschijnt :...
- Page 112 Snelle installatiegids voor de Bluestork p2p camera’s (iMAC) 8) Klik rechtsboven op de tab « WIFI », Het volgende beeldscherm verschijnt : Klik op « SCAN » en in het venster « Nom de réseaux (SSID) » of « SSID...
- Page 113 Snelle installatiegids voor de Bluestork p2p camera’s (iPhone, iPad, Android) Installatie van een iPhone, iPad of Android applicatie • Ga naar de App Store of naar GooglePlay en zoek de applicatie « BlueView » en download deze. • Open de geïnstalleerde applicatie op je startscherm :...
- Page 114 Snelle installatiegids voor de Bluestork p2p camera’s (iPhone, iPad, Android) Het volgende scherm verschijnt :...
- Page 115 Snelle installatiegids voor de Bluestork p2p camera’s (iPhone, iPad, Android) het etiket onder de camera :...
- Page 116 Snelle installatiegids voor de Bluestork p2p camera’s (iPhone, iPad, Android) Het volgende scherm verschijnt : Klik op « Login » en «Connexion»...
- Page 117 Snelle installatiegids voor de Bluestork p2p camera’s (iPhone, iPad, Android) Het volgende scherm verschijnt. Uw camera is nu geïnstalleerd in 3G, 4G en is functioneel. BS000013...
- Page 118 Snelle installatiegids voor de Bluestork p2p camera’s (iPhone, iPad, Android) Op het beeld om dit te bekijken in een groter formaat : BS000013 BS000013...
- Page 119 Snelle installatiegids voor de Bluestork p2p camera’s (iPhone, iPad, Android) Als de smartphone of tablet in horizontale stand staat, vult het beeld het hele beeldscherm :...
- Page 120 Snelle installatiegids voor de Bluestork p2p camera’s U beschikt over een complete hulp in de software (meegeleverd) om u te begeleiden bij het gebruik van de verschillende camera’s. (in het Engels). Wij wensen u een goed gebruik toe van de Bluestork p2p camera’s!
- Page 121 English Quick Install Guide for Cloud cameras...
- Page 122 Introduction The Bluestork Cloud cameras have an advanced software to view images from a Smartphone, a tablet, a PC or a MAC. Once the camera is installed on your network, you just have to flash the QRcode located under the camera, with a Smartphone, and the images will appear! The first step consists of installing the camera on your network.
- Page 123 Quick Install Guide for p2p Bluestork Cameras (PC) The camera’s start-up : 1) Screw the WIFI antenna to the back of the camera . 2) Plug the power supply on the mains and on the camera. 3) Plug the camera on your BOX or on yourADSL router thanks to the Ethernet RJ-45 network cable provided.
- Page 124 Quick Install Guide for p2p Bluestork Cameras (PC) Software Setup : The installation steps described below are for the software compatible with PC. 1) Insert the CD in the CD drive of your PC, and launch the program called « BlueView P2P PC ».
- Page 125 Quick Install Guide for p2p Bluestork Cameras (PC) 2) Click on «Next» : 3) If the destination of files suits you, click on « Next » once again, if not modify this destination with « Browse ».
- Page 126 Quick Install Guide for p2p Bluestork Cameras (PC) 4) If you want an icon from the cameras’ management program on your desktop, tick the first box. 5)Then click on «Next»...
- Page 127 Quick Install Guide for p2p Bluestork Cameras (PC) 6) The software is ready to be installed. Click on « Install» to accept.
- Page 128 Quick Install Guide for p2p Bluestork Cameras (PC) Once the installation done, if the following screen appears : 7) Click on «Close» on the bottom right.
- Page 129 Quick Install Guide for p2p Bluestork Cameras (PC) The following screen appears : Your cameras appear here To change the language, click on the icon « Settings » on the top left of the window. Select your language in the drop-down menu and click on «...
- Page 130 Quick Install Guide for p2p Bluestork Cameras (PC) • Your camera is then autorecognized and its identification number is present in the “LAN” tab on the right part of the screen (here the number is BS000013). • Click on the number of the camera, keep pressed on it, and make it slide on the left, in the main area on the left, before letting go.
- Page 131 Quick Install Guide for p2p Bluestork Cameras (PC) Setting the Wi-Fi access: 1) For the configuration on «Remote Use» or «WAN», click on the « WAN » on the right. The following screen appears: 2) Enter the password (which is written on a label under the camera with the mention «...
- Page 132 Quick Install Guide for p2p Bluestork Cameras (PC) The following screen appears: 6) Tick the box « Start WiFi setting » then click on « Scan ».
- Page 133 Quick Install Guide for p2p Bluestork Cameras (PC) The following screen appears: 7) Select your WIFI network in the drop-down menu, then enter your WEP key or your connection password in the box « Password ». 8) Click on «Ok»...
- Page 134 Quick Install Guide for p2p Bluestork Cameras (PC) The following screen appears: Click on «OK» 9) You can unplug the RJ-45 Ethernet cable from your camera. It works now with WI-FI. 10) Unplug the power supply from the camera , wait 10 seconds, then plug the power supply again.
- Page 135 Quick Install Guide for p2p Bluestork Cameras (PC) Access a group of cameras: If you have several cameras and you want to access the group of all your cameras with one single login you can create an account on the server: 2) Create a login and a password ;...
- Page 136 Quick Install Guide for p2p Bluestork Cameras (PC) 5) The following screen appears :...
- Page 137 Quick Install Guide for p2p Bluestork Cameras (iPhone, iPad, Android) Installation of an iPhone, iPad or Android app: • Go on the App Store or on Google Play and download the “BlueView” application. • Open the application installed on your home screen.
- Page 138 Quick Install Guide for p2p Bluestork Cameras (iPhone, iPad, Android) The following screen appears :...
- Page 139 Quick Install Guide for p2p Bluestork Cameras (iPhone, iPad, Android) Once the application installed, press « Scan» or on the button representing a QR Code and scan the QRcode or flashcode present on the label under the camera.
- Page 140 Quick Install Guide for p2p Bluestork Cameras (iPhone, iPad, Android) The following screen appears : Click on «Connexion»...
- Page 141 Quick Install Guide for p2p Bluestork Cameras (iPhone, iPad, Android) The following screen appears : BS000013 Your camera is then installed in 3G, 4G and is functional.
- Page 142 Quick Install Guide for p2p Bluestork Cameras (iPhone, iPad, Android) Click on the picture to view it in a bigger size: Click on «Connexion»...
- Page 143 Quick Install Guide for p2p Bluestork Cameras (iPhone, iPad, Android) If the smartphone or the tablet are in horizontal position, the picture in full screen : Your camera is then installed in 3G, 4G and is functional.
- Page 144 Introduction The Bluestork Cloud cameras have an advanced software to view images from a Smartphone, a tablet, a PC or a MAC. Once the camera is installed on your network, you just have to flash the QRcode located under the camera, with a Smartphone, and the images will appear! The first step consists of installing the camera on your network.
- Page 145 Quick Install Guide for p2p Bluestork Cameras (iMAC) The camera’s start-up : 1) Screw the WIFI antenna to the back of the camera . 2) Plug the power supply on the mains and on the camera. 3) Plug the camera on your BOX or on yourADSL router thanks to the Ethernet RJ-45 network cable provided.
- Page 146 Quick Install Guide for p2p Bluestork Cameras (iMAC) Software setup: The installation steps described below are for the software compatible with MAC. 1) Insert the CD in the CD drive of your PC, and launch the program called « BlueView P2P Mac».
- Page 147 Quick Install Guide for p2p Bluestork Cameras (iMAC) 4) On the top right, the « LAN » tab is highlighted in blue. The camera BS000007 is online. 5) Click on it, its image will appear in the first quarter of screen on the top left :...
- Page 148 Quick Install Guide for p2p Bluestork Cameras (iMAC) 6) Right click on the camera and select « Set Wi-Fi connection » (as it appears on the English version of the software).
- Page 149 Quick Install Guide for p2p Bluestork Cameras (iMAC) 7) The following screen appears:...
- Page 150 Quick Install Guide for p2p Bluestork Cameras (iMAC) 8) Click on the top right on the « WIFI » tab. The following screen appears. Click on « SCAN » and in the window « Name of networks (SSID), select the WiFi name of...
- Page 151 Quick Install Guide for p2p Bluestork Cameras (iMAC) Enter the WEP key or WIFI password in the window « PASSWORD » Click on « OK » to validate the configuration. Your camera is now installed on WIFI. You can unplug the RJ-45 Ethernet cable from your camera.
- Page 152 Quick Install Guide for p2p Bluestork Cameras (iMAC) Connect to a group of cameras: If you have several cameras and you want to access the group of all your cameras with one single login you can create an account on the server: 2) Create a login and a password ;...
- Page 153 Quick Install Guide for p2p Bluestork Cameras (iMAC) 5) The following screen appears :...
- Page 154 Quick Install Guide for p2p Bluestork Cameras (iPhone, iPad, Android) Installation of an iPhone, iPad or Android app: • Go on the App Store or on Google Play and download the “BlueView” application. • Open the application installed on your home screen.
- Page 155 Quick Install Guide for p2p Bluestork Cameras (iPhone, iPad, Android) The following screen appears :...
- Page 156 Quick Install Guide for p2p Bluestork Cameras (iPhone, iPad, Android) Once the application installed, press « Scan» or on the button and scan the QRcode or flashcode present on the label under the camera.
- Page 157 Quick Install Guide for p2p Bluestork Cameras (iPhone, iPad, Android) The following screen appears : Click on «Connexion»...
- Page 158 Quick Install Guide for p2p Bluestork Cameras (iPhone, iPad, Android) The following screen appears : BS000013 Your camera is then installed in 3G, 4G and is functional.
- Page 159 Quick Install Guide for p2p Bluestork Cameras (iPhone, iPad, Android) Click on the picture to view it in a bigger size: Click on «Connexion»...
- Page 160 Quick Install Guide for p2p Bluestork Cameras (iPhone, iPad, Android) If the smartphone or the tablet are in horizontal position, the picture in full screen : Your camera is then installed in 3G, 4G and is functional.
-
Page 161: Declaration Of Conformity
DECLARATION OF CONFORMITY We, the manufacture/ Importer, BLUESTORK INDUSTRY, 300 Rue du Président Salvador Allende, 92700 Colombes, France Declare that the products: - Kind of product:IP Camera - Brand name: BLUESTORK -Model : BS-CAM/DESK BS-CAM/R BS-CAM/DOME BS-CAM-OF BS-CAM-OR -EAN : 3760162058765 3760162059069 3760162058734... - Page 162 The declaration of conformity procedure, defined in the article n°10, and in the paragraph (IV) of the 1999/5/EC regulation, has been done under the control of the following organization : CE ( 0700) Technical documentation held by : Bluestork INDUSTRY France Available on request. Eric RAMPI The 13th of January 2014 Colombes, France 300 Rue du Président Salvador Allende –...
- Page 163 You have a complete help in the software to show you all the possibilities of your cameras. We wish you a good use of the Bluestork Cloud Cameras To contact the customer support (in French) in case of a question regarding...
Need help?
Do you have a question about the P2P and is the answer not in the manual?
Questions and answers