Table of Contents
Advertisement
Available languages
Available languages
Advertisement
Table of Contents

Subscribe to Our Youtube Channel
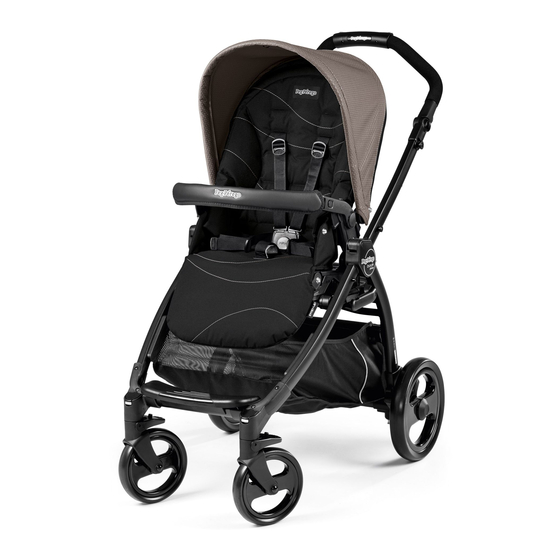
Related Manuals for Peg-Perego Book plus series


Summary of Contents for Peg-Perego Book plus series
- Page 1 U.S.A./CANADA EN Instructions for use ES Instrucciones de uso FR Notice d’emploi...
- Page 12 Reversible seat 1 ITSWCONANF 6 SPST6975DB 9 BSAPSS• 2 ASPI0145NF SPST6975SB 10 BCOPSS• 3 ASPI0136NFGL 7 SAPI7205NFGRPEG 11 MUCI5P22N 4 BCAPSS• 8 SPST7071DNF 12 ERSBSW00-RE01M 5 IRBELV0007 SPST7071SNF Book Plus chassis 1 SPST7372DGR SPST7372SGR 2 SPST7302N SPST7302KN 3 SPST7357NPEG 4 SPST6232KN 5 SAPI7255N 6 SPST7255N 7 ARPI0693L32NGR...
- Page 13 EN_English PROCEDURES SHOULD BE PERFORMED BY AN ADULT. _ DO NOT LIFT THE STROLLER BY Thank you for choosing a Peg-Pérego product. GRIPPING THE FRONT BAR. THE WARNING FRONT BAR IS NOT DESIGNED TO WITH STAND LOADS. _ ENSURE THAT THE STROLLER IS _ READ THE INSTRUCTIONS CAREFULLY OPENED CORRECTLY AND LOCKED IN BEFORE USE AND KEEP THEM FOR POSITION OF USE. FUTURE REFERENCE. _ CHECK TO MAKE SURE THAT THE FAILURE TO FOLLOW THESE WARNINGS CAR SEAT OR THE BABY CARRIAGE AND INSTRUCTIONS COULD RESULT IN IS CORRECTLY FASTENED TO THE SERIOUS INJURY OR DEATH. STROLLER (WHERE APPLICABLE).
- Page 14 ensure it engages securely onto the base. bar, put the caps back in the armrests. 2 FITTING THE WHEELS: Slot the uprights into the 1 1 BACKREST: to recline the backrest lift the lever rear wheel crosspiece (fig_a), ensuring that it is (fig_a) and choose one of the 4 positions (fig_b). facing the right way, then push the rear wheels on 1 2 FOOTREST: to lower the footrest push the two and make sure that they click into place (fig_b). levers downwards and then push the footrest 3 FITTING THE BASKET: if lowered, lift the basket downwards (fig_a); to raise the footrest lift it tube to the horizontal position. Press the silver upwards (fig_b). buttons under the metal basket tube located at 1 3 FIVE POINT SAFETY HARNESS: To fasten it, the back of the stroller (fig_a) and remove the push the two waist strap buckles (with the metal tube (fig_b). Thread the tube through the shoulder straps attached – arrow_a) into fabric loop on the back of the basket, making sure the leg divider until they click into place that the two silver buttons are facing downward (arrow_b). To unfasten it, press the round (fig_c). Re-attach the tube to the housings (fig_d). button in the centre of the buckle (arrow_c) 4 Secure the two upper basket vinyl eyelets to and pull the waist straps out (arrow_d). the two grey buttons on either side of the metal 1 4 To tighten the waist strap, pull on both sides tube housing. Please note that the eyelets open in the direction of the arrow (arrow_a). To (fig_e). Remove the cardboard from the lower loosen it, move it in the opposite direction.
- Page 15 outer sides towards the inside (fig_a) and fix be found on the Book Plus chassis. in place with the fastener (fig_b). _ The product name, production date and serial 2 2 FOLDING UP: The chassis can be folded up number of the chassis. without the seat, with the seat facing the person 2 9 Reversible seat reports information as at the pushing (recline the backrest before folding date of manufacture of the product. it) or with the seat facing forward. To fold the _ Product name, date of manufacture and serial stroller, it is best to set the front wheels to their number of the seat (fig_a) and of the carriage fixed position and close the hood (if fitted). (fig_b). Position the handlebar as shown in fig_a. Pull This information is required for any complaints. the inner handle on the base (fig_b), keep CLEANING AND MAINTENANCE hold of it, lift it (fig_c) and swing the handlebar forward until the chassis is folded. PRODUCT MAINTENANCE: protect from the 2 3 To ensure the frame is closed properly, check weather: water, rain, or snow; prolonged and that the side fastener is enabled (fig_d). When continuous exposure to bright sunlight may closed, the frame remains in the upright give rise to colour changes of various different position (fig_e). If necessary, it can be made materials; store this product in a dry place. even more compact by removing the rear CLEANING THE CHASSIS: periodically clean all wheels. Pull the pin out and remove the wheel, plastic parts with a damp cloth. Do not use as in fig_f. To remove the front wheels: press the...
- Page 16 ES_Español UN CINTURÓN DE SEGURIDAD DE 5 PUNTOS COMPLETO. ADVERTENCIA: Le agradecemos haber elegido un producto Peg-Pérego. NO DEJAR NUNCA AL NIÑO SIN ADVERTENCIA VIGILANCIA. _ USAR SIEMPRE TODOS LOS DISPOSITIVOS DE BLOQUEO CADA _ LEER ESTAS INSTRUCCIONES VEZ QUE LA SILLA DE PASEO NO ESTÉ DETENIDAMENTE Y CONSERVARLAS EN MOVIMIENTO. EN SU LUGAR DURANTE TODA _ PARA EVITAR LESIONES GRAVES, LA VIDA ÚTIL DEL PRODUCTO. ASEGURARSE DE QUE EL NIÑO NO EL INCUMPLIMIENTO DE ESTAS PUEDA MOVERSE PELIGROSAMENTE ADVERTENCIAS E INSTRUCCIONES MIENTRAS SE REGULA EL PRODUCTO. PODRÍA OCASIONAR LESIONES _ TODAS LAS OPERACIONES DE GRAVES O LA MUERTE.
- Page 17 _ Book Plus carrito: cestita; 2 ruedas traseras para bloquear el chasis y alzarlarla para con engranaje freno, barra ruedas traseras y desbloquearlo. portabebidas. 7 MANILLAR REGULABLE: para regular la altura _ Asiento reversible: capota, cubrepiés y del manillar, presionar simultáneamente los protector de lluvia. botones laterales (fig_a) y girar el manillar en la posición deseada (fig_b). Soltar los INSTRUCCIONES DE USO botones. 8 ENGANCHE DEL ASIENTO AL CARRITO: el 1 APERTURA: Antes de abrir el bastidor, quitar asiento reversible puede engancharse al todos los cartones troquelados, si los hay, sin carrito mirando hacia atrás o hacia delante utilizar cuchillas. (fig_a); colocarlo centrado sobre el carrito y ATENCIÓN: _ NO TIRE NI FUERCE EL GANCHO DE CIERRE MÁS empujar hacia abajo con ambas manos hasta ALLÁ DE SU FINAL DE CARRERA. escuchar el doble clic de enganche. Para _ NO UTILICE EL GANCHO DE CIERRE COMO comprobar el enganche correcto, sujetar el...
- Page 18 tirantes del saco (flecha_c) y páselos por la rueda como en la figura (fig_f ). Para extraer ranura más adecuada (flecha_d), finalmente las ruedas delanteras: presionar la lengüeta vuelva a enganchar las dos hebillas detrás del como en la figura y extraer la rueda (Fig_g). respaldo (flecha_e). Un clic determina que se 2 4 CÓMO QUITAR LA CAPOTA: desenroscar han enganchado correctamente las hebillas con un destornillador el tornillo interno (fig_f). de la capota (fig_a), desabotonarla de 1 6 CAPOTA: ATENCIÓN: Asegurarse de que los la parte posterior del respaldo (fig_b) y botones estén cerrados en la parte posterior desengancharla de la silla como en la figura del respaldo; en caso contrario, abotonar (fig_c). (fig_a). Para levantar la capota: tirar de la 2 5 DESMONTAJE: quitar el forro del estribo capota; para cerrar la capota: empujarla (fig_a), desenganchar de los brazos los hacia atrás. Será posible transformar la acoples del forro (fig_b), soltar los dos capota en parasol sólo cuando el respaldo botones de los laterales del respaldo (fig_c), no esté totalmente reclinado; para ello, desatornillar la correa de ambos lados abrir la cremallera con doble cursor (fig_b) (fig_d), quitar las correas y, por último, quitar y desabotonarla de la parte posterior del la correa para la entrepierna hacia arriba respaldo. La capota está dotada de un ojal...
- Page 19 FR_Français causar cambios de color de muchos materiales. Conservar este producto en un lugar seco. LIMPIEZA DEL CHASIS: Limpiar periódicamente las Merci d’avoir choisi un produit Peg-Pérego. partes de plástico con un paño húmedo sin usar solventes u otros productos similares. Mantener AVERTISSEMENT secas todas las partes de metal para prevenir la oxidación. Mantener limpias todas las partes LIRE ATTENTIVEMENT CES móviles (dispositivo de regulación, de enganche, INSTRUCTIONS ET LES CONSERVER ruedas...) quitando el polvo o la arena y, en caso necessario, engrasarlas con aceites ligeros. DANS LE LOGEMENT PRÉVU À LIMPIEZA DEL PROTECTOR DE LLUVIA: lavar CET EFFET PENDANT TOUTE LA con una esponja con agua y jabón, sin usar DURÉE DE VIE DU PRODUIT LE NON detergentes. RESPECT DE CES AVERTISSEMENTS LIMPIEZA DE LAS PARTES DE TEJIDO: cepillar ET INSTRUCTIONS PEUT ENTRAÎNER...
- Page 20 COMPLÈTE. porte-boisson. AVERTISSEMENT: _ Siège réversible: capote, tablier, habillage pluie. NE JAMAIS LAISSER L’ENFANT SANS INSTRUCTIONS D’UTILISATION SURVEILLANCE. _ TOUJOURS ACTIONNER LES FREINS 1 OUVERTURE : Avant d'ouvrir le châssis, le cas LORSQUE LE PRODUIT EST A L’ARRET. échéant, retirer (sans utiliser de lames) tous _ POUR ÉVITER DE GRAVES BLESSURES les éléments en carton. ATTENTION : LORS DU RÉGLAGE DU PRODUIT, _ NE PAS TIRER OU FORCER LE CROCHET DE FERMETURE S’ASSURER QUE LES MEMBRES DE AU-DELÀ DE LA FIN DE COURSE. L’ENFANT NE SONT PAS EN CONTACT _ NE PAS UTILISER LE CROCHET DE FERMETURE COMME POIGNÉE DE TRANSPORT OU POUR Y SUSPENDRE DES AVEC DES PIÈCES EN MOUVEMENT.
- Page 21 bloquer le châssis. Pour débloquer le châssis, les bretelles de la housse (flèche_c) et les procéder à l’opération inverse. enfiler dans la boutonnière la plus adaptée 7 POIGNÉE RÉGLABLE : pour régler la hauteur (flèche_d), enfin accrocher de nouveau les de la poignée, appuyer simultanément sur les deux clips derrière le dossier (flèche_e). boutons latéraux (fig_a) et tourner la poignée L’accrochage correct des clips est déterminé dans la position souhaitée (fig_b), puis par le déclic (fig_f). relâcher les boutons. 1 6 CAPOTE : ATTENTION Vérifier si les boutons 8 MONTAGE DU SIÈGE SUR LE CHÂSSIS : le siège sont bien boutonnés derrière le dossier, si ce réversible peut être accroché au châssis en n’est pas le cas, les boutonner (fig_a). Pour étant tourné vers maman ou vers la route soulever la capote : la tirer vers soi ; pour (fig_a) ; le positionner au centre du châssis et fermer la capote : la pousser vers l'arrière. La appuyer vers le bas des deux mains jusqu’au capote peut être transformée en ombrelle uniquement lorsque le dossier n’est déclic d’enclenchement. Pour s’assurer que le siège est correctement accroché, tirer le siège pas complètement incliné, en ouvrant la vers le haut en le tenant par la barre frontale. fermeture éclair avec double curseur (fig_b) 9 DÉCROCHAGE DU SIÈGE DU CHÂSSIS : et en la déboutonnant à l'arrière du dossier.
- Page 22 Tirer la languette vers l’extérieur et extraire agents atmosphériques (eau, pluie ou neige); la roue, comme indiqué sur la figure (fig_f). une exposition continue et prolongée au Pour extraire les roues avant : appuyez sur soleil pourrait entraîner un changement de la languette comme le montre la figure, et couleur de nombreux matériaux; ranger cet extraire la roue (fig_g). article dans un lieu sec. 2 4 ENLEVER LA CAPOTE : dévisser à l'aide NETTOYAGE DU CHÂSSIS: nettoyer d'un tournevis la vis située à l'intérieur de régulièrement les pièces en plastique à la capote (fig_a), la déboutonner derrière l’aide d’un linge humide; ne pas utiliser de le dossier (fig_b) et la décrocher du siège solvants ou autres produits similaires. Veiller comme le montre la figure (fig_c). à ce que toutes les pièces métalliques restent 2 5 ENLEVER LA HOUSSE : retirer la housse du sèches pour prévenir la formation de rouille. repose-pieds (fig_a), défaire les fixations de Maintenir le bon état de propreté de toutes la housse des accoudoirs (fig_b) et les deux les pièces mobiles (mécanismes de réglage, boutons des côtés du dossier (fig_c) ; dévisser mécanismes de fixation, roues, etc.) en ensuite la ceinture de part et d’autre (fig_d) et enlevant poussière ou sable; graisser avec enlever les sangles, puis retirer par le haut (en une huile légère si nécessaire. poussant par le dessous du siège) la sangle NETTOYAGE DE L’HABILLAGE PLUIE: utiliser d’entrejambes (fig_e). une éponge et de l’eau savonneuse; ne pas utiliser de détergents. SYSTÈME GANCIOMATIC NETTOYAGE DES ÉLÉMENTS EN TISSU: brosser les éléments en tissu pour enlever 2 6 Le Système Ganciomatic, pratique et rapide,...
- Page 23 - 23 -...
- Page 24 PEG PEREGO S.p.A. VIA DE GASPERI 50 20862 ARCORE MB ITALIA tel. 0039 039 60881 fax 0039 039 615869/616454 Servizio Post Vendita - After Sale: tel. 0039 039 6088213 fax: 0039 039 3309992 Conforms to ASTM F833 PEG PEREGO U.S.A. Inc. Safety Standards 3625 INDEPENDENCE DRIVE FORT WAYNE INDIANA 46808 phone 260 482 8191 fax 260 484 2940 Call us toll free: 1 800 671 1701 PEG PEREGO CANADA Inc. 585 GRANITE COURT PICKERING ONTARIO CANADA L1W3K1 phone 905 839 3371 fax 905 839 9542 Call us toll free: 1 800 661 5050 www.pegperego.com WARNING AVOID SERIOUS INJURY FROM FALLING OR SLIDING OUT.
Need help?
Do you have a question about the Book plus series and is the answer not in the manual?
Questions and answers