Table of Contents
Advertisement
Instruction Manual
for model
FLOWMAX - 170
Condensing water heater
174,000 BTU
WARNING
If the information in these instructions is not followed exactly, a fire or explosion may result, causing property damage, personal injury or death.
-Do not store or use gasoline or other flammable vapours and liquids in the vicinity of this or any other appliance.
-WHAT TO DO IF YOU SMELL GAS
●Do not try to light any appliance.
●Do not touch any electrical switch; do not use any phone in your building.
●Immediately call your gas supplier from a neighbour's phone. Follow the gas supplier's instructions.
●If you cannot reach your gas supplier, call the fire department.
-Installation and service must be performed by a qualified installer, service agency or the gas supplier.
Installation, operating, commissioning and maintenance instructions.
Water heaters for other than recreational vehicle installation
Advertisement
Table of Contents

Summary of Contents for FLOWMAX 170
-
Page 1: Instruction Manual
Instruction Manual for model FLOWMAX - 170 Condensing water heater 174,000 BTU WARNING If the information in these instructions is not followed exactly, a fire or explosion may result, causing property damage, personal injury or death. -Do not store or use gasoline or other flammable vapours and liquids in the vicinity of this or any other appliance. -
Page 3: Table Of Contents
CONTENTS Pages 1. General information 1.1 General warnings 1.2 Product conformity 2. Technical characteristics 2.1 Technical data 2.2 Dimensions 2.3 Internal parts of the water heater 2.4 Water circuit 2.5 Circulation pump head/flow graph 2.6 Printed circuit board – Technical characteristics 2.7 Control panel 3. - Page 4 CONTENTS Pages 6. Maintenance (authorized personnel) 6.1 General warnings 6.2 Maintenance 6.3 Water heater inspection 6.4 Accessing the water heater 6.5 Flushing out the primary side 6.6 Draining the central heating and domestic hot water system 6.7 Maintenance operations 6.8 Wiring diagrams 6.9 D.H.W Sensor Connection 6.10 Troubleshooting 6.11 Diagnostics...
-
Page 5: General Information
The appliance should be located in an area where leakage within the unit or at its connections will not result in damage to the area adjacent to the appliance or to lower floors of the structure. FLOWMAX will not be responsible for any damage resulting from leaking if adequate drainage is not provided. - Page 6 Check the Rating Plate FLOWMAX units come from the factory configured for use with natural gas. Prior to installation, check the rating plate of the water heater to ensure the unit matches gas type, gas pressure, water pressure and electrical supply.
- Page 7 GENERAL INFORMATION The “operating instructions” chapter of this manual must be read carefully as it provides information on the operation and the operating limits of the appliance. • After the removal of all the packaging, check that the appliance has not been damaged. In case of doubt, do not attempt to use the product but refer to the supplier.
- Page 8 Many jurisdictions require the installation of carbon monoxide detectors in building where a side wall vented fuel burning appliance is installed. Installers must abide by local code requirements regarding the installation of CO detectors. The use of a certified carbon monoxide detector is recommended but not required by FLOWMAX. “In the State of Massachusetts only”...
- Page 9 GENERAL INFORMATION...
- Page 10 GENERAL INFORMATION...
- Page 11 GENERAL INFORMATION...
- Page 12 GENERAL INFORMATION...
-
Page 13: Product Conformity
GENERAL INFORMATION 1.2 Product conformity All FLOWMAX water heaters are ETL certified and possess technical and functional characteristics that comply with the following standards: Gas fired water heaters also comply with the following directives: American National Standard/CSA Standard for Gas Water Heaters Volume III, Storage Water Heaters with input Ratings above 75,000 Btu per Hour, Circulating and Instantaneous. -
Page 14: Technical Characteristics
TECHNICAL CHARACTERISTCS 2. TECHNICAL CHARACTERISTICS 2.1 Technical data Model FLOWMAX 170 kW - BTU/hr 51 - 174019 Heat Input max Heat Input min kW - BTU/hr 12 – 40946 Heat Output max - 122/86°F kW - BTU/hr 54.5 – 185859 Heat Output max - 167/140°F... -
Page 15: Dimensions
TECHNICAL CHARACTERISTCS 2.2 Dimensions 18.5 LEGEND HEATING INTAKE Ø 3/4 " Ø 3/4 " HEATING OUTLET Ø 3/4 " Ø 1/2 COLD WATER INLET " Ø 3/4 HOT WATER OUTLET " CONDENSATE DRAIN Ø 0.98 in 19.3... -
Page 16: Internal Parts Of The Water Heater
SAFETY THERMOFUSE HEATING SENSOR HEATING SAFETY THERMOSTAT IONIZATION ELECTRODE EXPANSION TANK IGNITION TRANSFORMER FLOWMAX BURNER UNIT (GAS MANIFOLD + BURNER) AUTOMATIC AIR VENT VALVE 10. FAN 11. PUMP 12. CONDENSATE TRAP 13. AIR VENT VALVE 1/4 14. SAFETY VALVE 3/4 15. -
Page 17: Water Circuit
2.4 Water circuit LEGEND SAFETY THERMOFUSE AIR PRESSURE SWITCH HEATING SAFETY THERMOSTAT HEATING SENSOR LEGEND FLOWMAX BURNER UNIT (GAS MANIFOLD+BURNER) HEATING INTAKE PRIMARY CONDENSING HEAT EXCHANGER EXPANSION VESSEL HEATING OUTLET ELECTRONIC GAS VALVE 10. AUTOMATIC AIR VENT VALVE 11. PUMP COLD WATER INLET 12. -
Page 18: Circulation Pump Head/Flow Graph
TECHNICAL CHARACTERISTCS 2.5 Circulation pump head/flow graph Water flow (US gpm) Pump head I, II, III Pump speed Water heater losses... -
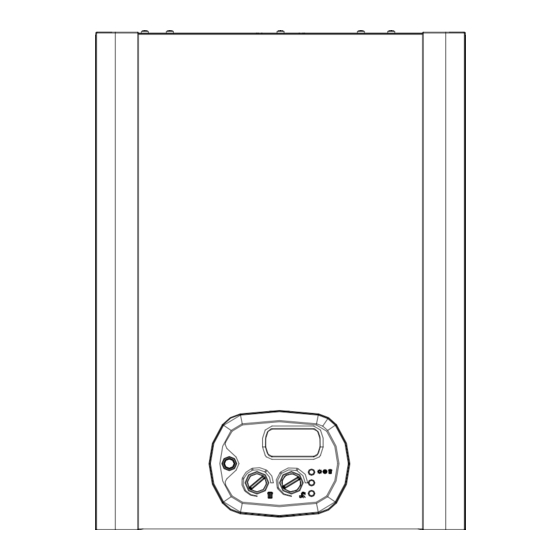
Page 19: Printed Circuit Board - Technical Characteristics
TECHNICAL CHARACTERISTCS ® 2.6 DIGITECH printed circuit board – SM 20021 Technical characteristics Adjustments possible by service personnel only • Standard (86-167°F) / reduced (77-104°F) central heating temperature • Water hammer prevention function • Central Heating timer - (adjustable from 0 to 7,5 minutes) •... -
Page 20: Installation (Authorized Personnel)
INSTALLATION INSTRUCTIONS 3. INSTALLATION (authorized personnel) 3.1 Reference standard Install in accordance with CEC and NEC. All wiring shall conform to CEC , NEC and local building and electrical codes. This appliance meets the requirements of: American National Standard/CSA Standard for Gas Water Heaters Volume III, Storage Water Heaters with input Ratings above 75,000 Btu per Hour, Circulating and Instantaneous. -
Page 21: Unpacking
INSTALLATION INSTRUCTIONS 3.2 Unpacking ■ The materials (cardboard) used for packing the appliance are fully recyclable. ■ It is recommended that the packing material is only removed prior to installing the water heater. The manufacturer will not be held responsible for damage caused by incorrect storage of the product. ■... -
Page 22: Installation Water Heater
In order to allow access to the interior of MINIMUM DISTANCE [INCHES] water heater maintenance Model purposes, it is important that the minimum FLOWMAX-170 distances indicated in figure 2 are respected To make the installation easier, the water heater is supplied with a Fig. 2... -
Page 23: Fixing The Water Heater
INSTALLATION INSTRUCTIONS 3.4 Fixing the water heater to wall Instructions as follows: 1) Fix the external part of mounting bracket to wall using proper screw anchors. 2) Insert the inner guide of mounting bracket 3) Hang the water heater onto the opposite hooks. -
Page 24: Water Connections
INSTALLATION INSTRUCTIONS 3.5 Water connections In order to safeguard the heat exchanger and circulation pump, especially in case water heater replacement, recommended that the system is hot- flushed remove impurities (especially oil and grease) from the pipes and radiators. Make sure that the domestic water and central heating pipes are not used to ground the electrical system. -
Page 25: Domestic Hot Water Circuit/Hard Water Warning/ Condensate Drain
Damage to the water heater as a result of water in excess of 14.5 gpg (250mg/L) of hardness is not covered by FLOWMAX Limited warranty. If there a problem with the water quality, contact your local water conditioning company for equipment to condition the water supply to this appliance The cold water supply pressure at the inlet to the water heater must be between 7.25 psi (0.5 bar) and 87 psi... - Page 26 INSTALLATION INSTRUCTIONS ■ The condensate pump must be installed with an overflow safety switch that detects downstream clogs and shuts off the water heater before flooding occurs. See condensate pump manufacture for installation instructions. ■ Be sure to check that condensate is freely flowing from the drain piping after the system has been installed. Condensate will begin flowing out of the water heater within 15 minutes after operation has started.
-
Page 27: Schematic Of Piping Installation
INSTALLATION INSTRUCTIONS 3.6 Schematic of Piping Installation... - Page 28 INSTALLATION INSTRUCTIONS...
-
Page 29: Gas Connection
Until pressure testing of the main gas supply line is completed, ensure the gas line to the FLOWMAX Combination Water Heater is disconnected to avoid any damage to the water heater. -
Page 30: Electrical Connections
If the local jurisdiction requires the unit to be wired directly, remove and discard the factory installed plug. An ON/OFF switch controlling the main power between the breaker and the FLOWMAX Water Heater should be provided to facilitate end-user maintenance and servicing. This should be done by a qualified electrician. - Page 31 INSTALLATION INSTRUCTIONS ■ The power supply cable must be replaced by a qualified electrician. If the cable is damaged in any way, switch off the appliance and have the cable replaced by a suitably qualified electrician; When using an electrical appliance, a few fundamental rules must be observed: •...
- Page 32 INSTALLATION INSTRUCTIONS Remote control connection Connect the power supply to the terminal board inside the control panel as follows: a. Switch off the power supply at the main switch. b. Remove the front case panel of the water heater. c. Slacken the screws and remove plate A (see fig. 1). d.
-
Page 33: Venting Connections
All FLOWMAX Combination Water Heaters are prepared at the factory to be direct vent (sealed combustion) units which draw all of their required combustible air directly from outside the building. • All FLOWMAX Combination Water Heaters use 2” or 3” diameter exhaust and 2” or 3” diameter air intake pipe. •... - Page 34 • Solid PVC schedule 40 PVC or ULC S636 pipe and fittings and ABS pipe and fittings can be used for combustion air intake on FLOWMAX products. • Transition cement must be used for the ABS pipe connected to the PVC appliance adaptors.
- Page 35 INSTALLATION INSTRUCTIONS...
- Page 36 INSTALLATION INSTRUCTIONS...
- Page 37 INSTALLATION INSTRUCTIONS...
- Page 38 INSTALLATION INSTRUCTIONS...
- Page 39 INSTALLATION INSTRUCTIONS...
-
Page 40: Commissioning The Appliance (Authorized Personnel)
INSTALLATION INSTRUCTIONS 4. COMMISSIONING THE APPLIANCE 4.1 General warnings The following operations must be carried out by professionally qualified personnel, registered in accordance with current legislation. The water heater leaves the factory pre-set and tested for burning either natural Gas or LPG. Nevertheless, when starting the water heater for the first time, make sure that the information on the rating plate corresponds to the type of gas being supplied to the water heater. -
Page 41: Filling The System
INSTALLATION INSTRUCTIONS 4.2 Filling the system Check the properties of the water supply and install the appropriate treatment devices if the mains water has a AIR VENT VALVE hardness rating more than 14.5 gpg (250 mg/L) i order to prevent scaling and eventual damage to the D.H.W AIR VENT VALVE PLUG heat exchanger. -
Page 42: Flushing The System
INSTALLATION INSTRUCTIONS 4.3 Flushing the system Failure to flush and add inhibitor to the system will invalidate the appliance operation. All systems must be thoroughly drained and flushed out using additives – corrosion inhibitors and flushing agents/descalers. All flushing must be done for new and retrofit installs. Warning: Failure to clean the system and add adequate inhibitor invalidates the warranty To flush out the primary side of this unit: a. -
Page 43: Starting Up The Water Heater
INSTALLATION INSTRUCTIONS 4.5 Starting up the water heater Once the system has been filled, proceed as follows: Table n°1 • Check that the exhaust flue is free Gas type obstructions correctly connected to the water heater; Natural Gas - G20 •... -
Page 44: Parameters Table
D.H.W pump overrun timer 00-90 (default = 18) Expressed in steps of 5 sec (factory set at 18 x 5 = 90”) Not applicable for FLOWMAX water Minimum gas pressure setting heaters Minimum central heating output Not applicable for FLOWMAX water... -
Page 45: Setting The Parameters
REGULATION INSTRUCTIONS 5.2 Setting the parameters To modify the preset values of the parameters reported in the previous table, open the parameter settings menu as follows: 1. Place the On/Off switch in the OFF O FF position. 120V 60Hz 2. Activate the On/Off switch while keeping P 00 buttons ‘+’... - Page 46 REGULATION INSTRUCTIONS To enter the parameters menu, follow the previously described procedure (steps 1-5). 1 – T ARAMETER YPE OF WATER HEATER 6. Use buttons ‘+’ and ‘-‘ to modify the value of the 120V 60Hz parameter: 00 = Instantaneous water heater 01 = Storage water heater 02 = Storage water heater ‘comfort’...
- Page 47 REGULATION INSTRUCTIONS 4 – C ARAMETER ENTRAL HEATING PUMP 6. Use buttons ‘+’ and ‘-‘ to modify the value of the parameter: 120V 60Hz 00 = standard (3” overrun) 01 = permanent (always running) 7. Press and release button ‘S’ to confirm. The parameter number (4) will appear on the display.
- Page 48 . 9 – M ARAMETER NO INIMUM GAS PRESSURE SETTING Not applicable for FLOWMAX burner (only for atmospheric burner) .10 – M ARAMETER NO INIMUM CENTRAL HEATING OUTPUT SETTING Not applicable for FLOWMAX burner (only for atmospheric burner) .11 –...
- Page 49 02 = water heater with FLOWMAX - 120; 7. Press and release button ‘S’ to confirm. The parameter number (14) 03 = water heater with FLOWMAX - 170; will appear on the display. 8. Switch off the appliance and switch it back on again to render the...
- Page 50 REGULATION INSTRUCTIONS 17 – M ARAMETER INIMUM PEED ETTING 6. Use buttons ‘+’ o ‘-’ to modify the value of the parameter between: min = 33 Hz ; max = value of parameter 18 The default value is : 120V 60Hz - 60 Hz for Natural Gas;...
- Page 51 REGULATION INSTRUCTIONS 21 – I ARAMETER GNITION EQUENCE ETTING 1 1 0 6. Use buttons ‘+’ o ‘-’ to modify the value of the 120V 60Hz parameter between: min = value of parameter 17; max = value of parameter 18. The default value is: 7.
-
Page 52: Gas Data
REGULATION INSTRUCTIONS 5.3 Gas data Technical data tables Table no.1 - CO Values Gas type Natural gas - G20 Liquid Propane Gas - G 31 Table no.2 - Frequency Gas type Minimum (Hz) Maximum (Hz) Natural gas - G20 Liquid Propane Gas - G 31 LIQUID PROPANE GAS Table no.3 - Gas data table NATURAL GAS G20... -
Page 53: Regulating The Gas Valve Offset
MAINTENANCE INSTRUCTIONS 5.4 Regulating the gas valve offset When replacing the gas valve, it is necessary to regulate the offset on the new gas valve to guarantee a correct operation of the water heater. Instructions as follows: Fig. 1 – Disconnect the silicon pipe from its connection onto the venturi air intake point. -
Page 54: Maintenance (Authorized Personnel)
Clean the burner cylinder using a non-metal brush and without damaging the ceramic fibre. Clean the heat exchanger using a recommended detergent from FLOWMAX Technologies for the stainless steel. Do not wet the ceramic fibre coating. - Page 55 MAINTENANCE INSTRUCTIONS ■ Remove and clean any oxidation from the burner. ■ Check that the seal of the room-sealed chamber is undamaged and positioned correctly. ■ Check the primary heat exchanger and clean if necessary. ■ Check the maximum and minimum modulation pressures and the modulation itself. ■...
-
Page 56: Accessing The Water Heater
MAINTENANCE INSTRUCTIONS 6.4 Accessing the water heater All maintenance operations require one or more of the water heater casing panels to be removed. The side panels can only be removed after the front panel has been removed. Front panel: Remove the fixing screws at the lower edge of the front panel. -
Page 57: Draining The Central Heating And Domestic Hot Water System
MAINTENANCE INSTRUCTIONS 6.6 Draining the central heating system If the need arises to drain the system, this can be done as follows: • Switch the system to “WINTER” mode and ignite the water heater. • Switch off the power supply to the water heater. •... -
Page 58: Maintenance Operations
ALWAYS turn off ELECTRICITY, WATER and supplies to the water heater. FLOWMAX will not be held responsible for damage to any of the water heater’s components caused by non-compliance with this instruction. For all maintenance operations requiring removal of the water heater casing, refer to the procedures described in paragraph 6.3 “Accessing the... - Page 59 MAINTENANCE INSTRUCTIONS Cleaning the D.H.W heat exchanger (see fig. 1) D.H.W heat • Close the shut-off valve and drain the domestic hot fixing exchanger bracket water circuit and central heating circuit of the water heater; • Disconnect the joints securing the heat exchanger to the pipes;...
- Page 60 MAINTENANCE INSTRUCTIONS Safety thermostat (see fig. 1) • Disconnect the connecting wire; • Unscrew fixing screws remove thermostat; • Replace the thermostat and re-assemble the components following the above procedure in heating reverse order; sensor • Switch on the electricity, water and gas supplies and restart the appliance.
- Page 61 MAINTENANCE INSTRUCTIONS Electric fan (see fig. 1) • Remove and dismantle the entire burner unit (see venturi “Cleaning the burner unit”). • Use an 8 mm wrench to unscrew the four nuts securing the electric fan to the gas manifold and then remove the electric fan, noting the positions of the washer.
- Page 62 MAINTENANCE INSTRUCTIONS Diverter valve (see fig. 1) Replacing the motor • Unscrew the fixing screws securing the transparent cover of the diverter valve and remove the cover; • Unscrew the two motor fixing screws and disconnect the wires; • Replace the motor and re-assemble the components following the above procedure in reverse order;...
- Page 63 MAINTENANCE INSTRUCTIONS Primary heat exchanger (see fig. 1) • Close the shut-off valves and drain the central primary heat flue connection exchanger chamber heating circuit of the water heater; • Switch off the power and gas supply to the water heater;...
-
Page 64: Wiring Diagrams
INSTALLATION INSTRUCTIONS 6.8 Wiring diagrams PRINTED CIRCUIT BOARD KOND DT - SK11003 COD. 76702LA PRINTED CIRCUIT BOARD DIGITECH - SM20021 EXHAUST FAN type RG 128 IG: Main Switch PA: Air Pressure switch TS: Safety thermostat fusibile 2A brown TF: Thermo Fuse 216°F SR: Heating sensor light-blue SS: DHW sensor... - Page 65 INSTALLATION INSTRUCTIONS Connecting the room thermostat (Option) Connect the wires to the terminal board inside the instrument panel as follows: (Example with WEEK digital weekly chronostat): a. switch off the power supply at the main switch. b. remove the front case panel of the water heater. c.
- Page 66 INSTALLATION INSTRUCTIONS Connecting the remote controller the outside temperature sensor (option) Connect the wires to the terminal board inside the instrument panel as follows: a. switch off the power supply at the main Outside temperature switch. sensor (option) b. remove the front case panel of the water heater.
- Page 67 INSTALLATION INSTRUCTIONS Remote control and zone valves wiring For the installation of a zone valve p.c.b, it is necessary to access the main p.c.b for electrical connection (see 6.3 “Accessing the water heater”) and to activate the parameter no. 16 (see 5.1 “Parameters table”).
- Page 68 INSTALLATION INSTRUCTIONS Remote control, zone valves and telephone control wirings...
- Page 69 INSTALLATION INSTRUCTIONS Regulating the Flow temperature in accordance with the outdoor temperature The outdoor sensor has to be connected directly to circuit board SM 20021. The sensor can thus be managed in one of two ways: • In case of remote controller + outdoor temperature sensor installation, the climatic compensation curve is set by the remote itself (see remote control installation and operating manual).
-
Page 70: Sensor Connection
INSTALLATION INSTRUCTIONS 6.9 D.H.W. Sensor connection Fig. 1 PRINTED CIRCUIT BOARD CVI-M SM20021 HOT WATER SENSOR LEAD MAX. LENGHT 8 mt. REMOTE DHW CYLINDER FLOW FILLING LOOP REMOTE DHW CYLINDER RETURN... -
Page 71: Troubleshooting
INSTALLATION INSTRUCTIONS 6.10 Troubleshooting ERROR PROBLEM POSSIBLE CAUSE REMEDY CODE WITH NO IGNITION NO GAS. CHECK MAINS SUPPLY. IGNITION ELECTRODE BROKEN OR GROUNDED. REPLACE PART. GAS VALVE MALFUNCTION REPLACE PART MECHANICAL MINIMUM ADJUSTMENT (ON GAS REGULATE MECHANICAL VALVE) SET TOO LOW OR SLOW IGNITION MINIMUM OR SLOW IGNITION. -
Page 72: Diagnostics
INSTALLATION INSTRUCTIONS 6.11 Diagnostics ■ Error codes: Ionization Lock Out Safety Thermostat Tripped / Air Pressure Switch Tripped Flue Gas Thermofuse Tripped Low Water Pressure Alarm Heating Sensor Malfunction D.H.W Sensor Malfunction Electric Fan Malfunction Parameter Programming Request 120V 60Hz Flame Detection Malfunction Fan Speed P.C.B. - Page 73 FLOW CHART...
- Page 74 FLOW CHART...
- Page 75 FLOW CHART...
- Page 76 FLOW CHART...
- Page 77 FLOW CHART...
- Page 78 FLOW CHART...
- Page 79 FLOW CHART...
- Page 80 FLOW CHART...
- Page 81 FLOW CHART...
-
Page 82: Parts List
PARTS LIST 6.12 Parts List / Available from FLOWMAX Main components CODE DESCRIPTION 20094-LA CONDENSING EXCHANGER 20079LA PLATE EXCHANGER 40P. 24060LA PUMP STAR S 21 KU RSL-PL6 UL/CSA 25-00274 PUMP UPS 15-58 CACAO ETL MOLEX-PN98282128 25-00045 EXPANSION VESSEL 6 lt. – 1,58 gal 25-00274 SAFETY VALVE 3/4"M - 3/4"F 30 psi... -
Page 83: Warranty
FLOWMAX warrants that its combo water heaters are free from defects in materials and workmanship for one (1) year from the date of installation. If any parts are found to be defective in manufacture, FLOWMAX will provide replacement of such defective parts. - Page 84 The maximum liability of FLOWMAX in connection with this limited warranty shall not in any case exceed price of the part claimed to be defective, or price of the water heater if the entire water heater is claimed to be defective. “Incidental” damages include expenses of inspection, obtaining substitute goods, transportation, etc.
-
Page 85: Warranty Registration Form
Date of Purchase: Date of Startup: Purchased From: Installing Contractors Name: Address: City: Province: Postal Code: Phone No. Fax: Email Address: Signature: Date: To ensure your warranty protection, please complete and return this form to FLOWMAX Technologies Inc. Attention: Product Registration... -
Page 86: Warranty Parts Request Form
Warranty Registration Form E-mail: info@flowmaxtechnologies.com Website www@flowmaxtechnologies.com Please complete the following information and return it with the part request Date: Contractor / Distributor / Rental Provider Name: Address: Unit # City: Prov. Postal Code: Phone # Other # Email: Homeowner Name: Address: Unit # City:... - Page 87 FLOWMAX Technologies 209 Citation Drive, Units 5&6, Concord, Ontario, L4K 2Y8 Tel; 905-264-1414 Fax; 905-264-1147 E-mail: info@flowmaxtechnologies.com Web Site: www.flowmaxtechnologies.com...
Need help?
Do you have a question about the 170 and is the answer not in the manual?
Questions and answers