
Related Manuals for Mahlkönig Tanzania


Summary of Contents for Mahlkönig Tanzania
-
Page 1: Operating Instructions
L A D E N M Ü H L E N S H O P G R I N D E R Operating Instructions Tanzania ”Innovation & Design“ The professional art of grinding since 1924... - Page 2 L A D E N M Ü H L E N S H O P G R I N D E R Dear Customer, with the new „Tanzania“ you have purchased a grinder in the well-known MAHLKÖNIG quality. Over 80 years of experience in the production and development of grinders have helped us to develop a new product in the MAHLKÖNIG company.
-
Page 3: Table Of Contents
L A D E N M Ü H L E N S H O P G R I N D E R Contents 5 Positioning the machine 1. Introduction Installation site requirements Safety instructions Scope of the documentation 6 Installing the machine Defi... - Page 4 L A D E N M Ü H L E N S H O P G R I N D E R 9.2.1.2 Removing the grinding disc in the stationary fl ange, with- out screws Maintenance work on the mains power supply 10 Protection devices / Faults 10.1 Protection devices...
-
Page 5: Introduction
L A D E N M Ü H L E N S H O P G R I N D E R 1. Introduction • Use only original spare parts when repairing the machine. Using spare 1.1 Safety instructions parts from other manufacturers may impair the serviceability of the The Operating Instructions must be kept permanently at the location machine. -
Page 6: Defi Nition Of The Terms Used
L A D E N M Ü H L E N S H O P G R I N D E R 1.3 Defi nition of the terms used 1.4 Copyright In these Operating Instructions, the following terms are used to defi ne These Operating Instructions must be treated in confi... -
Page 7: General Safety Instructions
L A D E N M Ü H L E N S H O P G R I N D E R NOTICE • The machine may only be operated if all safety and protection devices are fi tted and are functioning without defects. NOTICE indicates a property damage message. -
Page 8: Electrical Power
L A D E N M Ü H L E N S H O P G R I N D E R 2.3 Electrical power NOTICE Only coffee beans may be loaded into the bean hopper. Do not put oth- Never touch parts that are exposed to electrical volt- er objects or liquids into the bean hopper, since this will damage the age. -
Page 9: Description Of The Machine
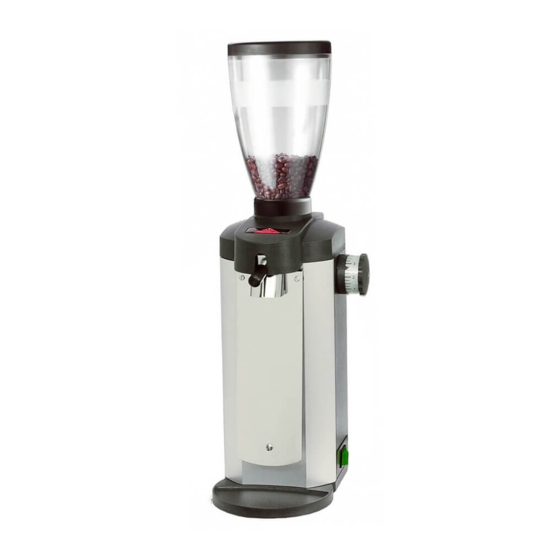
L A D E N M Ü H L E N S H O P G R I N D E R 3 Description of the machine 3.1 Function principle The Coffee Grinder is intended for grinding various types of coffee. An adjusting knob with scale is used to continuously set the fi... -
Page 10: Technical Data
The power supply ratings depend on the customer’s mains power sup- ply. Please note the nominal ratings on the nameplate fi xed to the rear of the machine. Description Tanzania Voltage/Frequenzy 220-230V / 50/60Hz Please see chapter 12 “Electrical wiring diagrams” for the electrical wir- ing diagrams. -
Page 11: Positioning The Machine
L A D E N M Ü H L E N S H O P G R I N D E R 6 Installing the machine 3. If you discover transport damage, notify both the transport and dis- Remove any adhesive tapes and remaining packaging. patching companies immediately. -
Page 12: Electrical Installation
L A D E N M Ü H L E N S H O P G R I N D E R 6.3 Electrical installation • Have all the cladding and covers been fi tted? NOTICE • Has the bean hopper been attached correctly to the Coffee Grinder? Before connecting the machine to the mains, check whether the local •... -
Page 13: Calibrating The Machine
L A D E N M Ü H L E N S H O P G R I N D E R NOTICE 8. Keep hold of the bag, raise the clamping lever to the limit stop and release it. The lever returns to its initial position, thus ensuring that Only whole coffee beans may be loaded into the spout is emptied correctly. -
Page 14: Maintenance
L A D E N M Ü H L E N S H O P G R I N D E R 9 Maintenance Careful and regular maintenance will ensure that your machine gives trouble-free service. This covers all the tasks which keep a functioning machine in good working order: •... -
Page 15: Removing / Replacing The Hopper
L A D E N M Ü H L E N S H O P G R I N D E R 9.1 Cleaning NOTICE Do not use compressed air to blow off material from the machine and do not spray with steam or water! This could short-circuit and thus dam- HINT age the machine. -
Page 16: Cleaning The Grinding Mechanism
L A D E N M Ü H L E N S H O P G R I N D E R 4. Use a (size 4) screwdriver to unscrew the 3 screws (2). 5. Remove the stationary disc fl ange (3) including the spout from the machine. -
Page 17: Cleaning The Collecting Tray
L A D E N M Ü H L E N S H O P G R I N D E R HINT HINT If the grinding mechanism jams or if you hear the sound of grinding Ensure that the mating surfaces are absolutely clean before reassembly! discs rubbing against each other, re-calibrate the machine. -
Page 18: Replacing Components
L A D E N M Ü H L E N S H O P G R I N D E R 9.2 Replacing components 9.2.1.1 Removing the grinding disc in the rotating fl ange, without screws 9.2.1 Replacing the grinding discs Procedure: When the grinding quality is no longer as desired, this means that the grinding discs need to be re-placed. -
Page 19: Removing The Grinding Disc In The Stationary Fl Ange, Without Screws
L A D E N M Ü H L E N S H O P G R I N D E R 9.2.1.2 Removing the grinding disc in the stationary fl ange, 9.3 Maintenance work on the mains power supply without screws HINT Procedure:... -
Page 20: Faults
L A D E N M Ü H L E N S H O P G R I N D E R 10.2.1 Fault correction If the short circuit protection has Fault Indication Corrective action tripped, it has to be reset manually: The grinder cannot The grinder is not con- Check and, if necessary,... -
Page 21: Waste Disposal
L A D E N M Ü H L E N S H O P G R I N D E R 11 Waste disposal Fault Indication Corrective action The bean hopper has Check and replace cor- Consider such issues as environmental compatibility, health hazards, not been replaced or rectly waste disposal regulations and the local facilities for disposal in compli-... - Page 22 L A D E N M Ü H L E N S H O P G R I N D E R 12 Electrical wiring diagram 200-230V / 50Hz...
- Page 23 L A D E N M Ü H L E N S H O P G R I N D E R 12 Electrical wiring diagram 100-115V / 60Hz...
-
Page 24: Contact Addresses
L A D E N M Ü H L E N S H O P G R I N D E R 13. Warranty Conditions 14 Contact addresses The warranty period is 1 year from the date of purchase. Customer Services If maintenance work reveals that the grinding discs need re-sharpening The warranty covers all damages that can be attributed to inferior or replacing, or that other repairs are necessary, please contact your... - Page 25 L A D E N M Ü H L E N S H O P G R I N D E R Notes...
- Page 26 L A D E N M Ü H L E N S H O P G R I N D E R Notes...
- Page 27 L A D E N M Ü H L E N S H O P G R I N D E R Notes...
- Page 28 L A D E N M Ü H L E N S H O P G R I N D E R MAHLKÖNIG GmbH & Co. KG Tilsiter Straße 142 D- 22047 Hamburg, Germany Tel.: +49 (0)40 / 69 69 40-0 Fax: +49 (0)40 / 69 39 721 offi...
Need help?
Do you have a question about the Tanzania and is the answer not in the manual?
Questions and answers