Table of Contents
Advertisement
Advertisement
Table of Contents

Related Manuals for RCA RLEDV2238A-B


Summary of Contents for RCA RLEDV2238A-B
- Page 1 22” LED Television TV with DVD MODEL: RLEDV2238A-B...
-
Page 3: Table Of Contents
Contents Contents Caution Safety Information Unit and Accessories Introduction 1. Front View 2. Rear View 3. Instruction for Wall Mount 4. Remote Control 8-10 Basic Operation OSD Menu 12-18 1. Picture menu 2. Audio menu 3. Time menu 4. Setup menu 5. -
Page 4: Caution
Caution Caution is intended to alert the user to the presence of un-insulated "dangerous to constitute a risk of electric shock to the persons. The exclamation point within an equilateral triangle is intend to alert the user to the presence of important operating and maintenance (servicing) instructions in the literature accompanying the appliance. -
Page 5: Safety Information
Safety Information Safety Information Electrical safety power Physical safety... -
Page 6: Unit And Accessories
Unit and Accessories Unit and Accessories Remote control TV set Batteries: 2xAAA Instructions for fixing stand Instructions for User's manual AC Cord fixing stand... -
Page 7: Introduction
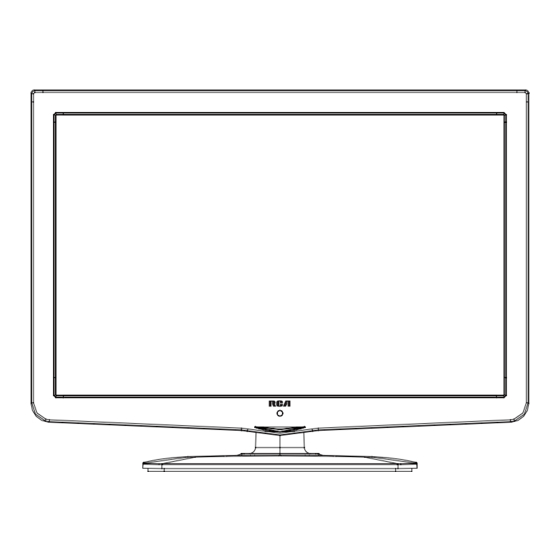
Introduction Introduction Please insert a 12cm disc according to the silk 1. Front View Power Indicator Remote Control window (Keep clear) 1). (IR) Infrared Receiver: Receives IR signals from the remote control. (Power on/Standby)LED Indicator: Press POWER to turn on and off. Indicator on(Red) Standby mode Indicator on(Green) -
Page 8: Rear View
Introduction 2. Rear View POWER PC AUDIO (for Service) POWER: Connect the supplied AC adapter. USB for Service : For service use only. HDMI1/2 : Connect it to the HDMI output of video device. PC AUDIO Connect them to theYPbPr video output terminal of the external devices. YPbPr RF: Connect antenna or cable 75 Ohm coaxial to receive TV signal. -
Page 9: Instruction For Wall Mount
- 4 pcs of type M4 screws are required for installing the wall mount bracket to your RCA TV. Do not use screws that are longer than 10 mm. Screws that are too long may cause damage to the inside of the TV set. -
Page 10: Remote Control
Introduction 4. Remote Control The remote control is using Infra-Red(IR). Point it towards the front of the LED TV. The remote control may not work correctly if it is operated out of range or out of angle. INPUT INPUT POWER Press to display the input source Press to turn the TV on/standby menu... -
Page 11: Introduction
Introduction INPUT Number buttons for DVD. Pressing “-/--”button to display “SELECT 10+”, and press a number button to play the program. DISPLAY( In DVD) Press to display the current mode’s information. LANGUAGE Select DVD disc language. PICTURE SOUND SLEEP DISPLAY ZOOM Adjust picture size in DVD mode. -
Page 12: Remote Control
Introduction Installing Batteries 1. Open the battery compartment cover on the back of the remote control. 2. Insert two 1.5V AAA size batteries observing the polarity markings inside the battery compartment. Don’t mix different types or used batteries with new ones. 3. -
Page 13: Basic Operation
Basic Operation Power on/off 1. -To turn on the Switch Press POWER button on the TV or remote control. -To turn off the TV Press POWER button on the TV or remote control. Input Source select Press INPUT button on the TV set or remote control to display input source menu, and use CH+/- button on the TV set or button Component... -
Page 14: Osd Menu
OSD Menu OSD Menu 1. Picture menu Description Picture mode: Select between Standard, Dynamic, Mild, Sports User and Power Saving. You may select the picture mode directly by pressing the PICTURE button on the remote control. Note: when select the "Power Saving", the machine is in energy-saving status. Contrast: Control the difference between the bright and dark regions of the screen picture. -
Page 15: Audio Menu
OSD Menu 2. Audio menu Setup Picture Audio Time Lock Channel Flat Sound Mode Bass Treble Balance Surround SPDIF Type Audio Language English Select Move Exit MENU Description Sound Mode: Select your desired picture mode as follow: Flat, Music, Movie, Sports and User You may select the sound mode directly by pressing the SOUND button on the remote control. -
Page 16: Time Menu
OSD Menu 3. Time menu Description Sleep timer: You may set the automatic shutdown timer choosing from 5 to 240 minutes, or deactivate this function. Time zone: Select between Pacific, Alaska, Hawaii, Eastern, Central and Mountain. Daylight Saving Time: Select between On and Off. Clock: User can not change time manually during DTV mode, for time is from signal source directly. -
Page 17: Setup Menu
OSD Menu 4. Setup menu Description Menu Language: Select OSD menu language. Transparency: Turn on or off the transparency menu function. Zoom Mode: Select the zoom mode between 16:9, 16:9 zoom, 4:3, 4:3 zoom just scan. Noise reduction: Select the noise reduction mode between Strong, Off, Weak and Middle. PC SETUP: If the video input signal comes from your PC, you may adjust the V-Position, H-Position, Clock, Phase or even perform an Auto adjustment. -
Page 18: Lock Menu
OSD Menu 5. Lock menu You must enter the password to gain access to the Lock menu. The default password is 0000. You may modify the following options: Description Change password: Change the password, you must enter the new password twice to confirm it. Note: Do not forget the password. -
Page 19: Channel Menu
OSD Menu 6. Channel menu Description Air/Cable: Allow you to select antenna between Air and Cable. If you selet “Cable”, the following items(Favorite, Show/Hide, Channel NO, Channel Label and DTV Signal) are unable to use. Auto Scan: Enter the Auto Scan menu to start auto scan. If you select “Cable”... -
Page 20: Osd Menu
OSD Menu Show/Hide: Allow you to show or hide the channels. button to highlight the desired item, then press OK button to show or hide the highlighted channel. Channel No.: Show and select the channel. Channel Label: Allow you to setup a label for the channel. Press button to select the position of the table, and press button to select the... -
Page 21: Dvd Operation
DVD Operation DVD Operation Press the Power button on the TV or the remote control, then press the INPUT button to select DVD mode. If there is no disc in the DVD player the screen will show "NO DISC". Insert Disc according to picture next to disc slot. Do not touch the playing surface. -
Page 22: Dvd Operation
DVD Operation DVD Operation... - Page 23 DVD Operation DVD Operation...
- Page 24 DVD Operation DVD Operation...
- Page 25 DVD Operation DVD Operation or NO disc...
- Page 26 DVD Operation DVD Operation...
- Page 27 DVD Operation DVD Operation...
- Page 28 OSD Menu OSD Menu...
-
Page 29: Simple Troubleshooting
Simple Troubleshooting Simple Troubleshooting If the display fails or performance dramatically deteriorates check the Display in accordance with the following instructions.Remember to check the peripherals topinpiont the source of the failure. If the display still fails to perform as expected,connect your helpline for assistance. No power - Check all connections to the TV. - Page 30 Technical Specifications 22”(Diagonal) Viewing Picture Size (diagonal) 1680 x1050 Resolution 16:10 Aspect Ratio Display colours 16.7M Brightness 250 cd/m 1000:1 Contrast ratio Response time (H)/160 View angle TV system Digital TV: ATSC Analog TV: NTSC ATSC decode Video System MPEG-2MP@HL Sound System AC-3 Video System NTSC NTSC...
-
Page 31: Limited Product Warranty
If you purchased your unit outside of Canada: This warranty does not apply. Contact your dealer for warranty information. ©Curtis International Ltd. 315 Attwell Drive, Toronto, Ontario M9W 5C1 www.curtisint.com “RCA”, “NIPPER & CHIPPER” ARE TRADEMARKS OF RCA TRADEMARK MANAGEMENT USED UNDER LICENSE TO: CURTIS INTERNATIONAL LTD.
Need help?
Do you have a question about the RLEDV2238A-B and is the answer not in the manual?
Questions and answers