Table of Contents
Advertisement
Z-Wave
Enabled
®
Thermostat
User Manual
For Model WDTC-20
Manage and automate your home's
climate to maximize energy
conservation and comfort
Thank you for purchasing the Z-Wave
of reliable service and easy to use climate control when operated manually or by remote control in a
Z-Wave
network. Z-Wave
®
remote control for convenience, comfort, safety and energy conservation. Your Z-Wave
is a great addition to your Z-Wave
minimizing the effort required to maintain the appropriate temperature in your home whether you are
at home or away. In addition to thermostats, indoor and outdoor lighting, security systems, garage door
openers and window shades are just a few of the items you can easily control with additional Z-Wave
certified products.
Your new Z-Wave
Enabled Thermostat is compatible with the complete range of Wayne-Dalton
®
Z-Wave
certified controllers. Your Z-Wave
®
controllers from other manufacturers and brands. Please consult the user manual and your controller
supplier for more details.
Home Control Basics
Z-Wave
certified products will allow you to easily control multiple devices in a home with the push of a
®
button in what is known as a "scene". Turning on your home's interior lights and activating the set-back
on your thermostat from your in-vehicle remote as you come home is an example of a scene. Dimming
the lights and automatically closing your curtains to watch TV with a single push of a button is another
example of a scene.
Visit www.wayne-dalton.com/access for more ideas on how to create, set-up and use scenes for safety,
security, comfort and convenience.
IMporTanT noTICE!
Read the enclosed instructions carefully before installing your new Z-Wave
close attention to all warnings and notes and carefully follow the installation steps in the order they are
presented to save time and minimize the risk of damaging the thermostat or the system it controls.
This manual should be retained for future reference.
Enabled Thermostat. It was designed to give you many years
®
products by Wayne-Dalton allow you to manage and control your home by
®
network and can maximize energy conservation and comfort while
®
Enabled Thermostat will also work with Z-Wave
®
Thermostat
®
®
Enabled Thermostat. Pay
®
®
certified
1
Advertisement
Table of Contents

Summary of Contents for Wayne-Dalton WDTC-20
-
Page 1: Introduction
TV with a single push of a button is another example of a scene. Visit www.wayne-dalton.com/access for more ideas on how to create, set-up and use scenes for safety, security, comfort and convenience. -
Page 2: Table Of Contents
Table of Contents Table of Contents Introduction ..................1 Table of Contents ................2 Glossary ..................3 Z-Wave Enabled Thermostat Basics ..........4 ® Package Contents/Tools Required ........... 5 Locating Thermostat ............... 6 Removing Existing Thermostat ............7 Mounting Thermostat ..............8 Wiring Information ................ -
Page 3: Glossary
GLoSSarY Bind – Activates Z-Wave module. Can be used to include Thermostat into a network, include ® into a Scene or delete thermostat from Scene or network. Similar to program button found on other products. Calibration - Accuracy of thermostat (set at factory only, see Temperature Offset.) Copy –... -
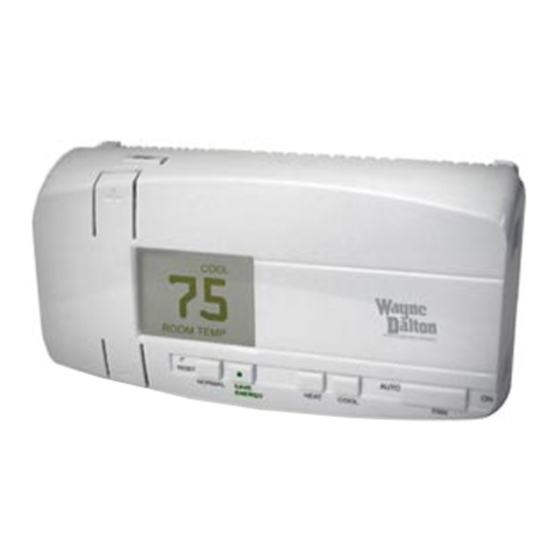
Page 4: Z-Wave ® Enabled Thermostat Basics
® • Easy Energy Savings buttons and Mode Switch • Low Battery indicator The Z-Wave Enabled Thermostat is a new arrival into the Wayne-Dalton Z-Wave product line and contains ® ® many new features that were not conceived when some Z-Wave controllers were initially developed. -
Page 5: Package Contents/Tools Required
Dimming the lights and automatically closing your curtains to watch TV with a single push of a button is another example. Visit www.wayne-dalton.com/access for more ideas on how to set up and use scenes in your Z-Wave ®... -
Page 6: Locating Thermostat
Step 1: Thermostat Location retrofit or replacement Installations: Mount the new thermostat in the same location as the old one. new Installations: Follow the guidelines below and refer to the diagram: • Locate the thermostat on an inside wall, about 5 ft. above the floor, and in a room that is used often. -
Page 7: Removing Existing Thermostat
Step 2: removing Existing Thermostat WarnInG: To avoid electrical shock and to prevent damage to the furnace, air conditioner, and thermostat disconnect the power supply at the circuit breaker or heater and air conditioner before beginning work. CaUTIon: Read instructions IMporTanT: carefully before removing any LABEL ALL WIRES BEFORE... -
Page 8: Mounting Thermostat
Step 3: Mounting Thermostat Tools required: Thermostat Control Unit Phillips or Slotted Screwdriver Drill 3/16 inch drill bit Hammer Pencil 1. Separate the control unit (front) of the thermostat from the mounting base (back.) Grasp the thermostat and pry the control Thermostat unit away from the base, lift up to remove Mounting... -
Page 9: Wiring Information
Step 4: Wiring Information General wiring guidelines for safe and secure wire connections: • Ends of wires should be stripped 3/8 inch as shown. • Take care not to damage or lose labels for each wire during handling. • Locate and dress wires to come in from behind the thermostat and turn up into the terminal area. -
Page 10: Terminal Designation Reference Guide
Common (power or hot) wire from secondary side of heating system transformer. (note: This wire is required for thermostat operation. If you do not have a “C” wire, please call customer support at 1-866-545-5765, e-mail at homesettings@wayne-dalton.com, or contact your HVAC professional to review possible solutions.) -
Page 11: Jumper Reference Guide
• If you have 2 large wires (12 or 14 gauge or if it is bigger than paper clip wire) or know that your system operates on line voltage, immediately stop, re-install your existing thermostat and contact customer support. The Wayne-Dalton Z-Wave Enabled thermostat operates on 24 Volts AC power only. -
Page 12: Wiring Diagrams And Jumper Configurations
Step 5: Match Wiring Match the wiring diagram below with the wires you labeled in Step 3 and proceed to the page referenced for detailed set-up information for your application. note: The C wire (24 Volts AC) is not optional. note: If your combination of wires in not shown, go to Step 6 and modify your labeling per the cross reference chart. - Page 13 If your combination of wires is not shown, refer to the cross reference chart below. add the corresponding Wayne-Dalton terminal designation label to your wire’s label and then repeat Step 5 to match your wiring diagram. If a match is still not successful, contact customer support at 1-866-545-5765, e-mail at homesettings@wayne-dalton.com or contact your...
- Page 14 Step 7: Configuration 2 Wire Heat + C Wiring and Jumper Configuration STEp a: Verify your labeled wires match the ones shown in the Your Labeled Wires box to the left. noTE: Do not allow the wires to contact another terminal, touch each other or touch other parts of the thermostat.
- Page 15 Step 7: Configuration 4 Wire Heat/Cool + C Wiring and Jumper Configuration STEp a: Verify your labeled wires match the ones shown in the Your Labeled Wires box to the left. noTE: Do not allow the wires to contact another terminal, touch each other or touch other parts of the thermostat.
- Page 16 Step 7: Configuration 4 Wire Heat pump without auxiliary Heat + C Wiring and Jumper Configuration STEp a: Verify your labeled wires match the ones shown in the Your Labeled Wires box to the left. noTE: Do not allow the wires to contact another terminal, touch each other or touch other parts of the thermostat.
- Page 17 Step 7: Configuration 2 Stage Heat and 1 Stage Cool + C Wiring and Jumper Configuration STEp a: Verify your labeled wires match the ones shown in the Your Labeled Wires box to the left. noTE: Do not allow the wires to contact another terminal, touch each other or touch other parts of the thermostat.
-
Page 18: Control Unit Installation
Step 8: Control Unit preparation prepare the Z-Wave Enabled ® Thermostat Control Unit for Installation: . Install 2 AA batteries as shown in the diagram to the right. The batteries are required to maintain your target temperatures during a power outage. If battery power is lost, or when changing batteries, you must reset your target temperatures. -
Page 19: Installation Verification
If any of these checks do not function properly, review your wiring and jumper configuration. If the problem persists, contact customer support for assistance. Installation of your Wayne-Dalton Z-Wave ® Enabled Thermostat is complete. Go to page 21 for operation and programming... -
Page 20: Degrees C And F
B in the diagram to the right. 2. Press and release the RESET button on the front of the control unit to activate your setting. Temperature offset Your Wayne-Dalton Z-Wave enabled ® Thermostat is very accurate and O FF comes from the factory calibrated to +/- 1º... -
Page 21: General Operating Information
Z-Wave Controllers such as the ® Wayne-Dalton computer USB port controllers in PC and Mac formats. Visit the Wayne-Dalton web site, www.wayne-dalton.com, for more information. Enabled Thermostat can also operate as an ordinary thermostat by manually setting the target Your Z-Wave ®... -
Page 22: Manual Operation
Manual operation To manually operate your Zwave Enabled Thermostat noTE: Confirm your thermostat has stabilized to room temperature prior to operation. 1. Confirm the Fan is in Auto mode by sliding the FAN switch to the left. noTE: To run the fan continuously with or without HEAT or COOL, slide the FAN switch to the right to the ON position. -
Page 23: Programming Target Temperatures
programming Target temperatures Target temperatures are programmed into the thermostat as the desired temperature for the mode being programmed. a total of four modes are available for programming: a) normal Heat, b) Save Heat, c) normal Cool, d) Save Cool norMaL modes are used when the home is occupied, and SaVE EnErGY modes are used for when the home... - Page 24 programming Target Temperatures (continued) programming SaVE HEaT target temperature: noTE: If this is not the first time set- up, place your thermostat into HEAT mode. If the display is showing the word COOL, press the HEAT button to change to HEAT mode. The LCD will display the word HEAT.
- Page 25 COOL SAVE mode and display the actual ROOM TEMP. noTE: Your Wayne-Dalton thermostat is designed to maintain your target temperature within 1 degree. In HEAT mode, if the temperature falls more than...
-
Page 26: Z-Wave ® Programming
Z-Wave network by observing the Z-Wave ® ® ® Class used by the Wayne-Dalton Z-Wave logo on the display. If the complete logo with ® Enabled Thermostat. The following waves flashing is present, use your controller procedure will allow the thermostat to be to remove the thermostat from the network. -
Page 27: Programming Example (Wdusb-10R With Thinkessentials ® )
SCENE on the controller. This will allow the controller to learn the NORMAL or SAVE ENERGY mode for the specific scene. See the example for the Wayne-Dalton Wireless Gateway, WDHA-12R, on page 32. aLTErnaTE proGraMMInG DIrECTIonS: (For controllers that do not support thermostat... - Page 28 Example ® EXaMpLE: programming the Z-Wave Thermostat to ® ThinkEssentials software ® noTE: The following directions apply only to Wayne-Dalton’s WDUSB- 10R, Z-Wave USB Adapter, and ® ThinkEssentials software. ® 1. Open ThinkEssentials to the HOME ® tab and then ensure the DESIGN TAB is active by pressing it with your mouse.
- Page 29 HEAT or COOL. 2. Click on the icon to change from NORMAL to SAVE ENERGY. 3. Refer to the Wayne-Dalton WDUSB- 10R User Manual for specific instructions on adding your thermostat to Scenes, Zones and schedules for automated control.
-
Page 30: Programming Example (Wireless Gateway, Wdha-12R)
Wireless Gateway is battery powered only. Do not plug the Wireless Gateway into AC power to program. 1. On the Wayne-Dalton Z-Wave ® Enabled Thermostat press either the HEAT or COOL mode, then the NORMAL mode button. The thermostat must be in either HEAT or COOL, NORMAL mode, to be added to the network correctly. - Page 31 Z-Wave programming ® Example with WDHa-12r 4. On the Wayne-Dalton Z-Wave ® Enabled Thermostat press the SAVE ENERGY mode. The thermostat must be in either HEAT or COOL, SAVE ENERGY mode, to be added to the network correctly. 5. On the Wireless Gateway, press...
-
Page 32: Programming Example (Handy Remote, Ha-09Wd)
2 through 6. noTE: The following directions apply only to the HA-09WD used in the example to the right: 1. On the Wayne-Dalton Z-Wave Enabled ® Thermostat press either the HEAT or COOL button, then the NORMAL button. The... - Page 33 Z-Wave alternate programming ® Example with Ha-09WD (continued) 4 Seconds 4. On the HA-09WD Remote Control, simultaneously press and hold the ON and OFF buttons of the desired SCENE. Both red and green LEDs will flash. (Note: The LEDs will time out after 10 seconds.
-
Page 34: Customer Support/Compliance
CUSTOMER SUPPORT For Installation support ONLY, please call 1-866-545-5765. For Z-Wave programming support, please e-mail: homesettings@wayne-dalton.com Additional product information and general information on Wayne-Dalton Home Control products may be found on our web site at www.wayne-dalton.com/access. © Copyright 2008 Wayne-Dalton Corp.
Need help?
Do you have a question about the WDTC-20 and is the answer not in the manual?
Questions and answers