Table of Contents
Advertisement
Advertisement
Table of Contents

Summary of Contents for Chocolady 561.105 Emga
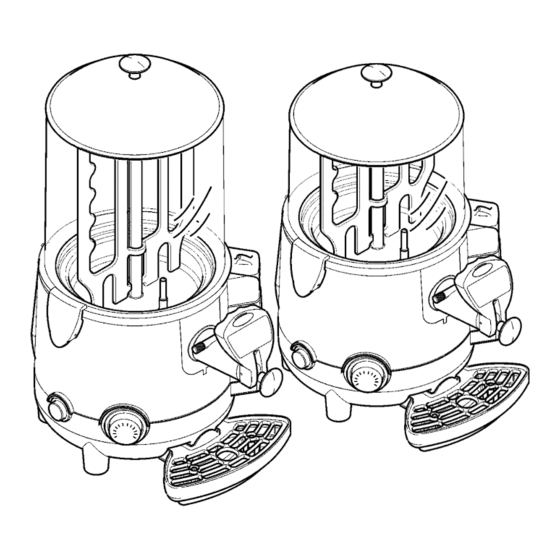
- Page 1 HOT CHOCOLATE DISPENSER MANUAL *561.105 - *561.110 1/22...
-
Page 2: Table Of Contents
INDEX 1. GENERAL INFORMATION ......3 7. CLEANING AND MAINTENANCE ....10 1.1. Manufacturer ............3 7.1. Cleaning and sanitation procedures ....10 1.2. Authorized persons ..........3 7.2. Emptying the bowl ..........11 1.3. Layout of the manual ..........3 7.3. Removing the bowl ..........11 1.3.1. Purpose and contents........3 7.4 . -
Page 3: General Information
1. GENERAL INFORMATION 1.3.2. Who must read the manual This manual is aimed at users and specialized technicians. Users must not attempt to carry out any operations restricted to qualified 1.1. Manufacturer technicians. The manufacturer will not be liable for any damage or injury caused as a result The manufacturer’s details are shown on the identification plate, illus- of failure to comply with this rule. -
Page 4: Machine Description
2. MACHINE DESCRIPTION 2.3. Technical Data The technical data and features are listed below. 2.1. Use of the machine Model 5 Liters (1.32 Gal US) 10 Liters (2.64 Gal US) The machine for professional use you have purchased is intended to produce Machine L=28,75 cm (11.32 inch) L=28,75 cm (11.32 inch) -
Page 5: Safety
3. SAFETY • Do not clean the machine with gasoline and/or solvents of any kind. • Repair work may be performed only by a Service Center authorized by the Manufacturer and/or specialized, trained personnel. • Do not site the machine near heating equipment (stoves or radiators). •... -
Page 6: Handling And Storage
4. HANDLING AND STORAGE The Purchaser will bear the cost of repairing or replacing damaged parts. In conditions of use, the machine may be moved in an upright position only after: All the operations described in Chapter 4 may be carried out •... -
Page 7: Accessories Supplied
The machine is of the attended type, and must be installed in After positioning the packing container in the vicinity of the installation site, pro- places where it can be monitored by trained personnel. ceed as follows: • open the front part of the packing container; •... -
Page 8: Operation
6. OPERAT A A ION • remove the lid and pour the beverage prepared according to the manu- facturer’s instructions into the bowl; • never exceed the maximum level, which is marked -MAX- on the tray itself; Before the machine may be started up for the fi rst time, specialized tech- nical personnel must check that it functions properly. -
Page 9: Dispensing The Product
6.2 Dispensing the product • the machines with LCD offer the opportunity to make a visual check to see when the product has reached the required temperature inside the bowl. Warning: the product dispensed from the machine has a very Warning: during bowl and/or boiler switch off the machine us- high temperature;... -
Page 10: Cleaning And Maintenance
7. CLEANING AND MAINTENANCE 7.1. Cleaning and sanitation procedures When performing cleaning and sanitation operations, proceed as described Machine cleaning and maintenance must be performed with the here below: main switch set to -OFF- and the machine unplugged from the mains electricity. -
Page 11: Emptying The Bowl
7.2. Emptying the bowl To remove the bowl correctly proceed as follows: • take off the lid; Before cleaning out the bowl, it is first necessary to empty out any product from inside it. With the machine switched on, empty out all of the product still inside the bowl, using the lever on the tap. -
Page 12: Removing The Tap
• unhook the bowl hook-on handles, as illustrated in the figure, to free the bowl • slide the mixing auger upwards with one hand, taking care to grip it by the from the machine body; rotation pin; 2° 1° Fig. 17 Fig. -
Page 13: Cleaning The Pan
• press the button (A) securing the tap to the machine and then remove the • clean the channel connecting the bowl and the tap, using a cleaning brush, tap (B) with both hands, as illustrated in the figure; as illustrated in the figure; 1°... -
Page 14: Disassembling The Tap
7.6. Disassembling the tap • pull out the rod (G) and spring (H) from the tap body (the pin/gasket assem- bly (I) will slide out together with the rod); To clean the inside of the tap more thoroughly, disassemble it as follows: •... -
Page 15: Washing And Sanitizing The Components
7.7. Washing and sanitizing the components Fig. 34 shows a seal which is not correctly assembled; here the seal does NOT perfectly adhere to the bowl edge. All of the component parts previously disassembled (tap, mixer, mixing auger, gasket and bowl) must be carefully washed and sanitised. To carry out this procedure correctly proceed as follows: •... -
Page 16: Assembling The Tap
Fig. 37 shows a bowl which is not correctly assembled; here the bowl does NOT • insert the mixer into its seating following the steps described in paragraph perfectly adhere to the machine edge. 7.3 in reverse order. Fig. 37 Fig. -
Page 17: Fitting The Tap
7.8.3 Fitting the tap 7.10. Cleaning the drip tray The drip tray should be emptied and cleaned daily. To fi t the tap correctly back in place proceed as follows: • hold down the button, making sure that the rod is completely extracted; •... -
Page 18: Emptying The Boiler
7.12. Emptying the boiler • pull out the cap (C) with a firm movement and wait for all the water to empty out from the boiler tank. Warning: while the boiler is being emptied, the machine must be unplugged. Warning: the boiler may be emptied only when the bowl is emp- ty and the machine has cooled down suffi... -
Page 19: Replacing The Thermometer Battery
7.14. Replacing the thermometer battery 7.15. Resetting the temperature sensor Cautionary notes: The temperature sensor can only be reset by a specialized • do not insert a used battery or one of a different type; technician, who must organize all of the operating sequences •... -
Page 20: Periodic Maintenance
7.16. Periodic maintenance The machine must be periodically checked (at least once a year) by a specialised technician. This periodic check serves to ensure that all the components installed and the machine itself are maintained at a high level of safety. Any worn components must be replaced by an original spare part. -
Page 21: Troubleshooting
9. TROUBLESHOTING Problem Cause Remedy Does not heat No power Make sure that the machine is plugged in properly Switch set to -OFF- Set the switch to -ON-. Thermoprobe intervention Reset the thermal protector as directed in section 6.1. Thermostat on “0” Adjust the thermostat Mixing paddle does not turn No power... -
Page 22: Basic Wiring Diagram
10. BASIC WIRING DIAGRAM 115 Volts Model 230 Volts Model ITEM DESCRIPTION ITEM DESCRIPTION MAIN POWER SWITCH MAIN POWER SWITCH BOILER TANK SENSOR RELAY SAFETY THERMOSTAT BOILER TANK WATER SENSOR MIXER MOTOR SAFETY THERMOSTAT ADJUSTMENT THERMOSTAT MIXER MOTOR HEATING ELEMENT ADJUSTMENT THERMOSTAT HEATING ELEMENT 561105-10 en ma 2012.10...
Need help?
Do you have a question about the 561.105 Emga and is the answer not in the manual?
Questions and answers