Table of Contents
Advertisement
Quick Links
UNVENTED (VENT-FREE) GAS LOG HEATER
OWNER'S OPERATION AND INSTALLATION MANUAL
REMOTE MODELS VUL24ND, VUL24PD, VUL30ND AND VUL30PD
Remote Models Also Design-Certified As Vented Decorative Appliances
WARNING: If the information in this manual is not
followed exactly, a fire or explosion may result causing
property damage, personal injury or loss of life.
— Do not store or use gasoline or other flammable
vapors and liquids in the vicinity of this or any other
appliance.
— WHAT TO DO IF YOU SMELL GAS
• Do not try to light any appliance.
• Do not touch any electrical switch; do not use any
phone in your building.
• Immediately call your gas supplier from a neighbor's
phone. Follow the gas supplier's instructions.
• If you cannot reach your gas supplier, call the fire
department.
— Installation and service must be performed by a quali-
fied installer, service agency or the gas supplier.
INSTALLER: Leave this manual with the appliance.
CONSUMER: Retain this manual for future reference.
For more information, visit www.desatech.com
Advertisement
Table of Contents

Subscribe to Our Youtube Channel
Related Manuals for Desa VUL24ND


Summary of Contents for Desa VUL24ND
- Page 1 UNVENTED (VENT-FREE) GAS LOG HEATER OWNER’S OPERATION AND INSTALLATION MANUAL REMOTE MODELS VUL24ND, VUL24PD, VUL30ND AND VUL30PD Remote Models Also Design-Certified As Vented Decorative Appliances WARNING: If the information in this manual is not followed exactly, a fire or explosion may result causing property damage, personal injury or loss of life.
-
Page 2: Table Of Contents
TAbLE OF CONTENTS Safety ..............2 Cleaning and Maintenance ........ 25 Unpacking............5 Troubleshooting ..........26 Product Identification ........... 5 Specifications ............ 33 Local Codes............5 Wiring Diagram ..........33 Product Features ..........6 Service Hints ............. 34 Air For Combustion and Ventilation ..... 6 Technical Service.......... - Page 3 SAFETy Continued WARNING: This product con- WARNING: Do not allow fans tains and/or generates chemicals to blow directly into the fireplace. known to the state of California Avoid any drafts that alter burner to cause cancer or birth defects flame patterns. Ceiling fans can or other reproductive harm.
- Page 4 SAFETy Continued 1. This appliance is only for use with the type 9. Before using furniture polish, wax, carpet of gas indicated on the rating plate. This cleaner or similar products, turn heater off. If appliance is not convertible for use with heated, the vapors from these products may other gases.
-
Page 5: Unpacking
3. Check heater for any shipping damage. If information. heater is damaged call DESA Heating, LLC at 1-866-672-6040 for replacement parts 1. Remove logs and heater base assembly before returning to dealer. -
Page 6: Product Features
PRODUCT FEATURES OPERATION SAFETY DEVICE This heater is clean burning. It requires no This heater has a pilot with an Oxygen Deple- outside venting. There is no heat loss out a tion Sensing (ODS) safety shutoff system. The vent or up a chimney. Heat is generated by ODS/pilot is a required feature for vent-free both realistic flames and glowing coals. - Page 7 AIR FOR COMbUSTION AND VENTILATION Continued If your home meets all of the three criteria 2. Multiply the space volume by 20 to determine the maximum Btu/Hr the space can support. above, you must provide additional fresh air. See Ventilation Air From Outdoors, ________ (volume of space) x 20 = (Maxi- page 8.
- Page 8 AIR FOR COMbUSTION AND VENTILATION Continued Ventilation Air From Outdoors WARNING: If the area in which Provide extra fresh air by using ventilation the heater may be operated does grills or ducts. You must provide two perma- nent openings: one within 12" of the ceiling not meet the required volume for and one within 12"...
-
Page 9: Installation
INSTALLATION NOTICE: This heater is intended WARNING: Seal any fresh for use as supplemental heat. air vents or ash clean-out doors Use this heater along with your located on floor or wall of fire- primary heating system. Do not place. If not, drafting may cause install this heater as your pri- pilot outage or sooting. - Page 10 INSTALLATION Continued CHECK GAS TYPE Example: The face of a mantel, bookshelf, etc. is made of combustible material and Use the correct type of gas (natural or propane/ protrudes 3 " from the wall. This com- LP). If your gas supply is not the correct gas bustible material must be 4"...
-
Page 11: Mantel Clearances
INSTALLATION Continued MINIMUM NONCOMBUSTIBLE If Using Mantel MATERIAL CLEARANCES You must have noncombustible material(s) above the fireplace opening. Noncombustible If Not Using Mantel materials (such as slate, marble, tile, etc.) Note: If using a mantel proceed to If Using must be at least 1/2" thick. With sheet metal, Mantel. - Page 12 INSTALLATION Continued Determining Minimum Mantel Clearance FLOOR CLEARANCES When Using a Hood A. If installing appliance on the floor level, If minimum clearances in Figure 6, page 11, you must maintain the minimum distance are not met, you must have a hood. When of 14"...
- Page 13 INSTALLATION Continued If reasons number 1 or 2 apply to you, you INSTALLING HEATER BASE must permanently open chimney flue damper. ASSEMBLY You must install the damper clamp accessory (to order, see Accessories, page 35). This WARNING: You must secure will insure vented operation (see Figure 10).
- Page 14 INSTALLATION Continued 1. Apply pipe joint sealant lightly to male CONNECTING TO GAS SUPPLY threads of gas fitting (provided). For Re- WARNING: This appliance mote models connect approved flexible gas hose to inlet side of gas control (see requires a 1/2" NPT (National Figure 11).
- Page 15 INSTALLATION Continued For propane/LP units, the installer must Apply pipe joint sealant lightly to male NPT supply an external regulator. The external threads. This will prevent excess sealant from regulator will reduce incoming gas pressure. going into pipe. Excess sealant in pipe could You must reduce incoming gas pressure to result in clogged heater valves.
- Page 16 INSTALLATION Continued CHECKING GAS CONNECTIONS Test Pressures Equal To or Less Than 1/2 PSIG (3.5 kPa) WARNING: Test all gas piping 1. Close equipment shutoff valve (see Fig- ure 15). and connections, internal and 2. Pressurize supply piping system by either external to unit, for leaks after opening propane/LP supply tank valve installing or servicing.
- Page 17 INSTALLATION Continued PRESSURE TESTING HEATER GAS When batteries are installed, the "little house" CONNECTIONS icon with current room temperature will be dis- 1. Open equipment shutoff valve (see played (see Figure 19). This icon will always Figure 15, page 16). show in the control window as long as the batteries have power.
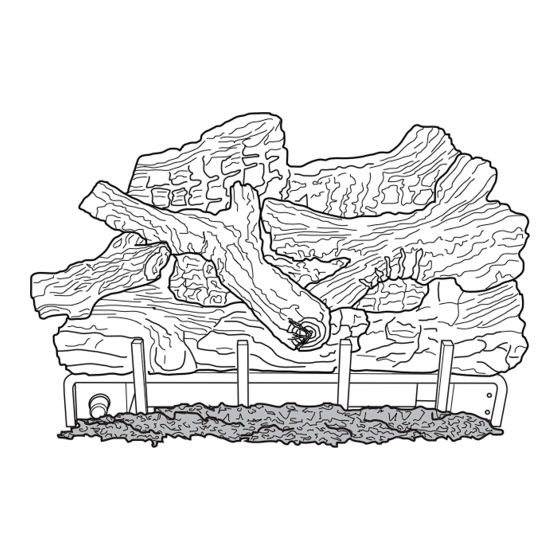
- Page 18 INSTALLATION Continued INSTALLING LOGS 5. Place middle right log over front right and bottom logs as shown in Figure 22. Be WARNING: Failure to posi- sure hole in middle right log seats over pin in bottom log. tion the parts in accordance 6.
-
Page 19: Operation
OPERATION FOR YOUR SAFETY NOTICE: During initial operation READ BEFORE LIGHTING of new fireplace, burning logs will give off a paper-burning WARNING: If you do not fol- smell. Open damper or window low these instructions exactly, to vent smell. This will only last a fire or explosion may result a few hours. - Page 20 OPERATION Continued 7. With control knob pressed in, press and ON REMOTE OFF release ignitor button. This will light pilot. The pilot is attached to the front burner. If needed, keep ignitor button pressed in until pilot lights. Note: If pilot does not stay lit, contact a qualified service person or gas supplier Figure 25 - Remote Selector Switch in for repairs.
- Page 21 OPERATION Continued HAND-HELD OPERATING REMOTE CONTROL REMOTE OPERATION WARNING: Fireplace can BATTERIES turn on suddenly. Keep away from burner. WARNING: Make sure your selector switch is in OFF posi- After lighting pilot, let pilot flame burn for about tion before installing or chang- one minute.
- Page 22 OPERATION Continued FLAME HEIGHT This function allows you to control the height of flames through 5 levels (see Figure 32). Select the manual flame height function by pressing the MODE button until a flame is shown in the lower left corner of the display. Use UP/DOWN arrow button to set desired flame height for front and rear burner (see Figure 32).
- Page 23 OPERATION Continued SMART THERMOSTAT REPLACING HAND-HELD REMOTE The Smart Thermostat adjusts flame height CONTROL ONLY in accordance to differences between set If your remote ever needs to be replaced you temperature and room temperature. As room will not need to replace the receiver. temperature gets closer to set temperature the PROGRAM RECEIVER TO REMOTE smart function will modulate the flame lower.
-
Page 24: Inspecting Burners
INSPECTING bURNERS FRONT BURNER FLAME PATTERN Check pilot flame pattern and burner flame patterns often. Figure 39 shows correct front burner flame pattern. Figure 40 shows incorrect front PILOT FLAME PATTERN burner flame pattern. The incorrect burner Figure 37 shows a correct pilot flame pattern. flame pattern shows yellow tipping at top of Figure 38 shows an incorrect pilot flame pat- blue flame. -
Page 25: Cleaning And Maintenance
CLEANING AND MAINTENANCE 5. Blow air into the primary air holes on the WARNING: Turn off heater injector holder. and let cool before cleaning. 6. In case any large clumps of dust have now been pushed into the burner repeat steps 3 and 4. -
Page 26: Troubleshooting
TROUbLESHOOTING WARNING: Turn off heater and let cool before servicing. Only a qualified service person should service and repair heater. CAUTION: Never use a wire, needle or similar object to clean ODS/pilot. This can damage ODS/pilot unit. Note: All troubleshooting items are listed in order of operation. OBSERVED PROBLEM POSSIBLE CAUSE REMEDY... - Page 27 TROUbLESHOOTING Continued OBSERVED PROBLEM POSSIBLE CAUSE REMEDY ODS/pilot lights but flame 1. Control knob not fully 1. Press in control knob fully goes out when control knob pressed in is released 2. Control knob not pressed in 2. After ODS/pilot lights, keep long enough control knob pressed in 30 seconds...
- Page 28 TROUbLESHOOTING Continued OBSERVED PROBLEM POSSIBLE CAUSE REMEDY Yellow flame in front burner 1. Not enough air 1. Check burner(s) for dirt during burner combustion and debris. If found, clean burner(s) (see Cleaning and Maintenance, page 25) 2. Gas regulator defective 2.
- Page 29 TROUbLESHOOTING Continued WARNING: If you smell gas • Shut off gas supply. • Do not try to light any appliance. • Do not touch any electrical switch; do not use any phone in your building. • Immediately call your gas supplier from a neighbor’s phone. Fol- low the gas supplier’s instructions.
- Page 30 PARTS REMOTE VARIABLE CONTROL MODELS VUL24ND, VUL24PD, VUL30ND, VUL30PD www.desatech.com 123220-01C...
- Page 31 PARTS REMOTE VARIABLE CONTROL MODELS This list contains replaceable parts used in your heater. When ordering parts, follow the instructions listed under Replacement Parts on page 34 of this manual. NO. PART NO. DESCRIPTION QTY. Ramp Burner Base • • •...
- Page 32 PARTS MODELS VUL24ND, VUL24PD, VUL30ND, VUL30PD This list contains replaceable parts used in your heater. When ordering parts, follow the instructions listed under Replacement Parts on page 34 of this manual. VUL24ND VUL30ND VUL24PD VUL30PD DESCRIPTION 121699-11 121699-17 Front Right Log...
-
Page 33: Specifications
SPECIFICATIONS VUL24PD, VUL30PD VUL24ND, VUL30ND • Rating (Variable): 15,000/36,000 Btu/Hr • Rating (Variable): 14,000/36,000 Btu/Hr • Type Gas: Propane/LP • Type Gas: Natural • Ignition: Electronic • Ignition: Electronic • Manifold Pressure: 8.4" W.C. • Manifold Pressure: 3.5" W.C. • Inlet Gas Pressure (in. of water): •... -
Page 34: Service Hints
• heater will not produce specified heat serial numbers of your heater ready. • propane/LP gas supply may be low You can also visit DESA Heating, LLC’s web You may feel your gas pressure is too low. If site at www.desatech.com. -
Page 35: Accessories
Purchase these accessories from your local dealer. If they can not supply these Available in 24"and 30" models. Circulat- accessories call DESA Heating, LLC at ing fireboxes feature louvers and an optional 1-866-672-6040 for information. You can blower. Non-circulating, smooth face models... -
Page 36: Warranty
This is DESA Heating, LLC’s exclusive warranty, and to the full extent allowed by law; this express warranty excludes any and all other warranties, express or implied, written or verbal and limits the duration of any and all implied warranties, including warranties of merchantability and fitness for a particular purpose to four (4) years on new products and 30 days on factory reconditioned products from the date of first purchase.
Need help?
Do you have a question about the VUL24ND and is the answer not in the manual?
Questions and answers