Table of Contents
Advertisement
Available languages
Available languages
Quick Links
Download this manual
See also:
Quick Manual
Table of contents
Package contents..........................................................................................................
Description of the phone...........................................................................................
Inserting the SIM card..................................................................................................
Getting started...............................................................................................................
3G & WiFi connection...................................................................................................
Google account & Contacts........................................................................................
Hints & tips with Android
Troubleshooting.............................................................................................................
For more information, please consult the FAQs on www.archos.com.
Make sure to read them before considering any product return. As we
are often updating and improving our products, your device's software
may have a slightly different appearance or modified functionality than
presented in this Quick Start Guide.
.........................................................................................
TM
EN
2
3
6
8
10
12
14
16
Advertisement
Chapters
Table of Contents

Related Manuals for Archos 50 Oxygen


Summary of Contents for Archos 50 Oxygen
- Page 1 Hints & tips with Android ..................Troubleshooting......................For more information, please consult the FAQs on www.archos.com. Make sure to read them before considering any product return. As we are often updating and improving our products, your device’s software may have a slightly different appearance or modified functionality than...
-
Page 2: Package Contents
Package Contents Check your product box for the following items: - ARCHOS 50 Oxygen - Headset - USB cable - USB host cable - Charger - Quick start guide - Warranty Legal & Safety notices The items supplied with your device and available accessories may vary depending on your region or service provider. -
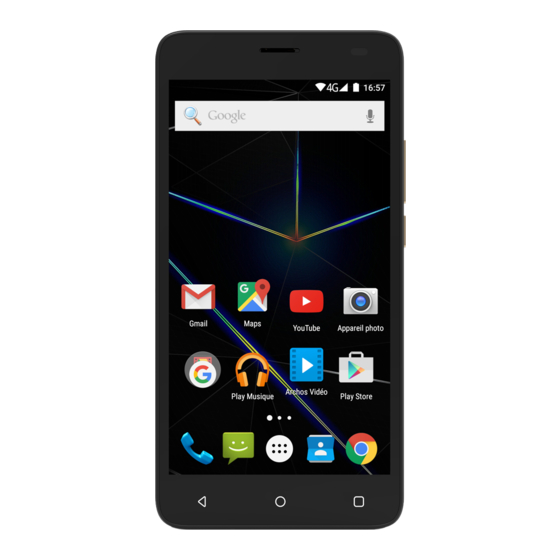
Page 3: Description Of The Phone
Description of the phone Micro-SIM slot Headset jack Flashlight Phone speaker Webcam Volume buttons ON/OFF button... - Page 4 Description of the phone Camera Flashlight Loudspeaker Micro-USB port* Microphone *Charge your device with the USB cable. Connect external devices with the USB host cable.
- Page 5 Menu Home/Recent apps Back Menu: open the list of options available on the current screen. Home/Recent apps: short press to return to the Home screen; long press to open the list of recent applications. Back: return to the previous screen.
-
Page 6: Inserting The Sim Card
Inserting the SIM card 1. Remove the cover by using the provided tool that you insert in the cover hole. 2. Lift up the cover to remove it completely. 3. Insert the micro-SIM according to the direction shown. 4. Use the provided tool to press it in. When the SIM card is well inserted, a click happens and the SIM card stays fixed. - Page 7 Enlever le cache en utilisant un bout Soulever le cache pour l’enlever Insérer la carte micro-SIM en suivant Util pointu que vous insérer dans le trou. complètement. le sens d’insertion indiqué. cart sérer la carte micro-SIM en suivant Utiliser un objet comme un cure- Remettre le cache en place.
-
Page 8: Getting Started
Getting started Turn ON 1. Press and hold the ON/OFF button to turn on the device. When you turn on your device, a PIN code may be requested. 2. Type the PIN code supplied with your SIM card. Beware of typing a wrong PIN code. 3. -
Page 9: Touch Screen Actions
Through the wizard The first time you start up your ARCHOS, the installation wizard will help you set up your device: - Location consent - Language - Google account - Location service options - Date & time Touch screen actions: Tap: touch once to select or launch a menu, option, or application. -
Page 10: G & Wifi Connection
3G connection With your 3G micro-SIM card, you should be connected to the Internet without any further setup. The ARCHOS will only have signal if you are in an area covered by your 3G provider’s 3G or EDGE network. When connected to the 3G network, the 3G icon is displayed in the status bar. -
Page 11: Wifi Connection
5. In the “Wireless & networks”section, if the WiFi is off, slide the WiFi switch to the “ON” position. Once the WiFi is on, the ARCHOS will scan for WiFi networks in range. 6. Touch “WiFi” to display available networks. -
Page 12: Adding A Google Account
Google & Contacts Adding a Google account A Google account lets you take full advantage of any Google apps and services that you may want to use. 1. Go to “Settings” > “Accounts” > “Add account”. 2. Select the account type “Google” to add. 3. - Page 13 Saving your contacts When your contacts are saved, they are always available on the web and can be synced to any Android phone that’s set up with your Google account. 1. Install the micro-SIM card with your contacts in your phone. 2.
-
Page 14: Hints & Tips With Android Tm
Hints & tips with Android The extended home screen: Navigate between different home screen panels by swiping left and right. Home button Short press the Home button to go back to the main screen. Double press the Home button to display all the apps you have opened. Swipe any app left or right to close it. - Page 15 Creating application folders: Drop one app icon over another on a home screen and the two icons will be combined. Widgets: Touch the “All Apps” icon on your home screen. Touch “Widgets” at the top of the screen. From the main Widget screen, you can move around widgets just as you do for app icons.
-
Page 16: Troubleshooting
Troubleshooting My phone is frozen or cannot switch on Press the ON/OFF & Volume + buttons for 10 seconds. Charge your device for at least 10 minutes. My phone cannot connect to a network or “No service” is displayed Try connecting in another location. Verify the network coverage with your operator. -
Page 17: Table Of Contents
Trucs & Astuces avec Android ................Dépannage........................Pour plus d’informations, consultez-les FAQs sur www.archos.com. Consultez-les avant d’envisager un éventuel retour du produit. Le problème que vous rencontrez peut être résolu facilement. Comme nous mettons à jour et améliorons régulièrement nos produits, le logiciel de votre appareil peut présenter une interface ou des fonctionnalités... -
Page 18: Contenu De La Boîte
Contenu de la boîte Vérifiez que les éléments ci-dessous sont présents dans la boîte : - ARCHOS 50 Oxygen - Kit piéton - Câble USB - Câble USB hôte - Chargeur - Guide d’utilisation rapide - Guide des garanties et des mentions légales Il se peut que les éléments fournis, de même que les accessoires, varient... -
Page 19: Description Du Téléphone
Description du téléphone Emplacement de la carte micro-SIM Prise kit piéton Flash Haut-parleur Caméra frontale Boutons de volume Bouton ON/OFF... - Page 20 Description du téléphone Caméra Flash Haut-parleur Port Micro-USB* Micro *Chargez votre appareil avec le câble USB. Connectez des périphériques externes avec le câble USB hôte.
- Page 21 Menu Accueil/Applications récentes Retour Menu : affiche une liste d’options disponibles pour un écran donné. Accueil/Applications récentes : appui court pour retourner à l’écran d’accueil. Appui long pour afficher les applications ouvertes. Retour : retour à l’écran précédent.
-
Page 22: Insertion De La Carte Sim
Insertion de la carte SIM 1. Enlevez le cache en utilisant l’outil fourni que vous insérez dans le trou. 2. Soulevez le cache pour l’enlever complètement. 3. Insérez la carte micro-SIM en suivant le sens d’insertion indiqué. 4. Utilisez l’outil fourni afin de l’enfoncer. Lorsque la carte micro-SIM est bien insérée, un clic se produit et la carte micro-SIM reste fixe. - Page 23 Enlever le cache en utilisant un bout Soulever le cache pour l’enlever Insérer la carte micro-SIM en suivant Util pointu que vous insérer dans le trou. complètement. le sens d’insertion indiqué. cart sérer la carte micro-SIM en suivant Utiliser un objet comme un cure- Remettre le cache en place.
-
Page 24: Mise En Route
Mise en route Allumer 1. Faites un appui long sur le bouton ON/OFF pour allumer votre appareil. Lorsque vous allumez votre appareil, il se peut qu’un code PIN vous soit demandé. 2. Saisissez le code PIN de votre carte SIM. Attention : assurez-vous de saisir le bon code PIN. - Page 25 Assistant de démarrage La première fois que vous allumez votre téléphone, l’assistant de démarrage vous permet de le paramétrer : - Autorisation de localisation - Langue - Compte Google - Les options du service de localisation - Date & heure Utilisation de l’écran tactile Appuyer: appuyez une fois pour sélectionner ou lancer un menu, une...
-
Page 26: Connexion 3G & Wifi
2. Tirez vers le bas la barre bleue. 3. Sélectionnez l’icône du panneau des => statuts. 4. Sélectionnez l’icône Données mobiles pour l’activer. Astuce : Des difficultés pour vous connecter? Consultez la foire aux questions sur www.archos.com ou contactez votre opérateur mobile. -
Page 27: Connexion Wifi
Connexion WiFi ATTENTION : assurez-vous d’être dans une zone WiFi. Vous pouvez accéder rapidement aux paramètres WiFi à partir de la barre de statuts. 1. Sélectionnez les icônes Heure et Batterie en maintenant votre doigt appuyé afin d’afficher la barre de statuts. 2. -
Page 28: Compte Google & Contacts
Compte Google & Contacts Ajouter un compte Google Un compte Google vous permet de profiter au maximum des applications et des services Google que vous pourriez utiliser. 1. Sélectionnez “Paramètres” > “Comptes” > “Ajouter compte”. 2. Sélectionnez “Google” pour le type de compte à ajouter. 3. - Page 29 Sauvegarder vos contacts Tous vos contacts sont disponibles sur le Web et peuvent être synchronisés sur n’importe quel téléphone Android paramétré avec votre compte Google. 1. Insérer votre carte micro-SIM incluant vos contacts dans votre téléphone. 2. A partir de l’écran d’ A ccueil ou de l’écran Toutes les applications, sélectionnez l’application Contacts 3.
-
Page 30: Trucs & Astuces Avec Android
Trucs & Astuces avec Android L’écran d’accueil étendu : Naviguez entre les différents écrans d’accueil en faisant glisser votre doigt vers la gauche ou vers la droite. Bouton Accueil Appui court pour retourner à l’écran d’accueil. Appuyez deux fois successivement pour afficher les applications ouvertes. - Page 31 Créer des dossiers d’applications : A partir d’un écran d’accueil, déposez une icône sur une autre pour les rassembler. Widgets : Sélectionnez l’icône Toutes les applications. Sélectionnez Widgets en haut de l’écran. A partir de l’écran d’accueil des widgets, vous pouvez déplacer les widgets de la même façon que vous procédez avec les applications.
-
Page 32: Dépannage
Dépannage Mon téléphone ne répond pas ou ne s’allume pas Appuyez sur les boutons ON/OFF & Volume + pendant 10 secondes. Chargez votre appareil pendant 10 minutes minimum. Mon téléphone ne se connecte pas au réseau ou affiche “Pas de service”... - Page 33 Google-Konten & Kontakte..................Android kennenlernen ..................... Fehlerbehebung......................Weitere Informationen finden Sie unter den FAQs auf www.archos.com. Diese unbedingt durchlesen, bevor Sie eine Rückgabe des Produkts in Erwägung ziehen. Es könnte ein geringfügiges Problem vorliegen. Da unsere Produkte kontinuierlich aktualisiert und weiterentwickelt werden, kann die Software Ihres Gerätes in Erscheinung und Funktionalität...
-
Page 34: Verpackungsinhalt
Verpackungsinhalt In der Verpackung müssen folgende Elemente enthalten sein: - ARCHOS 50 Oxygen - Headset - USB-Kabel - USB-Host-Kabel - Ladegerät - Benutzerhandbuch - Garantie, Impressum und Sicherheitshinweise Die mit Ihrem Gerät mitgelieferten Elemente und das verfügbare Zubehör können je nach Region oder Dienstleister abweichen. -
Page 35: Beschreibung Des Geräts
Beschreibung des Geräts Micro-SIM-Slot Headsetanschluss Bliztlicht Lautsprecher Webcam Lautstärketasten EIN/AUS-Taste... - Page 36 Beschreibung des Geräts Kamera Bliztlicht Lautsprecher Micro-USB-Anschluss* Mikrofon *Laden Sie Ihr Gerät mit dem USB-Kabel. Verbinden Sie externe Geräte mit dem USB-Host-Kabel.
- Page 37 Menü Home/Letzte Apps Zurück Menü: Öffnet die Liste verfügbarer Optionen für den aktuellen Bildschirm. Home/Letzte Apps: Kurz drücken, um zum Homescreen zu gelangen; lang drücken, um die Liste der letzten Anwendungen zu öffnen. Zurück: Zurück zum vorherigen Bildschirm.
-
Page 38: Einlegen Der Sim-Karte
Einlegen der SIM-Karte 1. Entfernen Sie mit dem mitgelieferten Werkzeug die Abdeckung, indem Sie es in das Abdeckloch einführen. 2. Die Abdeckung anheben, um sie vollständig zu entfernen. 3. Legen Sie entsprechend der abgebildeten Richtung die micro-SIM-Karte ein. 4. Drücken Sie diese mit dem mitgelieferten Werkzeug hinein. Sobald ein Klicken zu hören ist, ist die SIM-Karte vollständig eingerastet. - Page 39 Enlever le cache en utilisant un bout Soulever le cache pour l’enlever Insérer la carte micro-SIM en suivant Util pointu que vous insérer dans le trou. complètement. le sens d’insertion indiqué. cart sérer la carte micro-SIM en suivant Utiliser un objet comme un cure- Remettre le cache en place.
-
Page 40: Erste Schritte
Erste Schritte Einschalten 1. Drücken und halten Sie die EIN/AUS-Taste, um das Gerät einzuschalten. Beim Einschalten des Geräts muss eine PIN-Nummer eingegeben werden. 2. Geben Sie die mit Ihrer SIM-Karte erhaltene PIN-Nummer ein. 3. Wählen Sie ‘OK’ . Ausschalten Um das Gerät auszuschalten, drücken und halten Sie die EIN/AUS-Taste und wählen dann Power off (Ausschalten) >... - Page 41 Installationsassistent Wenn Sie Ihren ARCHOS das erste Mal in Betrieb nehmen, leitet Sie der Installationsassistent durch einige Bildschirme, um Ihnen dabei zu helfen, die grundlegenden Einstellungen vorzunehmen: - Zustimmung zur Standortbestimmung - Sprache - Google-Konto - Standortdienst - Datum & Uhrzeit...
-
Page 42: Wlan-Verbindung & 3G-Verbindung
3G- & WLAN-Verbindung Mit Ihrer 3G-SIM-Karte sollten Sie ohne weitere Einstellungen mit dem Internet verbunden sein. Beachten Sie, dass der ARCHOS nur dann ein Signal erhält, wenn Sie sich im Bereich des 3G- oder EDGE-Netzwerks Ihres 3G-Anbieters befinden. Ist das Gerät mit dem 3G-Netzwerk verbunden, wird in der Statusleiste das 3G-Symbol angezeigt. - Page 43 5. Im Bereich „Drahtlos und Netzwerke“ schieben Sie bei ausgeschaltetem WLAN den WLAN-Schalter in die Position „ON“. Nachdem das WLAN eingeschaltet wurde, sucht der ARCHOS nach WLAN-Netzwerken in Reichweite. 6. Berühren “WLAN”. 7. Berühren Sie den Namen des Netzwerks, mit dem Sie verbunden werden möchten.
-
Page 44: Google-Konten & Kontakte
Google-Konten & Kontakte Google-Konto hinzufügen Mit einem Google-Konto können Sie Ihre Google-Apps und Dienste in vollem Umfang nutzen. 1. Gehen Sie zu "Settings" > "Accounts" > "Add account" ("Einstellungen" > "Konten & Synchronisierung" > "Konto hinzufügen"). 2. Wählen Sie für das hinzuzufügende Konto den Typ "Google". 3. - Page 45 Speicherung Ihrer Kontakte Alle Ihre Kontakte sind im Web immer verfügbar und können mit jedem Android-Telefon synchronisiert werden, das mit dem gleichen Google- Konto eingerichtet ist. 1. Legen Sie die SIM-Karte mit Ihren Kontakten in Ihr Telefon ein. 2. Wählen Sie vom Bildschirm „Home“ oder „All Apps (Alle Anwendungen)“ aus die App „People (Kontakte)“...
-
Page 46: Android Tm Kennenlernen
Android kennenlernen Der erweiterte Startbildschirm: Wechseln Sie durch Wischen nach links und rechts zwischen verschiedenen «Home»-Bildschirmen. Home-Taste Kurz drücken, um zum Startbildschirm zu gelangen. Doppeltippen, um eine Liste der neuesten Anwendungen zu öffnen. Ein Element vom Startbildschirm verschieben: Zum Verschieben eines Elements vom Startbildschirm den Finger darauf legen und so lange halten, bis die Rasterlinien zur Positionierung erscheinen. - Page 47 Anwendungsordner erstellen: Ziehen Sie auf einem Startbildschirm ein Anwendungssymbol über ein anderes. Die beiden Symbole werden kombiniert. Widgets: Berühren Sie das «Alle Apps»-Symbol auf dem Startbildschirm. Berühren Sie «Widgets» oben auf dem Bildschirm. Auf dem «Widgets»- Hauptbildschirm können Sie Widgets genau wie Anwendungssymbole auch verschieben.
-
Page 48: Fehlerbehebung
Fehlerbehebung Mein Telefon ist abgestürzt oder es kann nicht eingeschaltet werden Halten Sie die EIN/AUS-Taste & die Lautstarketaste+ 10 Sekunden lang gedrückt. Laden Sie das Gerät für mindestens 10 Minuten lang auf. Mein Telefon kann nicht mit einem Netzwerk verbinden oder es wird „Kein Dienst“ angezeigt Testen Sie das Gerät an einem anderen Standort. - Page 49 Resolución de problemas................... Para más información, consulte la sección de preguntas y respuestas en www.archos.com. Examínela detenidamente antes de pensar en realizar cualquier devolución. Puede que su problema tenga una fácil solución. Al estar actualizando y mejorando constantemente nuestros productos, el aspecto o el software de su dispositivo pueden variar ligeramente con respecto a lo descrito en esta guía de inicio rápido.
-
Page 50: Contenido De La Caja
Contenido de la caja Compruebe que la caja del producto incluya los elementos siguientes: - ARCHOS 50 Oxygen - Headset - Cable USB - Cable host USB - Cargador - Guía de usuario - Avisos de garantía, legales y de seguridad Los elementos suministrados con su dispositivo y los accesorios disponibles pueden variar según la zona geográfica o proveedor de servicio utilizado. -
Page 51: Descripción Del Dispositivo
Descripción del dispositivo Ranura micro SIM Conector de headset Flash Altavoz Webcam Botones de volumen Botón ON/OFF... - Page 52 Descripción del dispositivo Camera Flash Altavoz Puerto micro USB* Micrófono *Cargue su dispositivo con el cable USB. Conecte los dispositivos externos con el cable host USB.
- Page 53 Menú Inicio/Aplicaciones recientes Volver Menú: muestra la lista de opciones disponibles de la pantalla actual. Inicio/Apps recientes: una pulsación breve para volver a la pantalla de inicio; mantenga pulsado para abrir la lista de aplicaciones recientes. Atrás: vuelve a la pantalla anterior.
-
Page 54: Colocación De La Tarjeta Sim
Colocación de la tarjeta SIM 1. Retire la tapa utilizando la herramienta suministrada que deberá introducir en el orificio correspondiente. 2. Levante la tapa y extráigala por completo. 3. Inserte la tarjeta micro SIM en el sentido indicado. 4. Sírvase de la herramienta suministrada para insertar la tarjeta. Un sonido de clic le avisará... - Page 55 Enlever le cache en utilisant un bout Soulever le cache pour l’enlever Insérer la carte micro-SIM en suivant Util pointu que vous insérer dans le trou. complètement. le sens d’insertion indiqué. cart sérer la carte micro-SIM en suivant Utiliser un objet comme un cure- Remettre le cache en place.
- Page 56 Utilización por primera vez Encendido 1. Mantenga pulsado el botón ON/OFF para encender el dispositivo. Al encender el dispositivo, se le pedirá que introduzca un código PIN. 2. Introduzca el código PIN suministrado con su tarjeta SIM. 3. Haga clic en “OK” [Aceptar]. Apagado Para apagar el dispositivo, mantenga pulsado el botón ON/OFF y luego seleccione "Power off"...
- Page 57 Asistente de inicio La primera vez que encienda el ARCHOS, el asistente de instalación le ayudará a configurar el dispositivo : - Consentimiento de ubicación - Idioma - Cuenta de Google - El servicio de ubicación - Fecha y hora - Conexión WiFi...
-
Page 58: Conexión 3G & Conexión Wifi
3. Pulse el icono => 4. Pulse el icono de datos móviles para activarlo. Consejo: Si tiene algún problema de conexión, consulte la sección de preguntas y respuestas (FAQ) de www.archos.com o póngase en contacto con su proveedor de servicios 3G. - Page 59 5. En la sección de Conexiones inalámbricas, si la WiFi está apagada, deslice el interruptor Wi-Fi hasta la posición “ON”. Una vez la WiFi activada, el ARCHOS buscará las redes WiFi disponibles. 6. Toque “WiFi”. 7. Toque el nombre de la red a la que desee conectarse. Las redes privadas se muestran con un icono de candado y será...
-
Page 60: Cuenta De Google/ Contactos
Cuenta de Google & Contactos... - Page 61 Guardar sus contactos Todos sus contactos están disponibles en todo momento en la web y pueden sincronizarse con cualquier teléfono Android configurado con la misma cuenta de Google. 1. Inserte la tarjeta SIM con sus contactos. 2. Desde la pantalla de Inicio o Todas las aplicaciones, seleccione la aplicación Contactos 3.
-
Page 62: Para Familiarizarse Con Android
Para familiarizarse con Android La pantalla de inicio ampliada: Desplácese entre distintos paneles de la pantalla de inicio deslizando el dedo a la izquierda y la derecha. Desplazamiento de un elemento de la pantalla de inicio: Mantenga el dedo sobre él hasta que aparezcan líneas de cuadrícula de posición;... - Page 63 Creación de carpetas de aplicaciones: Deje caer un icono de aplicación sobre otro en una pantalla de inicio y los dos iconos se combinarán. Widgets: Toque el icono odas las aplicaciones en la pantalla de inicio. Toque Widgets en la parte superior de la pantalla. En la pantalla Widgets principal, puede desplazarse de un widget a otro de la misma manera que lo hace para los iconos de aplicaciones.
-
Page 64: Resolución De Problemas
Resolución de problemas Mi teléfono está bloqueado o no lo puedo encender Pulse el botón ON/OFF & el botón Volume + durante 10 segundos. Cargue el dispositivo durante al menos 10 minutos. Mi teléfono no puede conectarse a la red o aparece un mensaje de "Sin servicio" Pruebe a conectarse desde otro lugar. - Page 65 Risoluzione dei problemi................... Per ulteriori informazioni, consultare le FAQ e il manuale utente del vostro prodotto su www.archos.com. Accertarsi di aver letto questo materiale prima di considerare l’eventuale restituzione del prodotto. Il problema riscontrato potrebbe non essere davvero un problema!
-
Page 66: Contenuto Della Confezione
Contenuto della confezione Assicurarsi della presenza dei seguenti articoli nella confezione: - ARCHOS 50 Titanium - Cuffia - Cavo USB - Cavo host USB - Caricatore - Guida dell’utente - Garanzia, note legali e sulla sicurezza Gli articoli forniti con il dispositivo e gli accessori disponibili possono variare in base al Paese o al gestore telefonico. -
Page 67: Descrizione Del Dispositivo
Descrizione del dispositivo Slot micro-SIM Jack per auricolare Flash Altoparlanti Webcam Pulsante volume Pulsanti ON/OFF... - Page 68 Descrizione del dispositivo Fotocamera Flash Altoparlanti Porta micro-USB* Microfono *Ricarica il tuo dispositivo con il cavo USB. Collegare dispositivi esterni con il cavo host USB.
- Page 69 Menu Home/App recenti Indietro Menu: Aprire la lista di opzioni disponibili sulla schermata corrente. Home/App recenti: Premere brevemente per tornare alla schermata principale; premere a lungo per aprire l’elenco delle applicazioni recenti. Indietro: Ritorno alla schermata precedente.
-
Page 70: Come Inserire La Scheda Sim
Come inserire la scheda SIM 1. Inserire lo strumento apposito nel foro della copertura per rimuoverla. 2. Sollevare la copertura per rimuoverla completamente. 3. Inserire la micro-SIM nel senso mostrato nella figura. 4. Utilizzando lo strumento apposito, spingere la scheda SIM fino a sentire un clic: a questo punto la scheda è... - Page 71 Enlever le cache en utilisant un bout Soulever le cache pour l’enlever Insérer la carte micro-SIM en suivant Util pointu que vous insérer dans le trou. complètement. le sens d’insertion indiqué. cart sérer la carte micro-SIM en suivant Utiliser un objet comme un cure- Remettre le cache en place.
-
Page 72: Introduzione
Introduzione Accensione 1. Premere e tenere premuto il pulsante ON/OFF per accendere il dispositivo. Quando si accende il dispositivo, può essere richiesto un codice PIN. 2. Digitare il codice PIN fornito con la scheda SIM. 3. Selezionare "OK". Spegnimento Per spegnere il dispositivo, premere e tenere premuto il pulsante ON/ OFF, e quindi selezionare Power off >... - Page 73 Installazione guidata La prima volta che si avvia ARCHOS, il wizard di installazione aiuterà ad installare il dispositivo : - Autorizzazione alla condivisione della posizione - Lingua - Account Google - Il servizio di localizzazione - Data e ora Azioni sul touch screen...
-
Page 74: Connessione 3G & Wifi
Connessione 3G Con la scheda SIM 3G, si dovrebbe essere connessi a Internet senza alcuna ulteriore configurazione. Il dispositivo ARCHOS riceverà il segnale solo se si trova in una zona coperta dalla rete 3G o EDGE del proprio provider 3G. Quando è collegato alla rete 3G, l'icona 3G è visualizzata nella barra di stato. - Page 75 (Wireless e reti), se il WiFi è spento, far scorrere l’interruttore WiFi in posizione “ON”. Una volta che la rete WiFi è attiva, il dispositivo ARCHOS ricerca le reti WiFi presenti nel raggio. 6. Selezionare “WiFi”. 7. Selezionare il nome di rete a cui si desidera connettersi. Le reti private vengono visualizzate con un lucchetto e richiedono l’inserimento di una...
-
Page 76: Account Google E Contatti
Account Google e contatti Aggiunta di un account Google Un account Google consente di sfruttare al meglio tutte le applicazioni e i servizi di Google che è possibile utilizzare. 1. Andare a "Impostazioni" > "Account"> "Aggiungi account". 2. Selezionare il tipo di account "Google" da aggiungere. 3. - Page 77 Salvataggio dei contatti Tutti i propri contatti sono sempre disponibili sul web e possono essere sincronizzati con qualsiasi telefono Android che è impostato con lo stesso account Google. 1. Installare la scheda SIM con i contatti presenti nel telefono. 2. Da una schermata Home o Tutte le Applicazioni, selezionare l'applicazione Persone 3.
-
Page 78: Conoscere Android
Conoscere Android Schermata iniziale estesa: Navigare tra i vari pannelli della schermata iniziale sfiorando da sinistra o destra. Pulsante Home Premere brevemente per tornare alla schermata principale. Doppio tocco per aprire l’elenco delle applicazioni recenti. Spostare una voce della schermata iniziale: Selezionare e tenere il dito su di essa fino a quando si visualizzano le linee della griglia di posizionamento, quindi scorrere nella posizione desiderata e togliere il dito. - Page 79 Creare cartelle di applicazioni: Lasciare un’icona di applicazione su un’altra icona della schermata iniziale e le due icone si combineranno. Widget: Selezionare l’icona Tutte le applicazioni della schermata iniziale. Toccare i Widget sulla parte superiore dello schermo. Dalla schermata principale Widget, è...
-
Page 80: Risoluzione Dei Problemi
Risoluzione dei problemi Il telefono è bloccato o non si accende Premere il pulsante ON/OFF & Volume + per 10 secondi. Caricare il dispositivo per almeno 10 minuti. Il mio telefono non riesce a connettersi a una rete o visualizza il messaggio "No service"... - Page 81 ................Probleemoplossing....................... Raadpleeg voor meer informatie de veelgestelde vragen (FAQ's) op www.archos.com. Lees eerst de antwoorden op deze vragen voordat u het product terugstuurt. Uw probleem is dan mogelijk snel opgelost. Aangezien wij onze producten regelmatig updaten en verbeteren, kunnen de vormgeving en/of de functies van uw apparaatsoftware...
-
Page 82: Inhoud Van De Verpakking
Inhoud van de verpakking Controleer of de volgende onderdelen in de verpakking zitten: - ARCHOS 50 Oxygen - Headset - USB-kabel - USB host kabel - Lader - Gebruikershandleiding - Garantie, wettelijke mededelingen en veiligheidsvoorschriftem De onderdelen die bij het apparaat zijn meegeleverd en de accessoires die verkrijgbaar zijn, verschillen per land en per service provider. -
Page 83: Beschrijving Van Het Apparaat
Beschrijving van het apparaat Micro-SIM-sleuf Aansluiting voor headset Flash Luidspreker Webcam Volumeknoppen AAN/UIT-knop... - Page 84 Beschrijving van het apparaat Camera Flash Luidspreker Micro-USB-poort* Microfoon *Laad uw apparaat met de USB-kabel. Sluit uw externe apparaten met de USB host kabel.
- Page 85 Menu Home/Recente apps Vorige Menu: de lijst met menu-opties van het huidige scherm weergeven. Home/Recente apps: kort indrukken om terug te keren naar het beginscherm, lang indrukken om de lijst met recente apps te openen. Vorige: terug naar het vorige scherm.
-
Page 86: Sim-Kaart Plaatsen
SIM-kaart plaatsen 1. Verwijder het klepje door het meegeleverde gereedschap in de opening van het klepje te steken. 2. Til het klepje omhoog en verwijder het. 3. Plaats de micro-SIM-kaart in de aangegeven richting. 4. Duw de kaart naar binnen met het meegeleverde gereedschap. Als de SIM-kaart goed is geplaatst, hoort u een klik. - Page 87 Enlever le cache en utilisant un bout Soulever le cache pour l’enlever Insérer la carte micro-SIM en suivant Util pointu que vous insérer dans le trou. complètement. le sens d’insertion indiqué. cart sérer la carte micro-SIM en suivant Utiliser un objet comme un cure- Remettre le cache en place.
-
Page 88: Aan De Slag
Aan de slag Inschakelen 1. Houd de AAN/UIT-knop ingedrukt om het apparaat in te schakelen. Mogelijk moet u een pincode invoeren nadat u het apparaat heeft ingeschakeld. 2. Voer de pincode in die is meegeleverd bij uw SIM-kaart. 3. Kies ‘OK’ . Uitschakelen Om het apparaat uit te schakelen, houdt u de AAN/UIT-knop ingedrukt en kiest u "Power off"... - Page 89 Installatiewizard De eerste keer dat u uw ARCHOS inschakelt, zal de installatiewizard u helpen bij het instellen van uw apparaat : - Location consent [Locatietoestemming] - Taal - Google account - De locatieservice - Datum en tijd Schermbediening Tikken: Eenmaal tikken om een menu, optie of toepassing te kiezen of te starten.
-
Page 90: 3G- & Wifi-Verbinding
3G-verbindung Via uw 3G SIM-kaart kunt u automatisch verbinding maken met het internet. De ARCHOS heeft alleen signaal in een gebied met dekking door uw 3G-aanbieder of EDGE-netwerk. Wanneer u bent verbonden met het 3G-netwerk wordt het 3G-pictogram weergegeven in de statusbalk. - Page 91 5. Als WiFi uit is bij Wireless & Networks [Draadloos en netwerken] schuif dan de WiFi-knop naar “ON’ [Aan]. Als WiFi is ingeschakeld, scant de ARCHOS naar WiFi- netwerken in het bereik. 6. Tik op WiFi. 7. Tik op de naam van het netwerk waarmee u verbinding wilt maken.
- Page 92 Google account & Contacten Een Google account toevoegen Met een Google account kunt u het meeste uit uw Google apps en voorzieningen halen. 1. Ga naar“Settings” [Instellingen] > “Accounts” > “Add account” [Account toevoegen]. 2. Kies het accounttype "Google" om toe te voegen. 3.
- Page 93 Contacten opslaan Uw contacten zijn altijd beschikbaar op internet en kunnen worden gesynchroniseerd met alle Android-telefoons die via hetzelfde Google- account zijn geconfigureerd. 1. Plaats de SIM-kaarten met uw contacten in uw telefoon. 2. In het beginscherm of in het scherm "Alle Apps" kiest u de app "People" [Contactpersonen] 3.
-
Page 94: Vertrouwd Raken Met Android
Vertrouwd raken met Android Het uitgebreide startscherm: Navigeren tussen de verschillende startschermpanelen door er van links en rechts overheen te vegen. Home-knop: Kort indrukken om terug te keren naar het beginscherm. Dubbel tikken om het overzicht van recente toepassingen weer te geven. Het verplaatsen van een item op het startscherm: Tik en houd uw vinger op zijn plaats tot de positioneringsrasterlijnen verschijnen, dan schuift u deze naar de gewenste locatie en laat uw vinger... - Page 95 Het aanmaken van applicatiemappen: Plaats op een startscherm het ene app-pictogram op het andere, en de twee pictogrammen worden gecombineerd. Widgets: Tik in uw startscherm op het pictogram Alle apps. Tik op Widgets aam de bovenkant van het scherm. Vanaf het Widgets-hoofdscherm kunt u widgets op dezelfde manier verplaatsen als app-pictogrammen.
-
Page 96: Probleemoplossing
Probleemoplossing Mijn telefoon doet niets meer of kan niet worden ingeschakeld Druk gedurende 10 seconden op de AAN/UIT-knop & Volumeknop +. Laad uw apparaat gedurende ten minste 10 minuten op. Mijn telefoon kan geen verbinding maken met een netwerk of "Geen service" wordt weergegeven Probeer op een andere locatie verbinding te maken. - Page 97 Resolução de problemas................... Para mais informações, consulte as perguntas frequentes (FAQs) em www.archos.com. Certifique-se de que as lê antes de devolver qualquer produto. O seu problema ter uma resolução muito simples. Como atualizamos e melhoramos frequentemente os nossos produtos, o software do seu dispositivo pode ter uma aparência ou funcionalidade...
-
Page 98: Conteúdo Da Embalagem
Conteúdo da embalagem Verifique se tem os seguintes itens na embalagem do seu produto: - ARCHOS 50 Oxygen - Headset - Cabo USB - Cabo USB host - Carregador - Guia do usuário - Garantia, avisos legais e de segurança Os itens fornecidos com o seu dispositivo e os acessórios disponíveis... -
Page 99: Descrição Do Dispositivo
Descrição do dispositivo Ranhura Micro-SIM Entrada do auricular Flashlight Coluna Webcam Botões de volume Ligar/desligar... - Page 100 Descrição do dispositivo Câmara Flashlight Coluna Porta Micro-USB* Microfone *Carregue o seu dispositivo com o cabo USB. Conecte seus dispositivos externos com o cabo USB host.
- Page 101 Menu Início/aplicações recentes Voltar Menu: abrir a lista de opções disponíveis no presente ecrã. Início/aplicações recentes: prima momentaneamente para voltar ao ecrã principal, pressione prolongadamente para ver a lista de aplicações usadas recentemente. Voltar: voltar ao ecrã anterior.
-
Page 102: Inserir O Cartão Sim
Inserir o cartão SIM 1. Use a ferramenta fornecida, acomodada no orifício da tampa, e remova a tampa. 2. Levante a tampa para removê-la completamente. 3. Introduza o micro-SIM na orientação exibida. 4. Use a ferramenta fornecida para colocá-lo no lugar. Quando o cartão SIM está... - Page 103 Enlever le cache en utilisant un bout Soulever le cache pour l’enlever Insérer la carte micro-SIM en suivant Util pointu que vous insérer dans le trou. complètement. le sens d’insertion indiqué. cart sérer la carte micro-SIM en suivant Utiliser un objet comme un cure- Remettre le cache en place.
-
Page 104: Preparação
Preparação Ligar 1. Mantenha premido o botão ligar/desligar para ligar o dispositivo. Pode ser solicitado o código PIN quando liga o seu dispositivo. 2. O código PIN é fornecido com o seu cartão SIM. 3. Selecione "OK". Desligar 1. Mantenha premido o botão ligar/desligar para ligar o dispositivo e em seguida selecione "Power off"... - Page 105 Assistente de instalação Quando iniciar o ARCHOS pela primeira vez, o assistente de instalação irá ajudá-lo a configurar o seu aparelho: - Autorização de localização - Idioma - Conta Google - Minha localização - Data e hora Ações no ecrã tátil Tocar: Toque uma vez para selecionar ou abrir um menu, opção ou...
-
Page 106: Ligação 3G & Wifi
Ligação 3G Se possuir um cartão SIM 3G, é possível estabelecer ligação à Internet sem passos adicionais. O ARCHOS terá sinal apenas se a área tiver cobertura 3G ou EDGE por parte da sua operadora móvel. Enquanto estiver ligado à rede 3G, o ícone 3G será exibido na barra de estados. - Page 107 5. Na secção “Wireless & networks” (Redes e Wi-Fi), se a opção WiFi estiver desligada, deslize-a para a posição “ON” (LIGADO). Assim que o Wi-Fi estiver ligado, o ARCHOS vai analisar as redes Wi-Fi que estiverem ao seu alcance. 6. Toque WiFi.
-
Page 108: Ecrã Da Conta Google E Contactos
Ecrã da conta Google e contactos Adicionar uma conta Google Uma conta Google garante-lhe o uso de todas as aplicações e serviços Google. 1. Vá a "Settings" (Definições) > “Accounts” (Contas) > “Add account” (Adicionar conta). 2. Selecione “Google” como tipo de conta. 3. - Page 109 Guardar os seus contactos Os contactos ficam sempre disponíveis na Web e podem ser sincronizados com qualquer dispositivo Android configurado com a mesma conta Google. 1. Introduza no dispositivo o cartão SIM que contém os seus contactos. 2. A partir do ecrã principal ou do ecrã de todos os aplicativos, selecione a aplicação People (Pessoas) 3.
-
Page 110: Familiarizar-Se Com Android Tm
Familiarizar-se com Android O ecrã inicial alargado: Navegue entre os diferentes painéis do ecrã inicial movendo-os para a esquerda e para a direita. Botão Principal: Prima momentaneamente para voltar ao ecrã principal. Toque duplo para abrir uma lista com as aplicações recentes. Mover um item do ecrã... - Page 111 Criar pastas de aplicações: Largue o ícone de uma aplicação sobre outro num ecrã inicial e os dois ícones ficarão combinados. Widgets: Toque no ícone Todas as aplicações no seu ecrã inicial. Toque em Widgets no topo do ecrã. A partir do ecrã Widgets principal, pode movimentar os widgets da mesma forma que o faz com os ícones das aplicações.
-
Page 112: Resolução De Problemas
Resolução de problemas O meu telemóvel está bloqueado e não liga Prima o botão LIGAR/DESLIGAR & o botão Volume + durante 10 segundos. Carregue o aparelho durante pelo menos 10 minutos. O meu telemóvel não consegue ligar-se a uma rede ou é exibida a mensagem "Sem cobertura de rede"... - Page 113 ................... Устранение неполадок.................... Для получения дополнительных сведений ознакомьтесь со списком часто задаваемых вопросов на веб-странице www.archos.com. Обязательно прочитайте их, прежде чем принимать решение о возврате изделия. Возможно, проблема, с которой вы столкнулись, не представляет собой ничего сложного. Поскольку мы часто обновляем и совершенствуем...
-
Page 114: Содержимое Упаковки
Содержимое упаковки Проверьте, входят ли в комплект поставки следующие компоненты: - ARCHOS 50 Oxygen - гарнитуре - Кабель USB - USB кабель хозяина - Зарядное устройство - Краткое руководство - гарантии и инструкции по безопасности Компоненты, входящие в комплект поставки устройства, и... -
Page 115: Описание Устройства
Описание устройства гнездо micro-SIM гнездо для гарнитуры фонарик громкоговоритель Веб-камера Кнопки регулировки громкости Кнопка включения и выключения... - Page 116 Описание устройства Камера фонарик громкоговоритель Порт micro-USB* Микрофон *Зарядка устройства с помощью кабеля USB. Подключите внешние устройства с помощью кабеля USB HOST.
- Page 117 Меню главный экран/последние приложения Назад Меню: открытие списка функций, доступных на текущем экране. Главный экран/последние приложения: нажмите один раз для возврата на главный экран; нажмите и удерживайте кнопку для открытия списка последних приложений. Назад: возврат к предыдущему экрану.
-
Page 118: Вставка Sim-Карты
Вставка SIM-карты 1. Снимите крышку, вставив прилагаемый инструмент в отверстие крышки. 2. Поднимите крышку до полного снятия. 3. Вставьте micro-SIM в указанном направлении. 4. Протолкните карту с помощью прилагаемого инструмента. При правильной вставке и фиксации SIM-карты прозвучит щелчок. 5. Наденьте крышку. Крышка удерживается на месте с помощью магнитной... - Page 119 Enlever le cache en utilisant un bout Soulever le cache pour l’enlever Insérer la carte micro-SIM en suivant Util pointu que vous insérer dans le trou. complètement. le sens d’insertion indiqué. cart sérer la carte micro-SIM en suivant Utiliser un objet comme un cure- Remettre le cache en place.
-
Page 120: Начало Работы
Начало работы Включение 1. Нажмите и удерживайте кнопку включения и выключения, чтобы включить устройство. При включении устройства может появиться запрос на ввод PIN-кода. 2. Введите PIN-код, предоставляемый с SIM-картой. 3. Нажмите OK. Выключение Чтобы выключить устройство, нажмите и удерживайте кнопку включения... - Page 121 Мастер настройки При первом запуске устройства ARCHOS мастер установки поможет выполнить настройку : - Согласие на определение местоположения - Язык - Учетная запись Google - Опции службы геолокации - Дата и время Действия на сенсорном экране Касание: Коснитесь один раз для выбора или запуска меню, функции...
-
Page 122: Подключение 3G & Подключение Wifi
=> отобразить панель мониторинга состояния. 3. Выберите значок 4. Для активации коснитесь значка мобильных данных Совет: Если возникнут проблемы с соединением, см. часто задаваемые вопросы и ответы на них на веб-сайте www.archos.com или свяжитесь со своим поставщиком услуг сети 3G. - Page 123 5. Если модуль Wi-Fi выключен, в разделе Wireless & networks («Беспроводная связь и сети») переместите переключатель Wi-Fi в положение ON («ВКЛ»). После включения Wi-Fi устройство ARCHOS выполнит обнаружение сетей Wi-Fi в диапазоне приема. 6. Выберите Wi-Fi. 7. Выберите ту сеть, к которой хотите подключиться. Частные сети.
-
Page 124: Учетная Запись Google И Контакты
Учетная запись Google и контакты Добавление учетной записи Google Учетная запись Google позволяет пользоваться преимуществами любых приложений и услуг Google, которые вы захотите использовать. 1. Перейдите к разделу Settings > Accounts > Add account (Настройки > Учетные записи > Добавить учетную запись). 2. - Page 125 Сохранение контактов Все ваши контакты в любой момент доступны в сети и могут быть синхронизированы с любым телефоном Android, настроенным на ту же учетную запись Google. 1. Установите в телефон SIM-карту, на которой записаны контакты. 2. На главном экране или экране All Apps (Все приложения) выберите приложение...
-
Page 126: Знакомство С Android
Знакомство с Android Расширенный домашний экран: Выполняйте переходы между различными панелями домашнего экрана, смещая их влево и вправо. Кнопка Home: Нажмите для возврата к главному экрану. Двойное касание для открытия списка последних приложений. Перемещение элемента домашнего экрана: Прикоснитесь к элементу и удерживайте палец, пока не появится сетка позиционирования, затем... - Page 127 Создание папок приложений: Поместите пиктограмму одного приложения поверх другого на домашнем экране, и две пиктограммы объединятся. Виджеты: Прикоснитесь к пиктограмме «Все приложения» на домашнем экране. Прикоснитесь к позиции Widgets в верхней части экрана. На основном экране Widgets можно переставлять виджеты таким же образом, как...
-
Page 128: Устранение Неполадок
Устранение неполадок Телефон не реагирует на действия или не включается Нажмите кнопку ON / OFF и громкость + и удерживать в течение 10 секунд. Зарядите устройство по крайней мере 10 минут. Не удается подключить телефон не может к сети, или отображается сообщение No service (Нет... - Page 129 Until the date that is three years after our last shipment of this product, you may obtain a copy of the source code corresponding to the binaries for any GPL-Licensed file by contacting ARCHOS customer service at http://www.archos.com and ARCHOS will send you a link to such source code or will provide instructions to get the source on a physical medium.
- Page 130 National restrictions This device is intended for home and office use in all EU countries (and other countries following the EU directive 1999/5/EC) without any limitation except for the countries mentioned below: Country Restriction Reason/remark Bulgaria None General authorization required for outdoor use and public service France Outdoor use...
- Page 131 Russian None Only for indoor applications Federation Note: Frequency 2454-2483.5MHZ are restricted to indoor use in France. Consult the declaration of conformity on http://www.archos.com/products/declaration_conformity.html After the labortory measurement, this mobile phone SAR value is: Head - 0.217W/kg Body - 0.561W/kg...
Need help?
Do you have a question about the 50 Oxygen and is the answer not in the manual?
Questions and answers