Table of Contents
Advertisement
Advertisement
Table of Contents

Subscribe to Our Youtube Channel
Summary of Contents for Centrios 1315117
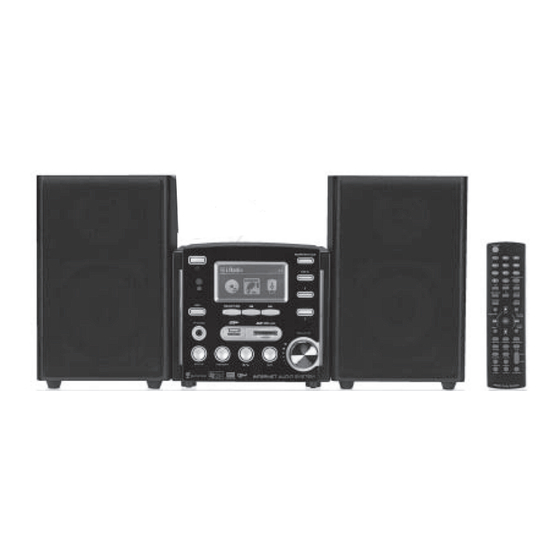
- Page 1 Internet Radio Micro Hi-Fi System 1315117...
-
Page 2: Table Of Contents
Table of Contents Copyright Statements ..............3 Safety . -
Page 3: Copyright Statements
Copyright Statements ● Music recognition technology and related data are provided by Gracenote®. Gracenote is the industry standard in music recognition technology and related content delivery. For more information visit http://www.gracenote.com/. ● CD and music-related data from Gracenote, Inc., copyright © 2006 Gracenote. Gracenote Software, copyright ©... - Page 4 Gracenote EndUser License Agreement ® Version 20061005 This application or device contains software from Gracenote, Inc. of Emeryville, California (“Gracenote”). The software from Gracenote (the “Gracenote Software”) enables this application to perform disc and/or file identification and obtain music-related information, including name, artist, track, and title information (“Gracenote Data”) from online servers or embedded databases (collectively, “Gracenote Servers”) and to perform other functions.
-
Page 5: Safety
Micro System with Internet Radio Please read the entire instruction manual before using and save it for future use. Any technical data in this manual is subject to change without notice. If you have any questions concerning technical problems please contact Orbyx Electronics technical support at www.orbyxelectronics.com. -
Page 6: Starting Up
2. Starting Up 2.1 Setting up the equipment 2.1.1 Speakers Connect the speakers to the outlet on the back of the device. Connect the right speaker to the outlet marked R and the left speaker to the outlet marked L. 2.1.2 Power cord 1. - Page 7 2.3 Installation of a wireless network (WLAN) WiFi Dongle 802.11 b/g Wireless Broadband Router Micro System Ethernet ADSL or Cable Modem PC (Media Server) WiFi Dongle PC (Media Server) To begin, first ensure that the wireless network (e.g. a wireless router) is ready for connection and has a connection to the Internet.
- Page 8 Network Settings – LAN Select LAN to connect to the Internet via a network. Select WLAN to connect to the Internet via a wireless network. Select EXIT to exit from the guide. If no IP number is obtained via Dynamic Host Configuration Protocol DHCP (DHCP Timeout), the below screen will be displayed.
- Page 9 Network Settings – WLAN (With WiFi Dongle) Select LAN to connect to the Internet via a network. Select WLAN to connect to the Internet via a wireless network. Select EXIT to exit from the guide.
- Page 10 If no wireless network can be found: Select GO to start the guide. (1) Cannot find a wireless network Select RESCAN to search again or select EXIT to exit the guide (1) Cannot find the desired wireless network Select RESCAN to search again or select EXIT to exit the guide...
- Page 11 Select an open, unprotected wireless network Select YES to establish a connection or NO to select another network. Select a protected wireless network which requires a password Enter the network password and then select YES to connect or NO to select another network.
- Page 12 Failed to connect to the wireless network 1. Select RETRY to reconnect 2. or select WIZARD to search for available wireless networks 3. or select EXIT to exit. No IP number is obtained via DHCP (DHCP Timeout) 1. Select RETRY to reconnect 2.
- Page 13 2.4 Starting the unit for the first time When you turn on the unit for the first time the stereo will try to automatically search for an IP address. If the network is successfully connected to the Internet, the unit will also synchronize the time with the time server.
-
Page 14: Cd Functions
2.6 Using the menus The instructions in the operating manual describe the buttons on the main unit and in some cases refer to the buttons on the remote control. ■ You can at any time return to the previous menu selection by pressing the stop button 1.Press MENU once to enter the main menu. - Page 15 ? All ? A l ll l ? Can ’ t Stop Loving You ? Unknow Track 01 ? Do You Remember ? Unknow Track 02 6.Once the track information has been collected, 7. If there is no information, the track will instead the display will show the name of the track.
- Page 16 Play tracks from a specific folder ? 001/012 Can ’ t Stop Loving You Phil Collins *** Love Songs: A Compilation 02 : 30 04 : 30 1.Use the arrows to select the desired folder and then press SELECT/OK 2.Use the arrow to select the tract you wish to play. Then press MEMORY to mark the selected track. 3.Repeat the above to mark several tracks.
-
Page 17: Using Internet Radio
4. Using the Internet Radio 4.1 Introduction Internet radio can receive radio stations that are transmitted over the Internet. Most large radio stations in the world offer their program to listeners through the Internet. To be able to listen to the Internet radio, the unit needs to be connected to the Internet through a router to a broadband connection (e.g. - Page 18 4.3 SHOUTcast To select a station by category: 1. In the main menu use the ↑ and ↓ buttons to select Internet Radio, then press SELECT/OK to confirm. 2. Choose SHOUTcast and press SELECT/OK to confirm. 3. Choose the desired category and press SELECT/OK to confirm. 4.
-
Page 19: Playing Music From Usb Memory
4.5 Record from an Internet radio to a USB memory or SD/MMC memory card Note! Recording from the Internet only works with radio stations that transmit through SHOUTcast. The instructions assume that you have first started the playing of a SHOUTcast Internet station. i.Radio i.Radio Whispering... -
Page 20: Playing Music From A Memory Card
6. Play music from a Memory card 6.1 Play music from a SD/MMC memory card 1. Insert a SD/MMC memory card containing MP3 or WMA files into the memory card slot on the front of the unit. will show on the display when the memory card is connected. ▲... -
Page 21: Using Fm Radio
7. Using FM radio 7.1 Listen to FM radio 90.10 MHz 90.10 MHz → 1. Press MENU to enter the main menu. Select 2. Press I◄◄ or ►►I to adjust the frequency FM and confirm with SELECT/OK. upwards or downwards. 7.2 Quick search radio channel To search for a radio channel press and hold I◄◄... - Page 22 108.00 MHz 90.10 MHz Pre- - - Scanning Completed 5. When the search is completed the message 6. Press ►II to listen to the stored radio channels. Pre-Scanning Completed will show on the display. Select any saved radio channels using the ↑ and ↓ buttons.
-
Page 23: Playing Music From A Media Server
8. Listen to music through a media server 8.1 Compatible software (Media Server) With a Media Server software installed in your computer, you can listen to music that is stored in your computer on your micro system. The music is transferred through the network to the micro system. Examples of software which must be installed in the computer: - Windows Media Player 11 or later (demands Windows XP with SP2) - Media Tomb (for Linux) http://mediatomb.cc/... -
Page 24: File Manager
8.3 Playing music over the network 1. In the main menu select the option UPNP and press SELECT/OK to connect to the media server. 2. When the server is found, choose Browse to select media server (if there are several servers on the network). -
Page 25: Settings
11. Settings Any stereo adjustments are done in the menu Settings and its submenus. The instructions in this chapter describe the submenus. 11.1 Setting time and date The built-in clock automatically updates the time and date if the device is connected to the Internet. Synchronization of time and date occurs every day at 12.00 and 24.00 hours and every time the unit is turned on. - Page 26 Time Date & Time TimeSync ? ? ? ? 13 : 41 : 23 Date > Time > ? ? ? ? 3. Use the ↑ or ↓ to set the hours. Then press 4. When you have adjusted the hour and minutes, SELECT/OK to confirm and to set the minutes.
- Page 27 Measure of signal strength for wireless network Weak (Under 20%) Title Low (20%-59%) Title Good (60% - 79%) Title Very good (over 80%) Title 11.3.2 Connect to a wireless network Connect with help of the connection guide (Wizard). 1. Place the wireless network adaptor in the USB socket marked WiFi on the back of the unit. 2.
- Page 28 11.3.3 Enter a static (fixed) IP address 1. Select Network and press SELECT/OK to confirm. IP Setting N twork Connect IP Source Dymanic → IP Setting > Use Proxy 2. Select IP Setting and press SELECT/OK. 3. Select IP source and press SELECT/OK to select Dynamic (Obtain an IP address automatically) or Static (Use a fixed IP address).
- Page 29 11.3.5 Use with Proxy-server If the micro system is used on the network where the connection occurs through a proxy server this is indicated in the submenu “Use Proxy.” Enter the domain and port for the proxy server using the remote control’s digits. 11.4 Language The menu settings are multi-lingual.
-
Page 30: Troubleshooting
Troubleshooting The Micro System No sound/ No voltage. The volume is not adjusted. Turn up the volume. No voltage in the wall socket. Check the wall socket and the stereo’s power cord. Ensure the speakers are properly connected. The display does not work properly or at all. Nothing is shown in the display when any of the controls are used. Static electricity needs to be uncharged. -
Page 31: Specifications
Internet radio The Internet radio does not function/ The list does not show any stations at all. Check the network adjustments and also that the stereo is connected to the Internet. Use a computer to check that a desired station can be reached and that is still exists. It can take a while before the list is updated if the radio station stops sending. -
Page 32: Warning Statements And Warranty
The FCC Wants You To Know This equipment has been tested and found to comply with the limits for a Class B digital device, pursuant to Part 15 of the FCC Rules. These limits are designed to provide reasonable protection against harmful interference in a residential installation. This equipment generates, uses, and can radiate radio frequency energy and, if not installed or used in accordance with the instructions, may cause harmful interference to radio communications. - Page 33 Orbyx Electronics, LLC (“Orbyx), as the distributor of this defects in materials and workmanship for a period of one (1) year Centrios™ product (your “Product”). from the date of purchase. Within this period, simply take the What Does This Warranty Cover? product and your proof of purchase to any ORBYX Electronics store •...
Need help?
Do you have a question about the 1315117 and is the answer not in the manual?
Questions and answers
I **** using USB for my alarm clock music. Can I change the song it selects from my USB?
Yes, you can change the song selected from a USB on your Centrios alarm clock model 1315117. Use the arrows to select the desired folder, press SELECT/OK, then use the arrow to choose the track. Press MEMORY to mark the selected track, and repeat the process to mark multiple tracks. Press ►II or SELECT/OK to start playback of the marked tracks.
This answer is automatically generated