Globalstar QUALCOMM GSP-1700 Quick Reference Card
Satellite phone
Hide thumbs
Also See for QUALCOMM GSP-1700:
- User manual (118 pages) ,
- Quick reference manual (2 pages) ,
- Quick manual (2 pages)
Table of Contents
Advertisement
Quick Links
Download this manual
See also:
User Manual
Troubleshooting
Problem
Solution
Making Calls Rotate and fully extend the
antenna.
Ensure antenna has a clear
view of the sky.
Check signal strength.
If "Calling is Restricted"
displays, check the Restrict
Phone setting.
Remove all service providers
from Prohibited List.
Receiving
Check that phone is on.
Calls
Check that the ringer is
loud enough.
Rotate and fully extend the
antenna.
Ensure antenna has a clear
view of the sky.
Check signal strength.
Remove all service providers
from Prohibited List.
Features
Display phone Number briefly displays
number
when phone is turned on.
or
Press
menu.
Press
for My Number.
Operating
Phone does not operate
Environment
inside buildings.
Phone does not operate in
vehicles unless you are
using a car kit.
My phone number is:
____________________________________
My service provider's number is:
____________________________________
Copyright ©2006 QUALCOMM Incorporated
80-C6301-1 Rev B
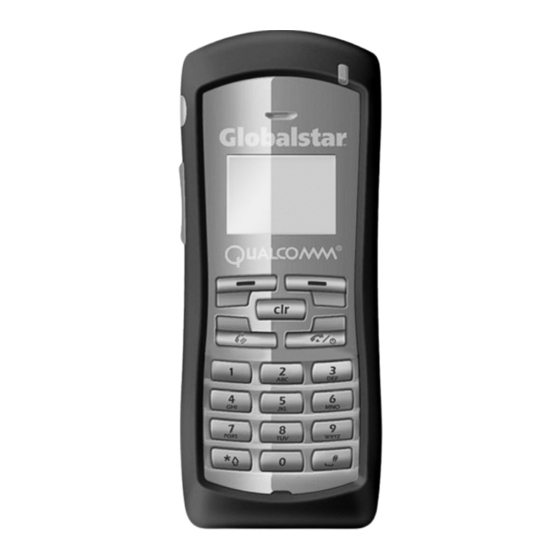
QUALCOMM Globalstar
GSP-1700 Satellite Phone
Quick Reference Card
Volume
Globalstar
Buttons
Apr 1, Sat
SMART
menu
book
KEY™
Options
Punctuation
Access
Battery
(on back)
Indicator
Light
Globalstar
antenna
(on back)
SMART
KEYS™
Power
Message
Scroll Keys
Advertisement
Table of Contents

Related Manuals for Globalstar QUALCOMM GSP-1700


Summary of Contents for Globalstar QUALCOMM GSP-1700
- Page 1 Troubleshooting Features QUALCOMM Globalstar Problem Solution GSP-1700 Satellite Phone Display phone Number briefly displays Quick Reference Card number when phone is turned on. Making Calls Rotate and fully extend the antenna. Ensure antenna has a clear Press menu. view of the sky.
- Page 2 Basic Operations Rotating and Extending Antenna Making Calls Make Calls Extend and rotate antenna. Rotate and fully extend the antenna. For best performance, move away from tall Enter phone number. obstacles such as buildings or trees. Press Save Phone Enter phone number. Book Entry Press save.
- Page 3 QUALCOMM Globalstar GSP-1700 Phone User Manual...
- Page 4 This guide is based on the production version of the QUALCOMM Globalstar GSP-1700 Phone. Software changes may have occurred after this printing. QUALCOMM reserves the right to make changes in technical and product specifications without prior notice. QUALCOMM Incorporated 5775 Morehouse Drive, San Diego, CA 92121-1714 Document Number 80-C6302-3 Rev A Copyright ©...
-
Page 5: Table Of Contents
Contents Getting Started ..................1 Understanding this guide ..............2 Preparing to make calls .................2 Making voice calls ..................4 Making Data Calls .................4 Receiving calls ..................5 Ending calls ....................6 Displaying your phone number .............6 Solving problems ..................6 Contacting customer service ..............6 Phone Basics ....................7 Phone features and keypad ..............8 Display indicators ................10 Antenna ....................11... - Page 6 Contents Erasing entries ..................29 Using the “secret” feature ..............29 Viewing numbers .................30 Sending tones ..................30 Prepending numbers ................31 Speed dialing ..................32 One-touch dialing ................32 Call History Menu ...................33 Accessing the call history list ..............34 Viewing call history details ..............35 Messages Menu ..................37 Message alerts ..................37 Reading messages ................37 Voice messages ..................38...
- Page 7 Contents Preferences Menu ...................59 Sounds ....................60 Display ....................64 Alerts ....................70 Calling ....................72 System Menu ....................77 Status ....................77 Find Home ....................78 Version ....................79 Service Provider Select ................79 Service Provider ...................83 Territory ....................84 My Number ..................84 Battery Care and Maintenance ............85 Battery ....................85 Battery care and charging ..............86 Battery chargers ..................87 Low battery ..................87...
- Page 8 Contents AC wall charger ...................99 Universal travel charger ..............99 Car power adapter/vehicle charger .............99 Data cables ..................100 Hands-free operation .................100 Troubleshooting ..................101...
- Page 9 See Battery Care and Maintenance, page 85, for more information. Note When using the QUALCOMM Globalstar Satellite Phone near a television or radio, the phone can cause interference. Regulatory agencies in your area, such as the United States Federal...
- Page 10 viii...
-
Page 11: Getting Started
Battery Charger This User Manual Quick Reference Card It is very important that you read this section because your Globalstar satellite phone is unique. This section provides information on the following basic concepts. Understanding this guide Preparing to make calls... -
Page 12: Understanding This Guide
Getting Started Understanding this guide These conventions or representations are used in this guide: Type of Action Example Action Key Presses Press key briefly. Press Press and hold Press key for more than one second. Using SMART Press menu. Press the SMART KEY KEY™... - Page 13 Incorrect The phone does not operate inside a building, nor does it operate in a vehicle, unless you are using the Globalstar Installation Kit. To prevent dropped calls, use the phone outdoors where you can see the whole sky and have direct line of sight access to the satellite. If a call is dropped, a “fade alert”...
-
Page 14: Making Voice Calls
A message displays if the phone is locked, the phone number is restricted, or there is another problem. Making Data Calls If your service provider offers Globalstar packet data service, you can make data calls. The Globalstar data cable is required to connect your computer (or Windows CE or other handheld organizer) to the phone. -
Page 15: Receiving Calls
Getting Started Note Position the phone on its side for better stability. Receiving calls To receive a call Turn the phone on. Rotate and extend the antenna to find service. Note The phone will ring with the antenna stowed (see Ring While Stowed, page 75), but cannot be answered until the antenna is extended. -
Page 16: Ending Calls
Getting Started From standby mode, press any key except . The Any-Key Answer feature must be set to “on” (see Any-Key Answer, page 74). If you miss a call, a message is displayed. To display the call history list for details about the missed call, press view. -
Page 17: Phone Basics
Phone Basics This section provides information on the following functions: Phone features and keypad Display indicators Antenna... -
Page 18: Phone Features And Keypad
Phone Basics Phone features and keypad Globalstar Apr 1, Sat menu book Light indicator – Flashes when turning the phone on, when receiving incoming calls, or when receiving text (not available in all markets) or voice mail messages. Earpiece. Volume buttons: Adjust ringer volume when not on a call. - Page 19 Move cursor. 14. Message key – To access messages, press and hold the key. (See Messages Menu, page 37.) 15. Microphone. 16. Antenna (see Preparing to make calls, page 2). 17. Battery. 18. Battery release latch. 19. Globalstar Installation Kit connector.
-
Page 20: Display Indicators
Phone Basics Display indicators The indicators on the screen show the status of the phone and the battery charge level at a quick glance. Globalstar: Looking for service..menu book Symbol Status Indicates signal strength ranging from a strong signal (four lines) to an extremely weak signal (one line). -
Page 21: Antenna
Never hold the phone by the antenna. Do not use the phone if the antenna is damaged, unless the phone is being used with the Globalstar Installation Kit. For more information on how to use the antennas, see Preparing to make... - Page 22 Phone Basics...
-
Page 23: Calling Basics
The phone is now in standby mode (see Standby mode, page 14) searching for service. When the phone is turned on, a Globalstar animation sequence displays. To stop this animation, press any key. Turning the phone off Press and hold until “Powering Off”... -
Page 24: Standby Mode
Calling Basics If the phone does not turn off, press and hold for more than one second. Standby mode With the power on, the phone is in standby mode while searching for service. The following screen shows the search messages that display. Looking for service.. -
Page 25: Entering Numbers
Calling Basics Entering numbers When you enter a telephone number, the phone accepts up to 32 digits or other characters including hyphens and pauses. Note All 32 characters do not always display on certain screens and may be replaced by periods (...). To display the entire number, use the View # option in the Phone Book menu (see Finding entries, page 27) or the Call History menu (see Viewing call history details, page 35). -
Page 26: Making Emergency Calls
Calling Basics Press options. Press to edit. Press to edit the number. Use the keypad to edit the numbers. button can be used to delete a digit or character. Note You cannot use to move the cursor when entering or editing numbers because these keys are used to enter # or *. To delete numbers Press to delete one previous character at a time. -
Page 27: Redialing A Call
Calling Basics Redialing a call To redial a recent call Press Select the phone number from the list. Press Muting a call While on a call, the microphone can be muted so that the person on the other end cannot hear you. To turn mute on Press mute. -
Page 28: Call Waiting
Calling Basics Press If international dialing is supported in your network, contact your service provider for more information. Position location service While making a call, it is possible to download your current location coordinates. (See Current position coordinates, page 46.) Call waiting Call waiting lets you know that you are receiving an incoming call by sounding a beep. -
Page 29: Menu Basics
Menu Basics This section provides a guide to Accessing the Main Menu ( menu) Navigating and using menus The following chart shows the various menus available from the Main Menu. Press menu to access the Main Menu. - Page 30 Menu Basics 1 Phone Book 7 Preferences 1 Entering Letters and Other Characters 1 Sounds 1 Ringer Type 2 Entering Pauses 2 Ringer Volume 3 Saving Entries 3 Earpiece Volume 4 Finding Entries 4 Key Beep Sound 5 Editing Entries 5 Key Beep Volume 6 The “Secret”...
-
Page 31: Accessing The Main Menu
Menu Basics Accessing the Main Menu The Main Menu provides access to all of the phone’s features. Use the scroll keys, , to move between screens. Use to move backward through the screens. To access the Main Menu, turn the phone on. The phone is now in standby mode (see Standby mode, page 14). - Page 32 Menu Basics To select a menu item, press the corresponding number. For example, to view the menu item 1 Phone Book, press To save changes or a setting Press To return to previous screen without saving changes Press To return to standby mode without saving changes (if not on a call) Press To return to standby mode without saving changes (if on a call) Press...
-
Page 33: Phone Book Menu
Phone Book Menu 1 Phone Book 1 Phone Book 1 Entering Letters and Other Characters 2 Entering Pauses 3 Saving Entries 4 Finding Entries 5 Editing Entries 6 The “Secret” Feature 7 Speed Dialing 8 One-touch Dialing This section provides information on the following functions: Entering letters and other characters Entering pauses Saving entries... - Page 34 Phone Book Menu To display the next character on the same key: Move the cursor forward by pressing Press the key repeatedly until the desired character is displayed. For example, to display “E,” press two (2) times. The “E” displays. To display the lowercase “e,” press five (5) times.
-
Page 35: Entering Pauses
Phone Book Menu To move backward between screens, press Entering pauses When using automated phone services, such as voice mail or online banking, adding a “pause” when entering a series of numbers allows a segment of time to be included in the string of characters. Each pause counts as one character. -
Page 36: Saving Entries
Phone Book Menu Saving entries The phone saves up to 99 entries. Each entry contains a name (up to 12 characters) and phone number (up to 32 numbers) stored in location numbers 1 through 99. (See Entering numbers, page 15.) To save a name and phone number Enter a phone number using one of the following options: From standby mode:... -
Page 37: Finding Entries
Phone Book Menu Select a location number. If the phone book is not full, you are asked to accept an empty location. Choose one of the following options: Accept the empty location, then press Enter a location number of your choice, then press Scroll to select an empty location, then press If the phone book is full, enter a location number that you want to reuse and replace with the new information. -
Page 38: Editing Entries
Phone Book Menu Use the scroll keys to select an entry. To view an entry, press view. To call the number, press To edit, erase, make secret, view number, prepend (add), or send tones, press options. Editing entries Changes can be made to an entry name, phone number, or location. To edit an entry From standby mode, press book. -
Page 39: Erasing Entries
Phone Book Menu Erasing entries Entries can be erased quickly and easily with a few keystrokes. To erase an entry From standby mode, press book. Scroll to the entry to be erased. Press view. Press options. Press to erase. Press Using the “secret”... -
Page 40: Viewing Numbers
Phone Book Menu Press To view or change a secret entry From standby mode, press book. Scroll to the secret entry. Press view. Press options. Enter your lock code. Select an option to change or view the entry. Press ok to accept any changes and return to the options menu. Viewing numbers An entry’s entire phone number can be viewed and edited. -
Page 41: Prepending Numbers
Phone Book Menu Tones are sent by manually entering numbers, or using numbers stored in the phone book. You can also send tones for numbers entered in the scratchpad (see Scratchpad, page 46). Note The length of the key beep, the sound you hear when pressing the keys, affects the duration of manually entered DTMF tones. -
Page 42: Speed Dialing
Phone Book Menu Press options. Press Prepend. The phone number displays. Enter the numbers to be added to the displayed characters. Press save. Speed dialing Speed dial a phone number if you know the location number of the phone book entry. Speed dial any of the 99 location numbers unless the phone is restricted. -
Page 43: Call History Menu
Call History Menu Call Hist view This section provides information on how to use the call history list: Accessing the call history list Viewing call history details The call history contains the last ten incoming or outgoing voice calls, and includes the following details on each call: Called By Incoming calls, if caller ID is available (see Caller... -
Page 44: Accessing The Call History List
Call History Menu Accessing the call history list To access the call history list From standby mode, press menu. Then press Call History. Press To access the last ten calls, press the scroll keys. For example: 7654321 John 5551212 view scrn_callhist.ep s Scroll down to select a call from the most recent to the oldest calls, or scroll up to select a call from the oldest to the most recent. -
Page 45: Viewing Call History Details
Call History Menu Viewing call history details To view call history details Scroll to select a call on the list. Wendy 1 Bob 658-0987 view Press view. CALL TO 202-987-6543 options Press options. Select one of the following: Date/Time – Display the date and time of the call. Date/Time: Sept 22, Wed 3:45 PM MDT... - Page 46 Call History Menu Duration – Display the duration of the call. Call Duration: 2 min 25 sec Save – Save the number in your phone book. Options Date/Time Duration Save View # – View the entire number. Send – Make a call to the number. Send Tones –...
-
Page 47: Messages Menu
Messages Menu 3 Messages Text Voice This section provides information about SMS (short message service) text and voice mail messages. Message alerts Reading messages Voice messages Text messages Contact your service provider for information regarding the availability of text and voice mail notifications. Message alerts The phone can be configured for message alerts (see New Message, page 72). -
Page 48: Voice Messages
Messages Menu Voice messages Accessing voice mail messages If someone leaves a voice mail message, your phone receives a voice mail notification and alerts you. To access messages, choose one of the following options: Access voice mail notifications for call details. Call your voice mail system and listen to the message. -
Page 49: Text Messages
Messages Menu To manually scroll, press a scroll key. To read the next voice mail notification, press next. To call your voice mail system Press and hold Press voice. To find the voice mail notification you want, press next. Press view. - Page 50 Messages Menu memory allows. For more information on managing phone memory, see Storing text messages, page 41. Accessing text messages To access text messages Press and hold The number of new and old text messages display. Press text. The newest unread messages display first followed by the newest read messages, if any.
- Page 51 Messages Menu To erase text messages Press and hold Press text. A text message displays. To display more detail, if available, press view. The text automatically scrolls on the screen and pauses so that you can read it. To manually scroll, press a scroll key. Scroll to the bottom of the message, press options.
- Page 52 Messages Menu When the phone is out of memory, the oldest unlocked messages are automatically deleted as necessary to receive new messages. Lock messages to prevent messages from being deleted. However, if all messages are locked when a new message is received and the phone is out of memory, the new message is lost.
- Page 53 Messages Menu To display more detail, if available, press view. The text automatically scrolls on the screen and pauses so that you can read it. To manually scroll, press a scroll key. Scroll to the bottom of the message and press options.
- Page 54 Messages Menu...
-
Page 55: Features Menu
Features Menu 4 Features 1 Keyguard 2 Scratchpad 3 Current Position Coordinates This section provides information on how to use the following features: Key Guard Scratchpad Current position coordinates Key Guard The key guard locks the phone keys to prevent accidental use. If you receive an incoming call when the key guard is on, answer the call by pressing Note The key beeps are silenced when the keyguard is set to “on.”... -
Page 56: Scratchpad
Features Menu Scratchpad This feature provides a shortcut to storing information. Enter numbers on the scratchpad to: Add to call history. Save to the phone book. Send tones over the air for automated phone services, such as voice mail or banking online. Note To add to call history or save to your phone book, you can be on a call or in standby mode. - Page 57 Features Menu To receive current position coordinates while making a call Press menu. Press Features. Press Position. Note Before the update button is pressed, the coordinates that appear show the last known position. Position N 40 5' 30" W 105 10' 6" update Press Update.
- Page 58 Features Menu...
-
Page 59: Call Information Menu
Call Information Menu 5 Call Information 1 Last Call 2 Home Calls 3 Roam Calls 4 Recent Calls 5 Data Calls 6 All Calls 7 Resetting call counters This section provides information on how to set counters that track the number of calls and airtime for billing purposes. -
Page 60: Home Calls
Call Information Menu Home Calls Home Calls displays the number and duration of all incoming and outgoing calls made in your home service area, as defined by your service provider. To reset this counter to zero, see Resetting call counters, page 51. To display home calls information From standby mode, press menu. -
Page 61: Data Calls
Call Information Menu Press RecentCall. Press Data Calls Data Calls displays the number of bytes received or transmitted and the duration of data calls made since resetting the counter. To reset this counter to zero, see Resetting call counters, page 51. To display Data Calls information From standby mode, press menu. - Page 62 Call Information Menu To reset the counter to zero From standby mode, press menu. Press Call Information. Select a call counter. Press zero. Press ok to reset the counter. Note After you press ok, you cannot undo the counter reset. Press undo to go back to the call counter information.
-
Page 63: Security Menu
Security Menu 6 Security 1 Lock code 2 Locking the phone 3 Restricting the phone 4 Entering priority numbers 5 Erasing call history list 6 Erasing phone book entries 7 Erasing SMS messages 8 Resetting preferences This section provides information on how to use the following security features: Lock code Locking the phone... -
Page 64: Locking The Phone
Security Menu To enter the new lock code From standby mode, press menu. Press Security Enter the current lock code. Press New Code. Enter your new 4-digit lock code. Press save. The phone displays confirmation of the new code entry. Locking the phone The phone can be locked to prohibit any outgoing calls except priority and emergency numbers. -
Page 65: Restricting The Phone
Security Menu To unlock the phone Press unlock. To return to the main menu, enter your lock code. (Enter the same lock code used to access the Security menu.) If you forget your lock code, contact your service provider. Restricting the phone Restricting the phone limits outgoing calls to emergency and priority numbers, plus phone book locations 1 to 9. -
Page 66: Erasing Call History List
Security Menu Press Priority #. Scroll to Priority#1, Priority#2, or Priority#3. Press edit. Enter the phone number. Press Erasing call history list This feature erases the entire call history list. From standby mode, press menu. Press Security. Enter your lock code. Press Erase Call. -
Page 67: Erasing Sms Messages
Security Menu Erasing SMS messages This feature erases all SMS (short message service) messages, including all locked or unlocked text messages and all voice mail notification messages. Use this erase feature to avoid running out of memory (see To avoid running out of memory, page 42). - Page 68 Security Menu...
-
Page 69: Preferences Menu
Preferences Menu 7 Preferences 1 Sounds 1 Ringer Type 2 Ringer Volume 3 Earpiece Volume 4 Key Beep Sound 5 Key Beep Volume 6 Key Beep Length 7 Mute Stereo 1 Backlight 2 Display 2 Sort Book 3 Banner 4 Auto Hyphens 5 Show Time 6 Time Zone 7 Language... -
Page 70: Sounds
Preferences Menu Sounds To set up your personal sound preferences, changes can be made to the following functions: Ringer type Ringer volume Earpiece volume Key beep sound Key beep volume Key beep length Mute stereo Ringer Type For incoming calls, the ringer can be changed to one of eight different rings or melodies. -
Page 71: Earpiece Volume
Preferences Menu Press to increase or to decrease the volume. To turn off the ringer, press until the word “Silent” appears. To remind you that the ringer is off, the “Ringer Silenced” icon )displays. Press To silence the ringer when receiving a call Press Earpiece Volume The earpiece volume is adjustable while on a call or from standby mode. -
Page 72: Key Beep Volume
Preferences Menu Press to select “tone.” A tone sounds. Press again to select “click.” A click sounds. Note While on a call, if you select “click,” keys pressed for voice mail sound as “tones.” Other keys pressed in menus sound as “clicks.” Press Key Beep Volume The volume of the sound you hear when pressing the keys (key beep), can... - Page 73 Press Mute Stereo To use this feature the Globalstar Installation Kit mute line must be connected to the stereo mute line. When using the kit, this feature can be set to automatically mute the stereo in your vehicle when receiving incoming calls.
-
Page 74: Display
Preferences Menu Press to select “yes.” Press again to select “no.” Press Display The following display features can be adjusted: Backlight Sort Book Banner Auto Hyphen Manual Hyphen Show Time Time Zone Backlight The screen and keypad backlighting can be adjusted to maximize battery life. - Page 75 Preferences Menu Always On – The backlight is always on, which significantly decreases battery life. Press To turn the backlight on Press any key. Note If this feature is set to “Always Off,” pressing any key does not turn the backlight on. Sort Book This option allows users to select whether the phone book displays in numerical location order or by alphabetic name order.
- Page 76 Preferences Menu Press Display. Press Banner. Choose one of the following: Press ok to return to standby mode. Press edit to change the banner. (See Entering numbers, page 15.) Press ok to confirm banner changes. Auto Hyphens This feature automatically inserts hyphens when entering phone numbers. As the following example shows, hyphens are inserted automatically when numbers are entered: # –...
-
Page 77: Time Zone
Preferences Menu To manually enter a hyphen Press and hold . The following screen displays: ardPause imePause - Hyphen To add a hyphen, on the screen, press Note You cannot insert a hyphen or pause as the first digit of a phone number. - Page 78 Preferences Menu until you change it. UTC (plus or minus any hour) is an option if your time zone is unavailable. The available time zones include: European Greenwich Mean Time same as UTC British Summer Time UTC + 1 hour Irish Summer Time UTC + 1 hour Western Europe Time...
- Page 79 Preferences Menu Moscow Summer, Kamchatka, MSD + 9 hours Anadyr Beij Beijing, China UTC + 8 hours U.S. and Atlantic Standard Time UTC – 4 hours Canada Atlantic Daylight Saving Time UTC – 3 hours Eastern Standard Time UTC – 5 hours Eastern Daylight Saving Time UTC –...
-
Page 80: Alerts
Preferences Menu Press to select a time zone from the list. Press to move backward through the list. Press Language Several languages are available to be displayed on your phone’s screen: English, Spanish, Portuguese, French, Russian, and Chinese. To set the language From standby mode, press menu. - Page 81 Preferences Menu Minute Service change New message Fade The fade alert occurs when any network drops a call. To set the fade alert From standby mode, press menu. Press Preferences. Press Alerts. Press Fade. Press to select “on.” Press again to select “off.” Press Minute The minute alert occurs ten seconds before the end of every minute.
-
Page 82: Calling
Preferences Menu To set the service change alert From standby mode, press menu. Press Preferences. Press Alerts. Press Service. Press to select “on.” Press again to select “off.” Press New Message The new message alert occurs when you receive a new text message or voice mail notification. -
Page 83: Auto Answer
Preferences Menu Auto Answer Use this feature to adjust the number of times the phone rings before it automatically answers a call. When this auto answer feature is used, the phone’s ringer option is automatically set to Standard. To set auto answer From standby mode, press menu. - Page 84 Preferences Menu To set auto redial From standby mode, press menu. Press Preferences. Press Calling. Press Auto Redial. Press to select one of the following options: Off – Do not automatically redial Every 10 seconds – Automatically redial every 10 seconds Every 30 seconds –...
- Page 85 Preferences Menu To set any-key answer From standby mode, press menu. Press Preferences. Press Calling. Press AnyKeyAnsw. Press to select “yes.” Press again to select “no.” Press Ring While Stowed Use this feature to allow the phone to ring while the antenna is stowed. To answer an incoming call, you must rotate and extend the antenna.
- Page 86 Preferences Menu...
-
Page 87: System Menu
Service Provider Territory My Number Status This feature provides status for the state of the phone’s antenna, Globalstar Installation Kit, battery, memory, lock, and self-test: ☺ Indicates a good condition or ready for use. Indicates a faulty condition or not ready for use. -
Page 88: Find Home
System Menu To access status information From standby mode, press menu. Press System. Press Status: ☺ Antenna Up – If displays, the antenna is rotated properly. If the antenna is rotated and displays, contact your service provider. ☺ Car Kit – If displays, the kit is operating properly. -
Page 89: Version
System Menu To force the phone to find home From standby mode, press menu. Press System. Press Find Home. Press Version The Version feature displays the version number of the software installed on your phone. To display the software version number From standby mode, press menu. - Page 90 System Menu Menu. System. Service Provider. Changes made to the Preferred or Prohibited Lists do not take effect until the phone is registered again with the network. To register the phone, choose one of the following methods: Turn the phone off and on. Find your home service provider (see Find Home, page 78).
- Page 91 System Menu Note You cannot add or delete your home service provider from any list. Viewing lists To view the Known, Preferred, or Prohibited Lists From standby mode, press menu. Press System. Press SP (service provider) Select. To select a list to view: Press Known List.
-
Page 92: Editing Lists
System Menu Scroll to select a service provider (see Navigating and using menus, page 21). Press edit. Press Preferred or Prohibited. Press Re-register your phone (see Phone Registering, page 79). Editing lists To edit (reorder or delete) from the Preferred List From standby mode, press menu. -
Page 93: Service Provider
System Menu Erasing a Provider from the Prohibited List From standby mode, press menu. Press System. Press SP (service provider) Select. Press Prohb List. Scroll to select a service provider. Press erase. Press Re-register your phone (see Phone Registering, page 79). Force Service Provider Selection This feature forces the phone to register with a service provider in the following order of priority:... -
Page 94: Territory
System Menu Press SrvcPrvder. Press Territory This feature displays the current Globalstar service provider’s MCC (mobile country code) and MNC (mobile network code). To display the territory information From standby mode, press menu. Press System. Press Territory. Press My Number This feature displays your phone number and service provider name. -
Page 95: Battery Care And Maintenance
Battery care and charging Battery chargers Low battery Battery removal Battery replacement Battery A rechargeable battery is located on the back of the phone: The following is typical battery performance: Service Mode Talk Time Standby Time Globalstar Satellite 4 hours 36 hours... -
Page 96: Battery Care And Charging
Battery Care and Maintenance Battery care and charging The battery charge level indicator is shown at the top right of the screen and ranges between four vertical bars (full charge) to one bar (minimal charge). If the indicator has no bars, the battery has no charge. Fully charge the battery immediately after purchasing the phone to maximize the talk and standby times. -
Page 97: Battery Chargers
Battery Care and Maintenance Battery chargers There are three (3) battery charger options (see Accessories, page 99): AC wall charger Universal travel charger Car power adapter/vehicle charger Note To avoid damaging the phone when using the AC wall charger, plug the charger into the power source first, and then into the phone. -
Page 98: Battery Removal
Battery Care and Maintenance The phone beeps three times (if you are on a call, the phone continues to beep every minute). The message “Low Battery! Recharge Battery Soon” displays on the screen. If the battery level gets too low, the phone turns off and loses any call in progress. -
Page 99: Battery Replacement
Battery Care and Maintenance Battery replacement To replace the battery, complete the following steps. If a battery is already installed, turn the power off to prevent losing data and then remove the battery (see Battery removal, page 88). On the new replacement battery, locate the three tabs shown below. Align the tabs to the slots in the battery cavity of the phone. - Page 100 Battery Care and Maintenance Align the tabs of the battery cover with the slots on the battery cavity. Press down on the battery lid to snap it securely into place. Safely dispose of the old battery, as described in Battery care, page 97.
-
Page 101: Safety Information
To comply with FCC radiation exposure requirements, use of this device for body-worn operational configurations is limited to accessories tested and approved by QUALCOMM and Globalstar. Other accessories used with this device for body-worn operations must not contain any metallic components and must provide at least 15 mm separation distance between the antenna and the user’s body. -
Page 102: Exposure To Radio Frequency Signals
Safety Information worn Specific Absorption Rate (SAR) may not comply with FCC radiation exposure limits and should be avoided. Exposure to radio frequency signals Your wireless handheld portable telephone is a low power radio transmitter and receiver. When it is on, it receives and also sends out radio frequency (RF) signals. -
Page 103: Body-Worn Operation
Safety Information Before a phone model is available for sale to the public, it must be tested and certified to the FCC that it does not exceed the limit established by the government-adopted requirement for safe exposure. The tests are performed in positions and locations as required by the FCC for each model. -
Page 104: Antenna Care
If using your phone while driving, please: Give full attention to driving – driving safely is your first responsibility. Use the hands-free component of the Globalstar Installation Kit, if available. Pull off the road and park before making or answering a call if driving... -
Page 105: Electronic Devices
Safety Information Electronic devices Most modern electronic equipment is shielded from RF signals. However, certain electronic equipment may not be shielded against the RF signals from your wireless phone. Pacemakers The Health Industry Manufacturers Association recommends that a minimum separation of six (6") inches be maintained between a handheld wireless phone and a pacemaker to avoid potential interference with the pacemaker. -
Page 106: Aircraft
Safety Information Vehicles and vessels RF signals may affect improperly installed or inadequately shielded electronic systems in motor vehicles. Check with the manufacturer or its representative regarding your vehicle. You should also consult the manufacturer of any equipment that has been added to your vehicle or vessel. -
Page 107: For Vehicles Equipped With An Air Bag
Safety Information For vehicles equipped with an air bag An air bag inflates with great force. Do not place objects, including installed or portable wireless equipment, in the area over the air bag or in the air bag deployment area. If in-vehicle wireless equipment is improperly installed and the air bag inflates, serious injury could result. - Page 108 Safety Information...
-
Page 109: Accessories
Accessories The optional accessories described in this section are available from your service provider. Caution Allow only authorized personnel to service the accessories. Unauthorized service can invalidate the warranty. Battery An extra battery allows you to have a charged battery available at all times. AC wall charger The North American, European, Chinese, Australian, and Argentine version AC wall chargers supply power to the phone and fast charge the... -
Page 110: Data Cables
Accessories Data cables The Globalstar data cable is required to connect your computer (or Windows CE or other handheld organizer) to the phone. Depending on the computer or other device, additional cables or an adapter may be required. With the Globalstar data cable installed, your computer (or handheld organizer) can be used to send and receive email, use Telnet or FTP, or browse the Internet. -
Page 111: Troubleshooting
Troubleshooting This section provides information to help troubleshoot your phone. If the problems with your phone are not resolved by following these troubleshooting tips, contact your service provider. Problem Solution Turning the phone on Hold for more than one second. Check the battery installation. - Page 112 Troubleshooting Problem Solution Battery draining quickly Check that your antenna is pointing straight up and has a clear view of the sky to conserve battery life. Set the backlight option to “off” (see Backlight, page 64). Replace the battery if it is several years old.
- Page 113 Troubleshooting Problem Solution Receiving calls Check that the phone is turned on. Check that the ringer is loud enough. Rotate and fully extend the antenna. Ensure that the antenna has a clear view of the sky. Check the signal strength indicator. Remove all service providers from the Prohibited List (see Erasing a Provider from the Prohibited List,...
- Page 114 Troubleshooting...
- Page 115 Index typical performance 85 AC wall charger 99 accessories 99 call history air bag safety 97 accessing 34 alerts 70 call a number 36 fade 71 call types 33 minute 71 date/time 35 new message 72 duration 36 service change 71, 72 erasing 56 all calls 51 prepend numbers 36...
- Page 116 Index clear key 22 pauses 25 defined 9 priority numbers 55 color scheme 70 punctuation 24 setting 70 spaces 24 counter erasing resetting 51, 52 all phone book entries 56 undo resetting 52 all SMS messages 57 current position coordinates 46 call history list 56 phone book entries 29 data cable, PC 100...
- Page 117 Index ringer silenced 10 text message 41 ringer volume 10 menu roaming 10 call history 33 scroll arrows 11 call info 49 signal strength 10 features 45 text message 10 messages 37 unlocked message 11 my numbers 84 voice message 10 phone book 23 Installation Kit 100 preferences 59...
- Page 118 Index deleting 16 language 70 editing 15 sounds 59 entering 15 preferred list 80 adding 81 deleting 82 one-touch dial editing 82 setting 74 reordering 82 using 32 viewing 81 one-touch dialing prepend 31 setting 74 priority numbers 55 prohibited list 80 pacemakers 95 adding 81 pauses 25...
- Page 119 Index air bags 97 accessing information 83 aircraft 96 force selection 83 antenna 94 lists 80 blasting areas 96 select 79 body-worn operation 93 show time 67 driving 94 signal strength indicator 10 electronic devices 95 silence ringer 61 explosive atmospheres 96 SMART KEYS 2, 9 hearing aids 95 SMS messages...
- Page 120 Index timed pauses 25 tones DTMF 30, 31 sending 30 sending by phone book 31 sending manually 31 turning phone on and off 13 undo counter 52 universal travel charger 99 unlocked message indicator 11 unlocking messages 42 unlocking phone 55 vehicle charger 99 version 79 voice mail 39...
Need help?
Do you have a question about the QUALCOMM GSP-1700 and is the answer not in the manual?
Questions and answers