Table of Contents
Advertisement
Advertisement
Table of Contents

Related Manuals for Siemens HB675GB.1B


Summary of Contents for Siemens HB675GB.1B
- Page 1 Built-in oven HB675GB.1B en Instruction manual...
-
Page 3: Table Of Contents
Table of contents e n I n s t r u c t i o n m a n u a l Intended use ......4 Sabbath mode . -
Page 4: Intended Use
Produktinfo Additional information on products, accessories, information replacement parts and services can be found at www.siemens-home.com and in the online shop www.siemens-eshop.com General information i n f o r m a t i o n I m p o r t a n t s a f e t y Warning –... -
Page 5: Halogen Lamp
Important safety information Cleaning function Warning – Risk of injury! Scratched glass in the appliance door may ■ Warning – Risk of fire! develop into a crack. Do not use a glass Loose food residues, grease and meat scraper, sharp or abrasive cleaning aids or ■... -
Page 6: Causes Of Damage
Causes of damage ]Causes of damage 7Environmental protection General information Your new appliance is particularly energy-efficient. Here C a u s e s o f d a m a g e t e c t i o n E n v i r o n m e n t a l p r o you can find tips on how to save even more energy Caution! when using the appliance, and how to dispose of your... -
Page 7: Getting To Know Your Appliance
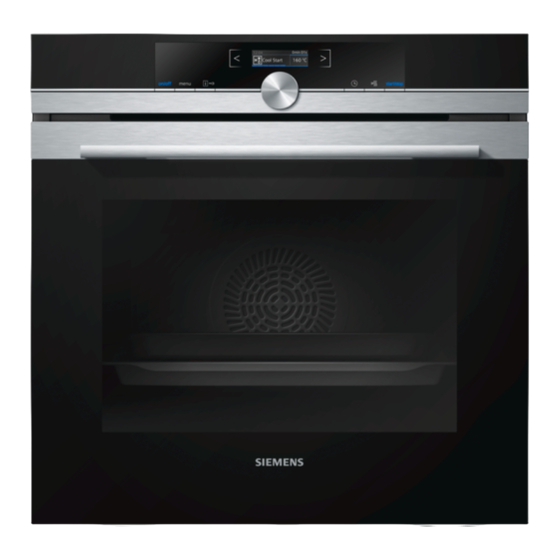
Getting to know your appliance Depending on the appliance model, individual Note: *Getting to know your details and colours may differ. appliance Control panel In this chapter, we will explain the displays and controls. In the control panel, you can use the various buttons, y o u r a p p l i a n c e G e t t i n g t o k n o w You will also find out about the various functions of your... -
Page 8: Operating Modes Menu
Getting to know your appliance Due to thermal inertia, the temperature displayed Progress line Note: may be slightly different to the actual temperature inside The progress line is under the status bar. The progress the oven. You can use the button to check the ²... -
Page 9: Further Information
Accessories Slow cooking 70-120 °C For gentle and slow cooking of seared, tender pieces of meat in ovenware without a lid. The heat is emitted evenly from the top and bottom at low temperatures. Bottom heating 30-250 °C For cooking in a bain marie and for the final baking stage. The heat is emitted from below. -
Page 10: Inserting Accessories
Accessories Inserting accessories Example in the picture: Universal pan The cooking compartment has five shelf positions. The shelf positions are counted from the bottom up. Combining accessories You can insert the wire rack and the universal pan at Always insert the accessory between the two guide the same time to catch drops of liquid. -
Page 11: Before Using For The First Time
Before using for the first time KBefore using for the first Wire insert HZ324000 For meat, poultry and fish. time For inserting into the universal pan to catch drip- ping fat and meat juices. Before you can use your new appliance, you must Profi pan HZ633070 t h e f i r s t t i m e... -
Page 12: Operating The Appliance
Switching the appliance on Use the On/Off button to switch the appliance on. The on/off symbol above the button is illuminated in blue. The Siemens logo appears in the display, and then a Press the arrow ¿ to switch to the temperature. -
Page 13: Rapid Heat Up
Time-setting options The set type of heating and the temperature are OTime-setting options displayed in the display. Your appliance has different time-setting options. Rapid heat up i o n s T i m e - s e t t i n g o p t Time-setting option You can use the button to heat up the cooking... -
Page 14: Cooking Time
Time-setting options Cooking time Touch the arrow to continue to " end". ¿ Set the end time using the rotary selector. If you set the cooking time for your food, operation stops automatically once this time has elapsed. The oven stops heating. Prerequisite: A type of heating and a temperature have been set. -
Page 15: Childproof Lock
Childproof lock AChildproof lock Audible signal duration Short (30 s) Medium (1 m) Your appliance is equipped with a childproof lock so Long (5 m) C h i l d p r o o f l o c k that children cannot switch it on accidentally or change Button tone Switched off (button tone still sounds any settings. -
Page 16: Sabbath Mode
Sabbath mode Power cut .Cleaning function Following a long power cut, the settings for initial use are shown in the display. You can use the "Self-cleaning" operating mode to Reset the language, time and date. C l e a n i n g f u n c t i o clean the cooking compartment effortlessly. -
Page 17: Setting The Self-Cleaning Function
Cleaning agent The appliance will become very hot on the outside behind in the cooking compartment and around the ■ during the cleaning function. Never hang appliance door. combustible objects, e.g. tea towels, on the door Very bad soiling may cause white deposits to Note: handle. -
Page 18: Keeping The Appliance Clean
Cleaning agent Notes Plastic Hot soapy water: Slight differences in colour on the front of the ■ Clean with a dish cloth and then dry with a soft appliance are caused by the use of different cloth. materials, such as glass, plastic and metal. Do not use glass cleaner or a glass scraper. -
Page 19: Rails
Rails Attaching the rails pRails The rails only fit on the right or the left side. For both rails, ensure that the curved rods are at the front. With good care and cleaning, your appliance will retain R a i l s its appearance and remain fully functional for a long First, insert the rail in the middle of the rear socket ‚... -
Page 20: Removing The Door Cover
Appliance door Removing the door cover Removing the appliance door Open the appliance door fully and push it in the The stainless steel inlay in the door cover may become direction of the appliance. discoloured. To carry out thorough cleaning, you can Fold up the two locking levers on the left and right remove the cover. - Page 21 Appliance door Loosen and remove the screws on the left and right Insert the front panel at the bottom into the retainers of the appliance door (figure (figure Before closing the door again, trap a tea towel which Close the front panel until both upper hooks are has been folded several times in the door (figure opposite the opening (figure Pull out the front panel upwards and lay it on a flat...
-
Page 22: Trouble Shooting
Trouble shooting information. ~ "Tested for you in our cooking studio" 3Trouble shooting on page 24 Warning – Risk of electric shock! If a fault occurs, there is often a simple explanation. T r o u b l e s h o o t i n g Incorrect repairs are dangerous. -
Page 23: Glass Cover
Customer service Glass cover PDishes If the glass cover of the halogen bulb is damaged, it must be replaced. You can obtain a new glass cover You can use the "Dishes" operating mode to prepare a from the after-sales service. Please specify the E D i s h e s wide variety of food. -
Page 24: Applying Settings For Dishes
Tested for you in our cooking studio Applying settings for dishes JTested for you in our You will be guided through the entire setting process for cooking studio your chosen food. Always touch the arrow. ¿ Press the menu button. Here, you can find a selection of dishes and the ideal Use the rotary selector to select "Dishes". - Page 25 Tested for you in our cooking studio Universal pan: Level 3 selected temperature. Always cut greaseproof paper to ■ Baking tray: Level 1 size. Baking tins/dishes on the wire rack ■ First wire rack: Level 3 Recommended setting values Second wire rack: Level 1 You can find the ideal heating type for various pastries in the table.
- Page 26 Tested for you in our cooking studio Dish Accessories/cookware Shelf po- Type of Tempera- Cooking sition heating ture in °C time in mins. Meringue baking tray 80-90* 120-150 Pavlova baking tray 90-100* 120-180 Soufflé 1,2L-soufflé dish 160-170* 35-45 Soufflé individual moulds 170-190 65-75 Choux pastry...
-
Page 27: Roasting And Braising
Tested for you in our cooking studio The cake is unevenly browned. Select a slightly lower temperature. Protruding greaseproof paper can affect the air circulation. Always cut greaseproof paper to size. Ensure that the baking tin does not stand directly in front of the openings in the cooking compartment back wall. - Page 28 Tested for you in our cooking studio If necessary, braise the meat first by searing it. Add In the table, you can find specifications for poultry and water, wine, vinegar or a similar liquid to the braising meat with default values for the weight. If you wish to liquid.
-
Page 29: Grilling
Tested for you in our cooking studio Dish Accessories/cookware Shelf po- Type of Temperature in Cooking time in sition heating °C mins. Casserole Diced meat (beef, pork, lamb), 500 g cookware, covered 140* 100-120 meat Diced chicken (boned), 500 g meat cookware, covered 140* 90-100... - Page 30 Tested for you in our cooking studio liquid. A covering approx. 1-2 cm deep should be Roasting on the wire rack applied to the base of the cookware. On the wire rack, poultry and meat will become very crispy on all sides. Roasting on the wire rack is well The steam evaporates in the cookware when roasting.
- Page 31 Tested for you in our cooking studio Remove unused accessories from the cooking Types of heating used: compartment. This will achieve the best possible Circulated air grilling ■ cooking results and energy savings of up to 20 per Grill, large area ■...
-
Page 32: Convenience Products
Tested for you in our cooking studio Dish Accessories Shelf po- Type of Temperature in °C / Cooking time sition heating Grill setting in mins. Chicken, portion, bone-in 200-250 g wire rack 200-220 30-45 each****** Duck, 2-3 kg wire rack 190-200 20+20 Turkey, thighs... - Page 33 Tested for you in our cooking studio Remove unused accessories from the cooking Types of heating used: compartment. This will achieve the best possible 4D hot air ■ cooking results and energy savings of up to 20 per Top/bottom heating ■...
-
Page 34: Yogurt
Tested for you in our cooking studio Yogurt Stir in 150 g (chilled) yogurt. Pour into cups or small jars and cover with cling film. You can make your own yogurt using your appliance. Place the cups or jars onto the cooking compartment floor and use the settings indicated in Preparing yogurt the table. -
Page 35: Acrylamide In Foodstuffs
Tested for you in our cooking studio Dish Accessories/cookware Shelf po- Type of Tempera- Cooking sition heating ture in °C time in mins. (White) Bread loaf tin (1x 900 g or 2x 450 g) 190-200 40-50 ‘ Scones baking tray 190-210 15-20 ‘... - Page 36 Tested for you in our cooking studio Your appliance features the heating type "Slow cook". Recommended setting values Only start operation when the cooking compartment The slow cooking temperature and cooking time are has fully cooled down. Allow the cooking compartment dependent on the size, thickness and quality of the to warm up for approx.
-
Page 37: Drying
Tested for you in our cooking studio Drying 2 wire racks: Level 3+1 ■ With 4D hot air, you can dry foods with outstanding Turn very juicy fruit and vegetables several times. After results. With this type of preserving, flavourings are drying, remove the dried products from the paper concentrated by the dehydration. -
Page 38: Prove Dough
Tested for you in our cooking studio switch off the appliance and make use of the residual influenced by room temperature, the number of jars, heat for several minutes as indicated in the table. quantity, heat and quality of the jar contents. The specifications are based on 1-litre round jars. -
Page 39: Defrosting
Tested for you in our cooking studio Defrosting Items which were frozen flat or portioned defrost Tip: faster than those frozen in a block. Use heating type 4D hot air to defrost fruit, vegetables and baked items. Poultry, meat and fish should ideally Remove frozen food from the packaging and place it in be defrosted in the refrigerator. - Page 40 Tested for you in our cooking studio Types of heating used: Top/bottom heating ■ 4D hot air Pizza setting ■ ■ Dish Accessory Shelf posi- Type of Tempera- Cooking tion heating ture in °C time in mins. Baking Shortbread Baking tray 140-150* 25-40 Shortbread...
- Page 44 *9001002281* 9001002281 951110...
Need help?
Do you have a question about the HB675GB.1B and is the answer not in the manual?
Questions and answers