Table of Contents
Advertisement
Advertisement
Table of Contents

Subscribe to Our Youtube Channel
Related Manuals for Whirlpool Magicook 20G


Summary of Contents for Whirlpool Magicook 20G
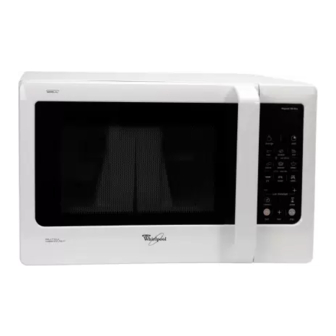
- Page 1 Magicook 20G (Elec) www.whirlpool.com...
-
Page 2: Connecting
INSTALLATION PRIOR TO CONNECTING . Check NSURE THAT THE APPLIANCE IS NOT DAMAGED on the rating HECK THAT THE VOLTAGE that the oven door closes fi rmly against the plate corresponds to the voltage in your door support. Empty the oven and clean the in- home. -
Page 3: Important Safety Instructions
IMPORTANT SAFETY INSTRUCTIONS READ CAREFULLY AND KEEP FOR FUTURE REFERENCE O NOT HEAT OR USE FLAMMABLE MATERIALS to use the appliance NLY ALLOW CHILDREN or near the oven. Fumes can create a fi re without adult supervision after adequate hazard or explosion. instructions have been given, so that the child is able to use the appliance in a safe way and understands the hazards of im-... -
Page 4: Deep-Frying
PRECAUTIONS GENERAL LIQUIDS . Overheating the liquid BEVERAGES OR WATER HIS APPLIANCE IS DESIGNED FOR DOMESTIC USE ONLY beyond boiling point can occur without evidence of bubbling. without food HE APPLIANCE SHOULD NOT BE OPERATED This could result in a sudden in the oven when using microwaves. -
Page 5: Accessories
ACCESSORIES GENERAL TURNTABLE SUPPORT a number of accessories available on under the HERE ARE SE THE TURNTABLE SUPPORT Glass turntable. Never put any oth- the market. Before you buy, ensure they are er utensils on the turntable sup- suitable for microwave use. port. -
Page 6: Control Panel
CONTROL PANEL IGITAL DISPLAY The display includes a 24-hour clock and indicator symbols to LOCK BUTTON tell you the time of day, cook- Use to set the 24-hour clock. ing time, power level, selected food classes and timer status. RILL OMBI BUTTON UTO MENU BUTTON Use to select Grill Combi func-... -
Page 7: Pause Or Stop Cooking
PAUSE OR STOP COOKING ’ O PAUSE COOKING F YOU DON T WANT TO CONTINUE COOKING , close the door HE COOKING CAN BE PAUSED EMOVE THE FOOD check, turn or stir the food and press the STOP button. by opening the door. The setting will be maintained for 5 minutes. -
Page 8: Cook & Reheat With Microwaves
COOK & REHEAT WITH MICROWAVES for normal cooking and reheating, such as vegeta- SE THIS FUNCTION bles, fi sh, potatoes and meat. repeatedly to set the power. RESS THE OWER BUTTON “+“, ”-” to set the cooking time. RESS BUTTON RESS THE TART BUTTON NCE THE COOKING PROCESS HAS BEEN STARTED... -
Page 9: Jet Start
JET START for quick reheating of food with a high water HIS FUNCTION IS USED content such as clear soups, coff ee or tea. RESS THE TART BUTTON with maximum microwave power HIS FUNCTION AUTOMATICALLY STARTS level and the cooking time set to 30 seconds. Each additional press increases the time with 30 seconds. -
Page 10: Grill And Grill Combi
GRILL quickly give a pleasant brown surface to the SE THIS FUNCTION TO food. RESS THE RILL BUTTON repeatedly to set grill power. “+“, ”-” RESS BUTTON to set the cooking time. RESS THE TART BUTTON used are heat resistant and ovenproof be- NSURE THAT THE UTENSILS fore grilling with them. -
Page 11: Auto Menu
AUTO MENU HIS FUNCTION provides you a convenient menu to defrost or cook different foods. the net weight of the food. The oven will HIS FUNCTION NEEDS TO KNOW automatically calculate the time for defrosting or cooking. to select function (Press repeat- RESS THE BUTTONS IN UTO MENU edly to select amount). - Page 12 MEMORY you with an easy way to quickly recall EMORY FUNCTION PROVIDES a preferred setting. is to store whatever setting that HE PRINCIPLE OF THE EMORY FUNCTION is currently displayed. OW TO USE A STORED SETTING RESS THE EMO BUTTON RESS THE TART BUTTON OW TO STORE A SETTING...
-
Page 13: Preset
PRESET to preset desired cooking fuction and time. SE THIS FUNCTION ET THE COOKING PROCEDURE RESS THE RESET BUTTON , shows the current time (The two left hand digits ”00”(hours) flicker). “+“, “-“ to set the hours. RESS THE BUTTON (The two right hand digits “00“... -
Page 14: Cooking Chart
COOKING CHART HE MORE FOOD YOU WANT TO COOK the longer it TIRRING AND TURNING OF FOOD ARE techniques takes. A rule of thumb is that double amount used in conventional cooking as well as in mi- of food requires almost double the time. crowave cooking to distribute the heat quick- , the longer cook- ly to the center of the dish and avoids over-... -
Page 15: Reheating Chart
REHEATING CHART , food reheat- S IN TRADITIONAL COOKING METHODS it is better to stir HEN REHEATING STEWS OR SAUCES ed in a microwave oven must always be heat- once to distribute the heat evenly. ed until piping hot. helps to keep the moisture OVERING THE FOOD if the food HE BEST RESULTS ARE ACHIEVED... -
Page 16: Defrosting Chart
DEFROSTING CHART ROZEN FOOD IN PLASTIC BAGS , plastic fi lms or card- halfway through the defrost- URN LARGE JOINTS board packages can be placed directly in the ing process. oven as long as the package has no metal defrost better OILED FOOD STEWS AND MEAT SAUCES parts (e.g. -
Page 17: Grilling Chart
GRILLING CHART HICKER FOODS such as gratins and chicken; Cook RILL FUNCTION IS EXCELLENT for browning the with microwaves fi rst and then allow the grill food after cooking with microwaves. to brown the top surface in order to put some colour to it. -
Page 18: Maintenance And Cleaning
MAINTENANCE & CLEANING normally re- LEANING IS THE ONLY MAINTENANCE RILL ELEMENT does not need cleaning since quired. It must be carried out with the micro- the intense heat will burn off any splashes, but wave oven disconnected. the ceiling beneath it may need regular clean- in a clean condition AILURE TO MAINTAIN THE OVEN ing. -
Page 19: Troubleshooting Guide
TROUBLE SHOOTING GUIDE , do not make a service it should F THE OVEN DOES NOT WORK F THE MAINS CORD NEEDS REPLACING call until you have made the following checks: be replaced by the original The Turntable and turntable support is in mains cord, which is avail- place. -
Page 20: Technical Specification
IN ACCORDANCE WITH IEC 60705. has developed a standard for comparative testing NTERNATIONAL LECTROTECHNICAL OMMISSION of heating performance of diff erent microwave ovens. We recommend the following for this oven: TEST AMOUNT APPROX. TIME POWER LEVEL CONTAINER 12.3.1 100% 3.220 YREX 12.3.2 100%...
Need help?
Do you have a question about the Magicook 20G and is the answer not in the manual?
Questions and answers