Table of Contents
Advertisement
CONTENTS
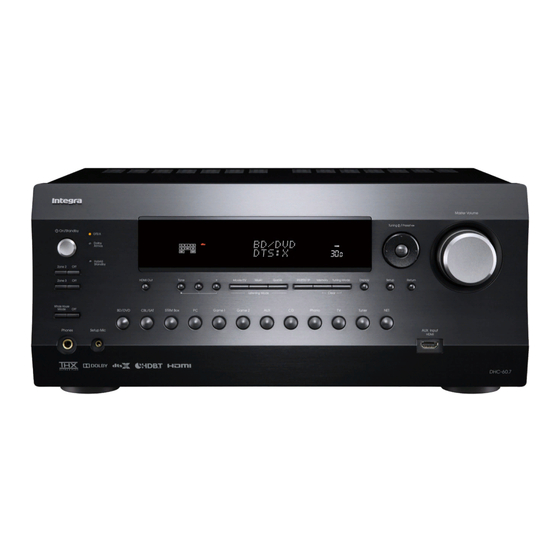
Front Panel .......................................................................... 3
Display ................................................................................. 4
Rear Panel........................................................................... 5
Step 1: Connections .............................................. 6
1 Connecting speakers........................................................ 6
・ Speaker layout .............................................................. 6
・ Notes for Speaker Connection ...................................... 7
Amplifier ........................................................................ 8
・ Height speaker types .................................................... 9
2 Connecting the TV and players ...................................... 10
・ HDMI cable connection ............................................... 10
・ Connecting Components without HDMI ...................... 11
3 Other connections .......................................................... 12
DHC-60.7
Basic Manual
Step 2: Initial Setup ............................................. 13
1 AccuEQ Room Calibration ............................................. 13
2 Source Connection ......................................................... 14
3 Remote Mode Setup ...................................................... 15
4 Network Connection ....................................................... 15
Step 3: Playing Back ........................................... 16
1 Basic operations ............................................................. 16
・ Remote controller parts name ..................................... 16
2 Network Functions .......................................................... 17
®
.......................................................................... 17
4 AM/FM Radio ................................................................. 18
5 Multi-zone ....................................................................... 18
・ Making Multi-zone Connection .................................... 18
・ Performing Multi-zone Playback ................................. 19
The Basic Manual
includes information needed
when starting up and also instructions for
frequently used operations.
The Advanced
Manual
has more detailed information and
advanced settings.
6 Quick Setup menu .......................................................... 20
7 Other useful functions .................................................... 21
Troubleshooting ................................................................. 22
Specifications .................................................................... 23
Table of image resolutions ................................................. 24
Resolutions supported by HDMI ........................................ 24
Supplied Accessories ......................................... Back Cover
Advertisement
Chapters
Table of Contents
Troubleshooting

Related Manuals for Integra DHC-60.7

Summary of Contents for Integra DHC-60.7
-
Page 1: Table Of Contents
DHC-60.7 Basic Manual The Basic Manual includes information needed when starting up and also instructions for frequently used operations. The Advanced Manual has more detailed information and advanced settings. CONTENTS Front Panel ................3 Step 2: Initial Setup ..........13 6 Quick Setup menu ............ - Page 2 Features ・ Supports playback in Dolby Atmos format and has Dolby Surround listening mode ・ Supports playback in DTS:X format and has DTS Neural:X listening mode ・ THX Ultra2 Plus certified ・ Equipped with 4K compatible HDMI IN/OUT jacks ・ Equipped with 2 HDMI output jacks ・...
-
Page 3: Front Panel
(Australian models) Front Panel zOn/Standby button: Turns the unit on or into standby Tone, Tone Level buttons: Adjusts the high tone and display. mode. low tone. Press the Tone button repeatedly to select Setup button: Used when making settings. Cursor buttons, Tuning jl button, Preset Hybrid Standby indicator: Lights if the unit enters the item to adjust from "Bass", "Treble"... -
Page 4: Display
Phones jack: Stereo headphones with a standard plug are connected. Setup Mic jack: The supplied speaker setup microphone is connected. Input selector buttons: Switches the input to be played. AUX Input HDMI jack: A HD camera or such other device is connected. Display Speaker/Channel display: Displays the output channel Stays lit when headphones are connected. -
Page 5: Rear Panel
PUSH PUSH Rear Panel RI REMOTE CONTROL jack: An Onkyo product with RI TUNER AM/FM(75Ω) terminal: The supplied antennas connected. INPUT BALANCE L/R jacks: XLR-type balanced input jack can be connected and synchronized with this unit. are connected. HDBaseT™ IN/OUT jack: HDMI input signals are DIGITAL IN COAXIAL/OPTICAL jacks: Digital audio jacks. -
Page 6: Step 1: Connections
Step 1: Connections Characteristics of speaker types Connecting speakers "# output front stereo sound and $ outputs center sound such as dialogs and vocals. %& create back sound field. ' Speaker layout reproduces bass sounds and creates rich sound field. Connecting 78, 9F, or GH speakers enables playback in 7.1 ch configuration. -
Page 7: Notes For Speaker Connection
Step 1: Connections ■ Connecting the multichannel power amplifier Notes for Speaker Connection to the PRE OUT RCA jack This unit works as an AV controller when connected with Connect the multichannel power amplifier to the PRE OUT a separately sold multichannel power amplifier. Connect RCA jack. -
Page 8: Connecting A Subwoofer With Built-In Power Amplifier
Step 1: Connections ■ Connecting the multichannel power amplifier Connecting a Subwoofer with Built-in Power Amplifier to the PRE OUT XLR jack You can connect a maximum four subwoofers with built-in Connect the multichannel power amplifier to the PRE OUT power amplifiers to this unit. -
Page 9: Height Speaker Types
Step 1: Connections Height speaker types Using Dolby Enabled Speakers When playing Dolby Atmos, the speakers required depend on how you have setup your back speakers or height Installing speakers in ceiling speakers. The following shows speaker combinations. Connection pattern Back or Height Back ... -
Page 10: Connecting The Tv And Players
Step 1: Connections Connecting the TV and players HDMI HDMI To use the ARC function, connect to the ARC compatible HDMI jack of the TV and make an appropriate setting on the unit. See "2 Source Game console Connection" of "Step 2: Initial Setup". -
Page 11: Connecting Components Without Hdmi
Step 1: Connections Connecting Components without HDMI Control) compliant device, connection with ARC compatible A TV with composite video input jacks or a player with TV, and HDMI Standby Through function. See "2 Source composite video output jacks can be connected. Connection"... -
Page 12: Other Connections
Step 1: Connections Network connection Video upconversion function Other connections You can enjoy Internet radio, DLNA and AirPlay by connecting the unit to LAN. Connect the Ethernet cable to Video signals input to the VIDEO IN jack or the the Ethernet port of the router. COMPONENT VIDEO IN jacks will be upconverted AM/FM antenna connections to HDMI signals and then output from the HDMI... -
Page 13: Step 2: Initial Setup
Step 2: Initial Setup "Initial Setup" automatically starts on the television when Before Start you first turn the unit on. AccuEQ Room Calibration Setup is performed as a series of responses to questions asked by the unit. Select the item with the cursors of the remote controller and press Enter to confirm your selection. -
Page 14: Source Connection
Step 2: Initial Setup * Correct measurement will not be possible if the microphone is held will be shown in the lower part of the screen. by hand. Measurement is not possible if headphones are being used. Source Connection 5. The test tones sound from the connected speakers *... -
Page 15: Remote Mode Setup
Step 2: Initial Setup Source Connection ONKYO PRIVACY STATEMENT Network Connection The following CEC-compatible devices are found; To improve our products and services of Onkyo Corporation, Do you wish to turn on the CEC link? Onkyo may collect information about your receiver usage. xxxxxxxxxxx To know more about what type of information we collect and how we use it please review Onkyo’s Privacy Policy at... -
Page 16: Step 3: Playing Back
Step 3: Playing Back z Receiver button: Turns the unit on or into standby Remote controller parts name mode. Basic operations RCV button: Switches the remote controller to the mode for operating this unit. Remote Mode/Input Selector buttons: Switch the input to be played. -
Page 17: Network Functions
Step 3: Playing Back Display button: Switches the information on the ・ Available services may vary depending on your area of display. residence. DLNA You can play music files stored in the PC or NAS device Network Functions connected to the network. Select the server with the cursors, select the desired music file and press Enter to start playback. -
Page 18: Am/Fm Radio
Step 3: Playing Back to "Chinese". Operate by confirming the display on the number between 1 and 40 while the preset number is 2-channel PCM audio signals can be played and that some players require audio output setting. Only players connected to the AUDIO main unit. -
Page 19: Performing Multi-Zone Playback
Step 3: Playing Back ■ b. Connecting with an integrated amplifier or Performing Multi-zone Playback To control on the main unit: press Zone2 or Zone3 and within 8 seconds, press the input selector button of the power amplifier in a separate room It is possible to perform playback in the main room and a source to be played in the other room. -
Page 20: Quick Setup Menu
Step 3: Playing Back ■ Audio: You can perform various audio settings including Equalizer: Select "Preset1" to "Preset3" configured in audio quality and speaker level adjustment. "2. Speaker" - "Equalizer Settings" in the Setup menu. Quick Setup menu ・ You cannot select this item when audio is output from The same sound field setting is applied all ranges when the TV's speakers. -
Page 21: Other Useful Functions
Step 3: Playing Back Center Spread: Adjust the width of the sound field of effective when an input with audio only has been selected the front channel when playing in the Dolby Surround (CD, NET, TUNER, and PHONO in the initial setting). ( Ú ) Other useful functions listening mode. -
Page 22: Troubleshooting
Others ● How to reset: Troubleshooting Cannot play digital surround ・ To enjoy digital surround sound including Dolby Digital and While holding down CBL/SAT on the main unit (note that DTS, audio output should be set to "Bitstream output" on the step 2 must be performed with this button pressed down) connected Blu-ray Disc Player or other device. -
Page 23: Specifications
Others Specifications General ・ Audio Inputs Digital Power Supply OPTICAL 1 (STRM BOX), 2 (CD), 3 (TV) Amplifier Section 120 V AC, 60 Hz (North American) COAXIAL 1 (BD/DVD), 2 (CBL/SAT) 220 - 240 V AC, 50/60 Hz (Others) Analog Power Consumption Input Sensitivity and Impedance BD/DVD, GAME2, PC, GAME1, CBL/SAT, TV, CD, PHONO... -
Page 24: Table Of Image Resolutions
Others ■ HDMI IN1 to IN5 (when using in Zone 2) Table of image resolutions Copyright protection Refer to the following table for information about the image formats and resolutions output by this unit in Display resolution Frame rate Color space Color Depth Remarks technology... - Page 25 – Limits for harmonic current emissions Limitation of voltage changes, voltage – Hér með lýsir Onkyo Corporation því yfir að varan DHC-60.7 er í samræmi – við grunnkröfur og aðrar kröfur sem gerðar eru í tilskipun 1999/5/EC. fluctuations and flicker –...
- Page 26 Others License and Trademark Information content or services may not be used in any manner other than Please note that the use of this accessory with iPod, iPhone or iPad may affect previously approved by the appropriate content owner or service wireless performance.
- Page 27 Others GNUライセンス whole GNU operating system, as well as its variant, the GNU/Linux operating system. covered by this License. You must supply a copy of this License. If the work during execution displays copyright notices, you must Although the Lesser General Public License is Less protective of the users' freedom, it does ensure that the user of a program include the copyright notice for the Library among them, as well as a reference directing the user to the copy of this License.
- Page 28 Others COST OF ALL NECESSARY SERVICING, REPAIR OR CORRECTION. interactive but does not normally print such an announcement, your work based on the Program is not required to print an convey the exclusion of warranty; and each file should have at least the "copyright" line and a pointer to where the full notice is 16.
- Page 29 Others BUT NOT LIMITED TO THE WARRANTIES OF MERCHANTABILITY, FITNESS FOR A PARTICULAR PURPOSE AND technique does not use the LZW algorithm; the resulting GIF files are larger than usual, but are readable by all standard GIF OR PROFITS; OR BUSINESS INTERRUPTION) HOWEVER CAUSED AND ON ANY THEORY OF LIABILITY, WHETHER IN NONINFRINGEMENT.
- Page 30 Others mailto: jhay@icomtek.csir.co.za Redistributions in binary form must reproduce the above copyright notice, this list of conditions and the following disclaimer in the mailto: glenn@herald.usask.ca documentation and/or other materials provided with the distribution. "You" (or "Your") shall mean an individual or Legal Entity exercising permissions granted by this License. mailto: iglesias@uci.edu All advertising materials mentioning features or use of this software must display the following acknowledgement: "Eric Young mailto: jagubox.gsfc.nasa.gov...
- Page 31 Others "You" is you, an individual or entity wishing to use the Work and exercise your rights under this License. Redistributions of source code must retain the above copyright notice, this list of conditions and the In no event and under no legal theory, whether in tort (including negligence), contract, or otherwise, unless required by applicable Fair Use/Fair Use Rights.
-
Page 32: Supplied Accessories
Speaker setup microphone --- (1) * The number in parenthesis indicates the quantity. On packaging, the letter at the end of the product name indicates the color. Integra Division of 18 park Way, Upper Saddle River, N.J. 07458, U.S.A. Tel: 800-225-1946, 201-818-9200 Fax: 201-785-2650 http://www.integrahometheater.com... -
Page 33: E N
DHC-60.7 Advanced Manual The Basic Manual includes information needed when starting up and also instructions for frequently used operations. The Advanced Manual has more detailed information and advanced settings. CONTENTS Details on AM/FM reception Operating Music Files with the Remote Controller... -
Page 34: Details On Am/Fm Reception
Details on AM/FM reception „ Tuning manually 2. Press D.TUN. 1. Press Tuner on the main unit several times to select Details on AM/FM reception either "AM" or "FM". Tuning into a Radio Station 2. Press Tuning Mode so that the "AUTO" indicator on the 3. -
Page 35: Presetting An Am/Fm Radio Station
Details on AM/FM reception Presetting an AM/FM Radio Station „ Deleting a Preset Radio Station Using RDS (Australian models) 1. Press CH +/- on the remote controller to select the It allows you to register up to 40 of your favorite AM/FM RDS stands for Radio Data System and is a method of preset number to delete. - Page 36 Details on AM/FM reception 3. Press Enter to search the radio stations of the selected 2. Press Preset to select the type of program to search type. for. 4. When such a radio station is found, the indication on the ●...
-
Page 37: Playing Music Files On A Usb Storage Device
Playing Music Files on a USB Storage Device „ Playing Back 5. With the cursors, select the music file to play, and then press Enter or to start playback. 1. Plug your USB storage device with the music files into Playing Music Files on a USB the USB port on the rear of the unit. -
Page 38: Listening To Internet Radio
Listening to Internet Radio TuneIn Radio Network Listening to Internet Radio With more than 70,000 radio stations and 2 million on- demand programs registered, TuneIn Radio is a service TuneIn Radio where you can enjoy music, sports and news from all over Pandora Spotify the world. -
Page 39: Pandora
Pandora stations. You can create your stations by entering your favorite tracks and artists when prompted. After you have created your account and stations you can return to your Integra receiver and press Enter to begin listening to your personalized Pandora. -
Page 40: Spotify
Listening to Internet Radio Why is this track playing?: Discover some of the Spotify SiriusXM Internet Radio (North American only) musical attributes that Pandora uses to create your personal radio stations. This unit is compatible with Spotify Connect. To enable If you want to listen to the service, you must subscribe. -
Page 41: Slacker Personal Radio (North American Only)
Listening to Internet Radio „ Playing Back Enabled buttons: Slacker Personal Radio (North American only) 1. Press NET on the remote controller to display NET TOP Add to My Favorites: Adds a channel to My Favorites ● Operation: You can set up by viewing the guidance screen. -
Page 42: Registering Other Internet Radios
Listening to Internet Radio Unmark Favorite: Deletes the currently playing station Registering Other Internet Radios from your favorites. Network To listen to other Internet radio program, register the Add song to Library: Adds the currently playing track program in the "My Favorites" list as described in the next to your library. - Page 43 Listening to Internet Radio 1. Press NET on the remote controller to display the NET 1. Press RCV on the remote controller. „ Playing a Registered Radio Station TOP screen. ● Always press RCV first to change the remote 1. Press NET on the remote controller to display the NET controller to RECEIVER mode (the mode to operate TOP screen.
-
Page 44: Playing Music With Dlna
Playing Music with DLNA Configuring the Windows Media Player DLNA Playback Playing Music with DLNA ● Operation: You can set up by viewing the guidance „ Windows Media Player 11 displayed on the TV screen (OSD). Select the item with the 1. -
Page 45: Controlling Remote Playback From A Pc
Playing Music with DLNA Controlling Remote Playback from a PC ● Operations during remote playback are possible from the "Play to" window on the PC. The playback Network screen is displayed on the TV connected to the You can use this unit to play music files stored on your PC HDMI output of the unit. -
Page 46: Playing Music Files In A Shared Folder
Playing Music Files in a Shared Folder Setting PC Playing from a Shared Folder Playing Music Files in a Shared ● Operation: You can set up by viewing the guidance „ Configuring the Sharing Options displayed on the TV screen (OSD). Select the item with the 1. - Page 47 Playing Music Files in a Shared Folder Network TuneIn Radio Pandora Spotify SiriusXM Internet Radio Slacker Personal Radio Deezer AirPlay 2. With the cursors, select "Home Media", and then press Enter. 3. With the cursors, select the target server, and then press Enter.
-
Page 48: Operating Music Files With The Remote Controller
Operating Music Files with the Remote Controller and activate the selected item. when the list screen is displayed toggles the screen / : These buttons allow you to navigate to other to playback. pages when the list continues on other pages. Operating Music Files with the Icons Displayed during Playback : This button fast-reverses the current track. -
Page 49: Using The Listening Modes
Using the Listening Modes Listening Mode Types „ Dolby D (Dolby Digital) Mode suitable for playing sources recorded in Dolby Digital. Using the Listening Modes The unit allows you to enjoy audio in a variety of listening ● This listening mode can be selected only if your Blu-ray modes. - Page 50 Using the Listening Modes „ DTS 96/24 „ DTS Neural:X „ Game-Rock Mode suitable for playing sources recorded in DTS 96/24. Neural:X enables upmixing of legacy content such as In this mode, sound pressure is emphasized to heighten With 96 kHz sampling rate and 24-bit resolution, it provides mono, stereo, 5.1 or 7.1ch to many higher speaker count live feel.
- Page 51 Using the Listening Modes „ THX „ Reference – THX U2 Music (THX Ultra2 Music) : For the replay of multichannel music, the THX Ultra2 Music should be Founded by George Lucas, THX develops stringent Dialogue Normalization selected. In this mode, THX ASA processing is applied standards that ensure movies are reproduced in movie Dialogue Normalization (DialogNorm) is a feature of to the surround channels of all 5.1 encoded music...
-
Page 52: Selectable Listening Modes
Using the Listening Modes Matching feature filters the information going to the Selectable Listening Modes „ Movie/TV button surround speakers so that they more closely match the You can select a mode suitable for movies and TV tonal characteristics of the sound coming from the front Listening modes that can be selected with the listening programs. - Page 53 Using the Listening Modes Input Format Listening Mode Input Format Listening Mode Input Format Listening Mode Multich PCM Direct Direct Dolby D Direct Mono Mono Mono Multich Dolby D Ú1 Ú1 Ú2 Ú1 Ú2 Dolby Surround Dolby Surround Dolby Surround DTS Neural:X Neo:6 Cinema Neo:6 Cinema...
- Page 54 Using the Listening Modes Input Format Listening Mode Input Format Listening Mode Input Format Listening Mode Dolby D+ Direct Dolby TrueHD Direct Direct Mono Mono Mono Dolby D+ Dolby TrueHD Ú1 Ú2 Ú1 Ú2 Ú1 Ú2 Dolby Surround Dolby Surround Dolby Surround Neo:6 Cinema Neo:6 Cinema...
- Page 55 Using the Listening Modes Input Format Listening Mode Input Format Listening Mode Input Format Listening Mode DTS 96/24 Direct DTS Express Direct DTS-HD HR Direct Mono Mono Mono DTS 96/24 DTS Express DTS-HD HR Ú1 Ú2 Ú1 Ú2 Ú1 Ú2 Dolby Surround Dolby Surround Dolby Surround...
- Page 56 Using the Listening Modes „ Music button Input Format Listening Mode Input Format Listening Mode You can select a mode suitable for music. DTS-HD MSTR Direct DTS-ES Direct Mono Mono Input Format Listening Mode DTS-HD MSTR Ú1 Ú2 Ú1 Analog Direct Dolby Surround ES Matrix...
- Page 57 Using the Listening Modes Input Format Listening Mode Input Format Listening Mode Input Format Listening Mode Multich PCM Direct Direct Dolby D Direct Stereo Stereo Stereo Multich Dolby D Ú1 Ú1 Ú2 Ú1 Ú2 Dolby Surround Dolby Surround Dolby Surround DTS Neural:X Neo:6 Music Neo:6 Music...
- Page 58 Using the Listening Modes Input Format Listening Mode Input Format Listening Mode Input Format Listening Mode Cannot be selected when the input format is monaural or 2 ch. Direct Cannot be selected when the input format is monaural or 2 ch. Ú1 Ú1 Center speaker or surround speakers need to be installed.
- Page 59 Using the Listening Modes Input Format Listening Mode Input Format Listening Mode Input Format Listening Mode DTS-ES Direct DTS-HD HR Direct Cannot be selected when the input format is monaural or 2 ch. Ú1 Center speaker or surround speakers need to be installed. Ú2 Stereo Stereo...
- Page 60 Using the Listening Modes „ Game button Input Format Listening Mode Input Format Listening Mode You can select a mode suitable for games. Multich PCM Direct Direct Multich Ú1 Ú1 Ú2 Input Format Listening Mode Dolby Surround Dolby Surround Analog Direct DTS Neural:X DTS Neural:X...
- Page 61 Using the Listening Modes Input Format Listening Mode Input Format Listening Mode Input Format Listening Mode Dolby D Direct Dolby D+ Direct Dolby TrueHD Direct Dolby D Dolby D+ Dolby TrueHD Ú1 Ú2 Ú1 Ú2 Ú1 Ú2 Dolby Surround Dolby Surround Dolby Surround DTS Neural:X DTS Neural:X...
- Page 62 Using the Listening Modes Input Format Listening Mode Input Format Listening Mode Input Format Listening Mode Direct DTS 96/24 Direct DTS Express Direct DTS 96/24 DTS Express Ú1 Ú2 Ú1 Ú2 Ú1 Ú2 Dolby Surround Dolby Surround Dolby Surround DTS Neural:X DTS Neural:X DTS Neural:X THX Games...
- Page 63 Using the Listening Modes Input Format Listening Mode Input Format Listening Mode Input Format Listening Mode DTS-HD HR Direct DTS-HD MSTR Direct DTS-ES Direct DTS-HD HR DTS-HD MSTR Ú1 Ú2 Ú1 Ú2 Ú1 Dolby Surround Dolby Surround ES Matrix Ú2 DTS Neural:X DTS Neural:X ES Discrete...
-
Page 64: Checking The Input Format
Using the Listening Modes „ THX button Checking the Input Format Input Format Listening Mode You can select a THX listening mode. DTS:X Direct While audio from the player is being input, press Display on DTS:X the remote controller several times to switch the information Input Format Listening Mode shown on the main unit display. -
Page 65: Advanced Settings (Setup Menu)
Using the Listening Modes „ Operation 5. With the / / / cursors, select the item to configure the settings. 1. Press RCV on the remote controller. Advanced Settings (Setup Menu) ● Always press RCV first to change the remote controller to RECEIVER mode (the mode to operate 1-1. - Page 66 Advanced Settings (Setup Menu) 1. Input/Output Assign HDMI Input You can change input assignment between the input selectors and HDMI IN jacks. TV Out Setting Item Default Value Setting Details Select the HDMI jack to be connected with the TV. Make settings for the on-screen display BD/DVD HDMI 1 (HDCP "HDMI 1 (HDCP 2.2)"...
- Page 67 Advanced Settings (Setup Menu) Video Input Setting Item Default Value Setting Details You can change assignment of the COMPONENT VIDEO IN 1 and 2 jacks and the VIDEO PHONO ----- "HDMI 1 (HDCP 2.2)" to "HDMI 7": Assign a IN 1 to 3 jacks between the input selectors. If you do not assign a jack, select "-----". desired HDMI IN jack to the Phono button.
- Page 68 Advanced Settings (Setup Menu) Digital Audio Input Setting Item Default Value Setting Details You can change input assignment between the input selectors and DIGITAL IN COAXIAL 1 PHONO ----- "COMPONENT 1", "COMPONENT 2": Assign to 2/OPTICAL 1 to 3 jacks. If you do not assign a jack, select "-----". the COMPONENT VIDEO IN jacks to the Phono button.
-
Page 69: Speaker
Advanced Settings (Setup Menu) 2. Speaker Setting Item Default Value Setting Details Surround (XLR) Normal Set the output for surround sound signals. Allows you to change the speaker configuration such as presence or not of subwoofer, "Normal": Set to output surround sound signals crossover frequency, and so on. - Page 70 Advanced Settings (Setup Menu) Crossover Setting Item Default Value Setting Details Allows you to change speaker configurations, such as crossover frequency. Settings are Surround 80 Hz(THX) Select the crossover frequency from "40Hz" to automatically configured if you use the Automatic Speaker Setup. Audio will not be output "200Hz"...
- Page 71 Advanced Settings (Setup Menu) Distance Setting Item Default Value Setting Details Set the distance from each speaker to the listening position. Settings are automatically Double Bass This can only be selected when "Configuration" - configured if you use the automatic speaker setup. "Subwoofer"...
- Page 72 Advanced Settings (Setup Menu) Level Calibration Setting Item Default Value Setting Details Adjust the level of each speaker with the built-in test tone. Settings are automatically Back Left 0.0dB Select a value between "-12.0 dB" and "+12.0 configured if you use the Automatic Speaker Setup. dB"...
- Page 73 Advanced Settings (Setup Menu) Equalizer Settings ● This is not effective if the listening mode is Direct. ● The result may not be as expected depending on the input source and listening mode setting. Adjust the output volume of each range of each connected speaker. You can adjust the volume of each range of each speaker.
-
Page 74: Audio Adjust
Advanced Settings (Setup Menu) 3. Audio Adjust Setting item Default Value Setting Details Loudness Plus When the setting is set to "On", it is possible to Configure various settings related to sound, such as settings for listening to multiplex audio enjoy even subtle nuances of audio expression or multilingual TV broadcasts and sound field settings for listening modes. - Page 75 Advanced Settings (Setup Menu) Dolby Setting item Default Value Setting Details Make the settings for Dolby listening mode. Other Multich Source 0dB Select the low-frequency effect (LFE) level of each type of signal from "0dB" to "-∞dB". If the Setting Item Default Value Setting Details low-frequency effect sound is too strong, select...
-
Page 76: Source
Advanced Settings (Setup Menu) Multi Zone 4. Source Setting Item Default Value Setting Details Make settings for input sources, such as volume difference adjustments for each input selector for the connected equipment. Select the input selector to configure. Zone 2 Out Fixed Select which of the integrated amplifier in a separate room or this unit should be used to... - Page 77 Advanced Settings (Setup Menu) Audio Select Setting Item Default Value Setting Details Make the audio input setting. The setting can be separately set to each input selector PCM Fixed Mode Select whether to fix input signals to PCM button. Select the input selector to configure. (except multi-channel PCM) when you have selected "HDMI", "COAXIAL", or "OPTICAL"...
-
Page 78: Listening Mode Preset
Advanced Settings (Setup Menu) 5. Listening Mode Preset 6. Hardware You can preset your favorite listening mode to each input. (For example, you can always Tuner apply straight decode to the Dolby TrueHD source of Blu-ray Disc to play it in unchanged sound field.) Setting Item Default Value... - Page 79 Advanced Settings (Setup Menu) HDMI Setting Item Default Value Setting Details HDMI Standby When this is set to anything other than "Off", Setting Item Default Value Setting Details Through you can play the video and audio of an HDMI HDMI CEC (RIHD) Setting to "On"...
- Page 80 Advanced Settings (Setup Menu) Setting Item Default Value Setting Details Setting Item Default Value Setting Details Audio TV Out (MAIN) Off You can enjoy audio through the speakers of the Audio TV Out (SUB) You can enjoy audio through the speakers of the HDMI connected TV while this unit is on.
- Page 81 Sleep Timer Select to turn the unit into standby mode application such as Integra Remote. automatically when the specified time elapses. ● When "Network Standby" is used, the power Select a value between "10 minutes" to "90 consumption increases even when the unit minutes".
- Page 82 Setting Details Make the network setting. Friendly Name DHC-60.7 Change the name for this unit to a simple one for ● When LAN is configured with a DHCP, set "DHCP" to "Enable" to configure the display on the equipment connected by network.
- Page 83 Advanced Settings (Setup Menu) 12V Trigger A Setting Item Default Value Setting Details Set when outputting the control signal (maximum 12 V/100 mA) through the 12V TRIGGER Usage Data As a means of improving the quality of our OUT A jack. Different settings can be set for each input selector. You can enable power link products and services, Onkyo may collect operation when you connect the unit and the external devices equipped with 12V trigger information about your usage over the network.
- Page 84 Advanced Settings (Setup Menu) Setting Item Default Value Setting Details Setting Item Default Value Setting Details CBL/SAT Main Set the 12V trigger output setting to each Main Set the 12V trigger output setting to each input. input. "Off": No output "Off": No output "Main": Output when "CBL/SAT"...
- Page 85 Advanced Settings (Setup Menu) Setting Item Default Value Setting Details Setting Item Default Value Setting Details GAME 2 Main Set the 12V trigger output setting to each Main Set the 12V trigger output setting to each input. input. "Off": No output "Off": No output "Main": Output when "GAME 2"...
- Page 86 Advanced Settings (Setup Menu) Setting Item Default Value Setting Details Setting Item Default Value Setting Details Main Set the 12V trigger output setting to each Main Set the 12V trigger output setting to each input. input. "Off": No output "Off": No output "Main": Output when "TV"...
- Page 87 Operating Other Components with the Remote Controller Setting Item Default Value Setting Details Setting Item Default Value Setting Details BD/DVD Zone2 Set the 12V trigger output setting to each STRM BOX Zone2 Set the 12V trigger output setting to each input.
- Page 88 Operating Other Components with the Remote Controller Setting Item Default Value Setting Details Setting Item Default Value Setting Details GAME 1 Zone2 Set the 12V trigger output setting to each Zone2 Set the 12V trigger output setting to each input. input.
- Page 89 Operating Other Components with the Remote Controller Setting Item Default Value Setting Details Setting Item Default Value Setting Details PHONO Zone2 Set the 12V trigger output setting to each TUNER Zone2 Set the 12V trigger output setting to each input. input.
- Page 90 Operating Other Components with the Remote Controller 12V Trigger C Setting Item Default Value Setting Details Set when outputting the control signal (maximum 12 V/25 mA) through the 12V TRIGGER CBL/SAT Main/Zone2/Zone3 Set the 12V trigger output setting to each OUT C jack.
- Page 91 Operating Other Components with the Remote Controller Setting Item Default Value Setting Details Setting Item Default Value Setting Details Main/Zone2/Zone3 Set the 12V trigger output setting to each GAME 2 Main/Zone2/Zone3 Set the 12V trigger output setting to each input. input.
- Page 92 Advanced Connections Setting Item Default Value Setting Details Setting Item Default Value Setting Details Main/Zone2/Zone3 Set the 12V trigger output setting to each Main/Zone2/Zone3 Set the 12V trigger output setting to each input. input. "Off": No output "Off": No output "Main": Output when "CD"...
-
Page 93: Remote Controller
Select an ID for the unit's remote controller from "1", "2", and "3" to prevent interference between "Main": Output when "NET" is selected as the unit and other Integra/Onkyo components input for main room. that are installed in the same room. After "Zone2": Output when "NET"... -
Page 94: Miscellaneous
Connecting and Operating Onkyo RI Components 8. Miscellaneous Firmware Update Setting Item Default Value Setting Details Update Notice Enable Availability of a firmware update will be notified via network. "Enable": Notify updates "Disable": Do not notify updates Version – The current firmware version will be displayed. Update via NET –... -
Page 95: Operating Other Components With The Remote Controller
● The following Remote Mode buttons are preprogrammed with remote control codes. BD/DVD: Integra/Onkyo Blu-ray Disc/DVD player CD: Integra/Onkyo CD player STRM Box: Apple TV 2. With the cursors, select "7. Remote Controller" - ● Only TV remote control codes can be entered for TV. -
Page 96: Tv Operation
Firmware Update „ Resetting the Remote Mode Buttons TV operation You can reset the remote control code registered in the Press the Remote Mode button programmed with the Remote Mode button to its default status. This operation remote control code for the relevant AV component to can be executed on a single Remote Mode button. -
Page 97: Blu-Ray Disc Player/Dvd Player/Dvd Recorder Operation
Firmware Update VCR/PVR operation Press the Remote Mode button programmed with the remote control code for the relevant AV component to switch the remote controller mode to that for the AV component. Then, operate by using the corresponding buttons. Available buttons vary depending on the product category of the component. -
Page 98: Satellite Receiver / Cable Receiver Operation
Firmware Update CD player operation Press the Remote Mode button programmed with the remote control code for the relevant AV component to switch the remote controller mode to that for the AV component. Then, operate by using the corresponding buttons. Available buttons vary depending on the product category of the component. -
Page 99: Cassette Tape Deck Operation
Troubleshooting Cassette tape deck operation To operate CEC-compatible components Press the Remote Mode button programmed with the If this unit is connected via HDMI to a TV or BD/DVD remote control code for the relevant AV component to player, you may be able to control the devices using switch the remote controller mode to that for the AV the remote controller of this unit with CEC (Consumer component. -
Page 100: Advanced Connections
Troubleshooting jack and the subwoofer (bass) jack. Connecting Dipole Speakers ● Use speakers supporting bi-amping only. For details, refer to the speakers' instruction manual. Advanced Connections A dipole speaker is bidirectional speaker outputting the same sound in two directions, for example forward and backward. -
Page 101: Connecting And Operating Onkyo Ri Components
Troubleshooting RI Connection and Setting Connecting and Operating Onkyo RI Components About RI Function 2. With the number buttons, enter the following 5-digit remote control code within 30 seconds. Connecting an Onkyo component with RI jack such as RI Dock: 81993 the separately sold RI Dock to the unit by using an RI Cassette tape deck with RI jack: 42157 cable and an analog audio cable enables the following RI... -
Page 102: R Operation
Troubleshooting iPod /iPhone Operation The RI Dock allows you to use this unit's remote controller to operate and play music on your iPod/iPhone. Moreover, it also allows you to view videos on your iPod/iPhone on the screen of your TV, as well as perform RI operations if connected via RI. -
Page 103: Control Function Between The Unit And External Component
Troubleshooting „ IR jack „ 12V trigger output jack Control Function between the Unit If you use a multiroom remote control kit with this jack, you You can enable power link operation when you connect can operate the unit with the remote controller even when the unit and an external device such as power amplifier and External Component you are in a separate room, or operate the unit with the... -
Page 104: Firmware Update
Troubleshooting Updating the Firmware via Network The Setup menu is displayed on the TV screen. Firmware Update Before Starting: Setup ● Check that the unit is turned on, and the connection to the Internet is secured. 1. Input/Output Assign 1. TV Out ●... -
Page 105: Updating The Firmware Via Usb
Reference Information Updating the Firmware via USB adapter to power it. ● If the USB storage device has been partitioned, each section will be treated as an independent device. Before Starting: ● Prepare a 64MB or larger USB storage device. This unit 5. - Page 106 Reference Information 7. Press Enter with "Update" selected to start update. „ If an Error Message is Displayed ● During the update, the TV screen may go black When an error occurs, "*-** Error!" is displayed on the unit. depending on the updated program. In that case, ("*"...
-
Page 107: Troubleshooting
Reference Information Resetting the unit Power Troubleshooting Resetting the unit to the status at the time of shipment „ Cannot turn on the unit may solve the problem. If the measures mentioned in the ● Make sure that the power cord is properly plugged into troubleshooting do not solve the problem, reset the unit the wall outlet. - Page 108 Reference Information Audio TV program, the sound is concentrated in the center „ About DTS signals speaker. ● When DTS program material ends and the DTS bitstream stops, the unit remains in DTS listening mode ● Make sure that the speaker setup microphone is not still „...
- Page 109 Reference Information Listening Mode Video Linked operation ● When listening to Dolby Digital and/or DTS sound, ● Check that the output jack of the connected equipment „ There is no HDMI linked operation with CEC- digital connection is necessary. and the input jack of this unit are connected correctly. compliant equipment such as a television ●...
- Page 110 Reference Information Network function ● If the PC is downloading or copying large files, the Multi-zone Function playback may be interrupted. ● Network services become selectable after the network „ There is no zone output from the connected player starts up even if they cannot be selected first. It may ●...
- Page 111 ● If you have connected another unit to the same wall „ Cannot operate Integra/Onkyo components (ones ● Make sure cord and cable plugs are properly plugged in. outlet as this unit, this noise may be an effect from the without RI connection) and components of other ●...
-
Page 112: Reference Information
Players/Recorders (Random order): compatible components. 6. Select “Use the speakers connected to this unit” from ● Onkyo and Integra RIHD-compatible players HDMI of the unit supports the following functions. the menu screen of the TV, and confirm that the audio is ●... - Page 113 Reference Information Home network (LAN) „ CAT5 Ethernet cable HDCP (High-bandwidth Digital Content Protection): The video The Ethernet cable is a cable that actually connects encryption technology developed by Intel for HDMI/DVI. It is designed to protect video content and requires a HDCP-compatible HDMI/DVI components that comprise the network.
- Page 114 Reference Information Server Requirements USB Storage Device Requirements Supported Audio Formats ● USB Mass Storage device class (but not always ● For server playback and playback from a USB storage „ Server playback guaranteed). device, this unit supports the following music file This unit can play digital music files stored on a PC or ●...
- Page 115 Reference Information „ WMA Lossless (.wma/.WMA) „ Apple Lossless (.m4a/.mp4/.M4A/.MP4) ● Supported sampling rates: 44.1 kHz, 48 kHz, 88.2 kHz, ● Supported sampling rates: 8 kHz, 11.025 kHz, 12 kHz, 96 kHz 16 kHz, 22.05 kHz, 24 kHz, 32 kHz, 44.1 kHz, 48 kHz, ●...
- Page 116 Reference Information Remote Control Codes Amstrad 10037, 10171, Bang & Olufsen 10620 Bush 11037, 10037, 11037 12676, 10668, Barco 10556 „ Television (A to E) 10714, 13790, Anam 10037, 10650 Base 10698 A.R. Systems 10037, 10556 13005, 11667, Andersson 12676, 11585 Basic Line 10037, 10668, 11687, 11983,...
- Page 117 Reference Information „ Television (F to J) Coby 13478, 12315, Devant 12098 Elbe 10037, 10556 13627 F&U 12676 12239 Electroband 10000 Commercial Solutions 11447 FairTec 11585 Diamant 10037 Electrograph 11755 Condor 10037 Favi 13382 Diamond 10698, 10672 Electrohome 11670 Conia 11498, 11523, Fedders Lloyd 13639...
- Page 118 10037, 10208 Insignia 12049, 11423, Hisawa 10714 Grandin 10037, 10714, 10171 Hisense 12846, 12098, „ Television (K to N) 10668, 11037, Integra 11807, 13100, 13519, 12183, Kaisui 10037 10556, 12125 13500 10556, 13123, Karcher 12125, 10714 Grundig 10195, 11223, Inteq...
- Page 119 Reference Information Kioto 10556 Loewe 10512, 10633, Maxess 12493 Mitsubishi Electric 11250, 12313, 10037 10150, 10178, Kiton 10037, 10668 Meck 10698 10512, 11797, Logic 11585 10037 Mediator 10037, 10556 10093, 10556, Logik 13432, 13005, Kneissel 10037, 10556 Medion 12676, 10714, 10037, 11150, 12486, 11037, 10037, 10668,...
- Page 120 Reference Information New Acoustic 10037, 10178 Onimax 10714 Panavision 10037 Polaroid 11523, 11769, Dimension 11498, 11687, Onix 10698 Panavox 13835 11767, 12676, New Sonic 11826 Onkyo 11807, 13100, Panda 10698, 10208, 14035, 12125, New Tech 10037, 10556 13500 10508 11826 Newave 10093, 10178, 12125, 11667...
- Page 121 Reference Information Quelle 10037, 10512, Rolsen 12098, 13067, Save 10037 Shinelco 12104 11037, 10195, 13434 10037, 10556 Shintoshi 10037 10668 Rowa 10898, 13047, Sceptre 13899, 12528, Shivaki 12197, 10178, Radiola 10037, 10556 10698, 11038, 12337 10037 13001, 10037 Radiomarelli 10037 Schaub Lorenz 10714, 12676, Siam...
- Page 122 Reference Information Soyo 11826 Tandy 10093 TELE System 11585, 12125 Tokaido 11037 Spectroniq 11498, 11687 Tashiko 10650, 11150 Telecor 10037 Tophouse 10672, 10698 Squareview 10171 Tatung 10037, 11150, Telefunken 10625, 12676, Topline 10668, 11037 11687 12414, 10698, SR Standard 10037, 11037 Toshiba 11508, 11524, 12239, 11585,...
- Page 123 Reference Information Venturer 13005 Watson 11037, 10037, Zenith 10017, 10178, Mitsubishi Electric 34004 10668, 10714 11423, 10000, 32966 Vestel 11037, 11585, 12731, 11365, 10037, 12676, WeCube 11860 32966 12358, 12362 10668, 11667 Wega 10037 Orava 30713 Zepto 11585 Vexa 10037 Welltech 10714 Orion...
- Page 124 32966, 30770, 32428, 30675, Best Buy 32139 Decca 30770 30591, 30741 30741 Black Diamond 30713 Denon 31634, 32258, Firstline 30713 Integra 30627, 32147, Blu:sens 31233 30490, 32748, Funai 30675 31769, 31634, 33851 Blue Parade 30571 30522 30571, 30503, Denver 31643...
- Page 125 Reference Information Kansas Technologies 31233 Medion 30831, 32966, Orion 30713, 31233 RE-BL 32555 30741, 30630 Kendo 30713, 30831 Ormond 30713 30490 Memorex 30831, 32213, Kennex 30713, 30770 Pacific 30831, 30713 32213 33153 Kenwood 30534, 30490 Packard Bell 30831 Red Star 30770 Metz 30713, 30571...
- Page 126 30730, 30831 30741, 31818, Insignia 32596, 32428, Accurian 30675 Waitec 30730, 31233 32139, 34004 30675 30675 Walker 32966 Technica 30713 Integra 32147, 32900, Akai 30675 Waltham 30713 32910, 33100, Technical 32966 Aristona 30646 WB Electronics 32555 33101, 33500, Technics 30490...
- Page 127 Reference Information Go Video 30741 Yamaha 30646 Amino 01615, 01898, Bright House 01877, 01376, 01481, 02482, 00476 30741 Zenith 30741 01998, 02302, British Telecom 02294 Hitachi 31664 03028 Broadstripe 00476, 01376 Humax 30646 „ VCR Anguang Network 03936 02979 Insignia 32095 DirecTV 20739...
- Page 128 Reference Information China Telecom 04196, 02913, Comporium 01877, 03560, Extra TV 02132 Hathw@y 02043, 02726 03937 02187 Hawaiian Telcom 03028 China Unicom 04366, 04196 Consolidated 01877, 01376, 01376, 01877, „ Cable Set Top Box (F to J) Chongqing Cable 03954 Communications 01998, 02302, 01982, 02979,...
- Page 129 Reference Information HyTV 02979, 03340 KabelBW 02889, 01981, Mega 02683 Numericable 02436 01983 Hyundai Digital 03465 Mega TV 02683 Technology KabelNoord 02015 Megacable 01376, 00476 „ Cable Set Top Box (O to S) HZRTV 02960 Kaon 02493, 02889, 02401 02586 I-Cable 01374 02746, 03407,...
- Page 130 Reference Information PTCI 01376 Seokyung 03340 StarHub 01927, 00276 Thomson 01582, 01981, 01982, 01983, 03348 Service Electric 01376, 00476, Stipte 01898 03007, 02407 QooK TV 02683, 03478 01982 Stofa 02015 Qook-Skylife 02683, 03478 SetaBox 01917 Suddenlink 01877, 01376, T-Hrvatski Telekom 02132 Shaanxi Broadcasting 03965...
- Page 131 Reference Information „ Satellite Set top Box Vodafone 02401 Atevio 02928 Boxer 02443, 01692, @sat 01300 01957, 04024 Volia 02493 Atlanta 02418, 03320 @Sky 01334 Brainwave 00658, 01672 Volia Cable 02493 Atom 02289 1.Sky 03538 BSkyB 01175, 01662, 02742 Audiola 03012, 02418 00847 Acoustic Solutions...
- Page 132 Reference Information Comag 02797, 02026, DigitalBox 02540, 01631, Echostar 00775, 02262, Freesat+ 02443, 03266 02458, 02813, 02289, 01100, 02527, 00853, freeview 02982 02308, 01413 03240 01409 Fte Maximal 02289 Comsat 01413 DigitSat-e 02842 Eco-Star 01413 Fuba 02750, 00173, Comwell 01956 Digiturk 03517, 02097 Edision...
- Page 133 Reference Information Grundig 00173, 00847, Humax 01176, 02443, Jaeger 02797, 01334 Logik 02034, 01284, 02376, 01291, 01427, 01808, 01906, 02842, Jameson 02813 02034, 00853, 02736, 01882, 01803, 03652 Jerrold 00869 02813, 01284, 01915, 03140, LogiSat 02797, 02026, Jiuzhou 03140 01780, 02738, 02231, 02408, 02813, 02458 00775, 01284...
- Page 134 Reference Information Metronic 01986, 02418, Nilox 02278 Pace 00847, 00887, PremiumX 03374 02738, 01334, 01356, 02754, Nokia 00853 Primacom 01176, 01195, 01631, 01413, 01682, 01175, 01197 Nordmende 01611 01672, 01935, 01693, 02475, Pro Basic 00853 Noru 02938 02278 00853, 02231, ProLine 01284 Nova...
- Page 135 Reference Information Samsung 03063, 00253, SHOI 02938 Skylink 02957, 01545, Sun Box 03571 01442, 01377, 02443, 02928, Siemens 00173, 01657, Sun Direct 02525 02467, 01682, 01195, 01197, 01429, 02418, Sunny 01300 01989, 03266, 01986 01626, 01334, Sunstech 02738 00853, 01662, 01672 Skymaster 01409, 02205,...
- Page 136 Reference Information Telestar 01100, 01099, TrekStor 02738 Viasat 01682, 01197, Zehnder 01777, 03422, 01334, 01197, 01195, 02235, 01334, 01413, Triax 01291, 01626, 02540, 01195, 00253 02289, 03424, 00853, 01099, 01351, 01626, 02034, 00740, 01611, 01631 Videocon 03077 01672 01631 Tricolor TV 02622, 03064 Vietnam Television 03834...
- Page 137 70157 Keedox 04442 Xbox 01805, 04000, Hitachi 70032 Sansui 70157 01272 03373 70072 SAST 70157 Xtreamer 02723 Linksys 01272 Integra 71817 Siemens 70157 ZT Group 01272 Magnavox 03339 Kenwood 70036, 70157 Silsonic 70036 Mede8er 02709 Krell 70157 Simaudio 70157 Media Center PC...
- Page 138 Maige TV 03937 Bell Aliant 01998 Finnet 02030 „ Receiver Matanuska 01481, 02254, Bell ExpressVu 01998 Freebox 01976 Telephone 02482, 02586 Integra 52503 Bell Fibe TV 01998 Frontier 02378 Association Onkyo 52503 BesTV 04196 Communications Mega TV 02683 Bluewin 02271...
- Page 139 Reference Information MHTC 01481, 01998, 02401 T-Home 02132 CenturyLink 01998 02254, 02302, Qwerty 01898, 01481, Thomson 03007, 02407 03647 02482 01615 01615 Chunghwa 03647 Minerva Networks 03118 Qwerty.TV 01898 U+ tvG 02682 Cisco 03028, 02132, 02275, 02802 Reliance 02556 00858, 02047, U-verse 00858 mio TV...
- Page 140 Reference Information Minerva Networks 03118 Telekom Deutschland 02132 Botech 02738, 03749 DTK Deutsche 01195, 01197 Telekabel Mitsubishi Electric 03274 TELUS 03028 Boxer 01957 Dyon 02738, 02813 03647 T-Home 02132 BSkyB 01175, 01662 Easy-One 03240 Motorola 01998, 02437, Thomson 03007 Bush 02034 02378, 02952, Echostar...
- Page 141 Reference Information IceCrypt 04197, 02928 Octagon 02928 02034 TechniSat 01197, 01195, 03440 ID Sat 01334 Openbox 02928 Set-One 03240 Technotrend 01429 Indovision 01989 Opensat 02957, 02719 Sharp 02034, 01935 Techwood 02034 iNETBOX 01237 Opticum 02957, 02797, Shaw Direct 00869 02932 Telasat 02466 Intv...
- Page 142 Reference Information Xoro 02738, 02813, Curtis 12855, 12466, Hikona 11983 Nordmende 13835 03422 13895, 13636, Hisense 13519 13434, 12676 14035 Xtreme 01300 Hitachi 12676, 11037, 12676 Dantax 12676 Xtrend 03320 11667 Orava 11037 Denver 12197, 13067, Zehnder 03422, 03424, Hyundai 12676 Orion 11037, 12676...
- Page 143 Reference Information Sencor 12197 Viore 13429, 12352, 12104, 13382, Sharp 10818, 12676, 13118 12360 VisionPlus 12426 Shinelco 12104 Walker 12676 Shivaki 12197 Waltham 11037 Skyworth 12963 Weltstar 11037 Soniq 12493, 13005 Westinghouse 11712 Sontech 11983 Wharfedale 11983 Sony 12778, 10000 Xiahua 11753 Soundwave...
- Page 144 Integra Division of 18 park Way, Upper Saddle River, N.J. 07458, U.S.A. Tel: 800-225-1946, 201-818-9200 Fax: 201-785-2650 http://www.integrahometheater.com Integra Division of Liegnitzerstrasse 6, 82194 Groebenzell, GERMANY Tel: +49-8142-4401-0 Fax: +49-8142-4208-213 http://www.integra.eu Integra Division of 302, Building 1, 20 North Chaling Rd., Xuhui District, Shanghai, China 200032 , Tel: 86-21-52131366 Fax: 86-21-52130396 http://www.integra.com.cn...
Need help?
Do you have a question about the DHC-60.7 and is the answer not in the manual?
Questions and answers