Table of Contents
Advertisement
Advertisement
Table of Contents

Summary of Contents for Franklin Explorer EST-7014
- Page 1 EST-7014 14-Language Speaking Global Translator User’s Guide www.franklin.com...
-
Page 2: License Agreement (Us Only)
License Agreement (US only) READ THIS LICENSE AGREEMENT BEFORE USING THE ELECTRONIC REFERENCE. YOUR USAGE OF THE ELECTRONIC REFERENCE DEEMS THAT YOU ACCEPT ALL TERMS OF THIS LICENSE. IF YOU DO NOT AGREE WITH THESE TERMS, YOU MAY RETURN THIS PACKAGE WITH PURCHASE RECEIPT TO THE DEALER FROM WHICH YOU PURCHASED THE ELECTRONIC REFERENCE AND YOUR... - Page 3 would be in violation of applicable copyright laws. Further, you may not modify, adapt, disassemble, decompile, translate, create derivative works of, or in any way reverse engineer the ELECTRONIC REFERENCE. You may not export or re-export, directly or indirectly, the ELECTRONIC REFERENCE without compliance with appropriate governmental regulations.
- Page 4 Introduction Thank you for purchasing the 14-Language Speaking Global Translator! With your translator, you can: • translate to and from 14 languages, including: Arabic, Chinese, Dutch, English, French, German, Italian, Japanese, Korean, Polish, Portuguese, Russian, Spanish, and Turkish; • find translations of hundreds of conversational phrases to and from 14 languages;...
- Page 5 • listen to music files; • view image files; • read travel guides of 10 popular global destinations in Chinese, Dutch, English, French, German, Italian, Japanese, Korean, Polish, Portuguese, Russian and Spanish; • use the extra functions in the Organizer, including: Calendar, Calculator, Clock, Memo, Voice Memo, Unit Converter, Currency Converter, Countdown Timer...
-
Page 6: Battery Precautions
Battery Precautions Your device is powered by a rechargeable lithium polymer battery. • If the device is not used for a long period of time, the battery may lose its charge. Please recharge the battery following the steps described above in order to use your device. - Page 7 of how much the device has been used during that time. • Should a battery leak, the device may become damaged. Clean the battery compartment immediately, avoiding contact with your skin. • Keep batteries out of reach of small children. If swallowed, consult a physician immediately.
-
Page 8: Product Care
Product Care Your device is designed to be light, compact, and durable. However, it is an electronic device and must be treated carefully. Putting unnecessary pressure on it or striking the device against other objects can cause damage. In order to avoid damage to your device, please: •... - Page 9 your hands immediately. • Please keep screen protectors and plastic bags away from babies and children to avoid danger of suffocation.
-
Page 10: Charging The Battery
Charging the Battery Your device is powered by a rechargeable lithium polymer battery of capacity 650 mAH. When you see the low battery warning, please recharge the battery. Please charge the battery before your first use of the device. Installing the Battery For the First Time Follow these instructions to install the battery for the first time. - Page 11 • Make sure the battery fits snugly into the compartment after it is connected. 4. Replace the battery compartment door. Charging the Battery with Your Computer Plug the wide end of a USB cable into a USB port on your computer and the smaller end of the USB cable into the USB port on your device (open the port cover on the device for connection).
- Page 12 2. Refer to the diagram below to insert a suitable plug to the AC adapter. • To detach the plug (for replacement), refer to the diagram below. 3. Plug the wide end of a USB cable to the AC adapter and the small end into the USB port on your device.
- Page 13 4. Insert the AC adapter to a power outlet. • The battery icon animates during charging and stays solid when the battery is fully charged. It generally takes a few hours to completely recharge the battery.
-
Page 14: Resetting Your Product
Resetting Your Product If the keyboard fails to respond, or if the screen performs erratically, perform a system reset by following the steps below: 1. Use a paper clip to gently press the reset button on your unit. • The reset button is recessed in a pin- sized hole on the front of your unit. -
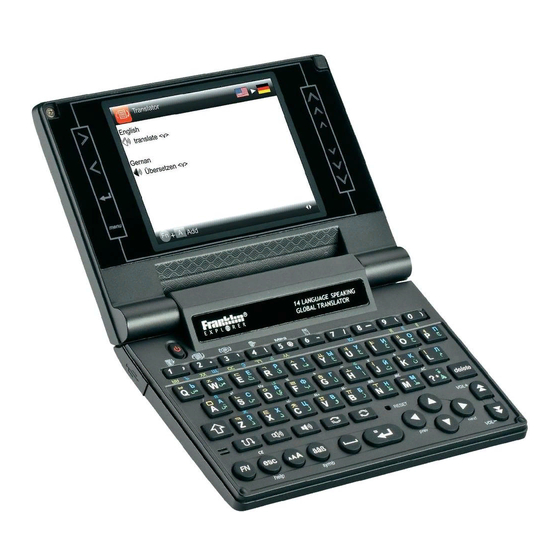
Page 15: Understanding Your Device
Understanding Your Device 1. Screen 2. Touch-sensitive Keys 3. Power Key 4. Short-cut keys for Main Menu, Translator, Phrases, Visual Dictionary, Music Player and Calculator (Hold Function Key (FN) and press the corresponding number key (1-6) for access) 5. Source and Target Language Keys 6. - Page 16 7. Function Key 8. Type Size Key 9. Enter Key 10. Direction Keys 11. Page up/down Keys, Volume Keys 12. Accent/Symbol Key...
-
Page 17: Using The Special Features
Using the Special Features Your device is equipped with several special features: Battery Compartment Headphone Jack USB Port Speaker MicroSD Card Slot Headphone Jack: The headphone jack is designed for 3.5 mm, 35 ohm impedance stereo headphones. Caution: Monophonic headphones will not work with this unit. USB Port: The USB Port is designed for a mini-USB 1.1 compatible connection. - Page 18 MicroSD Card Slot: Insert a MicroSD card to expand the unit’s memory space. To insert card, open the card slot cover and then push the card in until a click is heard. To remove card, push the card in until a click is heard, then slowly release the card.
-
Page 19: Key Guide
Key Guide Touch Keys The touch-sensitive keys are located on the left and right sides of the screen. 1. Moves right. 2. Moves left. 3. Enters a word or selects an item. 4. Goes to the main menu. 5. Touch once on the symbol to move one step in the indicated direction. -
Page 20: Function Keys
Function Keys Turns the device on or off. Shifts letter keys to type uppercase letters or other special characters. Toggles between the source and target languages. Pronounces the source language’s word. Pronounces the target language’s word. Changes the source language (the language you already know). -
Page 21: Combination Keys
Returns to the previous screen. Clears all current input. While in text, cycles through the available type sizes. After a letter, press repeatedly to cycle through the available accents. Types a space. Enters a word or selects an item. Moves up, down, left, or right (Direction keys). - Page 22 Goes to the Visual Dictionary. Goes to the Music Player. Goes to the Calculator. Displays the help messages. Displays the menu of symbols. Use the direction keys to move the cursor to the one you want and then press In a series of entries, displays the previous or next entry.
- Page 23 ✓ Using the Direction Keys The arrows on the bottom right of the screen show which direction keys you can press to move around menus or view more text.
-
Page 24: Getting Started
Getting Started Setting the Message Language The first time you use this translator (or following a product reset), you will be prompted to set the message language used for on-screen prompts and menu items. 1. Press the letter for the language you want. - Page 25 Changing the Source and Target Languages The source language is the language in which you enter a word at the translator or search entry screen. The target language is the language in which you wish to view the translation. The source language is the same as the message language.
- Page 26 Showing the Help Messages You can view a help message at any screen by holding FN and then press HELP. In a help message, hold FN and press M to display an overview of all the help topics. Press to select the topic you want and then press .
- Page 27 Other Input Methods When entering a word in Arabic, Chinese, Japanese, Korean, or Russian source language, there are a few differences from the languages with Roman-based alphabets. • For Arabic, type characters according to how they are indicated on your device. Note: Some keys contain two Arabic characters.
- Page 28 • For Russian, type letters according to your device’s keyboard. Note: Some keys contain two Cyrillic characters. To enter one of these letters, press the letter and then press äâß.
- Page 29 Using the Global Search You can use Global Search to search all words and phrases saved in the device. Remember, you can change the source and target languages at any time using , respectively. 1. From the main menu, press select Global Search and then press 2.
- Page 30 pronounced in the source or target language, respectively. • To adjust the volume, hold FN and press (VOL+) or (VOL-) once to display the volume control menu. Press (VOL+) or (VOL-) to adjust the volume and then press ESC or •...
- Page 31 Using the Translator Use the Translator to translate words from a source language to a target language. Remember, you can change the source and target languages at any time using , respectively. 1. From the main menu, press select Translator and then press Note: As a shortcut, hold FN and press ) to go to the Translator directly.
- Page 32 3. If the letters you typed match an entry in the word list, it is automatically highlighted. • Or, press to select another word entry you see in the word list. 4. Press to view the entry. • Press to hear the entry pronounced in the source or target language, respectively.
- Page 33 all input for a new search. ✓ Misspelling Words If you enter a misspelled word, a list of corrections appears. Press to select the word you want and then press see its entry.
- Page 34 Using the Visual Dictionary Use the Visual Dictionary to search words and their translations from color images in English, French, German, Italian and Spanish. The images are grouped into categories for your easy search. Remember, you can change the source and target languages at any time using , respectively.
- Page 35 translation in a pop-up window. • If necessary, press repeatedly to zoom in or out the diagram or change the size of the screen type. In an enlarged diagram, press the direction keys, if necessary, to move around. • Press to hear the entry pronounced in the source or target language, respectively.
- Page 36 select the word you want and then press to see its entry.
- Page 37 Translating Phrases The common phrases in this unit are always listed in the current source language. Remember, you can change the source and target languages at any time using , respectively. 1. From the main menu, press select Everyday Phrases or Travel Phrases and then press •...
- Page 38 • Press or , if necessary, to view the entry. Press to skip screen pages. • Hold FN and press A to save the current entry into the User Word List for further study or review. See Using the User Word List for more information.
-
Page 39: Using The Travel Guide
Using the Travel Guide Read guides of 10 popular travel destinations in Chinese, Dutch, English, French, German, Italian, Japanese, Korean, Polish, Portuguese, Russian and Spanish. 1. From the main menu, press select Travel Guide and then press 2. Press to select a city and then press 3. - Page 40 Using the User Word List As you explore new words or phrases, save them in the User Word List for further study or review. Adding Entries to the User Word List You can add entries from the Translator, Visual Dictionary, Everyday Phrases and Travel Phrases to the User Word List.
- Page 41 press to select Input Language from the pop-up menu for language selection. • Instead of typing a word, you may press to select an entry and then press 4. When you are pressing browse the User Word List, hold FN and press P to preview the currently selected entry.
- Page 42 To add a new entry to the User Word List. Type a word to be added and then press Next, if available, press to select results from a desired source (i.e., Translator, Visual Dictionary or Phrases) and then press . Press select a desired entry and then press to add it to the User...
- Page 43 Select To assign a category to the Category currently selected entry. Press for selection and then press Rename To rename a category name. Category Press to select a category to be renamed and then press . Next, type the new name and then press Filter To view entries in the selected category.
-
Page 44: Using The Personal Dictionary
Using the Personal Dictionary Create your own dictionaries by saving new words and definitions in the Personal Dictionary. Adding Entries to the Personal Dictionary 1. From the main menu, press select Favorites and then press 2. Press to select Personal Dictionary and then press 3. - Page 45 accent you want appears (e.g., é). • To enter a special character (if permitted), hold FN and press äâß(SYMB) to display the menu of symbols. Use the direction keys to move the cursor to the one you want and then press 6.
- Page 46 of potential matching entries is refreshed. 5. If the letters you typed match a word in the list, it is automatically highlighted. • Or, press to select another word you see in the list. 6. Press to view the definition. 7. Press ESC when done and return to the dictionary search entry screen.
- Page 47 Edit To edit the currently selected entry. When editing, press to move between fields. Hold FN and press S to save the changes. Delete To delete the currently selected entry. You are asked to confirm the deletion, press confirm or press and then to cancel.
- Page 48 Creating Personal Dictionaries on Your PC You can also create your personal dictionaries on your PC and then copy them to your device. 1. On your PC, create your custom dictionaries using a spreadsheet or database application. • A template .xls file for creating custom dictionaries is saved in the “PersonalDict”...
- Page 49 be sure to select “Unicode Text (*.txt)” format and that your columns are tab delimited (that is, separated by tabs). • The file name you give the file is exactly how it will display on your device. 2. Copy your .txt formatted files to the “PersonalDict” folder in the device. •...
- Page 50 History The unit stores the most recently browsed entries in the Translator, Visual Dictionary and Phrases. To browse the history: 1. From the main menu, press select Favorites and then press 2. Press to select History and press 3. Press to select a recent entry and then press to view.
-
Page 51: Using The Calendar
Using the Calendar Use the Calendar to check and set date and time. 1. From the main menu, press select Organizer and then press 2. Press to select Calendar and then press 3. Hold FN and press M, and then press to select the function you want from the pop-up menu. - Page 52 Search To view the calendar of a specific date. Use the number Date keys to input details and then press...
-
Page 53: Using The Calculator
Using the Calculator 1. From the main menu, press select Organizer and then press 2. Press to select Calculator and then press Calculator Keys Types numbers. DELETE Erases the last typed number. A(√x) Calculates a square root. Square a number. D(1/x) Calculates a reciprocal. - Page 54 V(M+) Adds the currently displayed value to the number stored in the memory. B(M-) Subtracts the currently displayed value from the number stored in memory. N(MR) Recalls the number stored in the memory. M(MC) Clears the number stored in memory. ?*(AC) Clears the calculator.
-
Page 55: Using The Clock
Using the Clock The clock displays both local and world time in your selected format. You can use the clock to check the time in different cities around the world and set six alarm settings. 1. From the main menu, press select Organizer and then press 2. -
Page 56: Setting The Alarm Clock
Set Date To change the date format to Format either MM\DD\YYYY or DD\ MM\DD\ MM\YYYY. YYYY (DD\MM\ YYYY) Set Time To change the time format to Format to either 12 or 24-hour. 12H (24H) Set Alarm To set the alarm clock. See Clock Setting the Alarm Clock for more information. - Page 57 2. Use the number keys to input the alarm activation time in the Alarm Time field. • If the clock is in 12 hour display format, press P for “PM” or A for “AM”. 3. Press to advance to Alarm Status. Press to set alarm on or off and then press...
- Page 58 de-selection, press the corresponding number keys again. 7. Press to save settings. • Press to move between fields at the above setting screen. ✓ Deactivating the Alarm Press any key on the unit to deactivate the alarm when it sounds.
- Page 59 Using the Memo Adding Entries 1. From the main menu, press select Organizer and then press 2. Press to select Memo and then press 3. Hold FN and press A. 4. Enter the appropriate information in the available fields. • Press to advance to the next field. Press to return to the previous field.
-
Page 60: Viewing Entries
5. When done, hold FN and press S. • To exit without saving, hold FN and press M, and then press to select Close from the pop-up menu. You are asked to confirm the exit. Press and then press to exit without saving. Viewing Entries 1. -
Page 61: Editing Entries
6. Press ESC when done. Editing Entries 1. From the main menu, press select Organizer and then press 2. Press to select Memo and then press 3. Press to browse the Memo entries. • When you are doing so, hold FN and press M, and then press to select the function you want from the pop-up... - Page 62 Clear To clear all Memo entries. You are asked to confirm the clearance, press to confirm or press and then press cancel. Preview To preview the currently selected entry. Select To assign a category to the Category currently selected entry. Press for selection and then press Rename...
- Page 63 Using the Voice Memo You can use Voice Memo to make voice recordings. The voice memos are stored in .wav format in the “Record” folder of the device. 1. From the main menu, press select Organizer and then press 2. Press to select Voice Memo and then press 3.
- Page 64 7. Press S to stop the playback. 8. To rename a selected file, press M. Enter a new name and then press 9. To delete a selected file, press DELETE. • You are asked to confirm the deletion, press to confirm or press and then press to cancel.
-
Page 65: Using The Metric Converter
Using the Metric Converter 1. From the main menu, press select Organizer and then press 2. Press to select Conversions and then press 3. Press to select Metric Converter and then press 4. Press once and then press select a conversion unit or category in the three selection menus on the top of the screen. -
Page 66: Using The Currency Converter
Using the Currency Converter 1. From the main menu, press select Organizer and then press 2. Press to select Conversions and then press 3. Press to select Currency Converter and then press 4. Press once and then press select a currency in the two selection menus on the top of the screen, respectively. - Page 67 Adjusting Exchange Rates 1. In the Currency Converter, press E. 2. Press once and then press select an exchange rate you want to change. • Each exchange rate is based upon the equivalent to 1 US Dollar. The rate should be in units of the other currency per one unit of the home currency (n other/1 home).
-
Page 68: Using The Countdown Timer
Using the Countdown Timer 1. From the main menu, press select Organizer and then press 2. Press to select Countdown Timer and then press 3. Enter the duration of countdown. 4. Press to start the countdown. 5. Press to pause the countdown. •... -
Page 69: Organizer Password
Organizer Password You can set a password to protect information in Memo and Voice Memo. 1. From the main menu, press select Organizer and then press 2. Press to select Organizer Password and then press 3. Create a password and then press •... -
Page 70: Using The Music Player
Using the Music Player You can play music files in mp3, wav or wma format. Adding Music to the Playlist 1. From the main menu, press select Entertainments and then press 2. Press to select Music Player and then press 3. -
Page 71: Playing Back Music
added to the Playlist automatically. Playing Back Music 1. From the main menu, press select Entertainments and then press 2. Press to select Music Player and then press 3. Press to select a music file in the Playlist. • The file name shows on the top of the screen. -
Page 72: Selecting Playback Modes
5. Press S to stop the playback. • If you press ESC during playback, you are asked to choose if you want to exit the Music Player but continue playing music. Press and then to do so. Playback will continue until its end or when you hold and press ESC. -
Page 73: Using The Photo Album
Using the Photo Album You can play image files in jpg, bmp or gif format. Viewing Image Files 1. From the main menu, press select Entertainments and then press 2. Press to select Photo Album and then press 3. Press or to select an image file from the Photo folder of the device. -
Page 74: Startup Picture
file. • Use the direction keys to move around in an enlarged image. • Press N to view the next image file. Press P to view the previous image file. 5. Press ESC when done. ✓ Startup Picture While viewing an image file, hold FN and press M, and then press to select Startup Picture from the pop-up menu to... - Page 75 • To start a slideshow from a specific image file, repeat this step as you are viewing the specific image file. 4. During the slideshow, hold FN and press M, and then press to select Slide Setting from the pop-up menu for the following slideshow settings.
-
Page 76: Managing Image Files
Managing Image Files 1. From the main menu, press select Entertainments and then press 2. Press to select Photo Album and then press 3. Hold FN and press M, and then press to select Sort by List from the pop- up menu. - Page 77 Paste To paste the copied file to the current location. Delete To delete the current file. Find To show all image files on the device with file paths. Go to To browse image files on an inserted MicroSC card. Note: Disk A This option shows as Go to Disk C when you are browsing...
-
Page 78: Changing The Settings
Changing the Settings At any time, you may adjust the settings of your device. Accessing the Settings Menu 1. From the main menu, press select Settings and then press 2. Press to select a menu item and then press • If there are more options under a menu item, repeat this step for selections. -
Page 79: Display Settings
Display Settings Theme This setting changes the theme color of the display. Press to select the one you want and then press Startup You can set to play back a selected music or picture file whenever you turn on the unit. Press to select a setting option and then press... -
Page 80: Volume Control
Volume Control Pronunciation This setting changes the preferred volume level when the unit reads words or phrases. Press to select the volume level you want and then press Keyboard This setting mutes or restores the key tone. Press to select a setting option and then press Note: To toggle between Pronunciation and Keyboard settings, press... -
Page 81: Font Size
Language Language You can set the message language used for on-screen prompts and menu items. Press the letter key corresponding to the language or use the direction keys to select the language you want and then press Font Size This setting changes the preferred size of the screen type. -
Page 82: Power Management
Power Management Unit Shutoff This setting sets the timer before the unit or the music player turns off automatically. Press to select the Unit or Music Player. Next, press to set the timer and then press Backlight Shutoff This setting sets the timer before the display turns off automatically. -
Page 83: Disk Management
Disk Management You can browse and manage files stored in the memory of the device (C:) or on an inserted MicroSD card (A:). 1. Press to select the disk you want and then press • At the disk selection screen, press I to display the used and free memory space of the selected disk or press F to format the selected disk. - Page 84 Paste To paste the copied file to the current location. Delete To delete the current file. Find To list all available files in the disk with file paths. Go to To view files on an inserted MicroSC card. Note: This Disk A option shows as Go to Disk C when you are browsing files on...
-
Page 85: Usb Connection
USB Connection Select this option to initiate USB connection after you have connected this unit to a PC with a USB cable. After successful connection, you can copy or manage files between this unit and your PC. - Page 86 Shortcut While number keys 1-6 are pre-assigned with shortcuts to the most used functions, you can also assign other functions to keys 7, 8, 9 and 0 as shortcuts to suit your own needs. For example, to assign key 7 as a shortcut to Global Search: 1.
-
Page 87: Program Management
Program Management Select this option to delete unwanted data files downloaded from Franklin’s website to free up memory space. If no data files are downloaded to the unit, you cannot go to Program Management. See Copying Files to Your Device for more information on downloading files to your device. -
Page 88: Host Information
Host Information Select this option to check the host ID, program version and data version. -
Page 89: Connecting Your Device
Connecting Your Device Your device has a built-in USB port and can be connected to your desktop or laptop PC with a USB cable. 1. Turn on your device. 2. Connect the wide end of a USB cable to a USB port on your PC and the smaller end to the USB port on your device. -
Page 90: Copying Files To Your Device
Copying Files to Your Device You can transfer data to the device from your PC or save copies of your data to another location on your PC to backup important information. 1. Make sure your device is connected to your PC. •... - Page 91 • If your file is .txt formatted personal dictionary, paste the file in the “PersonalDict” folder of the Removable Disk. • If your file is an image file, paste the file in the “Photo” folder of the Removable Disk. • If your file is a music file, paste the file in the “Music”...
- Page 92 Updating and Expanding Your Content Your device is not limited to the content it comes with. The firmware can be updated and the content can be expanded with additional data from Franklin’s Web site. After updates or data are downloaded to your PC, they should be copied to the device for installation.
-
Page 93: About Your Device Folders
About Your Device Folders When you access your device on your PC, an assortment of folders are available to you depending on which features you have used. Remember, “PersonalDict” is always the location to save any .txt formatted personal dictionaries so they appear on your device. “Record”... -
Page 94: Backing Up Your Data
Backing Up Your Data Because you have access to the folders in which any information you enter is saved, you can backup this important information on your PC. While your device is connected to your PC, right-click any or all of those folders and then click “Copy”. -
Page 95: Restoring Your Data
Restoring Your Data If you accidentally erase or lose information, you can restore any important information you have previously saved to your PC. Connect your device to your PC. Next, find the location on your PC where you saved a backup copy of your information. -
Page 96: Specifications
Specifications Model: EST-7014 14-Language Speaking Global Translator Battery: 1 x rechargeable lithium polymer Size: 4.1 x 3 x 0.75 in (104 x 76.2 x 19 mm) Weight: 4.6 oz (130 g) ISBN: 978-1-59074-588-5 © 2002-2010 Franklin Electronic Publishers, Inc. Burlington, N.J. 08016-4907 U.S.A. All rights reserved. - Page 97 Imported to the European Community by: Franklin Electronic Publishers GmbH Kapellenstr. 13 85622 Feldkirchen, Germany...
-
Page 98: Recycling And Disposal
Recycling and Disposal ✓ Device Disposal This device should be disposed through your local electronic product recycling system - do not throw in the trash bin. ✓ Packaging Disposal Please save this User’s Guide and all packing materials, as they contain important information. -
Page 99: Fcc Notice (U.s. Only)
FCC Notice (US only) This device complies with Part 15 of the FCC Rules. Operation is subject to the following two conditions: (1) This device may not cause harmful interference, and (2) This device must accept any interference received, including interference that may cause undesired operation. - Page 100 reception, which can be determined by turning the equipment off and on, the user is encouraged to try to correct the interference by one or more of the following measures: – Reorient or relocate the receiving antenna. – Increase the separation between the equipment and receiver.
-
Page 101: Disclaimer Of Warranties
Disclaimer of Warranties Except as specifically provided herein, Franklin makes no warranty of any kind, express or implied, with respect to this product. -
Page 102: Limited Warranty (U.s. Only)
Limited Warranty (U.S. only) LIMITED WARRANTY, DISCLAIMER OF WARRANTIES, AND LIMITED REMEDY FRANKLIN WARRANTS TO THE ORIGINAL PURCHASER THAT THIS PRODUCT WILL BE FREE FROM DEFECTS IN MATERIALS AND WORKMANSHIP FOR A PERIOD OF ONE (1) YEAR FROM THE ORIGINAL DATE OF PURCHASE AS EVIDENCED BY A COPY OF THE SALES RECEIPT. - Page 103 THE EXCLUSIVE REMEDY FOR BREACH OF THIS WARRANTY. THIS WARRANTY GIVES YOU CERTAIN RIGHTS; YOU MAY ALSO HAVE OTHER RIGHTS THAT MAY VARY FROM JURISDICTION TO JURISDICTION. EXCEPT FOR THE LIMITED WARRANTY EXPRESSLY RECITED ABOVE, THIS FRANKLIN PRODUCT IS PROVIDED ON AN “AS IS”...
- Page 104 OR CONSEQUENTIAL DAMAGES WHATSOEVER, INCLUDING, BUT NOT LIMITED TO, LOSS OF REVENUE OR PROFIT, LOST OR CORRUPTED DATA, OR OTHER COMMERCIAL OR ECONOMIC LOSS, EVEN IF FRANKLIN HAS BEEN ADVISED OF THE POSSIBILITY OF SUCH DAMAGES, OR EVEN IF OTHERWISE FORESEEABLE. FRANKLIN IS NOT RESPONSIBLE FOR CLAIMS BY A THIRD PARTY.
- Page 105 Warranty Service: If you think your product is defective, call Franklin’s Customer Service Desk, 1-800-266-5626, to request a return merchandise authorization (“RMA”) number, before returning the product (transportation charges prepaid) to: Franklin Electronic Publishers, Inc. Attn: Service Department One Franklin Plaza Burlington, NJ 08016-4907 If you return a Franklin product, please include your name, address, telephone...
-
Page 106: Limited Warranty (Eu And Switzerland)
Limited Warranty (EU and Switzerland) Notwithstanding the disclaimer of warranties above, this product, excluding batteries and liquid crystal display (LCD), is guaranteed by Franklin to be free of defects in materials or workmanship for a period of two years from the date of purchase. It will be repaired or replaced with an equivalent product (at Franklin’s option) free of charge for any defect in workmanship or materials during... -
Page 107: Limited Warranty (Outside U.s., Euand Switzerland)
Limited Warranty (outside U.S., EUand Switzerland) Notwithstanding the disclaimer of warranties above, this product, excluding batteries and liquid crystal display (LCD), is guaranteed by Franklin to be free of defects in materials or workmanship for a period of one year from the date of purchase. -
Page 108: Technical Support
Technical Support Technical Support/Ayuda técnica /Technische Hilfe/ Aiuto tecnico/Aide technique/Technische Steun Deutschland Bitte schicken Sie dieses Produkt im Garantiefall Österreich mit Kaufbeleg an folgende Service-Adresse: Franklin Electronic Publishers (Deutschland) GmbH, Kapellenstrasse 13, 85622 Feldkirchen. Den technischen Support erreichen Sie unter Tel. - Page 109 USA & Canada Technical Support is open from 9AM to 5PM EST Monday through Friday. Please call (800) 866-2110 and choose option 3, or fax (609) 387-1787 or visit us at www.franklin.com All other countries www.franklin.com Todos los otros paises Alle anderen Länder Altri paesi...
Need help?
Do you have a question about the EST-7014 and is the answer not in the manual?
Questions and answers