Table of Contents
Advertisement
Quick Links
Advertisement
Table of Contents

Related Manuals for GoPro Hero 4 Black


Summary of Contents for GoPro Hero 4 Black
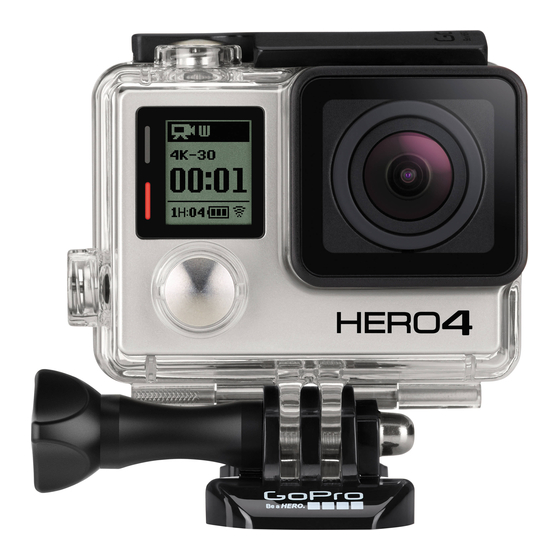
- Page 1 QUICK START GUIDE Download the User Manual at gopro.com/support...
- Page 2 Congratulations on your new HERO4 Black camera. This Quick Start Guide will show you the basics of capturing life’s most incredible When using your GoPro camera as part of your active lifestyle, always be moments with your GoPro. aware of your surroundings to avoid injury to yourself and others, and to prevent damage to your camera.
- Page 3 Settings/Tag Button [ card (sold separately). (Requires a Class 10 or UHS-1 card. Power/Mode Button [ For a list of the recommended SD cards, visit gopro.com/support.) STEP 3 Open the battery door and insert POWERING CAMERA ON AND OFF the battery.
- Page 4 / Selecting Camera Modes / Capturing Video and Photos Select your camera mode, then press the Shutter/Select button [ ] to Press the Power/Mode button [ ] repeatedly to cycle through the start/stop recording or take a photo. camera modes. Camera Modes Description Video, Time Lapse Video, Video + Photo,...
- Page 5 2. Press the Settings/Tag button [ ] to enter the Settings menu for that mode. To learn more about settings, download the User Manual at 3. Press the Power/Mode button [ ] to cycle through the options. gopro.com/support Camera Reset...
- Page 6 / Mounting Your Camera / Mounting Your Camera VERTICAL MOUNTING Mount your GoPro to helmets, gear and more with the included Curved + Flat Adhesive Mounts and hardware. APPLYING + REMOVING ADHESIVE MOUNTS Apply adhesive mounts to clean, smooth surfaces at room temperature only, at least 24 hours before use.
- Page 7 / Housing Backdoors / Swapping Backdoors Your HERO4 Black camera comes with two backdoors, each designed for different uses and environments. STANDARD BACKDOOR Provides waterproof protection to 131’ (40m). Use when shooting under water or in wet, damp or dirty conditions. STEP 1 STEP 2 SKELETON BACKDOOR...
-
Page 8: Playing Back Videos And Photos
™ Connect the camera to your This removable LCD touch screen Connect the camera to your Use the GoPro App to share videos computer with the included USB seamlessly attaches to the back computer with the included USB and photos by text, email or on your cable to transfer content for playback. - Page 9 / Help and Resources CONTROL. VIEW. SHARE. Visit gopro.com/getstarted to learn more: The GoPro App lets you control your camera remotely using a smartphone UPDATE YOUR CAMERA GET THE GOPRO APP + or tablet. See what your camera sees with live preview. View photos and...
- Page 10 USER MANUAL...
- Page 11 Pour télécharger ce manuel de l’utilisateur dans une autre langue, rendez-vous sur gopro.com/support. Wenn Sie dieses Benutzerhandbuch in einer anderen Sprache herunterladen möchten, besuchen Sie gopro.com/support. / Join the GoPro Movement Per scaricare questo manuale utente in un’altra lingua, visita gopro.com/support.
-
Page 12: Table Of Contents
Customer Support Camera Icons Trademarks Camera Menus Regulatory Information Camera Modes Navigating Settings Menus Video Mode Photo Mode Multi-Shot Mode Playback Mode Setup Mode Connecting to the GoPro App Transferring Files to a Computer Protune ™ Battery Important Messages Camera Housing... -
Page 13: The Basics
/ The Basics / The Basics 1. Camera Status Light (red) 7. microSD Card Slot 10. Microphone (microSD card not included) 2. Shutter/Select Button [ 11. HERO Port 8. Mini-USB Port 3. Wireless Status Light (blue) 12. Settings/Tag Button [ (supports composite A/V 4. -
Page 14: Getting Started
NOTICE: Using a wall charger other than a GoPro Wall Charger can damage the GoPro battery. Only use chargers marked: output 5V 1A. If you do not know the voltage and current of your charger, use 2. - Page 15 To get the latest features and best performance from your HERO4 camera, make sure you are using the most current camera so ware. You can update your camera so ware via the GoPro App or GoPro so ware. For more information, visit gopro.com/getstarted.
-
Page 16: Camera Status Screen
(sold separately). You must use a microSD card with a Class (field of view) 10 or a UHS-1 rating. (For a list of the recommended SD cards, 2. Camera Settings visit gopro.com/support.) GoPro recommends using brand name 3. Resolution/fps memory cards for maximum reliability in high-vibration activities. (frames per second) 4. -
Page 17: Camera Icons
/ Camera Icons / Camera Icons Auto Low Light LEDs Sharpness Looping Auto Off Shutter Beeps Megapixels Single Photo Multi-Shot Mode Burst Photos Spot Meter Color Night Lapse Time Lapse Continuous Photos Night Photo Touch Display On-Screen Display Date/Time Video Default Mode Orientation Video + Photo... -
Page 18: Camera Menus
/ Camera Menus / Camera Menus Camera Reset *Playback appears only if the camera is connected to a TV or LCD Touch BacPac (sold separately). -
Page 19: Camera Modes
/ Camera Modes / Navigating Settings Menus The HERO4 Black features several camera modes. To cycle through Each camera mode has its own settings menu. the modes, press the Power/Mode button [ ] repeatedly. TO NAVIGATE SETTINGS MENUS: 1. Verify that the camera is in the desired camera mode. If an icon for These modes appear: that mode does not appear on the camera status screen, press the Video... -
Page 20: Video Mode
/ Video Mode / Video Mode Video mode contains four capture modes: Video, Time Lapse Video, CAPTURING VIDEO Video + Photo and Video Looping. 1. Press the Power/Mode button [ ] repeatedly until you get to Video mode. Capture Mode Description 2. - Page 21 You can also add HiLight Tags when playing back content using an LCD Touch BacPac. You can add tags with your camera, the GoPro App, or the Smart Remote (sold separately). Tags are visible during playback in the GoPro App or GoPro so ware.
- Page 22 5-10 seconds Sunset recording. When viewing this content on a computer, you see separate Lengthy activities, such as files for each time segment. Use GoPro so ware to combine the files 10-60 seconds construction projects into a longer video. Video + Photo Intervals Available intervals for Video + Photo range from 5-60 seconds.
- Page 23 / Video Mode / Video Mode RESOLUTION, FPS AND FOV Video NTSC/ Screen Resolution The HERO4 Black includes the video resolutions listed below. Resolution 60/50 Video NTSC/ Ultra Wide, Screen Resolution 48/48 Resolution 1080p Medium, 1920x1080, 16:9 30/25 Narrow 30/25 24/24 Ultra Wide 3840x2160, 16:9...
- Page 24 In addition, lack of airflow around full-screen 16:9 for stunning widescreen the camera, using the camera with the GoPro App, or in combination playback on your computer or TV. with BacPac accessories further increases camera temperature and 16:9 resolution video downscales to provide power consumption, and decreases camera recording time.
- Page 25 / Video Mode / Video Mode Video Resolution Best Use Video Resolution Best Use Recommended for body-mounted, Use for body-mounted shots and when 2.7K 4:3 ski-mounted or surfboard-mounted slow motion is desired.* Provides large 960p shots. Provides large viewing area. viewing area and smooth results for high action capture.
- Page 26 PRO TIP: Easily create epic GoPro-style videos using free into a brighter setting, such as when recording the outdoors from GoPro so ware. Learn more and download this so ware at within a car. When Spot Meter is turned on, [ ] appears on the gopro.com/getstarted.
-
Page 27: Photo Mode
/ Photo Mode / Photo Mode Photo mode contains three capture modes: Single, Continuous CAPTURING A SINGLE OR NIGHT PHOTO and Night. 1. Select the desired photo capture mode (Single or Night): a. Press the Power/Mode button [ ] repeatedly until you get Capture Mode Description to Photo mode. - Page 28 / Photo Mode / Photo Mode CAPTURING CONTINUOUS PHOTOS PHOTO SETTINGS Three capture modes are available for Photo mode: Single, 1. Select Continuous mode: Continuous and Night. The capture mode that you select determines a. Press the Power/Mode button [ ] repeatedly until you get the Photo settings that appear in the rest of the menu.
- Page 29 / Photo Mode / Photo Mode SHUTTER INTERVAL Shutter applies only to Night Photo and Night Lapse and determines Interval applies only to Continuous photo. Available intervals are 3 (default), 5 or 10 photos every second. the amount of time that the shutter is open. The options for this setting are auto (up to 2 seconds), 2, 5, 10, 15, 20 or 30 seconds.
-
Page 30: Multi-Shot Mode
/ Photo Mode / Multi-Shot Mode Multi-Shot mode contains three capture modes: Burst, Time Lapse SPOT METER and Night Lapse. Spot Meter lets you capture photos from a dark space while pointing Capture Mode Description the camera into a brighter setting, such as when recording the Captures up to 30 photos in 1 second. - Page 31 / Multi-Shot Mode / Multi-Shot Mode CAPTURING BURST PHOTOS CAPTURING TIME LAPSE OR NIGHT LAPSE PHOTOS 1. Select Burst mode: 1. Select the desired multi-shot capture mode (Time Lapse or Night Lapse): a. Press the Power/Mode button [ ] repeatedly until you get to Multi-Shot mode.
- Page 32 / Multi-Shot Mode / Multi-Shot Mode MULTI-SHOT SETTINGS Three capture modes are available for Multi-Shot mode: Burst, Time Lapse and Night Lapse. The capture mode that you select determines Rate applies only to Burst. Photos can be captured at the following rates: the Multi-Shot settings that appear in the rest of the menu.
- Page 33 / Multi-Shot Mode / Multi-Shot Mode SHUTTER INTERVAL Shutter applies only to Night Photo and Night Lapse and determines Interval applies only to Time Lapse and Night Lapse. Interval determines the amount of time that the shutter is open. The options for this the amount of time that passes between each captured frame.
- Page 34 / Multi-Shot Mode / Multi-Shot Mode MEGAPIXELS SPOT METER The HERO4 Black captures photos at 12MP, 7MP or 5MP. Smaller Spot Meter lets you capture photos from a dark space while pointing the camera into a brighter setting, such as when recording the megapixel values take up less space on the microSD card.
-
Page 35: Playback Mode
/ Playback Mode You can play back your content on a computer, TV, smartphone/ Windows tablet (using the GoPro App) or on your camera using an LCD Touch Screen BacPac (sold separately). Playback mode appears only if the camera 1280 x800... - Page 36 PRO TIP: While playing back your video, you can add HiLight Tags to 3. Power on the camera. mark the best moments. In the GoPro App, tap the HiLight Tag icon. If 4. Press the Power/Mode button [ ] to cycle to Playback [...
-
Page 37: Setup Mode
1 minute (default), 2 minutes, 3 minutes Off (default) Sleep and Never. To manually dim the screen or Camera connects to the GoPro App or the to wake it, press the Touch Display Sleep/ remote (sold separately). For instructions on Wake button [ RC &... - Page 38 / Setup Mode / Setup Mode Setting Description ORIENTATION Determines the level of light on the touch If you mount your camera upside down, you might have to rotate the display. The options for this setting are high Brightness files during editing. This setting eliminates the need to flip your video (default), medium and low.
- Page 39 (none). The default setting is 4. Note: QuikCapture is disabled when the camera is connected to the remote or the GoPro App. Note: The Wireless status light (blue) is always activated unless you select off for this setting.
- Page 40 (default). NOTICE: If you select All/Format, the memory card is reformatted, Note: Your camera does not automatically power off when connected to the GoPro App or the remote. which deletes every file on the card.
-
Page 41: Connecting To The Gopro App
/ Connecting to the GoPro App CAMERA RESET The GoPro App lets you control your camera remotely using a With this setting, you can reset your camera’s settings or username smartphone or tablet. Features include full camera control, live preview, and password. -
Page 42: Transferring Files To A Computer
TO TRANSFER FILES TO A COMPUTER: professional productions. Protune gives content creators more 1. Download and install the latest GoPro so ware from flexibility and workflow efficiency than ever before. gopro.com/getstarted. -
Page 43: Protune
Color Setting Resulting Color Profile Automatically adjusts the color tone based Auto (default) on the environmental conditions GoPro Color Provides GoPro color-corrected profile (same (default) great color as when Protune is turned off). Warm light (incandescent or sunrise/ 3000K sunset lighting) Provides neutral color profile that can be... - Page 44 / Protune / Protune Protune for Photo ISO Limit ISO LIMIT Setting Resulting Quality ISO Limit adjusts the camera’s sensitivity in low-light environments, Brighter photo in very low light, increased and creates a balance between brightness and resulting image noise. 800 (default) image noise Image noise refers to the degree of graininess in the image.
-
Page 45: Battery
Adjusting this setting can improve image quality when shooting saves the file and powers off. in environments with contrasting lighting conditions. To maximize battery life, close the GoPro App. To maximize battery life when shooting longer-duration activities while the camera is Settings connected to an LCD Touch BacPac (sold separately), turn off... - Page 46 The battery charges to 80% in approximately one hour and 100% in REMOVING THE BATTERY FROM THE CAMERA approximately two hours when using GoPro’s USB-compatible Wall The HERO4 Black battery is designed to have a tight fit to maximize or Auto Charger.
- Page 47 / Battery / Battery BATTERY STORAGE AND HANDLING BATTERY DISPOSAL The camera contains sensitive components, including the battery. Most rechargeable lithium-ion batteries are classified as non-hazardous Avoid exposing your camera and battery to very cold or very hot waste and are safe for disposal in the normal municipal waste stream. temperatures.
-
Page 48: Important Messages
/ Important Messages / Important Messages MICROSD CARD MESSAGES FILE REPAIR ICON No card present. The camera requires a If your last video file was corrupted during recording, NO SD microSD, microSDHC or microSDXC card the camera displays the File Repair icon while it tries to (sold separately) to capture videos and photos. -
Page 49: Camera Housing
/ Camera Housing / Camera Housing ASSEMBLING THE CAMERA HOUSING To Secure the Camera in the Housing: 1. Open the housing and place the camera into position. To Remove the Camera From the Housing: 1. Li the front of the latch up to disengage it from the camera housing. 2. - Page 50 / Camera Housing / Camera Housing Your HERO4 Black camera comes with two types of backdoors: SWAPPING BACKDOORS Standard Backdoor and Skeleton Backdoor. You can switch the backdoor of your HERO4 Black camera to suit your activity and shooting conditions. The Standard Backdoor makes the housing To Change the Backdoor: waterproof to 131’...
-
Page 51: Using The Mounts
WARNING: Failure to follow these steps each time you use Quick Release Buckle, the assembled camera housing can be clicked your GoPro can result in leaks that may damage or destroy your camera. Water will damage both the camera and the battery, on and off... - Page 52 For more information on mounts, visit gopro.com/support. WARNING: If using your camera with a GoPro helmet mount or strap, always select a helmet that meets the applicable safety standard. Choose the right helmet for your particular sport or activity and make sure that it is the right fit and size for you.
-
Page 53: Troubleshooting
Make sure your GoPro is charged. To charge your camera, use the at 720p30 with Protune off, and make sure that all other programs on included USB cable and a computer. You can also use the GoPro Wall your computer are closed. -
Page 54: Customer Support
To reach GoPro Customer Support, visit gopro.com/support. / Trademarks GoPro, HERO, the GoPro logo, the GoPro Be a Hero logo, BacPac, Protune, SuperView, and Wear It. Mount It. Love It. are trademarks or registered trademarks of GoPro, Inc. in the US and internationally.
Need help?
Do you have a question about the Hero 4 Black and is the answer not in the manual?
Questions and answers