Table of Contents
Advertisement
Advertisement
Table of Contents

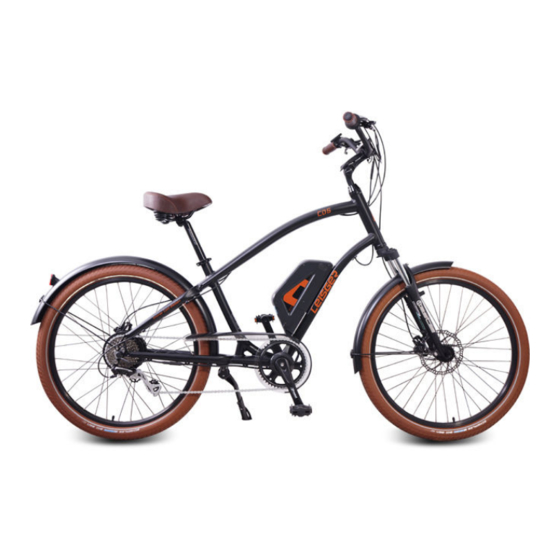
Summary of Contents for Leisger CD5
- Page 1 Instruction Manual for E-bikes...
-
Page 2: Table Of Contents
Table of contents 1. Your E-Bike 3—4 1.1 Introduction 1.2 General presentation of the vehicle 2. Function Display 5—12 2.1 Normal operation 2.2 Error code table 3. Using the bike 13—16 3.1 Riding the bike 3.2 Quick-release devices 3.3 Adjusting the height of the seat 3.4 Precautions required prior to each use 3.5 Lubrication 3.6 Routine maintenance. -
Page 3: Your E-Bike
1. Your E-Bike 1.1) Introduction We would like to thank you for your e-bike purchasing. The e-bike, equipped with pedals and an auxiliary electric motor, cannot be propelled exclusively by means of this auxiliary electric motor. You will thoroughly enjoy riding this new and electrical power- assisted bike. - Page 4 1.2.2) Spare parts spec Spare parts name CD5-650 Motor DAS-KIT, RX2C, 36V, 350W DAS-KIT,D5-3613S Battery 36V13AH SAMSUNG CELLS, with usb port DAS-KIT, C6BBT Display Front fork RST, NEON-TNL TEKTRO, Hydraulic, Auriga E-COMP E-Brake Lever TEKTRO, Hydraulic, Auriga COMP Disc Brake...
-
Page 5: Function Display
2. Function Display 2.1) NORMAL OPERATION... - Page 6 FULL VIEW AREA NORMAL VIEW AREA With the display on ,the default indicators are riding speed 、 t rip 2 、 P AS level b attery indicator as shown in fig below. Press SET to switch the display 、 information. Section 1: ON/OFF Press ON/OFF then the display is activated.
- Page 7 ※ T he panel will automatically power-off when speed is 0km/h for 5minutes. Section 2: 2.1) CURRENT INDICATOR It represents the discharging current of the controller currently, each segment is 2A, six segments are>=12A. 2.2) RIDING MODE SELECTION There are three modes for riding mode selection, including POWER, NORMAL and ECO.
- Page 8 The speed indicator is as below u ser can select KM/H or MPH in SET 3. 3.2) KM/H & MPH Select KM/H or MPH for measurement, the display will indicate the matched speed and mileage. 3.3) BACKLIGHT INDICATOR With the display power on, click ON/OFF can turn on the backlight. Click it again can turn off the backlight.
- Page 9 4.2) ERROR CODE INDICATOR If there is something wrong with the electronic control system, the display will flash at 1 HZ and show the error code automatically. Different error code represents different fault information, the details of Error code table are as represented on the Page 12.
- Page 10 parameter, and press the SET for 1 second will exit the setting interface. 4.3.1) SET0: Riding mode selection There are three modes for selection: POWER NORMAL ECO. 、 、 4.3.2) SET1: Reset trip1 distance Click the DOWN to reset the trip1, then the TRIP1 icon will flash at 1 HZ, meanwhile the trip 1 will be cleared.
- Page 11 The battery capacity viewing area have five segments, each segment represent 20% battery capacity. When the capacity is full, the five segments are all light up. If the battery capacity is low, the battery viewing area will flash, it indicates that the battery is severely insufficient and need to be recharged immediately.
-
Page 12: Error Code Table
value will be accumulated without resetting. 6.1.3) Trip2 Trip 2 represents the last driving distance for 30 s after turning on the display, it can be reset automatically and start to record the current distance. 6.2) TRIP TIME INDICATOR The riding time parameter is automatically reset after shutdown. 2.2 ERROR CODE TABLE The error code is corresponding with the fault definition. -
Page 13: Using The Bike
3. Using the bike 3.1) Riding the bike Before taking off, make sure that you activate the battery by pressing on the button located on the side of battery. The 4LEDs located on the side of the battery which indicate the charge level. Turn on the display unit which is on the handlebars. - Page 14 3.3) Adjusting the height of the seat Unlock the lever (open), adjust the seat height to the desired position without ever exceeding the mark carved onto the seat’s tube, lock the lever (LOCK). The seat’s height must be set so that your leg is stretched out when the corresponding pedal is in the lower position.
-
Page 15: Precautions Required Prior To Each Use
3.4) Precautions required prior to each use Verify that the brakes and the front & rear lights are all working properly. Also, check the pressure of the tires. On derailleur geared bicycles the rear derailleur automatically tensions the chain. Make sure that the hinges on your bike are properly locked. Indeed, when using the bike on a regular basis, the tension of the hinges’... -
Page 16: Routine Maintenance
3.6) Routine maintenance 3.6.1) Recommended values of the nut torque. Front Wheel Nuts 22-27 Newton Meters 16.2- 19.8 ft.-lb. Rear Wheel Nuts 24-29 Newton Meters 17.5- 21.3 ft.-lb. Seat Binder Nut 12- 17 Newton Meters 8.8- 12.5 ft.-lb. Seat Pillar Clamp Nut 15- 19 Newton Meters 11.0-14.0 ft.-lb. -
Page 17: The Battery
4. The battery 4.1) Installing and removing the battery To remove the battery, unfasten the lock which is located along the battery’s box. Remove the battery by pulling it out. To put the battery back into place, insert the battery along to the guide rail. -
Page 18: Battery Safety Instructions
4.3.2) Battery Your battery is just like a household battery. It contains a limited amount of energy, which diminishes as it is being used. When the available autonomy no longer corresponds with your needs, you need to buy a new one from your dealer. 4.3.3) Maintenance If you don’t use your bike for a period of time exceeding 2 months, store it in a humidity-free area to protect the electronic components and make sure that the... -
Page 19: Maintenance
immediately when the rim is worn out. Important: braking distance increases on humid or slippery ground. 5.1.4) Gears Like the chain, the freewheel must be kept clean and well lubricated. If the chain has become worn and need to be replaced, then it is likely that the freewheel will also have become worn and should also be replaced. -
Page 20: Accessories
Chain: It is recommended that you lubricate your bike’s 7 speed gearwheels and chain on a regular basis using appropriate products (ask your dealer for advice). 6. Accessories Mudguards (Place the mudguard assembly between the stays, make sure the mudguard bracket holes line up with those in the frame. Tighten all bolts and screws until snug.) Helmet, baskets and storage pouch are not provided with the vehicle. - Page 21 BB-Leisger International GmbH ADD: Walsroder Straße 75 , D-30851 Langenhagen/Hannover , Germany Tel: +49-511-899 4343 0 E-Mail: info@leisger.com www.leisger.com...