Table of Contents
Advertisement
Available languages
Available languages
Quick Links
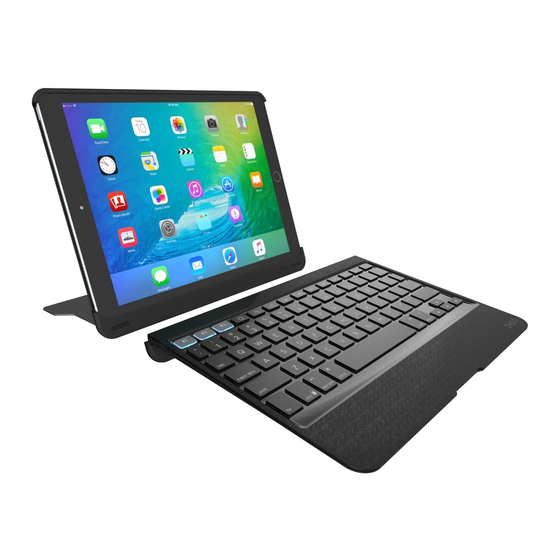
Slim Book
Keyboard Instructions
Samsung Tab S 2
See the important Health and Safety information on page 7 before using this product.
*WARRANTY REGISTRATION
Your ZAGG Slim Book™ comes with a one-year manufacturer's warranty. In order to activate the
warranty, you must register your Slim Book as well as keep your purchase receipt. If you purchased
your Slim Book from zagg.com, ZAGG has already registered it and has a copy of your proof of
purchase.
NEED MORE HELP? PLEASE SEE OUR FAQ SECTION AT: www.ZAGG.com/faq
Advertisement
Table of Contents

Related Manuals for Zagg Slim Book


Summary of Contents for Zagg Slim Book
- Page 1 Your ZAGG Slim Book™ comes with a one-year manufacturer’s warranty. In order to activate the warranty, you must register your Slim Book as well as keep your purchase receipt. If you purchased your Slim Book from zagg.com, ZAGG has already registered it and has a copy of your proof of purchase.
-
Page 2: Powering On And Off
Slim Book. POWERING ON AND OFF To turn your Slim Book on, press the Power button. A green LED will illuminate briefly while the keyboard powers up. To turn your Slim Book off, press and hold the Power button for three seconds. - Page 3 2. Turn your Slim Book keyboard off. PAIRING YOUR ZAGG SLIM BOOK Your Slim Book Keyboard can pair with up to three devices – each on a different operating system if you like. It even pairs with your desktop computer to save valuable desk space or with your smart TV for ultimate convenience.
-
Page 4: Battery Life
3. A red LED under the Power button will illuminate to indicate your Slim Book is charging. Wait until this light turns off, indicating a full charge. 4. Remove the micro USB connector and enjoy your Slim Book for up to two years before you need to charge it again. -
Page 5: Special Function Keys
To help preserve battery life, your Slim Book will enter sleep mode if left on and not used for several minutes. To awaken your Slim Book, press any key. The Slim Book’s battery has no memory and may be charged whenever you wish. -
Page 6: Troubleshooting
BLUETOOTH 2 – Pairs your Slim Book with a second device. If you have paired with a first or third device, press to instantly switch to that device. BLUETOOTH 3 – Pairs your Slim Book with a third device. If you have paired with a first or second device, press to instantly switch to that device. -
Page 7: Customer Service
Google Chrome™, Google Voice™, GMail™, and Google Calendar™ are trademarks of Google, Inc. The Bluetooth® word mark and logos are registered trademarks owned by Bluetooth SIG, Inc. and any use of such marks by ZAGG Inc is under license. Other trademarks and trade names are those of their respective owners. - Page 8 • Connect the equipment into an outlet on a circuit different from that to which the receiver is connected. • Consult the dealer or an experienced radio/TV technician for help. FCC Caution: Any changes or modifications not expressly approved by the party responsible for compliance could void the user’s authority to operate this equipment.
- Page 9 *ENREGISTREMENT DE LA GARANTIE Votre ZAGG Slim Book™ est livré avec une garantie d’un an du fabricant. Pour activer la garantie, vous devez enregistrer votre Slim Book et garder votre reçu d’achat. Si vous avez acheté votre ZAGG Slim Book de ZAGG.com, ZAGG l’a déjà...
-
Page 10: Mise Sous Tension Et Hors Tension
INSÉRER/RETIRER VOTRE TABLETTE Pour insérer votre tablette dans le Slim Book, ouvrez l’étui du Slim Book et séparez-le du clavier (pour ce faire, tirez l’étui vers le haut en l’éloignant du clavier). Ensuite, alignez votre tablette sur les trous de l’étui. Assurez- vous que le trou de la caméra ainsi que l’ouverture... - Page 11 DÉCONNEXION DE VOTRE CLAVIER Votre Slim Book est équipé d’un étui qui protège votre tablette même si votre clavier est déconnecté. Si vous souhaitez utiliser l’étui sans le clavier, vous pouvez le déconnecter des deux manières suivantes : 1. Appuyez sur le bouton Clavier Virtuel.
- Page 12 2. Branchez le connecteur USB dans une prise USB 5V. 3. Le voyant LED rouge situé sous le bouton d’Alimentation s’allumera pour indiquer que le Slim Book est en cours de charge. Attendez que ce voyant s’éteigne, indiquant une charge complète.
-
Page 13: Autonomie De La Pile
Pour vérifier la charge restante de la pile de votre Slim Book, appuyez sur le bouton fn et le bouton de la pile. Le voyant LED clignotera de l’une des trois façons suivantes : 1. - Page 14 + S VOIX – Ouvre l’option Google Voice™. fn + INTERNET – Ouvre Google Chrome™ ou votre navigateur internet par défaut. BLUETOOTH 1 – Jumelez votre Clavier Slim Book à votre dispositif préféré. Si vous l’avez jumelé avec un second dispositif ou un troisième dispositif (voir ci- dessous), pressez pour basculer instantanément vers ce dispositif.
-
Page 15: Dépannage
REMARQUE : La fonction de rétroéclairage doit être allumée afin de sélectionner votre couleur préférée. DÉPANNAGE Si votre tablette ne répond pas à votre Slim Book, il peut y avoir une explication simple comme une décharge de la pile ou un échec du jumelage. - Page 16 ZAGG Inc est sous licence. Les autres marques et noms commerciaux sont ceux de leurs propriétaires respectifs. ZAGG®, InvisibleShield®, et ZAGG Slim Book sont des marques ou des marques déposées de ZAGG Inc. DÉCLARATION DU FCC Cet appareil est conforme à...
- Page 17 non contrôlé et sont sans danger pour le fonctionnement prévu, comme décrit dans ce manuel. La poursuite de la réduction de l’exposition RF peut être obtenu si le produit peut être maintenu autant que possible à partir du corps de l’utilisateur ou que l’appareil pour abaisser la puissance de sortie si cette fonction est disponible.
- Page 19 *REGISTRO DE GARANTÍA El ZAGG Slim Book™ viene con una garantía de fábrica de un año. Con el fin de activar la garantía, debes registrar tu Slim Book, así como conservar el comprobante de compra. Si has comprado el ZAGG Slim Book desde ZAGG.com, ZAGG®...
-
Page 20: Encender Y Apagar
INSERTAR / EXTRAER LA TABLET Para insertar la tablet en el Slim Book abre el estuche del Book y retíralo del teclado (para ello tira del estuche hacia arriba y quítalo del teclado). Luego, alinea la tablet con los orificios del estuche. Asegúrate de que el orificio de la cámara está... - Page 21 Slim Book. 4. Tu dispositivo mostrará “ZAGG Slim Book” como dispositivo disponible. Selecciona esta opción y completa el proceso de conexión. Una vez conectado, el LED azul se apagará. Una vez empieza, si el Slim Book no...
-
Page 22: Duración De La Batería
Como se ha mencionado antes, el Slim Book cuenta con una potente batería recargable que dura hasta dos años entre cargas. Para comprobar el nivel de batería restante del Slim Book pulsa fn y la tecla batería. El indicador LED parpadeará de una de estas tres maneras:... - Page 23 Cuando el Slim Book alcance este nivel, la luz roja parpadeará una vez cada cinco minutos. Para mantener la batería, el Slim Book se pondrá en modo reposo si se deja encendido y no se utiliza durante unos minutos. Para activarlo de nuevo, pulsa cualquier tecla.
- Page 24 fn + INTERNET – Abre Google Chrome™ o tu navegador de internet predeterminado. BLUETOOTH 1 – Conecta el teclado a tu dispositivo preferido. Si lo has conectado a un segundo o tercer dispositivo (ver más abajo), pulsa para cambiar automáticamente a ese dispositivo. BLUETOOTH 2 –...
-
Page 25: Solución De Problemas
5. Vuelve a sincronizar el Slim Book 6. Pulsa fn + uno de los botones de Bluetooth del Slim Book y fíjate si el indicador LED parpadea en color azul. 7. La tablet debería mostrar “ZAGG Slim Book” como dispositivo disponible. - Page 26 EN TRÁMITE | NASDAQ: ZAGG | FABRICADO EN CHINA Bluetooth® es una marca registrada de Bluetooth SIG., Inc. ZAGG®, InvisibleShield®, y ZAGG Slim Book son marcas comerciales o marcas registradas de ZAGG Inc. Declaración de Interferencias de la Comisión Federal de Comunicaciones Este dispositivo cumple con la Parte 15 de la Normativa de la FCC.
- Page 27 El producto cumple con la Normativa de la FCC sobre el límite de exposición a radiofrecuencias establecido para un entorno no controlado y es seguro para utilizarse tal y como se describe en este manual. Se puede lograr una mayor reducción de la exposición a radiofrecuencias si se mantiene el producto lo más alejado posible del usuario o si se fija la potencia de salida a un nivel más bajo siempre y cuando dicha función esté...
Need help?
Do you have a question about the Slim Book and is the answer not in the manual?
Questions and answers