Table of Contents
Advertisement
INSTALLATION AND OPERATING INSTRUCTIONS
INSTALLATION AND
OPERATING INSTRUCTIONS
Melbourne: 03 8796 8600
Sydney: 02 9853 2100
Brisbane: 07 3308 5400
30/07/2010
Outdoor Unit
Gold Coast: 07 5552 2600
Townsville: 07 4750 3100
Adelaide: 08 8152 7600
I
INSTALLATION AND OPERATING INSTRUCTIONS
JX Series Pool & Spa Heater
Bolero ND
Genus IV
Indoor Unit
Perth: 08 9350 2600
sales@astralpool.com.au
www.astralpool.com.au
Cleaner
Advertisement
Table of Contents

Subscribe to Our Youtube Channel
Related Manuals for Astralpool Genus IV JX Series

Summary of Contents for Astralpool Genus IV JX Series
-
Page 1: Operating Instructions
INSTALLATION AND OPERATING INSTRUCTIONS INSTALLATION AND OPERATING INSTRUCTIONS JX Series Pool & Spa Heater Bolero ND Genus IV Cleaner INSTALLATION AND OPERATING INSTRUCTIONS Outdoor Unit Indoor Unit Melbourne: 03 8796 8600 Gold Coast: 07 5552 2600 Perth: 08 9350 2600 Sydney: 02 9853 2100 Townsville: 07 4750 3100 sales@astralpool.com.au... -
Page 2: Table Of Contents
INDEX Introduction Introduction ..........................3 Notice to Installers ........................3 Safety Rules ..........................3 Operation Lighting Instructions ........................4 Operating Instructions ......................4 Turning Gas Off ......................... 4 Chemical Balance ........................4 Corrosion Prevention in Heaters ..................... 5 Digital Thermostat Operation ....................6 Fault Indication .......................... -
Page 3: Introduction
INTRODUCTION Congratulations on your purchase of a Hurlcon JX Series Pool and Spa Heater. Proper installation and service of your new heating system and correct chemical maintenance of the water will ensure years of enjoyment. The JX Series Heater is a compact lightweight and efficient gas fired pool and spa heater. It is equipped with features that take advantage of new technology developed exclusively by Hurlcon. -
Page 4: Lighting Instructions
LIGHTING INSTRUCTIONS For your safety – read before lighting This appliance is equipped with an ignition device which automatically lights the burner. Do not try to light the burner by hand. This appliance must be tested for correct operation after installation by the installer. BEFORE OPERATING smell all around the appliance area for gas. -
Page 5: Corrosion Prevention In Heaters
CORROSION PREVENTION IN HEATERS All pool and spa heaters use copper or copper nickel to make their heat exchangers as it is the most efficient material in transferring heat from the combustion chamber into the water. The typical life expectancy of a well maintained pool/spa heater is between 8 and 15 years. -
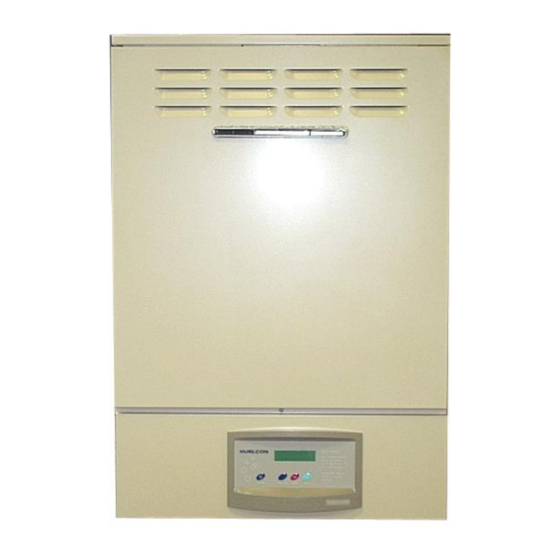
Page 6: Digital Thermostat Operation
DIGITAL THERMOSTAT OPERATION HURLCON ○ ON/OFF POOL/SPA WARM COOL HURLCON DESCRIPTION The sophisticated digital thermostat provides temperature read out, set point temperature and operating status of the heater. The electronic display indicates the operational status of the heater and any fault conditions. TEMPERATURE DISPLAY The temperature display indicates water temperature in the inlet of the heater. -
Page 7: Fault Indication
FAULT INDICATION Under fault conditions the thermostat will display a set of alpha numeric symbols to indicate the status of the heater. The meaning of each symbol and action to be taken are listed as follows: SYMBOL MEANING ACTION Temp Display Unit has power. -
Page 8: Maintenance
MAINTENANCE It is recommended that you check the following at least every six months and at the beginning of every swimming season. 1. Examine the Flue outlet & Air Intake vents. Make sure there are no obstructions to the flow of air to, or flue products from, the appliance. -
Page 9: Installation
INSTALLATION THIS APPLIANCE MUST BE INSTALLED BY AN AUTHORISED PERSON. Refer to heater data plate for specifications of gas type, gas consumption, burner pressure and water pressure. This appliance must be installed in accordance with local regulations and A.G.A. Installation Code AS5601. This appliance must be tested for correct operation after installation by the installer. -
Page 10: Heater Dimensions
HEATER DIMENSIONS INDOOR MODEL ONLY 1 85.0 88.0 Model Dimension A Dimension B Dimension C JX 130 INDOOR 520mm 300mm 755mm JX 160 INDOOR 650 mm 300mm 755mm JX 130 OUTDOOR 520mm 300mm 755mm JX 160 OUTDOOR 650 mm 300mm 755mm CLEARANCES The heater must not be installed against any combustible surface. -
Page 11: Flue Installation
MAXIMUM FLUE INSTALLATION LENGTHS (FOR INDOOR MODELS ONLY) THIS TERMINAL MUST ALWAYS VENT DIRECTLY OUTDOORS The heater is supplied with a spigot connection which enables fitting to the approved coaxial flue system. Because the appliance draws its own combustion air from outside using the outer skin of the flue, no ventilation requirements are needed for the heater. -
Page 12: Gas Connection
GAS CONNECTION The gas connection is on the base of the heater. A 12mm F.I. connection on the JX130 & 20mm F.I. connection on the JX160 is provided for gas line connection. An approved manual shut off valve must be installed in the gas fitting line before the heater and should be sized the same as the gas fitting line to prevent excessive pressure drop in the gas pipe. -
Page 13: Starting The Heater
1. Perform a final check with the heater operating.- See the section below titled “Starting the heater”. Pressure Switch Adjustment Slide toggle Turn wheel in up to allow direction of adjustment arrow to decrease pressure required to operate heater STARTING THE HEATER 1. -
Page 14: Testing Burner Pressure
TESTING BURNER PRESSURE 1. Set thermostat to “OFF”. 2. Open front door and set up manometer 3. Remove screw from ⅛” brass test point located on outlet side of gas valve 4. Connect manometer tube to test point 5. Set thermostat to “ON” and wait for burner to ignite 6. -
Page 15: Gas Conversion
GAS CONVERSION BURNER CONVERSION 1. Turn off gas supply to unit. 2. Turn off power supply to pump and heater. 3. Remove front access doors 4. Disconnect gas supply tube from burner manifold. 5. Remove burner inspection bracket and ignitor. 6. -
Page 16: Troubleshooting
TROUBLESHOOTING HEATER WILL NOT LIGHT Possible cause Remedy Automatic ignition system fails Check if power to heater is turned on and pump is in operation Fan runs but burner will not ignite Blocked flue inlet or outlet Pump not running Start pump Pump airlocked Check for leaks... -
Page 17: Jx Series Wiring Diagram
JX SERIES WIRING DIAGRAM Inst.212 JX Series Pool & Spa Heater V07.10... - Page 18 Maintenance of your heater Maintenance Schedule: You new product incorporates moving parts and withstands high velocity water with chemicals in it. Some of these parts will wear in the normal course of use and require regular checks and maintenance. Performing these checks and maintenance will identify parts that have worn and require repair/replacement before further serious damage is sustained.
- Page 19 FIVE YEAR PRO RATA WARRANTY Hurlcon cover your pool and spa heater with a limited 5 year Pro Rata warranty against defective materials and workmanship from the date of purchase (plus 30 days to allow for installation). 1. The cabinet, refractory insulation and combustion chamber are covered for a period of five years (plus 30 days to allow for installation).
- Page 20 INSTALLATION AND OPERATING INSTRUCTIONS INSTALLATION AND OPERATING INSTRUCTIONS ASTRALPOOL Pty. Limited. A.B.N. 97 007 284 504 www.astralpool.com.au email: service@astralpool.com.au Information and specifications subject to change without notice. Victoria: New South Wales: Queensland: South Australia: Western Australia: Gold Coast: Townsville: Ph: (03) 8796 8600 Ph: (02) 9853 2100 Ph: (07) 3308 5400 Ph: (08) 8152 7600...
Need help?
Do you have a question about the Genus IV JX Series and is the answer not in the manual?
Questions and answers