
Related Manuals for Beamz DMX-240 Controller 192-Channel

Summary of Contents for Beamz DMX-240 Controller 192-Channel
- Page 1 DMX-240 Controller 192 channel Ref. nr.: 154.090 INSTRUCTION MANUAL GEBRUIKSAANWIJZING GEBRAUCHSANLEITUNG MANUAL DE INSTRUCCIONES...
- Page 2 ENGLISH Congratulations to the purchase of this Beamz controller. Please read this manual thoroughly prior to using the unit in order to benefit fully from all features. Read the manual prior to using the unit. Follow the instructions in order not to invalidate the warranty. Take all precautions to avoid fire and/or electrical shock.
- Page 3 NEDERLANDS Hartelijk dank voor de aanschaf van deze Beamz controller. Neemt U a.u.b. een paar momenten de tijd om deze handleiding zorgvuldig te lezen, aangezien wij graag willen dat u onze producten snel en volledig gebruikt. Lees deze handleiding eerst door alvorens het product te gebruiken. Volg de instructies op anders zou de garantie wel eens kunnen vervallen.
- Page 4 DEUTSCH Vielen Dank für den Kauf dieses Beamz gerat. Nehmen Sie sich einen Augenblick Zeit, um diese Anleitung sorgfältig durchzulesen, damit sie die Möglichkeiten, die unser Produkt bietet, sofort voll ausnutzen können. Lesen Sie erst die Anleitung vollständig vor der ersten Inbetriebnahme durch. Befolgen Sie die Anweisung, da sonst jeglicher Garantieanspruch verfällt.
- Page 5 ESPAÑOL Enhorabuena por la compra de este aparato Beamz. Por favor lea atentamente este manual antes de usar el aparato para disfrutar al completo de sus prestaciones. Seguir las instrucciones le permite no invalidar la garantía. Tome todas las precauciones para evitar que se produzca fuego o una descarga eléctrica.
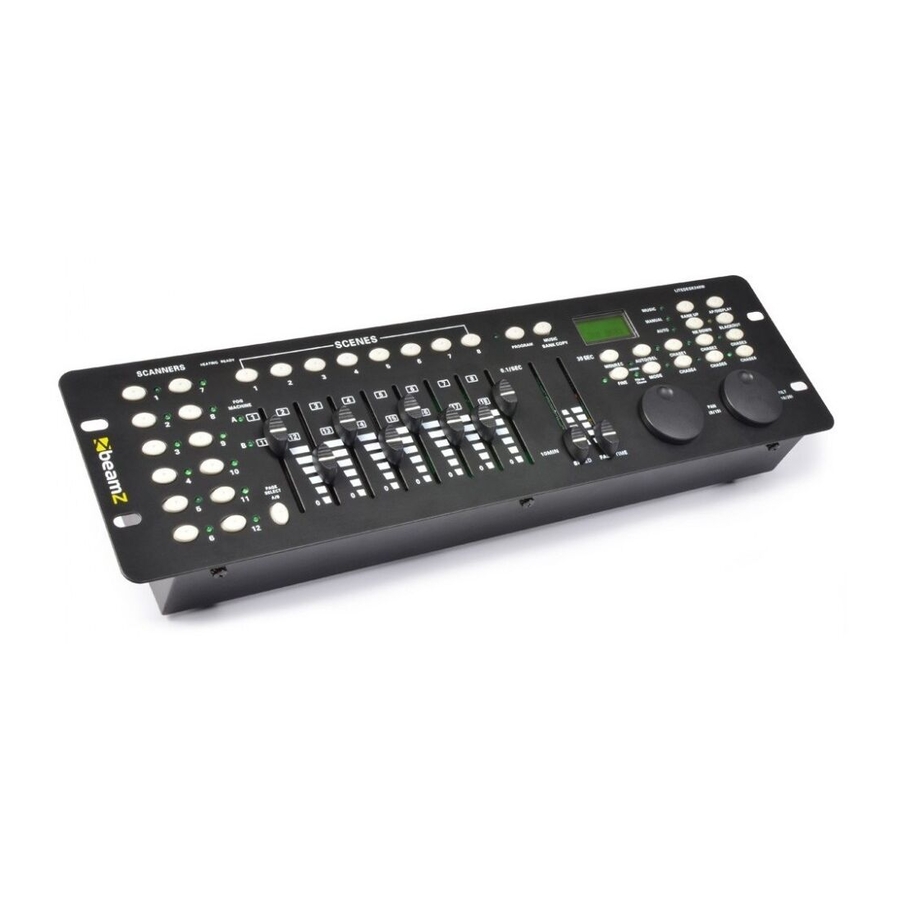
- Page 6 Installation Install the device on a horizontal surface or in a 19” equipment rack. The DMX-240 controller is provided with an DC-adaptor. Plug the adapter into the DC input socket (34) of the device. Plug the adapter into the mains outlet (230V, 50Hz) Front 1.
- Page 7 Rear 29. AUDIO input socket 30. MIDI input socket 31. DMX POLARITY selector 32. DMX output socket 33. DMX input socket 34. DC input socket 35. POWER ON / OFF switch Setup Sound Control Sound control works through the built-in microphone or through the LINE IN socket. Connect the sound signal from a mixer (e.g.
- Page 8 Channel Setting This device can control up to 12 x 20-channel scanners. The first 8 channels of each scanner can be controlled through the 8 faders. The next 8 channels are controlled through the 8 faders and the PAGE selection button (10) on page B.
- Page 9 DMX operation A bank is a sequence of different scenes that will be called up one after another. With the DMX-240 controller you can program up to 30 different banks, each bank containing up to 8 scenes. Assigning a Jog Wheel to a Channel o Choose your channel.
- Page 10 Running a Chaser o Press the respective CHASER buttons (22) and press the AUTO / DEL (21). Adjust the chaser speed by pressing the TAP button (17) twice. The time interval between two presses determines the speed (up to 10 minutes). o Press the MIDI / REC button (19) and select the desired record using the SCANNER selection buttons (1).
- Page 11 Scenes A. Inserting a Scene Press and hold the PROGRAM button (11) to enter the programming mode. Select the desired chaser using the CHASER buttons (22). The respective LEDs will be lit. Press the TAP / DISPLAY button (17) to switch to the step mode. The display will show the scenes in the chaser.
-
Page 12: Auto Mode
Sound-controlled Mode o Press the MUSIC / BANK COPY button (12). The LED will light. When the device receives a sound signal, it will work in sound-controlled mode. o Select the bank to be sound-controlled using the BANK buttons (15 and 16). o You may adjust the fade time using the FADE TIME fader (24). -
Page 13: Cleaning And Maintenance
Cleaning and Maintenance 1. All screws should be tightened and free of corrosion. 2. The electric power supply cables must not show any damage. Have a qualified technician maintain the device. 3. Disconnect the device from the mains prior to maintenance activities. 4. - Page 14 CE – Declaration of Conformity Importer: TRONIOS BV Bedrijvenpark Twente 415 7602 KM - ALMELO Tel : 0031546589299 Fax : 0031546589298 The Netherlands Product number: 154.090 Product Description: DMX-240 Controller 192 Channel Regulatory Requirement: EN 60598-1/-2 EN 60335-1 EN 55014-1/-2 EN 61000-3 The product meets the requirements stated in Directives 2006/95 and 2004/108/EC and conforms to the above mentioned Declarations.
- Page 15 This symbol on the device or the package indicates that disposal of the device after its lifecycle could harm the environment. Do not dispose of the unit (or batteries) as unsorted municipal waste; it should be taken to a specialized company for recycling. This device should be returned to your distributor or to a local recycling service.
- Page 16 www.tronios.com Copyright © 2013 by TRONIOS the Netherlands...
Need help?
Do you have a question about the DMX-240 Controller 192-Channel and is the answer not in the manual?
Questions and answers