Table of Contents
Advertisement
Quick Links
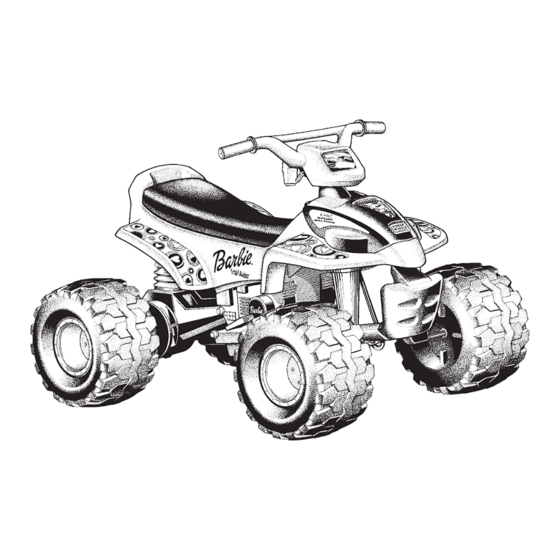
Product features may vary from the picture above.
Please read this manual and save it with your original sales receipt.
Tools needed for assembly: Phillips Screwdriver, Slotted Screwdriver, Hammer
and Pliers (not included); Cap Nut Assembly Tool (included).
Use only with a Power Wheels
®
6 Volt Rechargeable Battery with A-Style Connector and Built-in
Thermal Fuse and a Power Wheels
Super 6
Volt Charger (both included).
®
™
Owner's Manual
with Assembly Instructions
For Model B2008
Advertisement
Table of Contents

Subscribe to Our Youtube Channel
Related Manuals for Power Wheels Barbie

Summary of Contents for Power Wheels Barbie
- Page 1 Please read this manual and save it with your original sales receipt. Tools needed for assembly: Phillips Screwdriver, Slotted Screwdriver, Hammer and Pliers (not included); Cap Nut Assembly Tool (included). Use only with a Power Wheels ® 6 Volt Rechargeable Battery with A-Style Connector and Built-in...
-
Page 2: Table Of Contents
Authorized Service Centers ..............27 Important Information • If you have any questions about your Power Wheels ®... -
Page 3: Warnings And Cautions
- Use of the wrong type battery or charger could cause a fire or explosion resulting in serious injury. - Use of Power Wheels ® components in products other than Power Wheels ® vehicles could cause overheating, fire or explosion. -
Page 4: Parts
Parts • If you experience a problem with this product, or are missing a part, please call us at 1-800-348-0751, rather than return this product to the store. • Please identify all parts before assembly and save all packaging material until assembly is complete to ensure that no parts are discarded. - Page 5 Parts Hand Grip - 2 Microphone 6 Volt Charger 6 Volt Battery Handlebar Neck Handlebar Rear Axle Foam Spacer Note: Do not discard the foam spacer packaged Cap Nut with the battery. Save it Assembly Tool Steering Bushing for use in the vehicle's Round Bushing - 2 Hex Bushing - 4 battery compartment.
-
Page 6: Parts Diagram
Parts Diagram Note: Some parts are assembled on both sides of the vehicle. This illustration shows assembly on right side only. #10 x 1 " Screw - 2 Microphone Vehicle Body Rear Axle 6 Volt Battery Cowling #10 Lock Nut - 2 Hand Grip - 2 Seat Handlebar... -
Page 7: Battery Charging
If under normal use conditions the thermal fuse continually explosion resulting in serious injury. trips, contact your local Power Wheels ® Authorized Service - Use of Power Wheels ®... - Page 8 Battery Charging A-Style Charger Connector A-Style Battery Connector NO GAP • Plug the charger into a standard 120 volt wall outlet. Incorrect Correct Note: If power flow to the wall outlet is controlled by a switch, make sure the switch is “ON”. •...
-
Page 9: Assembly
Assembly Vehicle Body WARNING Rear Axle Children can be harmed by small parts, sharp edges and sharp points in the vehicle’s unassembled state, or by electrical items. Care should be taken in unpacking and assembly of the vehicle. Children Motor Assembly Pins should not handle parts, including the battery, or help in assembly of the vehicle. - Page 10 Assembly Front Axle Wheel Hex Bushing Washer Bushing Hubcap Round Cap Nut Cap Nut Bushing Assembly Tool Wheel Hubcap Cap Nut Cap Nut Assembly Tool Washer Rear Barrel Side Wheel Driver Ring Side Barrel Side Hex Bushing • Slide a washer onto the rear axle. Hex Bushing Round Bushing •...
- Page 11 Assembly Front Tabs Front Tabs PRESS HERE To Snap Side Tabs Cowling Side Side Tabs Tabs Rear Tab Shifter Handle Harness Wires Channel • Press firmly on each side of the cowling to snap the four side tabs into the slots in the vehicle body. Make sure the rear tab stays aligned with the slots.
- Page 12 Assembly .437 Cap Nut Handlebar .437" Handlebar Steering Neck Column Lock Nuts Rounded Side • Position the handlebar upright. • Fit the handlebar neck to the undersideof the handlebar, with the holes in the handlebar and handlebar neck aligned. " screws down through the handlebar •...
- Page 13 Assembly Front Short Handlebar Screw Assembly Pegs Cap Nut Back Handlebar Handlebar Steering Assembly Assembly Column .437 Cap Nut .437" • Now, fit the back handlebar assembly to the front • Fit the handlebar assembly onto the end of the steering handlebar assembly.
- Page 14 Assembly Microphone "T" End Hand Grip Handlebar Hole • Bend the plastic tip at the end of the microphone cord so that it forms a "T". • Insert the "T" end of the microphone cord into the hole in the handlebar. Pull gently on the microphone cord to make sure it is secure in the handlebar.
-
Page 15: Label Decoration
Label Decoration Proper label application will help to keep the labels looking their best! When applying labels, keep the following guidelines in mind: • Wash your hands before applying the labels. • Before applying the labels, wipe the surface of the vehicle with a clean, dry cloth to remove any dust or oils. •... - Page 16 Label Decoration Left Side...
-
Page 17: Battery Installation
Battery Installation IMPORTANT! Use only a Power Wheels ® 6 volt battery Motor with A-style connector and built-in thermal fuse. Use of Harness any other battery can damage your vehicle. Make sure Connector that you charge the battery for at least 18 hours using the enclosed Power Wheels ®... -
Page 18: Battery Care And Disposal
Never charge the battery longer than 30 hours. • Return exhausted batteries to federal or state approved Overcharging or undercharging the battery may lead-acid battery recycler, such as a Power Wheels ® shorten battery life and decrease vehicle running time. -
Page 19: Rules For Safe Driving
Rules for Safe Driving RIDING HAZARD 7. Do not allow your child to drive on sloped or inclined WARNING surfaces. Restrict your child’s driving to generally level ground ONLY! 8. Do not allow your child to drive down or across a Prevent Injuries and Deaths steep slope. -
Page 20: How To Operate Your Vehicle
How to Operate How to Operate Your Vehicle Your Vehicle IMPORTANT! use the vehicle ONLY outdoors. Most TO STOP interior flooring can be damaged by riding this vehicle indoors. Fisher Price ® will not be responsible for damage to the floor if the vehicle is used indoors. FORWARD Shifter •... -
Page 21: Problems And Solutions Guide
Problems and Solutions Guide IMPORTANT! If you experience a problem with your vehicle, first check the Problems and Solutions Guide below. If you still experience a problem, please contact Power Wheels Consumer Relations, ® toll-free at 1-800-348-0751 between 8 AM and 6 PM (EST) Monday through Friday. Or, contact your local Power Wheels authorized service center. - Page 22 Do not drive up hills or run into fixed objects, which can cause the wheels to stop spinning while power is still being supplied to the motors. If a thermal fuse continually trips, contact your local Power Wheels ® authorized service center.
- Page 23 If, after reviewing the Problems and Solutions Guide, the vehicle still fails to operate, please contact your nearest authorized service center (see page 24) or contact Power Wheels ® Consumer Relations toll-free at 1-800-348-0751.
-
Page 24: O Statement Of Limited Warranty
We are continually expanding our independently owned and operated Authorized Service Center Network. Please check this listing for the independently owned and operated Authorized Service Center nearest you. If there is not one in your area, please call Power Wheels ®... - Page 25 Authorized Service Centers ATLANTIC BEACH - First Coast Repair, 25 Seminole HONOLULU - McCully Bicycle & Sporting Goods, Blvd., 51103, (712) 258-3435 Road, 32233, (904) 246-4616 932 Hausten Street, 96826, (808) 946-1192 KANSAS BOYNTON BEACH - Discount Vacuum, WAILUKU (MAUI) - Tom’s Appliance Sales & Service, CHANUTE - Zimmerman Electric Service, 1865 W.
- Page 26 Authorized Service Centers 582 Washington Street, Rt. 3A, 02169, (617) 773-6656 1919 S. Westwood Blvd., 63901, (573) 785-2628 420 Violet Avenue, 12601, (845) 452-6122 SALEM - Fix Master, Inc., 190 North Street, 01970, ST. LOUIS - Authorized Appliance, Inc., RICHMOND HILL - Lockdoctor Locksmiths, (508) 745-0004 2355 Hampton Avenue, 63139, (314) 647-4250 104-37 Atlantic Ave., 11418 (718) 441-6242...
-
Page 27: Authorized Service Centers
Authorized Service Centers OKLAHOMA CITY - Appliance Services by CK, FORT MILL - Service Engines & Supply, Inc., VIRGINIA 101 East Madison, 73105, (405) 525-8862 3023 Highway 21, 29715, (803) 548-1778, ALEXANDRIA - D & S Repair Service, 20 South Dove (800) 845-1191 OKLAHOMA CITY - Oaklahoma Service Center, Street., 22314 (703) 683-0009... - Page 28 For the location nearest you, refer to the Authorized Service Center list in this manual. Fisher-Price, Power Wheels, Power Wheels by Fisher-Price and Barbie are U.S. trademarks of Mattel, Inc. Fisher-Price, Inc., a subsidiary of Mattel, Inc., East Aurora, New York 14052 U.S.A.
Need help?
Do you have a question about the Barbie and is the answer not in the manual?
Questions and answers