Table of Contents
Advertisement
Advertisement
Table of Contents
Troubleshooting

Summary of Contents for EnergyLogic EL-140H
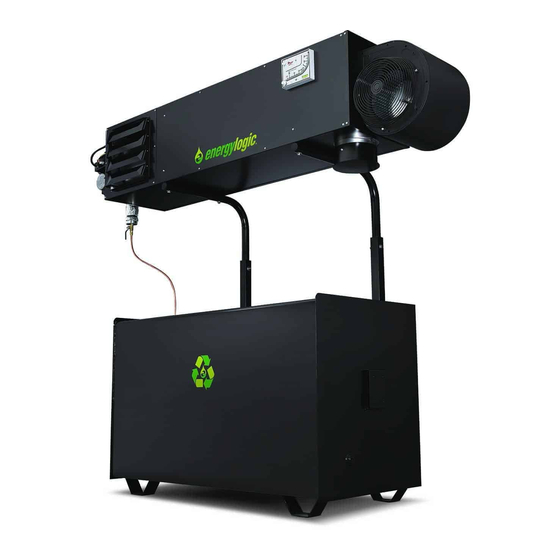
- Page 1 Installation & Operation Manual Waste Oil Furnace Models: EL-140H, EL-200H, and EL-350H 115V/60Hz Designed to save. Built to last.™ 5901 Crossings Boulevard Nashville, TN 37013 www.energylogic.com Item #: 98030028 (615) 471-5290 Issue Date: 28 April 2015...
- Page 3 • If you have any questions or concerns during the installation or operation of the furnace, contact your local service representative or EnergyLogic. Thank you for purchasing an EnergyLogic furnace. Record your Unit I.D. number below for future reference. Please register your unit to activate the warranty by visiting EnergyLogic’s website at www.energylogic.com/register...
-
Page 4: Table Of Contents
3.5.2 Drain Valve Installation – EnergyLogic Tanks ..............16 3.5.3 Low Fuel Cutoff Switch – EnergyLogic Tanks ..............16 3.6 Fuel Metering Pump and Filter Installation – EnergyLogic Tank (continue to section 3.7 if you don’t have EL tank)........................... 17 3.6.1 Fire Stop Valve and Filter Head Installation –... - Page 5 7.4.1 Fuel System Priming ......................36 7.4.2 Starting the Furnace ......................38 7.4.3 Burner System Checkout ....................39 7.5 Everyday Operation of Your EnergyLogic Used Oil Furnace ............42 8. Maintenance ........................... 43 8.1 Service Contracts ........................44 8.2 Safety Warnings – Lockout/Tagout .................... 44 8.3 Monitoring System Performance over Time ................
- Page 6 8.5.3 Fuel Oil Filter Replacement ....................51 8.5.4 Preheater Cleaning ......................52 8.5.5 Nozzle Line Assembly Cleaning ..................54 8.5.6 Retention Head and Electrode Settings ................57 8.5.7 Solenoid Valve Cleaning ..................... 59 8.5.8 Air Compressor Maintenance ....................61 8.6 Seasonal Shut Down & Start Up ....................63 9.
-
Page 7: Safety, Codes And Regulations
1. Safety, Codes and Regulations Thank you for the purchase of an EnergyLogic used oil furnace. EnergyLogic furnaces are designed and tested for safe, reliable long term operation. However, proper installation, fuel quality control, and regular maintenance are required. Please read and understand this manual completely before attempting to install, operate, or service the furnace. -
Page 8: General Warnings
• Do not allow unqualified personnel to install or service the furnace, electrical system, or flue system. Contact EnergyLogic for help with finding a qualified installation and service company. Failure to install and maintain your heater properly will void your warranty and the UL listings. - Page 9 system or any of the components. Make sure covers are in place during normal use. Use only copper conductors. Liquid Fuels: Used oils must be handled properly to prevent spills. Uncontained oil leaks may contaminate the local water supply. Ensure that all national and local codes are followed in regards to the requirements for spill containment and SPCC paperwork.
-
Page 10: Codes And Regulations
1.4 Codes and Regulations The installation, operation, and maintenance of the furnace system in the United States must be performed by qualified personnel in accordance with this manual and all national, state, and local codes / regulations, as well as the following standards of the National Fire Protection Association (NFPA): NFPA 31 Standard for the Installation of Oil Burning Equipment... -
Page 11: Fuels And Fuel Management
UL listing. If you have any question about what is contained in your used oil, it is your responsibility to have the oil analyzed prior to burning. Contact EnergyLogic Technical Services if you have questions about a particular fuel type, or if you need fuel analysis. For a nominal fee, EnergyLogic Technical Services will provide a professional fuel analysis. -
Page 12: Clearances To Combustible Surfaces
1.6 Clearances to Combustible Surfaces It is of the utmost importance that the installation conform to the minimum clearances to combustible surfaces (Material made of or surfaced with wood, compressed paper, plant fibers, plastics, or other material that can ignite and burn, whether flame proofed or not, or whether plastered or unplastered). -
Page 13: Installation Considerations
EnergyLogic for application support. Locate furnace and tank in a dry area above 50°F (10°C) at all times. If not installing the pump to an EnergyLogic Tank, mount it according to guidelines in the EnergyLogic Top Suction Kit packaging instructions. -
Page 14: Tools Required
Below is a recommended list of tools and equipment that may be used to aid in the installation of EnergyLogic furnaces. This is a minimum list for a Tank-Mount system. Additional tools and equipment are required for other mounting methods. - Page 15 Cabinet Orientation vs. Air Flow Direction – Consider the workspace to be heated. Consider proximity to windows, doors, etc. The EnergyLogic used oil furnace is designed such that the louver and cabinet panels may be swapped and the cabinet can be rotated 180º.
-
Page 16: Assembly And Installation - Cabinet, Tank, Pump And Suction Fuel Line
After unpacking your new furnace, make sure you have received the proper parts and quantities shown in the checklist on the following page. For missing parts, contact EnergyLogic. If any parts were damaged during shipment, please contact your shipping carrier. 3.2 Warranty Registration IMPORTANT: You must register your furnace with EnergyLogic for the warranty to become active and to receive technical service. - Page 17 Wall Thermostat (White - Standard, Black - Smart Stat) Wall Thermostat Harness (Two Cables for Smart Stat) Included with EnergyLogic Furnace 17 Thread Sealant Tube 18 EnergyLogic Workbench Tank 19 Drain Valve Assembly 20 Swing-Arm Fuel Gauge 3/8"...
-
Page 18: Furnace Cabinet Installation - On An El Tank
If you are mounting the furnace to a structural ceiling or wall proceed to Section 3.4. Do not mount an EL-350H furnace to any EnergyLogic Tank smaller than 250 gallons. 3.3.1 Locate the EnergyLogic Used Oil Storage Tank EnergyLogic supplied workbench tanks are U.L. - Page 19 EL-200H only) Insert (4) 3/8 inch x 4 inch bolts with flat washers through the box tubing and stands (2 sets per side).
-
Page 20: Furnace Cabinet Installation - Not Mounted On A Tank
3.4 Furnace Cabinet Installation – Not Mounted on a Tank 3.4.1 Ceiling Mount with Threaded Rod HEAVY! Use proper lift equipment. Combustible materials must not be near the furnace. See required clearances in Section 1.6. Bridge /secure structural (2) Nuts. steel across structural Flat Washer. -
Page 21: Wall Mount With Optional Brackets
EnergyLogic. Call to order your parts. 2. Hang the EnergyLogic Wall Mount Brackets such that they are spaced 40 inches (101.6 cm) apart to match the hole pattern on the bottom or top of the cabinet. Hang the EnergyLogic Wall Mount Brackets directly to structural wall support only. -
Page 22: Preparing The Energylogic Used-Oil Tank
3.5 Preparing the EnergyLogic Used-Oil Tank If you are not installing an EnergyLogic Tank, first verify that your used oil storage system meets all applicable codes and requirements, then proceed to the instructions for installing the metering pump. 3.5.1 Tank Vent Installation – EnergyLogic Tanks Once the tank is in place, install a tank vent (not included). -
Page 23: Fuel Metering Pump And Filter Installation - Energylogic Tank (Continue To Section 3.7 If You Don't Have El Tank)
(continue to section 3.7 if you don’t have EL tank). On EnergyLogic Tanks, the fuel pump components are mounted on the side as shown. Follow the steps below to first install the firestop valve and filter head, and then install the pump. -
Page 24: Gauge And Pump Tubing Installation - El Tank
3.6.3 Gauge and Pump Tubing Installation – EL Tank Install the gauges and tubing as follows: The pump fittings Pressure Outlet Tee are sealed and leak tested at Gauge the factory. Use a backup Vacuum wrench when installing the Gauge gauges and flare fittings to Inlet Tee ensure that you do not turn the... -
Page 25: Metering Pump Installation - Non-El Tank (Skip If You Have El Tank)
3.7 Metering Pump Installation – Non-EL Tank (skip if you have EL tank) If you are metering fuel directly from a tank not supplied by EnergyLogic, the top suction method may be used. Verify regulations prior to installation. Contact your authorized EnergyLogic dealer to purchase an EnergyLogic Top Suction Kit (if one was not included in your original purchase), which will help to avoid common fuel delivery issues. -
Page 26: Installation Of Furnace Components
4. Installation of Furnace Components With the cabinet in place, you are ready to attach the blower assembly, the burner assembly, and the preheater. Then, you will install the fuel tubing from the pump to the preheater. 4.1 Blower Assembly Installation The blower assembly provides warm air from the heat exchanger to the room. - Page 27 HEAVY – GET HELP TO LIFT! To mount the blower to the cabinet, slide the blower panel over the open end of the cabinet. Align the holes and attach with the sheet metal screws provided. Refer to the figure below for this step. Blower junction box 4 Screws for 140 and 200 (2 on each side)
-
Page 28: Burner/Preheater Assembly
4.2 Burner/Preheater Assembly Before installing the burner to the cabinet, assemble the preheater to it, as follows: 1. Remove the long bolt from the right side of the burner air compressor shown in figure. 2. Align the preheater bracket with the air compressor hole and reinsert (do not tighten) the long bolt into the air compressor (refer... -
Page 29: Burner/Cabinet Assembly
4.3 Burner/Cabinet Assembly Once the burner and preheater are assembled, they can be installed on the furnace cabinet. This is done as follows: The burner assembly is heavy and must be installed into the cabinet at heights. Use proper lifting and safety equipment when performing the installation. 1. -
Page 30: Pump Outlet Tubing Installation
4.4 Pump Outlet Tubing Installation Now that you have installed the burner, you will install the fuel tubing between the pump and the preheater. 4.4.1 Pump Outlet Tubing Installation If you purchased a complete system (tank mount), the required fuel tubing is included. The tubing is installed as follows (refer to figure). -
Page 31: Pump Outlet Tubing Installation - Ceiling Or Wall Mounted Furnace (Skip If You Have A Tank Mounted Furnace)
4.4.2 Pump Outlet Tubing Installation – Ceiling or Wall Mounted Furnace (skip if you have a tank mounted furnace) If installing the furnace with a remote tank, the required fuel discharge tubing is not included. The tubing is installed with the same procedure as in Section 4.4.1, except for tube routing. The following guidelines are provided: Pump Discharge Tubing Considerations: •... -
Page 32: Exhaust Flue System Installation
• The EL-350H requires an 8 inch diameter flue and may not be reduced. • The flue connector for EL-140H and EL-200H may only be reduced down to 6 inch diameter flue provided that the following conditions are met without fan assist, otherwise use an 8 inch flue system: o Adequate Draft, with additional margin for adjustment of the damper door. - Page 33 2 feet higher than any portion of a building within 10 feet (NFPA 31, 54 and 211 – see figure). For increased margin, EnergyLogic recommends extending the flue further than the minimum guidelines. • Minimum stack height: 10 feet, plus 1 foot for each NFPA rules for flue height above roof additional tee or elbow.
- Page 34 There are other possible causes as well. Corrective measures must be taken before operating the appliance if the correct draft setting cannot be achieved. Contact EnergyLogic or consult a local professional for assistance.
-
Page 35: Draft Gauge Installation (Included With Some Packages)
5.3 Draft Gauge Installation (included with some packages) The draft gauge is a precision inclined-vertical manometer. Permanently installing the EnergyLogic draft gauge allows you to monitor the draft during operation. Installation (refer to figures) 1. Mount and level the draft gauge to the furnace cabinet using the screws provided with the gauge (refer to figure). -
Page 36: Electrical System Installation
8. Connect the black thermostat wire to the (R) Terminal (24V AC power) by loosening screw in (R) Terminal, inserting wire and tightening screw. NOTE: If installing an EnergyLogic low fuel cut off switch, or an EnergyLogic Top Thermostat Suction Kit with an integrated low fuel cut... - Page 37 13. Install (2) AAA alkaline batteries into the battery holder and place into thermostat. 14. Route the thermostat wire to the burner and connect the plug on the burner end of the cable to the receptacle at burner wiring box (refer to figure). Thermostat Wiring with Low Fuel Cutoff Switch Thermostat Wiring without Low Fuel Cutoff Switch Call 1-615-471-5290 for Technical Support...
-
Page 38: Fuel Pump Power Connection
6.2 Fuel Pump Power Connection Make sure that power is shut off and locked out prior to making electrical connections. 1. Remove the fuel pump housing cover. 2. Use flexible metal conduit with white, orange and green wires, NEC size 14 AWG. Route the conduit from the cabinet wire box to the fuel pump housing. -
Page 39: Main Electrical Connection
6.3 Main Electrical Connection Personally verify that the main circuit is OFF and Locked-Out before making any wiring connections. Use only copper conductors. All wiring installations should meet National Electric Code (NEC) and local guidelines. Canadian wiring installations are to be done in accordance with the Canadian Electrical Code, Part I. -
Page 40: Startup And Operation
7. Startup and Operation Once setup properly, EnergyLogic furnaces are designed to operate reliably over a wide range of conditions with minimal adjustment. This section is provided to make sure that the furnace is set up properly, and to provide instructions on the initial start up. -
Page 41: Safety Systems And Warnings
Reset Button Primary Control Burner Primary Control (models vary) During normal operation, the furnace operates as follows: 1. The wall thermostat closes. 2. If the preheater is hot enough to close the internal thermostat (120°F), then the controller is released to start the burner. 3. -
Page 42: Furnace Startup
combustion chamber, potentially generating smoke, rumbling and/or misfiring once the burner lights. Primary Control – Recycle Mode: If the burner loses flame for any reason, the Primary Control will enter Recycle Mode (Red LED flashes). After approximately 60 seconds, the Primary Control will attempt to restart the system. - Page 43 1. Make sure the used oil storage tank has adequate oil, with oil level above the low fuel cut off float switch (if installed). You may pre-fill the Fuel Filter with non-synthetic clean ATF to speed the priming process and to reduce amount of air in system. Do not pre-fill with new motor oil as new motor oil will not burn! Hand-tighten the filter (apply thin film of oil to gasket).
-
Page 44: Starting The Furnace
4. If the furnace will not light, proceed to the troubleshooting section of the manual or call EnergyLogic for technical support. Continue to the next section for important checks and adjustments. Call 1-615-471-5290 for Technical Support... -
Page 45: Burner System Checkout
If you are unable to obtain the proper adjustments, do not run the furnace. If you cannot resolve the issue, call EnergyLogic Technical Services for assistance. Blower Operation: Within the first two or three minutes after the furnace starts, make sure that the blower turns on and directs warm air into the room. - Page 46 View from a distance of at least 18 inches (46 cm). Close the viewport after checking the flame. If the flame is other than bright yellow, this indicates improper combustion. Contact EnergyLogic Technical Service for help. The burner door and view port cover are hot.
- Page 47 The factory settings shown below normally work well, but higher altitude locations may require adjustments: • EL-140H: 5 for Plate – Closed Air Band Shutter Adjustment • EL-200H: 7 for Plate – Closed Air Band •...
-
Page 48: Everyday Operation Of Your Energylogic Used Oil Furnace
• Don’t let your oil tank run dry. Don’t risk introduction of air into the fuel delivery system. You will save yourself much time and trouble by keeping your tank filled with oil. If you don’t have one, consider installing an optional EnergyLogic Low-Fuel Cut-Off Switch to turn off the furnace at low fuel levels. -
Page 49: Maintenance
8. Maintenance Regular maintenance is required to keep your EnergyLogic furnace operating reliably and efficiently. For best results, purchase an EnergyLogic furnace annual maintenance kit (PN 05000027 for EL140/200 or 05000028 for EL350), which includes nozzle, preheater/drip cap/burner/solenoid gaskets and o-rings, as well as fuel and air compressor filters. An EnergyLogic burner maintenance brush kit (PN 05000071) and an EnergyLogic furnace cleaning tool are the best tools to use with the maintenance procedures. -
Page 50: Service Contracts
If you are not qualified or do not wish to perform the furnace maintenance yourself, contact EnergyLogic for the location of our nearest dealer or service provider. Putting a service contract in place is the best way to make sure that the required maintenance is completed regularly and your system will operate reliably when needed, saving you both time and money. - Page 51 Call 1-615-471-5290 for Technical Support...
-
Page 52: Maintenance Procedures
Or, to remove accumulated oil as needed. Tools Required: 5/16 in. & 1/2 in. sockets, 3/4 in. open-ended wrench, EnergyLogic Furnace Cleaning Tool (PN 14033227 for the EL-140H and EL-200H; PN 04000223 for the EL-350H), chimney brush, small pipe brush, work gloves, dust mask and safety glasses, large heavy-duty plastic trash bag and duct tape. - Page 53 possible (refer to figure). Beware of falling parts that may create a crush hazard. 7. Tape the opening of a trash bag to the Drip Leg with duct tape, so ash will fall into the trash bag. 8. Accessing the interior of the heat exchanger through the burner opening, use the furnace cleaning tool or brush to push the ash to the opposite end of the exchanger, out the clean out port, and into the trash bag.
- Page 54 used to remove ash. Gently tap the flue pipe and allow ash to fall into the heat exchanger and trash bag. 9. Make sure to clean the ash from the top of the baffle (where the flue pipe connects). 10. The flue pipe should be cleaned at least once a year, and whenever it becomes clogged with ash and/or soot.
- Page 55 Blower and Internal Baffle Can Be Removed for Access to Clean the Flue from the Bottom - 350H Call 1-615-471-5290 for Technical Support...
-
Page 56: Blower Cleaning
8.5.2 Blower Cleaning How often? Once every 800 to 1,000 hours of operation. Tools Required: Screw or 5/16” nut driver, pipe brush, shop vacuum, work gloves, dust mask and safety glasses. Personally verify that the main power is turned off and locked out at the circuit breaker. -
Page 57: Fuel Oil Filter Replacement
EnergyLogic Spin-On Fuel Filter (PN 20270185) Spec: Hydraulic/140 Micron/Metal Mesh, max. working pressure 200 psi, 25 GPM capacity. Note: Use only genuine EnergyLogic parts to avoid damage and maintain UL status. Procedure - All Models: 1. Wear all safety equipment. -
Page 58: Preheater Cleaning
8.5.4 Preheater Cleaning How often? Once per year. Tools Required: 3/4 in. wrench, pipe wrench or vice, wire brush, one gallon of 140°F (60°C) + flashpoint parts washer fluid, safety glasses, rubber gloves. Replacement Parts: Preheater Gaskets (Qty=2) PN 20940122 (2 5/8” O.D.) Unplug burner Preheater Connector at... - Page 59 Open the Preheater Valve and drain fuel into your tank. Gasket Top Cap Bottom Gasket Extrusion Housing Cleaning Preheater 7. Hold Top Cap (outlet) firmly in a vice or with a pipe wrench and unscrew the housing to expose the finned aluminum Extrusion. Do not attempt to unscrew the Extrusion from the top cap.
-
Page 60: Nozzle Line Assembly Cleaning
(from optional maintenance accessory brush kit), parts washer fluid, shop air gun, safety glasses, rubber gloves. Replacement Parts: Nozzle O-ring (PN 20213152) or Nozzle (PN 20210123 for EL-140H/EL-200H, PN 20210124 for EL-350H) Personally verify that the main power is turned off and locked out at the circuit breaker. - Page 61 6. Disconnect nozzle heater Two-Pin Connector. Slide nozzle assembly out of burner assembly. Nozzle Block 2-Pin Assembly Removing Nozzle Block 7. Slide Nozzle Block Assembly out through the air tube. Nozzle Block 2-Pin Connector Electrode Assembly Assembly Air Vane Nozzle Spacer Set Screw Retention Head...
- Page 62 13. Using a pair of pliers and a towel, gently clamp the stem of the Nozzle (a small spinner is loosely contained Nozzle inside the Nozzle) and spin (counter-clockwise) the cap from the stem. *Skip steps13-17 if installing new nozzle. 14.
-
Page 63: Retention Head And Electrode Settings
8.5.6 Retention Head and Electrode Settings How often? Once per year (refer to 8.5.5, Nozzle Line Cleaning) Procedure - All Models. NOTE: There are two Electrode/Retention Head designs: one where the electrodes wires make two 90 degree bends (called “Double Bend”), and one with a single angled bend. - Page 64 • Retention Head is recessed approximately 1/16” - 1/8” (1.5 – 3 mm) into the Air Tube. • Retention Head is centered within the Air Tube. If not centered, straighten the centering Tabs of the Retention Head if they are bent. Loosen the knurled nuts, center the Retention Head and retighten the knurled nuts if necessary.
-
Page 65: Solenoid Valve Cleaning
8.5.7 Solenoid Valve Cleaning How often? Once per year or if the solenoid valve is blocked with debris (higher operating pressure will be seen on the pressure gauge). Tools Required: 5/16 inch and 7/16 inch wrenches, flat-blade screwdriver, small wire brush or pipe cleaner, pocket pick, parts washer fluid, shop air gun, rubber gloves, safety glasses. - Page 66 8. Inspect the seal at the end of the nucleus and note if it has an excessive impression from where it seals in the internal cavity of the body. Replace if damaged – nucleus and spring, sold separately. 9. Clean out the inside of the stem with parts washer fluid, then blow dry. 10.
-
Page 67: Air Compressor Maintenance
How often? Once per year. More often for dusty conditions. Tools Required: 1/8 inch Allen wrench, 7/16 inch wrench, flat-blade screwdriver, EnergyLogic Air Compressor Pressure Gauge Kit (PN 05000092), Gast compressor cleaning fluid, shop towel, rubber gloves, safety glasses. Procedure - All Models (refer to figures): 1. - Page 68 (4) Vanes Carbon Gasket Cover Plate Compressor Vanes 1. Using a 9/64 inch Allen wrench, carefully remove the air compressor cover plate and carbon gasket. 2. Inspect the carbon gasket for wear—reverse if worn or replace as necessary. 3. Spin the squirrel cage using a screwdriver. 4.
-
Page 69: Seasonal Shut Down & Start Up
8.6 Seasonal Shut Down & Start Up EnergyLogic strongly recommends that you remove power from the preheater when the furnace will not be in use for two weeks or longer. Leaving the preheater on for prolonged periods without fuel flow through it will cause fuel carbonization and sludge to form. A preheater in such a state will not adequately preheat the oil. -
Page 70: Troubleshooting
9. Troubleshooting Your EnergyLogic furnace is designed and built for years of reliable service with regular maintenance. Should you experience trouble, refer to this section for troubleshooting guidance. A qualified serviceman may perform the tests in this section. Do not tamper with the unit or controls – call your service technician or EnergyLogic for support. -
Page 71: Troubleshooting Condition Table
9.1 Troubleshooting Condition Table Behavior Part to Check 01. The furnace does not operate when you set the wall 1. Wall T-Stat (See Section 9.3) thermostat to a high temperature. 2. Blower/Fan Limit (See Section 9.3) 3. Burner Motor (See Section 9.2) 4. -
Page 72: Troubleshooting Trees
9.2 Troubleshooting Trees Part Action/Question Response 1. Check Air Shutter Setting. What is Correct settings are: 140H=5 and 200H=7 Compressor the air shutter setting? with closed Inner Band; 350H=4 with 4 on Inner Band. 2. See Air Compressor Maintenance Follow procedure in Section 8.5.8 for Air (Section 8.5.8) for testing air pressure. - Page 73 Standard Mix - Go to Next fuel? Action/Question/Component Unknown/Cold/New Oil/Non Standard Mix - Call EnergyLogic Technical Services group for an Oil Analysis to be performed 4. When was the tank last drained of Used Oil Storage Tanks should be drained on...
- Page 74 6. (SKIP - for Gravity Fed Pumps Yes - Repair/Replace leaking component(s) w/plenty of fuel) Check for Air Leaks: Check all fittings from the pump back to the tank for suction side air leaks (make sure pipe sealant is used for all No - Go to Next Component threaded connections).
-
Page 75: Testing Procedures
9.3 Testing Procedures Only qualified servicemen are to perform the testing procedures. Many of the tests involve high voltage electricity, which if mishandled may cause serious injury or death. 9.3.1 Wall Thermostat Testing (Standard T-Stat – White) Tools Needed: Digital Multi-Meter Wall Thermostat Function: Monitors the temperature of the room and compares it to the set desired temperature. -
Page 76: Blower Assembly Testing
9.3.2 Blower Assembly Testing Tools Required: 1/8” Allen wrench, 5/16” & 3/4” wrench, Flat-blade screwdriver, 120VAC capable Digital Multi- Meter, alligator clips or a jumper wire and Tachometer Blower Assembly Function: Moves air across the Heat Exchanger, once it is above 130°F during the call for heat. Note: During this test, if the Blower Assembly does not function as stated, call Technical Services for assistance, or Customer Service to order components of the blower assembly. -
Page 77: Cad Cell Testing
9.3.3 Cad Cell Testing Tools Required: Flat-blade screwdriver, 120VAC capable Digital Multi-Meter (Ohms) Cad Cell Function: The Cad Cell senses the flame via a resistance measurement, so the primary controller will continue to power the burner during the call for heat. The normal flame sensing range is less than 1600 ohms. -
Page 78: Metering Pump Assembly Testing
9.3.4 Metering Pump Assembly Testing Tools Required: 1/8” Allen wrench, 3/4” wrench, Flat-blade screwdriver, 120VAC capable Digital Multi-Meter, alligator clips or a jumper wire, Tachometer, stop watch and a graduated cylinder (ounce or milliliter). Metering Pump Assembly Function: Pumps fuel from the tank to the preheater and burner during the call for heat (given the preheater is up to temperature) Note: During this test, if the Pump Assembly does not function as stated, call Technical Services for assistance, or Customer Service to order service parts. - Page 79 b. If motor does not run, replace motor. With pump operating and preheater ball valve closed, verify that the pump outlet pressure is around 60 psi (pump is now in bypass). Speed testing with a tachometer Test pump shaft speed per tachometer instruction and compare to values found in the table under step 4.
-
Page 80: Preheater And Nozzle Ptc Testing Procedure
9.3.5 Preheater and Nozzle PTC Testing Procedure Tools Required: 1/4”, 5/16” wrenches, alligator clips or jumper wire, 120 VAC capable Digital Multi-Meter DMM, temperature probe, or the TPI combustion analyzer with a type K thermocouple attached. Preheater/Nozzle PTC Function: Heats the fuel to a temperature over 120°F for proper combustion. There are standby PTCs in the Preheater and the Nozzle that are energized whenever there is power to the burner in order to keep the fuel warm for immediate start up. - Page 81 5. Plug the burner in. Unplug the preheater. Turn the preheater ball valve off. Verify power by testing for 120VAC across the preheater receptacle (see figure). a. Verify power across the preheater receptacle Standby Heater pins. Preheater Receptacle b. Note: This should only be performed Standby Keyway Heaters...
-
Page 82: Primary Control Testing
9.3.6 Primary Control Testing Tools Required: Flat-blade screwdriver, alligator clip or piece of jumper wire. Primary Controller Function: Processes the call for heat and distributes power to the necessary components in order to operate the furnace or boiler. During the startup and heating cycle, the primary controller looks for a flame to insure that there is combustion, and shuts down the burner if there is no flame. -
Page 83: Solenoid Valve Testing
9.3.7 Solenoid Valve Testing Tools Required: 7/16” wrench, Flat-blade screwdriver, 120VAC capable Digital Multi-Meter and alligator clips or jumper wires. Solenoid Valve Function: Blocks flow of the fuel from the preheater to the nozzle block when burner is not operating, and allows for flow during burner operation. -
Page 84: Top Suction Kit Testing
Save time/money and increase reliability when delivering fuel from the top of various types of tanks. An EnergyLogic Top Suction Kit combines fuel pick-up with a foot valve and a low fuel cut off switch. The fuel pick-up line has a copper tube, increasing reliability of the fuel delivery. -
Page 85: Iron Core Transformer Testing
Note: During this test, if the Transformer does not function as stated, call Technical Services for assistance, or Customer Service to order a service part. EnergyLogic does not recommend the use of a screwdriver or any other conductor to contact the transformer springs other than the testing procedure below! During a portion of this test, high voltage electrical components will be energized. - Page 86 b. With an amp clamp (must have mA AC capability) i. With burner plug unplugged, run wire from spring to spring of the transformer. ii. Plug in the burner and apply jumpers as in step 11. iii. Using the amp clamp around the wire, read the amperes. 1.
-
Page 87: Fan And Limit Controller Testing
9.3.10 Fan and Limit Controller Testing Tools Required: Screwdriver Fan and Limit Controller Function: Turns fan on and off at designed temperatures. For safety, the controller prevents overheating of the furnace by turning off the burner at a designated limit temperature. Note: During this test, if the Controller does not function as stated, call Technical Services for assistance, or Customer Service to order a service part. -
Page 88: Appendices
10. Appendices 10.1 Furnace Wiring and Oil Schematic Furnace System Wiring Diagram Call 1-615-471-5290 for Technical Support... - Page 89 Preheater Plug Pin Diagram Wide Key at Top Standby Heater - Neutral Run Heaters - Neutral Run Heaters – 115V Standby Heater – 115V (Center Pin Not Used) Preheater Thermostat Primary Control Circuit (with 24 VAC thermostat) Oil Schematic Call 1-615-471-5290 for Technical Support...
-
Page 90: Carlin 50200E Primary Control
10.2 Carlin 50200E Primary Control Call 1-615-471-5290 for Technical Support... - Page 91 Call 1-615-471-5290 for Technical Support...
-
Page 92: Furnace Specifications
10.3 Furnace Specifications Multi-Fuel Burning Appliance Model EL-140H EL-200H EL-350H Number Bonnet Capacity 112,000 BTU 160,000 BTU 280,000 BTU Output BTU Fuel Input 1.0 GPH 1.4 GPH 2.5 GPH Nozzle Only No. 30609-5 No. 30609-5 No. 30609-28 Fuels ASTM D396 No. 2 Fuel Oil, Used Crankcase Oil, and Used Automatic Transmission Fluid... - Page 93 Call 1-615-471-5290 for Technical Support...
- Page 94 Call 1-615-471-5290 for Technical Support...
- Page 95 Call 1-615-471-5290 for Technical Support...
-
Page 96: Limited Warranty
Obtaining Warranty Service: If the local Service Provider is unknown, contact EnergyLogic, LLC at 5901 Crossings Blvd, Antioch, TN 37013, or at 1-615-471-5290. A representative will assist you in locating the nearest authorized service provider or in verifying the warranty coverage. The Unit Registration identification number will be required.
Need help?
Do you have a question about the EL-140H and is the answer not in the manual?
Questions and answers