Table of Contents
Advertisement
Quick Links
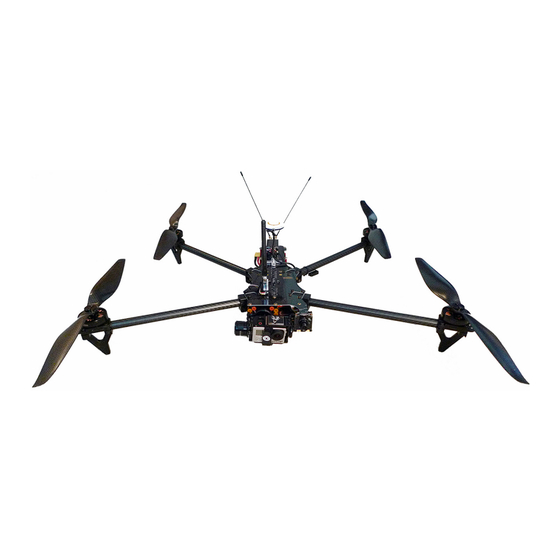
TBS DISCOVERY / DISCOVERY
PRO ENDURANCE KIT
High speed and endurance upgrade for the TBS
DISCOVERY quadcopter platform
Revision 2014-09-10
TBS DISCOVERY and TBS DISCOVERY PRO owners will enjoy the ability to
add larger props and higher cell motors to get the endurance or long range
juices going. Also great for higher speed setups. It will generally turn your
quadcopter into a matured aerial filming or aerial surveillance platform.
Flights of up to 30 minutes are within reach. Extends the arms to allow up to 15-inch propellers. The length is
customizable by cutting the carbon fiber tube to length, so you can even go symmetric if that's your thing.
Features
●
Real endurance and long range capability
●
Up to 15-inch propellers supported
●
Customizable carbon fiber arm length
●
Low vibration and warping for great efficiency
●
Specialized motors with self-locking propeller mount
Up to 45 minutes flight duration possible
●
Include all the great features of the original frame
●
1
Advertisement
Table of Contents

Summary of Contents for tbs electronics TBS DISCOVERY
- Page 1 DISCOVERY quadcopter platform Revision 2014-09-10 TBS DISCOVERY and TBS DISCOVERY PRO owners will enjoy the ability to add larger props and higher cell motors to get the endurance or long range juices going. Also great for higher speed setups. It will generally turn your quadcopter into a matured aerial filming or aerial surveillance platform.
-
Page 2: Before We Begin
Before we begin Thank you for buying a TBS product! The TBS DISCOVERY is a new multirotor aircraft from Team BlackSheep (TBS) for hobbyist, semi-pro and pro aerial videographers. It features the best design practices available on the market to date, providing great flying stability and incredible FPV characteristics. -
Page 3: Specifications
Specifications The following specifications list our target for the TBS DISCOVERY ENDURANCE upgrade kit. Type: Asymmetric spider quadrotor Arms: Carbon fiber tubes, 83g, length 330mm, Ø16mm, thickness 1.2mm (ea.) Airframe: Reinforced black fiberglass (rear top RF transparent, bottom PDB) Battery: 6S (22.2V nom.) 2500 to 4000mAh LiPo pack, XT60, max. -
Page 4: Required Parts
Required parts Before upgrading your TBS DISCOVERY, be sure you have acquired the following parts, or similar grade. We provide an upgrade kit which has been proven to work and include everything, except propellers which is up to the builder to choose. - Page 5 Endurance upgrade It is finally here! The endurance upgrade kit for the TBS DISCOVERY quadcopter series. All the pieces for a 25 minutes flight time solution, for your convenience everything required is available from TBS. The new TBS 400kV LR motor is the cornerstone in this kit. One of the reasons this motor is great for endurance is the weight.
- Page 6 Choosing the right endurance setup The following list recommendations are based on TBS DISCOVERY and TBS DISCOVERY PRO base setups and you might already have most of the suggested equipment if you are upgrading an existing platform. TBS DISCOVERY / TBS DISCOVERY PRO setup for short range endurance...
- Page 7 TBS DISCOVERY / TBS DISCOVERY PRO setup for long range endurance flights ● Expected flight time: 35-45 min ● Cost range: US$ 3’000 - US$ 3’500 ● Experience level: Expert Ideal for: Long, wide open fields, plains, coastlines and valleys or urban flying ●...
-
Page 8: Installation
Installation Preparation Remove the current drive train setup (propellers, motors, ESCs) from the DJI arms, remove the arms and clean the ESCs solder pads. If you are going to reuse the motors, clean the top of bearings with a cotton-bud. It is imperative to remove as much excessive weight from the platform as manageable before upgrading to the endurance kit. -
Page 9: Motor Mount
Motor mount If you are going to use your current setup or motors with short motor wires, it is necessary to extend the motor wires to reach at least the length of the tubes, plus 20%. Wire gauge should be 18 to 20 AWG. Heatshrink to protect against short-circuit. - Page 10 Add small amount of thread-lock to the M3x8mm motor screws and fasten properly. Thread the motor wires through the slot on the motor mount part and align the back of the motor with the mounting pattern on the motor mount part.
- Page 11 The motor mount section of the assembly is now complete. Mount boom Now, thread the motor wires through the carbon fiber tube and position the motor assembly on to the boom. Keep these screws fairly loose until the end of the install to allow you to vertically tweak the final alignment of the propeller and motor assembly to the frame.
- Page 12 Mount boom support Prepare the boom support parts; boom mount, boom brackets, landing gear and 4x M4x20mm screws. You have three choices to support the motor mount to the boom, pick one: ● Boom mount - wide mount with notch which locks into the end of the carbon tube (original length) ●...
- Page 13 Align the carbon fiber tube to the opposite side of the motor assembly, the notch in the mount should be arranged with the corresponding hole on the carbon fiber tube. The boom mount and boom brackets provides a low profile and saves weight. It is recommended to use the boom brackets when using custom carbon tube length.
- Page 14 Use four M4x20mm screws to secure the motor mount to the boom. Use a small drip of thread-lock to make sure vibrations from the motor will not weaken the boom grip. The motor and boom support assembly is now complete. Note: On the v1.0 and v1.5 kits, there are two mounting holes from the top and two from the bottom, on the later versions the screws are all from the bottom to accommodate the use of “pancake”...
- Page 15 Mount frame clamp Feed the wires through the frame clamp part and slide the part onto the boom. Align the hole on the boom with the corresponding guide screw hole on the frame clamp. Use the longest M4x25mm set screw in the kit, add thread-lock and insert it into the guide hole to lock the boom and frame clamp.
- Page 16 Next, use a M4x20mm screw and insert it into the second screw hole beneath the boom to ensure a good fit. Do not over tighten, the last screw is designed to keep the boom secured to the frame clamp. If the boom clamp is a little loose, use a small strip (halfway around the tube) of electrical tape to close the gap between the tube and the clamp.
- Page 17 Mount propellers Mount the propellers using our new innovative way to mount and dismount low level propellers on the new TBS 400kV “pancake” motor. Prepare the motors and propellers, together with the supplied mounting accessories. Make a note of the rotation of both the propeller and motor header. A anti-clockwise (counter-rotating) propeller should be matched with a motor marked by a white dot - indicating that anti-clockwise rotating will lock the propeller to the motor header when force is applied.
- Page 18 other disc with the counter-sunk screw holes, also facing up. Add a small amount of thread-lock to the two screws and tighten properly.
- Page 19 The complete propeller assembly should be absolutely flush. If there are any noticeable misalignment, remove the discs and sand the surface to remove any carbon fiber specs or foreign particles. Mount the propeller assembly to the motors by spinning them a few turns while holding the motor bell. For quick swap, hold the motor bell and with a firm grasp at the core of the propeller, twist in the opposite direction of the propeller rotation to release the lock and unmount the propeller.
-
Page 20: Install Battery
A 6S 2500 to 4000mAh battery with an envelope smaller than W34 x H55 x L137mm will fit neatly in the TBS DISCOVERY and TBS DISCOVERY PRO battery bay. Longer batteries might make the platform tail heavy but the bigger power train can easily counter the imbalance. - Page 21 Speed controller mount Cut the ESCs power leads to length and solder wires to the “+” and “-” pads on the bottom frame. Connect the motor wires to the ESCs. Position the ESCs either on the booms using zip-ties to securing them, or staggered inside the frame for a cleaner look but at the expense of lower airflow for cooling.
-
Page 22: Flight Controller Configuration
Flight controller configuration If you use the DJI NAZA flight controller, update the PID settings to reflect the new power train and flight dynamics. Setup Gain Pitch Roll Yaw Vertical TBS 400kV 15x5 6S4000mAh 30A Basic/manual 145% 110% 120% 135% NAZAM V2 ... - Page 23 Vibration damping system (TBS DISCOVERY PRO only) With larger motors and propellers spinning at relatively low RPM, the platform will experience different harmonics and vibrations compared to a regular setup. These vibrations will normally be at lower frequencies and are harder to get rid off. It is therefore important that the entire system is well balanced, from battery CG, arms, motors and propellers (from least to most important).
- Page 24 Diagrams The diagrams below shows the exploded view of the AerialMob arm extensions to make it easy to see the different assemblies (brackets, landing gear, boom support). ...
-
Page 25: Good Practices
Good practices We have compiled a list of all of the things that have been tried and tested in countless environments and situations by TBS crew and other experienced FPV pilots. Follow these simple rules, even if rumors on the internet suggest otherwise, and you will have success in FPV. ●... - Page 26 Try to achieve as much separation of the VTx and R/C receiver as possible to lower the RF noise floor ● and EMI interference. ● Do not buy the cheapest equipment unless it is proven to work reliably (e.g. parts falling off, multitudes of bug fix firmware updates, community hacks and mods are a good indicator of poor quality and something you do NOT want to buy for a safe system).
- Page 27 Appendix Manual written and designed by ivc.no in cooperation with TBS.
Need help?
Do you have a question about the TBS DISCOVERY and is the answer not in the manual?
Questions and answers