Table of Contents
Advertisement
Advertisement
Table of Contents

Related Manuals for Strida 3

Summary of Contents for Strida 3
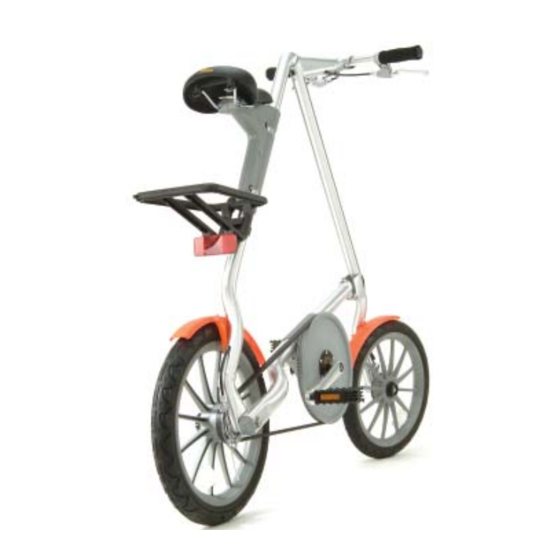
- Page 1 a w h o l e n e w w a y t o m o v e owners manual...
- Page 2 fi cation of the frame or components shall void this warranty. strida UK limited shall not be respon- sible for incidental or consequential damages. labour charges associated with parts changeovers are not covered by the warranty.
- Page 3 110kg 240lbs maximum loading: 110kg/240lbs always wear a helmet! use lights at night! minimum rider danger height: 5’ 2”/1.57m no loose clothing maximum rider height: 6’ 4”/1.93m no stunt riding! no ice riding! no wheelies! minimum: -20°C (-4°F) www.strida.com...
- Page 4 (page 5) check the brakes check tyre treads & before riding infl ation STOP 45-55psi ensure all bolts and fastenings are caution: wet weather increases correctly tightened (page 17 & 18) stopping distance www.strida.com...
- Page 5 www.strida.com...
- Page 6 Problems see page 26 www.strida.com...
- Page 7 fi t handlebar into stem push brake and grip onto bar spray a little window cleaner (NEVER oil) into grip to help tighten stem screw see page 19 adjusting brakes www.strida.com...
- Page 8 (do not remove) remove straight handlebars (if fitted). spray window cleaner (NEVER oil) into grip to ease removal fit handlebars into stem tighten screw. adjust in 1/4 turn incriments to stop handlebars wiggling attach brake cables 5-9 on opposite page www.strida.com...
- Page 9 fi tting mud guards available from www.strida.com optional: add fender extension available from www.strida.com see page 27 www.strida.com...
- Page 10 & adjust seat if already fi tted, remove 4 bolts, 2 clips and the rack 175-200cm 175-200 cm 150-175 cm 150-175cm use caution not to strip aluminum thread when installing seat pin press fi t seat moulding starting from bottom www.strida.com...
- Page 11 - under saddle 12Nm 12Nm to remove saddle www.strida.com...
-
Page 12: Brake Levers
40Nm brake levers small hands - tighten screws to move brake levers closer to handlebars www.strida.com... - Page 13 www.strida.com...
- Page 14 LED lights tool - under saddle fi t rear light upside down available from www.strida.com www.strida.com...
- Page 15 D-lock metal wheels www.strida.com...
- Page 16 www.strida.com...
- Page 17 14Nm 18-20Nm 40Nm 16Nm 16Nm www.strida.com...
- Page 18 3.2 parts list & exploded view 552-01 552-03 552-02 100-07 100-0 100-0 160 172 122-06 122-04 122-03 122-02 118-01 117-02 118-02...
- Page 19 215-12 215-14 215-11 215-03 215-15 215-09 215-05 215-06 330-00 216-00 122-01 122-05 www.strida.com...
- Page 20 12Nm (*6no.) 18-20Nm 14Nm +rite-lok TL70 +rite-lok TL70 40Nm 16Nm +rite-lok TL43 +rite-lok TL43 16Nm +rite-lok TL43 www.strida.com...
-
Page 21: Adjusting Brakes
16kph = 4.5 metres using either brake STOP www.strida.com... - Page 22 %#?£!! 45-55psi www.strida.com...
- Page 23 5 loosen screw to decrease magnet strength tighten screw to increase magnet strength www.strida.com...
-
Page 24: Front Wheel
19mm (3/4") m8 steel washer magnet nylon washer threadlock m6 steel washer m6 x 20 SS button head screw, nylock parts & upgrade kits available from www.strida.com... -
Page 25: Rear Wheel
(add petroleum jelly) 100 Bottom Tube reflector 300 Rear Tube rear wheel drum brake assy rear axle (mwc) bearing spacer rear 19mm (3/4") wheel bearing wheel bearing nylon washer X3 magnet spacer tyre & tube: magnet keeper 16" x 1.5" schrader valve... - Page 26 (will eliminate all noise) apply cycle oil using a syringe white lightning lubricant call to order upgraded pulley call to order upgraded freewheel (will eliminate all noise) kit (will eliminate all noise) www.strida.com...
- Page 27 2 for metal wheels: ask a professional to ensure spokes are correctly tightened bike shop ask a professional to correctly adjust & grease bottom bracket (part 122) see left & pages 28-29 install a new freewheel upgrade (part 610) www.strida.com...
- Page 28 4 bolts retighten 4 bolt tighten 4 turns only caution: over tight belt strains bearings and 6.5-8.5kg reduces efficiency www.strida.com...
- Page 29 2 off m5*16 button hex bolt bearing m5 nylock nut 6 off freewheel crush washer double flange front crank axle pulley crank parts and upgrade kits available from www.strida.com pedal crank axle bolt tip: to remove belt, use a screwdriver www.strida.com...
- Page 30 a w h o l e n e w w a y t o m o v e upgrade & repair kits instructions...
- Page 31 610 strida upgrade - freewheel & pulley 100-07 frame end cap 122-01 bb set - locknut 100-00 bottom tube fabrication 122-05 bb set - tab washer 167 crank axle bolt 122-06 bb set - left hand cone 120 pedal 122-03 bb set - bearings in cage...
- Page 32 171-D skiffy cap front bolt only 116 belt tension wire into centre hole www.strida.com...
- Page 33 627 strida 3 upgrade - steering ball socket 215-15-1 socket peg 215-11 steering ball socket, right 215-12 steering ball socket, left 273 ball socket screw 200-01 front tube remove rear brake cable, then socket peg and screw first remove brake cable...
- Page 34 1195mm rear brake cable 1205mm www.strida.com...
- Page 35 - to improve braking power in new brakes, available for loan from www.strida.com. safety screw deep socket wrench 19mm reverse thread on rear reverse thread on rear axle brake skimmer 100% threadlock 16Nm tighten and adjust cable www.strida.com...
- Page 36 (uk) limited 5 lockhart drive sutton coldfi eld, BR75 6RR t: +44 121 681 0964 f: +44 121 682 0244 e: uk@strida.com www.strida.com part: 446-5 issue: 4 © 2006 strida ltd...
Need help?
Do you have a question about the 3 and is the answer not in the manual?
Questions and answers