Table of Contents
Advertisement
Available languages
Available languages
Advertisement
Table of Contents

Subscribe to Our Youtube Channel
Summary of Contents for Amundson Opticam
- Page 1 Full HD 1080p User Manual...
-
Page 2: Item Checklist
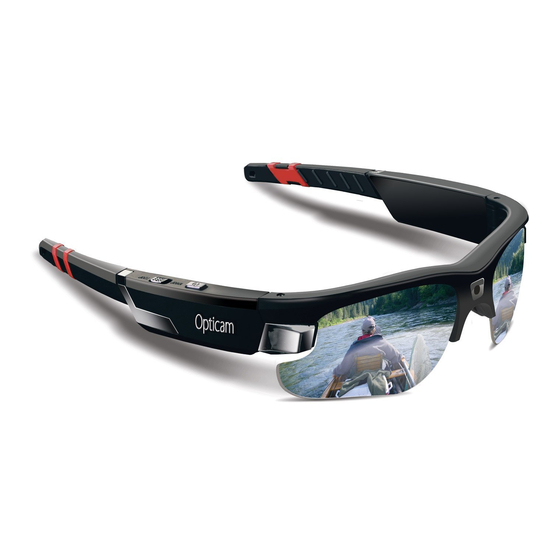
ITEM CHECK LIST Before starting, check that all of the following items have been included with your camera. If anything is missing, contact your retailer. Opticam Full HD 1080p headset 4 gb Micro-SD card Micro-SD card adapter 100-240V AC adapter... - Page 3 KNOWING THE OPTICAM Power/Video Record ON/OFF 1080P/720P selector Power/ Recording light Battery Reset indicator light Micro SD slot USB Port Opticam Full HD 1080p Reset Frame status light...
-
Page 4: Charging The Battery
There are 2 ways to charge your Opticam: A) 100-240 AC ADAPTER Plug the USB cable (A) into the AC adapter (B) and into the Opticam (C), then plug the AC Adapter into a wall socket (D). On charging mode, the battery indicator light (E) shows a steady RED light. -
Page 5: Installing The Microsd Card
Computer USB Port INSTALLING THE MICRO-SD CARD With the Opticam turned OFF, insert the Micro-SD card into the slot (A) with the printed side facing the outside of the frame until you hear a click. To extract the Micro-SD card, make sure the Opticam is turned OFF then push the card in until you hear a click so the Micro-SD card automatically pops-up. -
Page 6: General Controls
Opticam is recording a video. Power OFF /Stop Recording To stop recording and to turn OFF the Opticam press and hold the Power/Video Record ON/OFF button (A) for 2 seconds. You will hear a steady 3 seconds chime as the camera saves the recording file and turns the Opticam OFF. - Page 7 Make sure the Opticam is turned OFF, and then plug the USB cable (A) into the Opticam (B) and into a computer USB port (C). The Power/ Recording light (D) will blink a BLUE light showing that your Opticam is connected to a computer.
-
Page 8: Pc & Mac Connection
BASIC AND ADVANCED CAMERA SETTINGS A) Basic Camera Settings You can select the quality of the video using the selector located on the right arm of the Opticam (A). Slide the button to select between 720p and 1080p Full HD video. 1080P... - Page 9 B) Advanced Camera Settings NOTE: After typing settings, please change the words The Opticam gives you the option “UPDATE: N” to “UPDATE: Y”, then of controlling different camera save and exit the “setting.txt” file. settings like Exposure, Sharpness, Quality, Audio...
- Page 10 LENSES Removing lenses Replacing lenses To remove the lenses, support the To replace lenses, support the eyewear frame with one hand, eyewear frame with one hand fold the frame arm and pull the and slide the lens into the support lock up (A) (B).
-
Page 11: Light Status
LIGHT STATUS Status Green Light Blue Light Red Light Sound Alert Power ON Stay ON 3 sec then flash 3 Chimes 1 sec then OFF 1 sec then OFF 4 sec chime Power OFF 1 chime every Stay ON Flash Recording 25 minutes No Micro-SD... -
Page 12: Specifications
Avoid dropping the device. Lenses are impact resistant but are not to be used as safety glasses. The Opticam Full HD 1080p is not waterproof. The rubber flaps system tolerate a moderate amount of humidity on the USB and Micro-SD slots... -
Page 13: Warranty
Proof of purchase is necessary. How Long Does The Coverage Last? The Opticam products have a 12 month limited warranty period. What happens after my warranty period expires? Don’t worry; Amundson will replace broken or damaged cameras or components at a cost. - Page 15 HD Intégrale 1080p Manuel d’instructions...
- Page 16 LISTE DE CONTRÔLE DES ACCESSOIRES Avant de commencer, assurez-vous que tous les accessoires ci dessous ont été inclus dans votre boite à lunette. S’il manque des pièces, veillez contacter votre détaillant. Des oreilletes Opticam HD Intégrale 1080p Carte microSD de 4 Go Adaptateur...
- Page 17 CONNAISSEZ VOS LUNETTES Commutateur/enregistrement vidéo marche-arrêt Sélecteur 1080P/720P Voyant d’alimentation/ enregistrement Indicateur Bouton de de charge réinitialisation de la pile Fente pour carte microSD Opticam HD Intégrale 1080p Bouton de réinitialisation Voyant d’état de la monture...
- Page 18 Le temps de charge moyen est de trois à quatre heures. Afin de protéger la pile et de prolonger sa durée de vie, ne la chargez pas pendant plus de huit heures de suite. Vous pouvez charger votre Opticam de deux façons : A) ADAPTATEUR C.A.
- Page 19 Port USB d’un ordinateur INSTALLATION DE VOTRE CARTE MÉMOIRE «MICRO-SD» Une fois l’Opticam HORS TENSION, insérez la carte microSD dans la fente (A) prévue à cet effet face imprimée vers l’extérieur de la monture jusqu’à ce vous entendiez un déclic.
-
Page 20: Contrôles Généraux
émettra trois carillons. Après quelques secondes, le voyant d’état de la monture (D) deviendra bleu et clignotera, ce qui indique que l’Opticam enregistre une vidéo. Arrêt/arrêt de l’enregistrement vidéo Pour arrêter l’enregistrement et mettre l’Opticam HORS TENSION, appuyez sur le bouton Commutateur/enregistrement vidéo marche-arrêt... - Page 21 A) Câble USB Assurez-vous que l’Opticam est HORS TENSION et branchez ensuite le câble USB (A) dans l’Opticam (B) et dans le port USB d’un ordinateur (C). Le voyant d’alimentation/enregistrement (D) sera BLEU et clignotera, ce qui indique que votre Opticam est connecté à un ordinateur.
- Page 22 RÈGLAGE DE LA DATE ET DE L’HEURE Connectez l’Opticam à votre ordinateur et créez un fichier texte (.txt) que vous nommerez setdate.txt dans le volume de la carte SD qui est monté. Ouvrez le nouveau fichier setdate.txt, tapez 20151108090828 et enregistrez-le dans le volume de la carte SD.
- Page 23 B) Paramètres avancés de chiffres ou les termes désirés qui l’appareil photo sont présentés dans le tableau ci- dessous et enregistrez le fichier. L’Opticam vous permet d’ajuster NOTE : Après avoir saisi les différents paramètres de l’appareil photo tels que l’exposition, la nouveaux paramètres,...
- Page 24 LES VERRES DE LUNETTES Comment enlever les verres? Comment remplacer les verres? Pour enlever lentilles, Pour remplacer lentilles, soutenez la monture des lunettes soutenez la monture des lunettes d’une main, pliez la branche de d’une main et faites glisser la la monture et tirez le dispositif de lentille dans les charnières en serrage (A) (B).
-
Page 25: Caractéristiques
Charging complet Éteinte Éteinte Éteinte Éteinte CARACTÉRISTIQUES Opticam HD Intégrale 1080p Windows XP ou superiéur / Mac OS 10.6 ou superiéur. Système d’exploitation Mémoires Prend en charge les cartes TF à haute vitesse de 32 Go au maximum. Caméra 5.0 mégapixels / View angle: 63 degrés Résolution 1920x1080 P à... -
Page 26: Dépannage
être utilisé comme lunettes de comparé au champ de la lentille sécurité. de la camera et sa position sur la L’Opticam HD Intégrale 1080p monture des verres est légèrement n’est pas hydrofuge. Les fentes au dessus du niveau des yeux. -
Page 27: Garantie
Cependant, les preuves de paiement ou d’achat sont nécessaires. Quelle est la durée de la couverture? Les produits Opticam sont garantis pour une période de 12 mois. Que se passe t-il après expiration de la période de garantie? Soyez sans crainte, Amundson remplacera les cameras brisées,... - Page 29 1. Name / Nom 2. Address / Adresse 3. City / Ville 4. Postal Code / Code Postal 5. Province / State / État 6. Country / Pays 7. Phone / Numéro de téléphone 8. Product / Produit 9. e-mail / Adresse e-mail 10.
- Page 30 2. Send the product back to us with a proof of purchase and the form. Purchasers are responsible for shipping warranty products to Amundson. Check our Specific shipping section bellow before sending the product. Our shipping address is: Amundson Outdoor Products Ltd.
- Page 32 www.amundson.ca...
Need help?
Do you have a question about the Opticam and is the answer not in the manual?
Questions and answers