Table of Contents
Advertisement
For all your Sales and Service enquiries call us on 1300 BRIVIS (1300 274 847)
www.brivis.com.au
Brivis Australia
Brivis New Zealand
61 Malcolm Rd
Distributor: Warm Air Ltd
Braeside Victoria 3195
69 Marsden Street
Lower Hutt 5010 New Zealand
Australia
PO Box 38523
1300 BRIVIS (1300 274 847)
Wellington Mail Centre
Fax: +61 (03) 9264 9400
Wellington 5043 New Zealand
www.brivis.com.au
0800 WARMAIR (0800 9276 247)
email: sales@brivis.com.au
Ph: +64 (04) 920 1670
Fax: +64(04) 920 1681
www.warmair.co.nz
email: sales@warmair.co.nz
© 2013 Brivis Climate Systems Pty. Ltd.
All rights reserved. No part of these documents may be used in any way or form without prior written consent from Brivis Climate Systems Pty Ltd.
Specifications subject to change without notice. © 2013 Brivis Climate Systems Pty. Ltd.
Brivis South Africa
Distributor: Lorenz and Associates
Northlands Deco Park
Cnr Witkoppen and Newmarket Roads
North Riding, Johannesburg South Africa 2194
0861 BRIVIS (0861 274 847)
Ph: +27 (011) 704 6112
Fax: +27 (011) 704 0022
www.brivis.co.za
email: info@brivis.co.za
Part Number: B061526
November 2013
Brivis Climate Systems Pty. Ltd.
ABN 64 096 079 088
AU24752
Brivis
Ducted Reverse
Cycle Inverter
Wired Programmable Controller
OWNERS MANUAL
PLEASE READ THESE INSTRUCTIONS CAREFULLY BEFORE
INSTALLING & USING THIS PRODUCT
Advertisement
Table of Contents

Subscribe to Our Youtube Channel
Summary of Contents for Brivis B061526
- Page 1 © 2013 Brivis Climate Systems Pty. Ltd. INSTALLING & USING THIS PRODUCT All rights reserved. No part of these documents may be used in any way or form without prior written consent from Brivis Climate Systems Pty Ltd. Part Number: B061526 November 2013 Brivis Climate Systems Pty.
-
Page 2: Table Of Contents
CONTENTS ● This manual provides detailed descriptions of precautions that should be brought to your attention during operation. ● In order to ensure correct service of the wired control, 1. SAFETY PRECAUTIONS................1 B026004, please read this manual carefully before using 2. -
Page 3: Safety Precautions
1. SAFETY PRECAUTION 2. INSTALLATION ACCESSORIES Select the appropriate installation location Read the safety precautions carefully before installing the unit. Stated below are important safety issues that must be obeyed. Don’t install in an area contaminated with heavy oils, vapors or gases that may cause the control to deform, this may lead to a system malfunction. -
Page 4: Installation Method
3. INSTALLATION METHOD 2. INSTALLATION ACCESSORIES Installation diagram Wired programmable control installation precautions. 1. This manual describes the installation method of the control. Please refer to the Interconnecting wiring loom Indoor unit main board wiring diagram in this installation manual to wire the control to the indoor unit. 2. - Page 5 3. INSTALLATION METHOD 3. INSTALLATION METHOD Optional Control extension mounting box 5. Fix the bottom cover to the electric cabinet with the slotted head screws. Align the bottom cover so it is level on the wall surface, then reinstall the bottom cover of the wall control.
-
Page 6: Wired Programmable Control Wiring Diagram
4 . WIRED PROGRAMMABLE CONTROL WIRING 5. SPECIFICATION DIAGRAM Operational Limits 1. Wiring diagram of wired control, showing connection with indoor unit (See g 4-1) DC 12V Input voltage Temperature Range -5 ~ 43 C RH 40% ~ RH 90% Humidity Range Indoor Unit control box... -
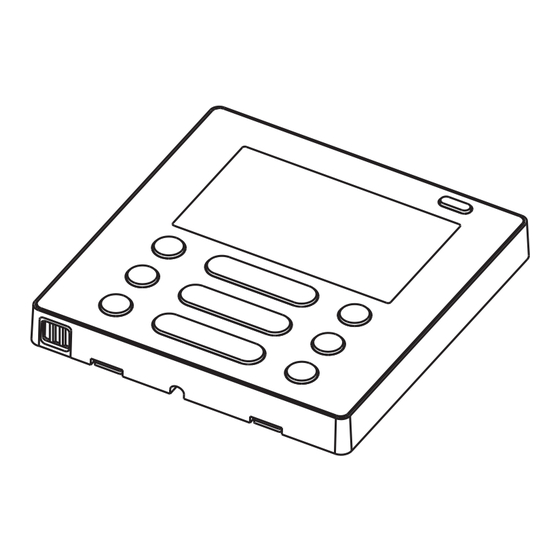
Page 7: Lcd Display Layout
6. LCD DISPLAY LAYOUT 7. BUTTON DESCRIPTION POWER MODE FAN SPEED 5, 6 TIMER SWING SWING FOLLOW ME 1 Operating mode indicator 8 Temperature display 2 Fan speed indicator 9 Lock indicator DELAY/DAY OFF CONFIRM BACK COPY 3 Left-right swing indicator 10 Room temperature indicator 4 Vertical swing indicator 11 Clock display... -
Page 8: Preparatory Operation
7. WIRED CONTROL BUTTON DESCRIPTION 8. PREPARATORY OPERATION Set the current day and time MODE Press the TIMER button for 3 seconds or more. Adjustment up and down The timer display will ash. TIMER FAN SPEED Vertical airow direction and swing Horizontal swing Press the “... -
Page 9: Operation
9. OPERATION 9. OPERATION To start/stop operation Fan speed setting Press the FAN SPEED button to set the fan speed. Press the POWER button. (This function is unavailable in AUTO or DRY modes) POWER FAN SPEED Operation lamp System ON : Lamp is lit System OFF : Lamp is not lit To set the operation mode Room temperature sensor selection... - Page 10 9. OPERATION 9. OPERATION Child lock function Left-Right swing (applicable products) SWING SWING Press the “+” and “-” adjust buttons simultaneously for 3 seconds to activate the child lock function. This will lock all buttons on the wired control. Press the button to start Left-Right swing function.
-
Page 11: Timer Functions
9. OPERATION 10. TIMER FUNCTIONS Up-Down airow direction and swing (applicable products) WEEKLY timer Use this timer function to set operating times for each day of the week. SWING SWING On timer 1.For every press of the SWING button, the louver changes in 6 degree increments. Use this timer function to start the system. - Page 12 10. TIMER FUNCTIONS 10. TIMER FUNCTIONS To set the On and Off TIMER To set the On or Off TIMER Press the TIMER button to select the Press the TIMER button to select the TIMER TIMER No display Press the CONFIRM button, the Clock display is ashing. Press the CONFIRM button, the Clock display is ashing.
-
Page 13: Weekly Timer (Time Clock Operation)
11. WEEKLY TIMER 11. WEEKLY TIMER Weekly timer setting TIMER CONFIRM Example: Tuesday time period 1 Up to 4 timer settings can be saved for each day of the week. This allows the user to congure the week timer to suit their lifestyle. Press the TIMER button to select the , press the CONFIRM button to conrm. - Page 14 11. WEEKLY TIMER 11. WEEKLY TIMER WEEKLY timer operation To set the DAY OFF (for a holiday) To activate the WEEKLY TIMER operation In weekly timer mode, press the CONFIRM Press the TIMER button while is displayed on the screen. button CONFIRM TIMER...
- Page 15 11. WEEKLY TIMER 11. WEEKLY TIMER DELAY function Press the COPY button, the letter “CY” will be displayed on the screen. In the weekly timer function, press the DELAY button once, the display COPY will read “ “. Press this button twice, the display will read " ".
-
Page 16: Fault Code Definition
12. FAULT CODE DEFINITION 12. FAULT CODE DEFINITION If the system does not operate correctly, the following faults may be evident. Investigate the system fault in accordance to the following fault codes. FAULT CODE FAULT CODE FAULT CODE DESCRIPTION FAULT CODE DESCRIPTION DISPLAYED DISPLAYED Communication error between wired control...
Need help?
Do you have a question about the B061526 and is the answer not in the manual?
Questions and answers