Table of Contents
Advertisement
GB
Imperial Electric Fires
IE
MODELS:
Flamescape II Curvascape II manual & remote.
Installation and User Instructions
PLEASE READ THESE INSTRUCTIONS CAREFULLY
AND RETAIN FOR FUTURE REFERENCE
This electric fire has been made with great care. Here are some instructions including cleaning
and maintenance, which will help you keep your fire in good condition for many years. If you experience
any parts or service problems contact your retailer.
This appliance is not intended for use by persons (including children) with reduced physical, sensory or
mental capabilities, or lack of experience and knowledge, unless they have been given supervision or
instruction concerning use of the appliance by a person responsible for their safety. Children should be
supervised to ensure that they do not play with the appliance.'
This is an amendment to the standard and now applies to all EN60335 or later approved products.
WARNING
TURN OFF APPLIANCE AT MAINS AND UNPLUG FROM SOCKET OR REMOVE FUSE
FROM SWITCHED ISOLATOR BEFORE REPLACING LAMPS.
LAMPS MAY BE HOT - ALLOW TO COOL BEFORE REMOVING LAMP GUARD.
Created and Manufactured in the UK By
Imperial Fires Ltd
Saxon Business Park, Stoke Prior, Bromsgrove, Worcestershire B60 4AD UK
Telephone: +44(0)1527 577800
Web: imperial-fires.co.uk
Email: sales@widney-leisure.co.uk
The product complies with the European Safety Standards EN 60335 -1,EN60335-2-30 and the essential requirements of EEC Directives 73/23 and 89/336
1
Advertisement
Table of Contents

Subscribe to Our Youtube Channel
Related Manuals for Imperial Fires Flamescape II


Summary of Contents for Imperial Fires Flamescape II
- Page 1 Imperial Electric Fires MODELS: Flamescape II Curvascape II manual & remote. Installation and User Instructions PLEASE READ THESE INSTRUCTIONS CAREFULLY AND RETAIN FOR FUTURE REFERENCE This electric fire has been made with great care. Here are some instructions including cleaning and maintenance, which will help you keep your fire in good condition for many years.
-
Page 2: This Appliance Must Be Earthed
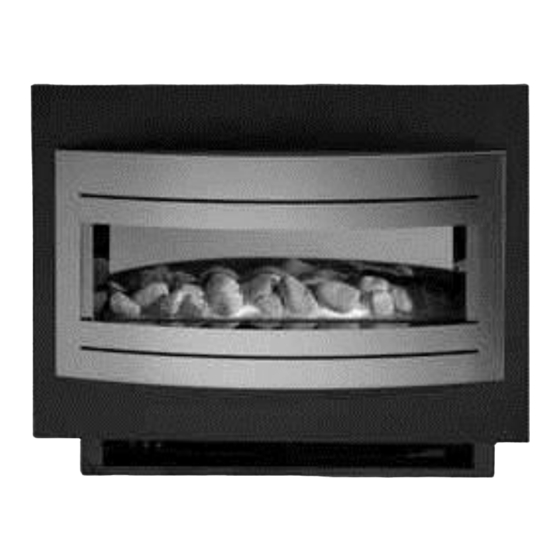
YOUR FIRE The Curvascape II and Flamescape II ranges are available with real flame effect or light effect with incandescent lamps. They are available in several different facia trims and optional remote control. Diagrams shown in these instructions represent the Curvascape II manual variant unless stated. - Page 3 The appliance can either be fixed to a flat vertical wall or inset – please refer to the instructions below. All Curvascape II and Flamescape II variants FLAT WALL FIXING Wall fixing -The appliance should be securely fixed to the wall using wall plugs and screws suitable to fit the 5mm hole in the hanging bar.
- Page 4 7. At the top of the fire is a hanging lip that is designed to fit over the upturned lip on the wall hanger; hang the fire onto this lip. 8. To fix the fire permanently to the wall there is a tab at the rear of the fire on the bottom right hand side (viewed from the front) shown in the diagram right that should be...
-
Page 5: Fitting The Facia
For Curvascape II models care should be taken when fitting the facia so as not to damage the chrome trim or the fire fuel bed. For Flamescape II models the glass panel fits to the fire in the same way as the Curvascape II. -
Page 6: Manual Operation
SECTION 2: ELECTRIC FIRE OPERATION CURVASCAPE II AND FLAMESCAPE II MANUAL Manual operation: ON - OFF Light Only The three switches control the following: Left hand switch - light effect only- ( = ON; 0 = OFF) Middle switch -1kW Heat setting ( I = ON 1kW; 0 = OFF) Right hand switch - 2 kW Heat Setting. -
Page 7: Remote Operation
FLAMESCAPE II REMOTE CONTROL Remote operation: On first use insert the batteries into the remote control handset—see battery replacement section. With the mains supply connected to the fire and switched on the fire can be operated. By pressing the ON/OFF button the operational features of the fire are ON/OFF enabled;... -
Page 8: Section 3: Maintenance And Cleaning
SECTION 3: MAINTENANCE AND CLEANING DISCONNECT THE FIRE FROM THE SUPPLY BEFORE CLEANING OR CARRYING OUT ANY MAINTENANCE CLEANING Warning: If the air inlet becomes covered with dust the fire may cut out. This is a safety feature. Refer to Safety Cut-out information for further action. IMPORTANT NOTICE. -
Page 9: Remote Handset Battery Replacement
5 minutes to reset once activated - do not switch the fire on until the above checks have been completed. 4. If the fault persists contact your retailer or Imperial Fires Customer Service on the telephone numbers provided at the beginning of these instructions. -
Page 10: Overall Dimensions
Dimensions OVERALL DIMENSIONS Height Width Depth Curvascape II Inset / Flamescape II Inset Stainless Trim Curvascape II Inset / Flamescape II Inset Glass Trim Curvascape II Wall Mounted / Flamescape II Wall Mounted Stainless Trim Curvascape II Wall Mounted /... -
Page 11: Short Parts List
SHORT PARTS LIST Short Parts List Item Part Number Quantity per Fire Light Lamp 25w Max SES - Clear I00456 2 / 1 Remote Control Kit I00942 Remote Control Battery AAA or equivalent I00572 1 pack of 2 Mains Cord UK Plug MAINS CORD: If the mains I00467 supply cord is damaged it must be replaced by a competent electrician or similarly qualified... - Page 12 Imperial Fires Ltd Saxon Business Park, Stoke Prior, Bromsgrove, Worcestershire B60 4AD UK Telephone: +44(0)1527 577800 Web: imperial-fires.co.uk Email: sales@widney-leisure.co.uk...
- Page 13 If you experience any parts or service problems contact either your retailer or IMPERIAL FIRES LTD. IMPERIAL FIRES LTD. Saxon Business Park, Hanbury Road, Stoke Prior, Bromsgrove B60 4AD.
-
Page 14: Electrical Installation
ELECTRICAL INSTALLATION: THIS APPLIANCE MUST BE EARTHED Check that the voltage stated on the rating label of your fire at the rear is the same as your house electricity supply which must be AC (alternating current). The mains cord of the fire has a UK type plug fitted with a 13amp fuse. When replacing a fuse, use a 13amp fuse approved to BS 1362. -
Page 15: Fireplace Installation
FIREPLACE INSTALLATION: THIS FIRE MUST BE INSTALLED IN A FIREPLACE OPENING Your IMPERIAL fire is designed to fit into a bespoke fireplace opening. Before installing, thoroughly clean the fireplace and ensure debris and dust cannot enter the fire. The fire should be installed into an aperture 640mm wide x 502mm high. The fireplace must have a minimum depth of 200mm from the front edge to the rear wall to allow for air to move freely around the appliance. - Page 16 FUEL and FLAME EFFECT: The flame effect can be used without heat. Depress the first switch on the left. HEAT Model 1Kw Depress the left and middle switches for cool air or depress all three for full heat Model 1.5Kw & 2Kw Depress the left and middle switches for 750w / 1Kw or depress all 3 switches for 1.5 or 2Kw heat ( dependant on model).
-
Page 17: Lamp Replacement
(The thermal cut-out will take approximately 5 minutes to reset once activated—do not switch the fire on until the above checks have been completed. If the fault persists contact your retailer or Imperial Fires Customer Service on the telephone numbers provided at the beginning of these instructions. -
Page 18: Maintenance
Only genuine IMPERIAL spares should be used, and these can normally be obtained from your retailer. If you have any problems contact IMPERIAL FIRES at the address on the front of these instructions. Below is a list of the most common parts. - Page 19 Imperial fires Ltd Imperial fires reserves the right to refuse warranty for any product returned that does not have valid proof of date of purchase: Please return your original sales invoice with any returned product This guarantee does not effect your statutory rights.
-
Page 20: Packing List
Packing list Glove (If Applicable) Cast Grate (If Applicable) Affix Second Data Label here Coal Pack (If Applicable) Pebble Pack (If Applicable) Fixing Bracket (If Applicable) White Fuel Pack (If Applicable) Packed By Date Model Type: 1kW 1.5kW 2kW...
Need help?
Do you have a question about the Flamescape II and is the answer not in the manual?
Questions and answers