
Related Manuals for Alfa Laval Micro STC


Summary of Contents for Alfa Laval Micro STC
- Page 1 Installation, service and operating instruction Alfa Laval Micro DOC-1347 Rev: 1 December 2014...
- Page 2 Installation, service and operating instruction Alfa Laval Micro Swedish (SV) Installation, service och driftinstruktion Alfa Laval Micro French (FR) Consignes d'installation, d'entretien et d'exploitation pour Alfa Laval Micro Dutch (NL) Instructies voor installatie, onderhoud en bediening van de Alfa Laval Micro...
- Page 3 Installation, service and operating instruction Alfa Laval Micro Heating & domestic hot water substation for apartments and single family houses DOC-1355, 17th September 2014...
-
Page 5: Table Of Contents
Micro STC and Micro STC2 warnings .......................7 Operating instructions ......................8 General operation ............................8 Heating operation Alfa Laval Micro STC and Alfa Laval Micro STC2 ............8 Heating operation Alfa Laval Micro RTC ....................8 Safety equipment/inspection ........................8 Product overview ........................9 Product overview AquaMicro ........................9... - Page 6 Grundfos Alpha2L settings ........................47 16.2 Pump curve ............................48 Electrical circuit diagram ....................49 17.1 Micro RTC .............................. 49 17.2 Micro STC and Micro STC2 ........................50 Schematic diagram, main components ................51 18.1 AquaMicro .............................. 51 18.2 Micro DPC .............................. 51 18.3 Micro RTC ..............................
- Page 7 Operating data and performance ..................64 21.1 Operating data ............................64 21.1.1 AquaMicro ............................64 21.1.2 Micro DPC, Micro RTC, Micro HTC, Micro STC, Micro STC2 ............64 21.2 Technical Data............................65 21.3 Measure sketch ............................66 Options ..........................67 22.1...
-
Page 8: General Information
Alfa Laval Micro is a complete, ready-to-install heating network substation for hot water and heating. It is designed for buildings with a connection to a heating network. Alfa Laval has years of experience in heating network technology and has developed Alfa Laval Micro with well-planned pipe work and with all components easily accessible for inspection and possible future servicing. -
Page 9: General Warnings
Open up the valves slowly to avoid pressure surges. Micro STC and Micro STC2 warnings Before the substation is connected to the electrical supply, make sure that the heating system is topped up with water. -
Page 10: Operating Instructions
Heating operation Alfa Laval Micro STC and Alfa Laval Micro STC2 With an Alfa Laval Micro STC or an Alfa Laval Micro STC 2, the heating circuit is controlled in relation to outdoor temperature (option) and/or desired room temperature by means of a room thermostat and temperature sensor. -
Page 11: Product Overview
Alfa Laval Micro Installation, service and operating instruction 3 Product overview Note: The product overview pictures are shown without the insulation. Product overview AquaMicro Picture 1 Heat exchanger and temperature Adapter for Hot water flow meter controller for hot water... -
Page 12: Product Overview Micro Dpc
Alfa Laval Micro Installation, service and operating instruction Product overview Micro DPC Picture 2 Heat exchanger and temperature Heating network media, supply controller for hot water Control valve for hot water Heating network media, return Temperature sensor connection, Cold water (cw) -
Page 13: Product Overview Micro Rtc
Alfa Laval Micro Installation, service and operating instruction Product overview Micro RTC Picture 3 Heat exchanger and temperature Cold water outlet (cw) controller for hot water Control valve for hot water Hot water (hw) Temperature sensor connection, Differential pressure controller... -
Page 14: Product Overview Micro Stc
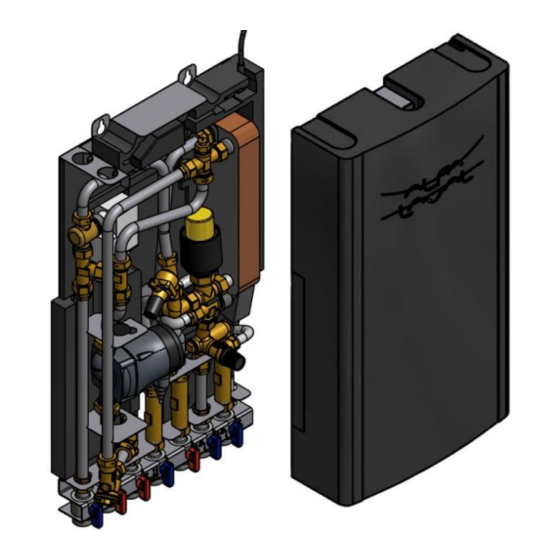
Alfa Laval Micro Installation, service and operating instruction Product overview Micro STC Picture 4 Heat exchanger and temperature Differential pressure controller controller for hot water Control valve for hot water Heating circuit, return Temperature sensor connection, Heating circuit, supply heating media supply... -
Page 15: Product Overview Micro Stc2
Alfa Laval Micro Installation, service and operating instruction Product overview Micro STC2 Picture 5 Heat exchanger and temperature Heating circuit, return controller for hot water Control valve for hot water Heating circuit, supply Temperature sensor connection, Control valve, heating circuit... -
Page 16: Product Overview Micro Htc
Alfa Laval Micro Installation, service and operating instruction Product overview Micro HTC Picture 6 Heat exchanger and temperature Heating network media, return controller for hot water Control valve for hot water Cold water (cw) Temperature sensor connection, Cold water outlet (cw) -
Page 17: Installation
Alfa Laval Micro Installation, service and operating instruction 4 Installation Unpacking Remove the transport packaging and check that the product has not been damaged in transit and that the consignment agrees with the specifications. When lifting the unit take care not to apply stress to pipes and heat exchanger as this may weaken them. -
Page 18: Mounting Options General
Mounting options Micro RTC 6 Installing the CM721 wireless system. 4.4.2 Mounting options Micro STC 5 Installing the room thermostat CM737. Mount the outdoor temperature sensor (option) on the north side of the building, 2 metres above the ground, or higher. -
Page 19: Adjustments And Setting General
Set point °C (approx.) Alfa Laval recommends that the tap water temperature is set to 10º less than the primary inlet temperature. If a HTC the temperature must be 15º less than the primary inlet temperature. NOTE: Make sure that no cold water is mixed with the hot water while making this adjustment. -
Page 20: Installing The Room Thermostat Cm737
Time change buttons 5 Temperature display Holiday function button Micro STC and Micro STC2 with CM737 are supplied fully wired. The wiring conforms to the applicable rules for CE marking and has undergone electrical safety tests testing and function tests. OK-button (9) When changing settings/values in CM737 the numbers in the display is flashing. -
Page 21: Installing The Room Thermostat
Alfa Laval Micro Installation, service and operating instruction Installing the room thermostat Before installation make sure that the electrical power supply is disconnected. Install the room thermostat in the living space according to following: A suitable installation is about 1.5 meters above floor and on... - Page 22 Alfa Laval Micro Installation, service and operating instruction Picture 12...
-
Page 23: Installing The Outdoor Temperature Sensor (Option)
Alfa Laval Micro Installation, service and operating instruction Installing the outdoor temperature sensor (option) Connect the outdoor temperature sensor to the terminal strip in accordance with the electrical diagram, remove any resistor. If the outdoor temperature sensor is connected at a later time, for example in a construction period, the current must be disconnected for a few minutes. -
Page 24: Setting The Time
Alfa Laval Micro Installation, service and operating instruction b) Press the buttons to set the current month of the year (e.g. m 01 = January) then press the green button to confirm. c) Press the buttons to set the current year (e.g. yr. -
Page 25: Installing The Cm721 Wireless System
Alfa Laval Micro Installation, service and operating instruction 6 Installing the CM721 wireless system General Note: The individual room thermostat (CM721) and relay box (BDR91) in system packs is pre-configured at the factory and therefore SHOULD be installed at the same site. -
Page 26: Relay Box Bdr91
Alfa Laval Micro Installation, service and operating instruction Info-button (7) Operating with outdoor compensation, target room temperature is shown on the display Press the Info-button to review: target room temperature error code, if any measured supply water temperature After ca. -
Page 27: Preparing The Room Thermostat
Alfa Laval Micro Installation, service and operating instruction Preparing the room thermostat 6.5.1 Installing the batteries The thermostat constantly monitors the battery power level, which typically lasts for about 2 years before needing replaced. When the power is running low a flashing symbol will be displayed on the screen. -
Page 28: Rf Communication Check (Test Mode)
Alfa Laval Micro Installation, service and operating instruction RF Communication check (test mode) To check the RF communication: 1. Hold the room thermostat about 2-3 meters from the installed relay box. Picture 16 2. On the room thermostat, press the OFF button, then press the buttons together with the button for 3 seconds. -
Page 29: System Check
7. The installation is completed. 8. Choose operating mode, see 8.1 Choosing the operating mode. Alfa Laval recommends MAN mode. 9. The room thermostat has been set at the factory. If any function needs tuning, values can be changed with see 12.3 CM721–... -
Page 30: Binding/Rebinding The Cm721
Alfa Laval Micro Installation, service and operating instruction 7 Binding/rebinding the CM721 The binding operation is required if: Any of the system components (room thermostat or relay box) are replaced. The relay box has incorrect or no binding data stored e.g. when pre-bound system pack components have been mismatched. - Page 31 Alfa Laval Micro Installation, service and operating instruction Picture 22 Set Room Unit into binding mode Picture 23 Send the binding signal 6. Press the green button to send the binding signal out to the relay box. The red LED is switched off to confirm successful binding operation.
-
Page 32: Running The Room Thermostat Cm737 And Cm721
To set the operating mode press either of the AUTO, MAN or OFF buttons. The screen indicates which mode is currently active by displaying AUTO, MAN or OFF. NOTE: Alfa Laval recommends the mode MAN. AUTO (automatic) the room thermostat follows the built-in temperature program, default or modified. -
Page 33: Reviewing The Heating Program
Alfa Laval Micro Installation, service and operating instruction Reviewing the Heating Program To review or edit the heating program use the PROGRAM buttons to navigate between the four individual programming periods. Room thermostat CM737: Use the DAY button to step through each day of the week, so the complete 7 day heating program can be reviewed or edited. -
Page 34: Modifying The Heating Program In The Room Thermostat Cm721
Alfa Laval Micro Installation, service and operating instruction Modifying the heating program in the room thermostat CM721 To change the heating program: a) Press either of the PROGRAM buttons to enter the programming mode. The time /temperature settings for period will be flashing. -
Page 35: Special Functions For The Cm737
Alfa Laval Micro Installation, service and operating instruction 9 Special functions for the CM737 OTC heating curve The CM737 controls the indoor temperature as a Heat curve 10 (15:OC) has been set at the factory. function of the measured outside air temperature. -
Page 36: Basic Operation Of The System Cm721
Alfa Laval Micro Installation, service and operating instruction 10 Basic operation of the system CM721 10.1 Setting one temperature for the whole day To operate as a simple thermostat with one temperature throughout the day, select the manual operating mode by pressing the MAN button. -
Page 37: Special Functions For Cm721
Alfa Laval Micro Installation, service and operating instruction 11 Special functions for CM721 11.1 Service indicator NOTE: This option only works if activated by the installer. The 'SERVICE' indicator is displayed at set intervals as a reminder to make a routine check of the heating system. -
Page 38: Activation Of Installer Parameters
Alfa Laval Micro Installation, service and operating instruction 12 Activation of installer parameters Installer Mode is used to alter the system settings for specific applications, to use the special features of the room thermostat in a different way or to alter the factory present parameters. Parameters are divided into groups: ... -
Page 39: Cm737-Installer Parameters Table
Alfa Laval Micro Installation, service and operating instruction 12.2 CM737-Installer parameters table 12.2.1 CM737-Category 1: Room Thermostat Settings Parameter Para Factory Default Setting Optional Setting meter Display Description Display Description 12 hr. – AM/PM clock display AM-PM / 24hr 1:CL 24 hr. -
Page 40: Cm737-Category 2: System Settings
Alfa Laval Micro Installation, service and operating instruction 12.2.2 CM737-Category 2: System Settings Parameter Para Factory Default Setting Optional Setting meter Display Description Display Description Summer heating in 1:SH Summer heating 1 to 40 Minimum set point for the OTC mode... -
Page 41: Cm737-Category 4: Transparent Boiler Parameter
Alfa Laval Micro Installation, service and operating instruction 12.2.4 CM737-Category 4: Transparent Boiler Parameter Parameter Para Factory Default Setting Optional Setting meter Display Description Display Description P_heat Proportional band I_heat Integral factor 0.1 / minute Run time valve Time needed to open... -
Page 42: Cm721- Installer Parameters Table
Alfa Laval Micro Installation, service and operating instruction 12.3 CM721– Installer parameters table 12.3.1 CM721- Category 1: Room Thermostat Settings Parameter Parameter Factory Default Setting Optional Setting Display Description Display Description 12 hr. – AM/PM clock AM-PM / 24hr 1:CL 24 hr. -
Page 43: Cm721- Category 2: System Settings
Alfa Laval Micro Installation, service and operating instruction 12.3.2 CM721- Category 2: System Settings Parameter Parameter Factory Default Setting Optional Setting Display Description Display Description Minimum boiler 1:Ot 1 minute minimum ON 2 to 5 Selection of 2, 3, 4 or 5... -
Page 44: Troubleshooting The Cm737
Alfa Laval Micro Installation, service and operating instruction 13 Troubleshooting the CM737 Symptom Possible Cause Remedy The CM737 receives power The CM737 is not connected to supply from the heating the correct terminals of the A flashing symbol appliance, but no information. -
Page 45: Fault Codes On The Cm737
Alfa Laval Micro Installation, service and operating instruction 13.1 Fault Codes on the CM737 If a spanner is visible on the display there is an on ongoing alarm. Press the Info-button to view the fault code. Error source Error code... -
Page 46: Troubleshooting The Cm721
Display shows symbol. If the symbol does not clear after a few minutes contact Alfa Laval. Display shows the The installer has set a scheduled Call your installer to arrange a word 'SERVICE' maintenance alert period on your maintenance visit. -
Page 47: Diagnostic Mode, Cm721
Alfa Laval Micro Installation, service and operating instruction 14.1 Diagnostic mode, CM721 The CM721 room thermostat has a user accessible mode that provides information useful to a remote service person and a means of checking whether the boiler is working. -
Page 48: Differential Pressure Control Valve, Dpc
Alfa Laval Micro Installation, service and operating instruction 15 Differential pressure control valve, DPC Adjusting the DPC must be carried out by an authorized service technician. 15.1 Setting the DPC valve Set the valve to the differential pressure 25kPa. Start with the valve at minimum position and then open with 3 numbers of turns. -
Page 49: Pump Settings And Pump Performance
Alfa Laval Micro Installation, service and operating instruction 16 Pump settings and pump performance The Micro STC is equipped with a Grundfos Alpha2L pump. 16.1 Grundfos Alpha2L settings Picture 35 Settings Pump curve Function Lowest proportional The duty point of the pump will move up or down on the lowest pressure curve proportional-pressure curve, depending on the heating demand. -
Page 50: Pump Curve
Alfa Laval Micro Installation, service and operating instruction 16.2 Pump curve Picture 36... -
Page 51: Electrical Circuit Diagram
Alfa Laval Micro Installation, service and operating instruction 17 Electrical circuit diagram 17.1 Micro RTC Picture 37... -
Page 52: Micro Stc And Micro Stc2
Alfa Laval Micro Installation, service and operating instruction 17.2 Micro STC and Micro STC2 Picture 38... -
Page 53: Schematic Diagram, Main Components
Alfa Laval Micro Installation, service and operating instruction 18 Schematic diagram, main components 18.1 AquaMicro Picture 39 18.2 Micro DPC Picture 40... -
Page 54: Micro Rtc
Alfa Laval Micro Installation, service and operating instruction 18.3 Micro RTC Picture 41 18.4 Micro STC Picture 42... -
Page 55: Micro Stc2
Alfa Laval Micro Installation, service and operating instruction 18.5 Micro STC2 Picture 43 18.6 Micro HTC Picture 44... -
Page 56: Service Instructions
Alfa Laval Micro Installation, service and operating instruction 19 Service instructions Always start with the general service instruction before the specific instructions for each model. To avoid the risk of scalding, make sure that no-one draws any water while servicing the substation. -
Page 57: Stc Service Instructions
Alfa Laval Micro Installation, service and operating instruction Symptom Reason Action Heating system Filter for heating media clogged 19.5.2 Check if the filter for heating media is temperature too blocked. high or too low 15 Differential pressure control valve, DPC. - Page 58 Alfa Laval Micro Installation, service and operating instruction Symptom Reason Action No heating Circulation pump not running Check that the electrical power is on Check the circulation pump If the pump fails to start after stopping, try to start it at the highest setting.
-
Page 59: Rtc Service Instructions
Alfa Laval Micro Installation, service and operating instruction 19.3 RTC service instructions Symptom Reason Action Heating system Check and adjust the heating program in the The heating control equipment may temperature too room thermostat. need to be adjusted high or too low 8.6 Modifying the heating program in the... -
Page 60: Check If The Filter For Heating Media Is Blocked
Alfa Laval Micro Installation, service and operating instruction 19.5.2 Check if the filter for heating media is blocked Service actions must be carried out by an authorized service technician. Before starting out repairs always close the primary supply and return shutoff valves and drain the system with the draining valves. -
Page 61: Check The Actuator And Valve Function
Alfa Laval Micro Installation, service and operating instruction 19.5.4 Check the actuator and valve function Service actions must be carried out by an authorized service technician. Check the actuator and valve function Check the actuator by pulling out the electrical cable and refit it again;... -
Page 62: Maintenance And Repairs
Alfa Laval Micro Installation, service and operating instruction 20 Maintenance and repairs When carrying out repairs, please contact your local service partner. 20.1 Change the hot water actuator and exchanger Maintenance and repairs must be carried out by an authorized service technician. -
Page 63: Change The Heating Actuator
Alfa Laval Micro Installation, service and operating instruction 20.3 Change the heating actuator Maintenance and repairs must be carried out by an authorized service technician. 1. Disconnect the electrical power supply. 2. Unscrew the heating actuator from the valve. 3. Disconnect the cable from heating actuator in the connection box. -
Page 64: Change The Pump
Alfa Laval Micro Installation, service and operating instruction 20.5 Change the pump Maintenance and repairs must be carried out by an authorized service technician. Before starting out repairs always close the primary supply and return shutoff valves and drain the system with the draining valves. -
Page 65: Change The Differential Pressure Control Valve
Alfa Laval Micro Installation, service and operating instruction 20.8 Change the differential pressure control valve Maintenance and repairs must be carried out by an authorized service technician. Before starting out repairs always close the primary supply and return shutoff valves and drain the system with the draining valves. -
Page 66: Operating Data And Performance
Hot water circuit 80-25/10-55 0,34 0,42 70-25/10-58 0,19 0,18 65-25/10-50 0,33 0,33 21.1.2 Micro DPC, Micro RTC, Micro HTC, Micro STC, Micro STC2 Performance at available differential pressure 50-400 kPa Designed Capacity Primary Actual Secondary temperature (kW) flow return temp. -
Page 67: Technical Data
400x120x630 (mm, WxDxH) Without cover Weight 12-15kg, cover 2kg Electrical connection 230 V, 1-phase, 50 W Micro STC & Micro STC2 230 V, 1-phase, 25 W Micro RTC 230 V, single phase, 2 W Micro HTC Transportation Total weight 19-22 kg, 0.08 m³... -
Page 68: Measure Sketch
Alfa Laval Micro Installation, service and operating instruction 21.3 Measure sketch Picture 58... -
Page 69: Options
1°C steps 22.2 First fix-jig To save time and efficiency the installation, Alfa Laval offers a first-fix- jig including shut-off valves. The first fix- jig is available in three different models, with five, six or seven shut-off valves. Picture 62... -
Page 70: Declaration Of Conformity
Alfa Laval Micro Installation, service and operating instruction 23 Declaration of conformity... - Page 71 Installation, service och driftinstruktion Alfa Laval Micro Värme och varmvattencentral för lägenheter och enfamiljshus DOC-1356: 1 december 2014...
- Page 73 Generella varningar ...........................7 Micro STC och Micro STC2 varningar ......................7 Driftinstruktioner ........................8 Drift ................................8 Värmedrift med Alfa Laval Micro STC och Alfa Laval Micro STC2 ............8 Värmedrift med Alfa Laval Micro RTC .......................8 Säkerhetsutrustning/kontroll ........................8 Allmänt ..........................9 Produktöversikt AquaMicro ........................9 Produktöversikt Micro DPC ........................
- Page 74 Grundfos Alpha2L pumpinställningar ..................... 47 16.2 Pump kurva ............................48 Elschema ..........................49 17.1 Micro RTC .............................. 49 17.2 Micro STC and Micro STC2 ........................50 Schematiskt diagram, huvudkomponenter ............... 51 18.1 AquaMicro .............................. 51 18.2 Micro DPC .............................. 51 18.3 Micro RTC ..............................
- Page 75 Byt ut flödesvakten ..........................63 Driftdata och prestanda ...................... 64 21.1 Driftsdata ..............................64 21.1.1 AquaMicro ............................64 21.1.2 Micro DPC, Micro RTC, Micro HTC, Micro STC, Micro STC2 ............64 21.2 Tekniskdata ............................65 21.3 Måttskiss ..............................66 Tillval ........................... 67 22.1 Golvvärmetermostat ..........................
-
Page 76: Allmän Information
Installation, service och driftinstruktion 1 Allmän information Alfa Laval Micro är en komplett värmecentral för värme och varmvatten, klar för installation. Den passar för lägenheter och enfamiljshus som är anslutna till ett värmenätverk. Alfa Laval har flera års erfarenhet av fjärrvärmeteknik och har utvecklat Alfa Laval Micro med genomtänkta rördragningar och alla komponenter lättåtkomliga för underhåll och eventuell framtida service. -
Page 77: Generella Varningar
Vid uppstart av värmesystemet: öppna värmenätverk tillopp och därefter retur, detta för att undvika att föroreningar kommer in i systemet. Öppna avstängningsventilerna långsamt för att undvika tryckstötar. Micro STC och Micro STC2 varningar Innan värmecentralen ansluts elektriskt ska värmesystemet på sekundärsidan vara påfyllt. Startas systemet upp utan vatten kommer cirkulationspumpen att skadas. -
Page 78: Driftinstruktioner
Värmedrift med Alfa Laval Micro STC och Alfa Laval Micro STC2 Med en Alfa Laval Micro STC eller en Alfa Laval Micro STC2, styrs värmekretsen av utomhustemperaturen och/eller den önskade rumstemperaturen genom en rumstermostat och en utetemperaturgivare (tillval). Det automatiska kontrollsystemet stannar pumpen när ingen uppvärmning behövs. -
Page 79: Allmänt
Alfa Laval Micro Installation, service och driftinstruktion 3 Allmänt OBS! Produktöversikts bilderna visar inte den isolerade ramen. Produktöversikt AquaMicro Bild 1 Värmeväxlare, inkl. utrustning för Passbit, varmvattenmätare temperaturreglering av varmvatten2 Reglerventil, varmvatten Värmenätverk, tillopp Anslutning för temperaturgivare, värmenätverk Värmenätverk, retur tillopp Filter, värmenätverk... -
Page 80: Produktöversikt Micro Dpc
Alfa Laval Micro Installation, service och driftinstruktion Produktöversikt Micro DPC Bild 2 Värmeväxlare, inkl. utrustning för Värmenätverk, tillopp temperaturreglering av varmvatten2 Reglerventil, varmvatten Värmenätverk, retur Anslutning för temperaturgivare, värmenätverk Kallvatten, inlopp tillopp Filter, värmenätverk Kallvatten, utlopp Passbit, energimätare Varmvatten Backventil kallvatten Differenstrycksregulator Passbit, kallvattenmätare... -
Page 81: Produktöversikt Micro Rtc
Alfa Laval Micro Installation, service och driftinstruktion Produktöversikt Micro RTC Bild 3 Värmeväxlare, inkl. utrustning för Kallvatten, utlopp temperaturreglering av varmvatten2 Reglerventil, varmvatten Varmvatten Anslutning för temperaturgivare, värmenätverk Differenstrycksregulator tillopp Filter, värmenätverk Värmekrets, retur Passbit, energimätare Värmekrets, tillopp Backventil kallvatten Flödesvakt... -
Page 82: Produktöversikt Micro Stc
Alfa Laval Micro Installation, service och driftinstruktion Produktöversikt Micro STC Bild 4 Värmeväxlare, inkl. utrustning för Differenstrycksregulator temperaturreglering av varmvatten2 Reglerventil, varmvatten Värmekrets, retur Anslutning för temperaturgivare, värmenätverk Värmekrets, tillopp tillopp Filter, värmenätverk Flödesvakt Passbit, energimätare Styrventil, värmekrets Backventil kallvatten Ställdon, värmekrets... -
Page 83: Produktöversikt Micro Stc2
Alfa Laval Micro Installation, service och driftinstruktion Produktöversikt Micro STC2 Bild 5 Värmeväxlare, inkl. utrustning för Värmekrets, retur temperaturreglering av varmvatten2 Reglerventil, varmvatten Värmekrets, tillopp Anslutning för temperaturgivare, värmenätverk Styrventil, värmekrets tillopp Filter, värmenätverk Ställdon, värmekrets Passbit, energimätare Kopplingsbox för el och givare, värmekrets... -
Page 84: Produktöversikt Micro Htc
Alfa Laval Micro Installation, service och driftinstruktion Produktöversikt Micro HTC Bild 6 Värmeväxlare, inkl. utrustning för Värmenätverk, retur temperaturreglering av varmvatten2 Reglerventil, varmvatten Kallvatten, inlopp Anslutning för temperaturgivare, värmenätverk Kallvatten, utlopp tillopp Filter, värmenätverk Varmvatten Passbit, energimätare Differenstrycksregulator Backventil kallvatten Värmekrets, retur... -
Page 85: Montering Och Installation
Alfa Laval Micro Installation, service och driftinstruktion 4 Montering och installation Uppackning Ta bort förpackningsmaterialet och kontrollera att produkten inte har skadats under transporten samt att leveransen stämmer med specifikationerna. Lyft enheten försiktig så att rör och värmeväxlaren inte utsätts för påfrestningar, detta kan försvaga dem. -
Page 86: Montering Av Tillval Allmänt
4.4.1 Montering av tillval Micro RTC 6 Installation av rumstermostat CM721. 4.4.2 Montering av tillval Micro STC 5 Installation av rumstermostat CM737. Montera utetemperaturgivaren(tillval) på byggnadens norra sida, 2 meter från marken eller högre. För inkoppling av utetemperaturgivaren. Se 5.4 Installation av utetemperatur givaren... -
Page 87: Justering Och Inställning Allmänt
Rekommenderad inställning är 5 eller 6. Inställning °C (ca) Alfa Laval rekommenderar att varmvattentemperaturen ställs in på 10° lägre än värmenätverket tilloppstemperatur. Med en HTC måste temperaturen vara 15° lägre än värmenätverkets tillopps- temperatur. OBS: Se till att inget kallvatten blandas med varmvattnet när denna justering utförs. -
Page 88: Installation Av Rumstermostat Cm737
14 Tidsförändrings knappar Temperaturvisning 10 Semester funktionsknapp Micro STC och Micro STC2 med CM737 levereras med färdigkopplade ledningar. Kopplingarna uppfyller gällande regler för CE-märkning och har genomgått elsäkerhetstest och funktionstest. OK-knappen (9) När inställningar/värden ändrats i rumstermostaten blinkar siffrorna på displayen. -
Page 89: Installation Av Rumstermostaten
Alfa Laval Micro Installation, service och driftinstruktion Installation av rumstermostaten Innan installation måste matningsspänningen till termostaten vara bruten. Rumstermostaten monteras på lämplig plats som är representativ för inomhustemperaturen. Lämplig placering är ca 1.5 meter över golv och på innervägg. - Page 90 Alfa Laval Micro Installation, service och driftinstruktion Bild 12...
-
Page 91: Installation Av Utetemperatur Givaren (Tillval)
Alfa Laval Micro Installation, service och driftinstruktion Installation av utetemperatur givaren (tillval) Anslut utetemperaturgivaren till kopplingslist i kopplingsboxen enligt elschemat, ta bort ev. motstånd. Ansluts utetemperaturgivaren vid ett senare tillfälle, t.ex. i en byggperiod, måste strömmen till CM737 brytas i några minuter. -
Page 92: Inställning Av Tid
Alfa Laval Micro Installation, service och driftinstruktion 3. Tryck på eller knapparna för att ställa in aktuellt år, ex. yr01 =2001, bekräfta genom att trycka på den gröna knappen. Datumet är nu lagrat. Inställning av tid 1. Tryck på eller knapparna en gång för att nå... -
Page 93: Installation Av Rumstermostat Cm721
Alfa Laval Micro Installation, service och driftinstruktion 6 Installation av rumstermostat CM721 Allmänt OBS: varje rumstermostat (CM721) är förkonfigurerad på fabrik med en reläbox (BRD91) och ska därför installeras tillsammans. Detta gör installation snabb och enkel, om de förkonfigurerade delarna blir separerade eller ihop blandade med andra delar kan de kopplas ihop igen. -
Page 94: Reläbox Bdr91
Alfa Laval Micro Installation, service och driftinstruktion Info-knappen (7) Vid utomhustemperaturkompensering visas önskad rumstemperatur direkt på displayen. Vid tryck på Info-knappen visas i följande ordning: önskad rumstemperatur eventuell felkod aktuell framledningstemperatur. Efter cirka fem sekunder återgår displayen till normalt läge och visar aktuell rumstemperatur. -
Page 95: Förberedelse Av Rumstermostaten
Alfa Laval Micro Installation, service och driftinstruktion Förberedelse av rumstermostaten 6.5.1 Installation av batteri Rumstermostaten visar hela tiden batterinivån. Batteriet varar ca 2 år innan det behöver bytas ut. När batteriets laddningsnivå blir låg visas en blinkande symbol på skärmen. -
Page 96: Radiokommunikations Test (Test Mode)
Alfa Laval Micro Installation, service och driftinstruktion Radiokommunikations test (test mode) För att testa radiokommunikationen: 1. Håll rumstermostaten 2-3 meter från den installerade reläboxen. Bild 16 2. Tryck på OFF knappen, tryck sen knapparna tillsammans med knappen i 3 sekunder. -
Page 97: System Test
7. Installationen är klar. 8. Välj drift läge, se 8.1 Välj driftläge. Alfa Laval rekommenderar driftläge MAN. 9. Rumstermostaten är fabriksinställd. Om någon funktion inte är tillfredsställande kan värdena ändras 12.3 CM721 - Installatörsparametrar. Till en början ska driftsättningen ske med fabriksinställningarna. -
Page 98: Koppla/ Koppla Ihop Cm721
Alfa Laval Micro Installation, service och driftinstruktion 7 Koppla/ koppla ihop CM721 Åter ihop parning krävs om: någon av systemkomponenterna (rumstermostat eller reläbox) byts ut reläboxen har felaktig eller ingen bindningsdata lagrade t.ex. när de förkonfigurerade delarna har blivit ihop blandade. - Page 99 Alfa Laval Micro Installation, service och driftinstruktion Bild 22 Sätt rumstermostaten i bindningsläge Bild 23 Skicka bindnings signal 6. På rumstermosten, tryck på den gröna knappen för att skicka bindnings signal till reläboxen. Den röda lysdioden är släckt för att bekräfta lyckad bindning. Om den röda lysdioden blinkar tryck på...
-
Page 100: Användning Av Rumstermostaten Cm737 Och Cm721
Rumstermostaten kan reglera i tre olika driftslägen; Automatik, Manuellt eller Av. Önskat driftläge väljs genom att trycka på antingen AUTO, MAN eller OFF knappen. Skärmen visar vilket driftläge som har valts. OBS: Alfa Laval rekommenderar driftläge MAN. AUTO (automatik) läget använder och följer tidsprogrammen, det förprogrammerade eller anpassade. -
Page 101: Kontrollera Värmeprogrammet
Alfa Laval Micro Installation, service och driftinstruktion Kontrollera värmeprogrammet För att kontrollera eller förändra värmeprogrammet, använd PROGRAM eller knapparna för att navigera mellan de fyra individuellt programmerade perioderna. Rumstermostat CM737: Använd DAY knappen för att stega igenom varje dag av veckan, så att det kompletta sju dagars program kan kontrolleras eller förändras. -
Page 102: Modifiering Av Värmeprogrammet I Rumstermostaten Cm721
Alfa Laval Micro Installation, service och driftinstruktion Modifiering av värmeprogrammet i rumstermostaten CM721 Att ändra grundprogrammet: 1. Tryck antingen på PROGRAM eller knapparna för att nå programmeringsläget. Tid/temperaturinställningarna för period , måndag dag 1, kommer blinka. Den aktuella perioden belyses med en blinkande fyrkant runt siffrorna i skärmens nedre kant och vald dag visas... -
Page 103: Specialfunktioner För Cm737
Alfa Laval Micro Installation, service och driftinstruktion 9 Specialfunktioner för CM737 Utomhuskompenseringens kurvlutning CM737 styr inomhustemperaturen som en Kurva 10 (parameter 15:OC) är fabriksinställd. funktion av aktuell utomhustemperatur. Kurvlutningen är ett förhållande mellan den uppmätta utomhustemperaturen och den kalkylerade framledningstemperaturen. -
Page 104: Normal Drift Av Cm721
Alfa Laval Micro Installation, service och driftinstruktion 10 Normal drift av CM721 10.1 Inställning av samma temperatur hela dagen För att fungera som en enkel termostat med samma temperatur under hela dagen, välj manuellt driftläge genom att trycka på MAN-knappen. -
Page 105: Specialfunktioner För Cm721
Alfa Laval Micro Installation, service och driftinstruktion 11 Specialfunktioner för CM721 11.1 Serviceindikering OBS: Denna funktion måste aktivera av din installatör. Indikeringen ”SERVICE” visas på displayen, med inställt intervall, som en påminnelse att genomföra rutinkontroller av värmesystemet. Indikeringen ”SERVICE” visas på displayen tills den återställs eller avaktiveras av din installatör. -
Page 106: Aktivering Av Installatörsparametrar
Alfa Laval Micro Installation, service och driftinstruktion 12 Aktivering av installatörsparametrar Installatörsläget används för att ändra systeminställningarna för specifika applikationer, för att använda de speciella funktionerna i rumstermostaten på ett annat sätt eller för att ändra fabriksinställda parametrar. Parametrar är indelade i grupper: ... -
Page 107: Cm737 - Installatörsparametrar
Alfa Laval Micro Installation, service och driftinstruktion 12.2 CM737 - Installatörsparametrar 12.2.1 CM737 - Kategori 1: Rumstermostat inställningar Parameter Para- Fabriksinställning Alternativa inställningar meter Display Beskrivning Display Beskrivning 12 timmars – AM/PM AM-PM/24 timmars 1: CL 24 timmars visning klockformat klockvisnings format Återställ tid/temp program... -
Page 108: Cm737 - Kategori 2 - Systeminställningar
Alfa Laval Micro Installation, service och driftinstruktion CM737 - Kategori 2 – Systeminställningar 12.2.2 Parameter Para- Fabriksinställning Alternativa inställningar meter Display Beskrivning Display Beskrivning Sommarvärme 1: SH Sommarvärme 1 till 40 1°C till 40°C justerbar med avstängd 1°C steg Sommarbegränsning... -
Page 109: Cm737 - Kategori 4 Parametrar: Inställningar Värme
Alfa Laval Micro Installation, service och driftinstruktion 12.2.4 CM737 - Kategori 4 parametrar: Inställningar värme Parameter Para- Fabriksinställning Alternativa inställningar meter Display Beskrivning Display Beskrivning P_värme Proportional band I_värme Integreringsfaktor 0.1 / minut Gångtid motorventil Gångtid för att 10 sekunder öppna eller stänga... -
Page 110: Cm721 - Installatörsparametrar
Alfa Laval Micro Installation, service och driftinstruktion 12.3 CM721 - Installatörsparametrar 12.3.1 CM721 - Kategori 1: Rumstermostat inställningar Parameter Para- Fabriksinställning Alternativa inställningar meter Display Beskrivning Display Beskrivning 12 timmars – AM/PM AM-PM/24 timmars 1: CL 24 timmars visning klockformat klockvisnings format Återställ tid/temp program... -
Page 111: Cm721 - Kategori 2 - Systeminställningar
Alfa Laval Micro Installation, service och driftinstruktion CM721 - Kategori 2 – Systeminställningar 12.3.2 Parameter Para- Fabriksinställning Alternativa inställningar meter Display Beskrivning Display Beskrivning Minimum ON tid 1:Ot 1 minuts minimum 2 till 5 Välj mellan 2, 3, 4 eller 5... -
Page 112: Felsökning Av Cm737
Alfa Laval Micro Installation, service och driftinstruktion 13 Felsökning av CM737 Symptom Tänkbar orsak Lösning CM737 är inte ansluten till rätt CM737 har matningsspänning plintar på reglercentrale. En blinkande symbol från värmecentralen, men ingen Kontrollera att kablarna är visas på skärmen inom 1 minut information. -
Page 113: Felkoder På Cm737
Alfa Laval Micro Installation, service och driftinstruktion 13.1 Felkoder på CM737 Finns det ett aktuellt larm, visas en skiftnyckel i displayen. Tryck på Info knappen för att läsa av felkoden. Felkoder Felkod Inget fel Framledningsgivare eller dess kablage Utomhusgivaren eller dess kablage Felaktig temperatur i kopplingsboxen Sekundär pump eller primär fjärrvärme... -
Page 114: Felsökning Av Cm721
Alfa Laval Micro Installation, service och driftinstruktion 14 Felsökning av CM721 Symptom Tänkbar orsak Lösning Skärmen visar Ingen matspänning till CM721. Kontrollera att batterierna är monterade ingenting. genom att ta bort batteriluckan. Kontrollera att batterierna är korrekt monterade. Byt batterierna. -
Page 115: Diagnostiskt Läge, Cm721
Alfa Laval Micro Installation, service och driftinstruktion 14.1 Diagnostiskt läge, CM721 Rumstermostaten CM721 har ett användarinställningsläge som ger information som är användbar för servicetekniker och ett medel för att kontrollera om pannan arbetar som den ska. 1. Tryck på Off-knappen, tryck sen och håll inne knappen i 5 sekunder. -
Page 116: Differenstrycksregulator, Dpc
Alfa Laval Micro Installation, service och driftinstruktion 15 Differenstrycksregulator, DPC 15.1 Inställning av differenstrycksregulator Ställ in differenstrycksregulator till 25kPa differenstryck. Starta med regulatorn i stängt läge och öppna sen 5 ¾ varv. Använd en 4mm insexnyckel. OBS: Utgå alltid från regulatorns min läge innan nya inställningar görs. -
Page 117: Pumpinställningar Och Pumpkapacitet
Alfa Laval Micro Installation, service och driftinstruktion Pumpinställningar och pumpkapacitet Micro STC och Micro STC2 är utrustad med en Grundfos Alpha2L pump. 16.1 Grundfos Alpha2L pumpinställningar Bild 35 Inställning Pumpkurva Funktion Lägsta kurva Pumpens driftspunkt kommer att röra sig längs den lägsta kurvan för proportionellt... -
Page 118: Pump Kurva
Alfa Laval Micro Installation, service och driftinstruktion 16.2 Pump kurva Bild 36... -
Page 119: Elschema
Alfa Laval Micro Installation, service och driftinstruktion 17 Elschema 17.1 Micro RTC Bild 37... -
Page 120: Micro Stc And Micro Stc2
Alfa Laval Micro Installation, service och driftinstruktion 17.2 Micro STC and Micro STC2 Bild 38... -
Page 121: Schematiskt Diagram, Huvudkomponenter
Alfa Laval Micro Installation, service och driftinstruktion 18 Schematiskt diagram, huvudkomponenter 18.1 AquaMicro Bild 39 18.2 Micro DPC Bild 40... -
Page 122: Micro Rtc
Alfa Laval Micro Installation, service och driftinstruktion 18.3 Micro RTC Bild 41 18.4 Micro STC Bild 42... -
Page 123: Micro Stc2
Alfa Laval Micro Installation, service och driftinstruktion 18.5 Micro STC2 Bild 43 18.6 Micro HTC Bild 44... -
Page 124: Serviceinstruktioner
Alfa Laval Micro Installation, service och driftinstruktion 19 Serviceinstruktioner Gör alltid de allmäna serviceinstruktionena före de model specifika instruktionerna. För att undvika skållningsrisk, se till att ingen använder tappvarmvatten medans service utförs. Grå markerade serviceåtgärder måste utföras av en auktoriserad servicetekniker. -
Page 125: Stc Serviceinstruktioner
Alfa Laval Micro Installation, service och driftinstruktion Symptom Orsak Åtgärd Filter, värmenätverk, igensatt 19.5.2 Kontrollera om filter värmenätverk är igensatt Värmesystemets temperatur är för hög Differenstrycksregulator felaktigt 15 Differenstrycksregulator, DPC. eller för låg justerad (option) Stängda radiator eller golvvärme Kontroller att alla radiator och golvvärme ventiler ventiler. - Page 126 Alfa Laval Micro Installation, service och driftinstruktion Symptom Åtgärd Orsak Cirkulationspumpen går inte Kontrollera att strömmen är påslagen Kontrollera cirkulationspumpen Om pumpen inte startar efter ett stopp försök att starta den på den högsta inställningen. Kontrollera inställda värmeparametrar i manöverpanelen Kategori 2, parameter 2: 2:SL sommarbegränsning.
-
Page 127: Rtc Serviceinstruktioner
Alfa Laval Micro Installation, service och driftinstruktion 19.3 RTC serviceinstruktioner Symptom Orsak Åtgärd Kontrollera och justera värmeprogrammet i Reglerutrustningen behöver rumstermostaten justeras 8.6 Modifiering av värmeprogrammet i rumstermostaten CM721 Värmesystemets temperatur är för hög Kontrollera att relät är på eller för låg Se 10.3 Tillfällig manuell kontroll... -
Page 128: Kontrollera Om Filter Värmenätverk Är Igensatt
Alfa Laval Micro Installation, service och driftinstruktion 19.5.2 Kontrollera om filter värmenätverk är igensatt Denna serviceåtgärd måste utföras av en auktoriserad servicetekniker. Innan reparation och underhåll ska alla avstängningsventilerna stängas och systemet tappas ur med hjälp av avtappningsventilerna. Efter utfört arbete; öppna först värmenätverk tillopp och därefter retur, detta för att undvika att föroreningar kommer in i systemet. -
Page 129: Kontrollera Ställdonet Och Ventilens Funktion
Alfa Laval Micro Installation, service och driftinstruktion 19.5.4 Kontrollera ställdonet och ventilens funktion Denna serviceåtgärd måste utföras av en auktoriserad servicetekniker. Ställdonets funktion kan testas genom att först göra rumstermostaten strömlös, sen spänningssätta den igen. När rumstermostaten spänningssätts görs en automatisk kontroll av ställdon och pump. -
Page 130: Underhåll Och Reparation
Alfa Laval Micro Installation, service och driftinstruktion 20 Underhåll och reparation Vid reparation kontakta din servicepartner. 20.1 Byt varmvattenställdonet och växlaren Denna serviceåtgärd måste utföras av en auktoriserad servicetekniker. Innan reparation och underhåll ska alla avstängningsventilerna stängas och systemet tappas ur med hjälp av avtappningsventilerna. -
Page 131: Byte Av Ställdon För Värmekrets
Alfa Laval Micro Installation, service och driftinstruktion 20.3 Byte av ställdon för värmekrets Denna serviceåtgärd måste utföras av en auktoriserad servicetekniker. 1. Gör värmecentralen spänningslös. 2. Skruva loss ställdonet från ventilen. 3. Koppla ur kontakten från ställdonet styrenheten genom att lossa snabbkontakten 4. -
Page 132: Byte Av Pump
Alfa Laval Micro Installation, service och driftinstruktion 20.5 Byte av pump Denna serviceåtgärd måste utföras av en auktoriserad servicetekniker. Innan reparation och underhåll ska alla avstängningsventilerna stängas och systemet tappas ur med hjälp av avtappningsventilerna. Efter utfört arbete; öppna först värmenätverk tillopp och därefter retur, detta för att undvika att föroreningar kommer in i systemet. -
Page 133: Byt Ut Differenstrycksregulatorn
Alfa Laval Micro Installation, service och driftinstruktion 20.8 Byt ut differenstrycksregulatorn Denna serviceåtgärd måste utföras av en auktoriserad servicetekniker. Innan reparation och underhåll ska alla avstängningsventilerna stängas och systemet tappas ur med hjälp av avtappningsventilerna. Efter utfört arbete; öppna först värmenätverk tillopp och därefter retur, detta för att undvika att föroreningar kommer in i systemet. -
Page 134: Driftdata Och Prestanda
(l/s) Varmvatten 80-25/10-55 0,34 0,42 70-25/10-58 0,19 0,18 65-25/10-50 0,33 0,33 21.1.2 Micro DPC, Micro RTC, Micro HTC, Micro STC, Micro STC2 Prestanda vid tillgängligt differenstryck 50-400 kPa Dimensionerande Kapacitet Primär Aktuell Sekundär design (kW) flöde retur temperatur flöde temperatur (°C) (l/s) (°C) -
Page 135: Tekniskdata
400x120x630 (mm, WxDxH) Utan kåpa Vikt 12-15kg, kåpa 2kg Elektrisk anslutning 230 V, 1-fas, 50 W Micro STC & Micro STC2 230 V, 1-fas, 25 W Micro RTC 230 V, single fas, 2 W Micro HTC Transport Total vikt 19-22 kg, 0.08 m³... -
Page 136: Måttskiss
Alfa Laval Micro Installation, service och driftinstruktion 21.3 Måttskiss Bild 58... -
Page 137: Tillval
22.2 Anslutningsskena För att spara tid och effektivisera installationen, erbjuder Alfa Laval en anslutningsskena med avstängningsventiler. Anslutningsskenan finns i tre olika modeller, med fem, sex eller sju avstängningsventiler. Bild 62 Bild 60 Bild 61 1. Montera anslutningsskenan till anslutningspunkten. Dra med 45 Nm. -
Page 138: 23 Försäkran Om Överensstämmelse
Alfa Laval Micro Installation, service och driftinstruktion 23 Försäkran om överensstämmelse... - Page 139 Consignes d'installation, d'entretien et d'exploitation pour Alfa Laval Micro Module Thermique d’Appartement pour la production de chauffage et d'eau chaude sanitaire pour appartements DOC-1357, 1 December 2014...
- Page 141 Mises en garde relatives pour Micro STC et Micro STC2 .................7 Consignes d'utilisation ......................8 Fonctionnement général ..........................8 Fonctionnement du chauffage avec Alfa Laval Micro STC et Alfa Laval Micro STC2 ......8 Fonctionnement du chauffage avec Alfa Laval Micro RTC ...............8 Inspection/équipement de sécurité......................8 Présentation générale......................
- Page 142 16.2 Courbe de la pompe ..........................48 Schéma de câblage électrique ................... 49 17.1 Micro RTC .............................. 49 17.2 Micro STC et Micro STC2 ........................50 Schéma, composants principaux ..................51 18.1 AquaMicro .............................. 51 18.2 Micro DPC .............................. 51 18.3...
- Page 143 Données de fonctionnement et performances..............64 21.1 Données de fonctionnement ........................64 21.1.1 AquaMicro ............................64 21.1.2 Micro DPC, Micro RTC, Micro HTC, Micro STC, Micro STC2 ............64 21.2 Caractéristiques techniques ........................65 21.3 Schéma de mesures ..........................66 Options ..........................67 22.1...
-
Page 144: Informations Générales
Consignes d'installation, d'entretien et d'exploitation 1 Informations générales Alfa Laval Micro est un Module Thermique d’Appartement complet prêt à être installé, pour la production de chauffage et d'eau chaude sanitaire. Il est destiné aux constructions dotées d'un raccordement à un réseau de chauffage. -
Page 145: Mises En Garde D'ordre Général
Ouvrez les vannes lentement afin d'éviter les coups de bélier. Mises en garde relatives pour Micro STC et Micro STC2 Avant de raccorder le Module Thermique à l'alimentation électrique, assurez-vous que le système de chauffage est rempli d'eau. -
Page 146: Consignes D'utilisation
Fonctionnement du chauffage avec Alfa Laval Micro STC et Alfa Laval Micro STC2 Avec Alfa Laval Micro STC ou Alfa Laval Micro STC 2, le circuit de chauffage est régulé en fonction de la température extérieure (en option) et/ou de la température souhaitée dans le logement au moyen d'un régulateur et d’une sonde d’ambiance. -
Page 147: Présentation Générale
Alfa Laval Micro Consignes d'installation, d'entretien et d'exploitation 3 Présentation générale Remarque : Les images des équipements les montrent sans l'isolation. Présentation générale d’AquaMicro Figure 1 Échangeur de chaleur et régulateur de Adaptateur pour compteur d'eau chaude température pour l'eau chaude sanitaire sanitaire Vanne de régulation pour l'eau chaude sanitaire... -
Page 148: Présentation Générale De Micro Dpc
Alfa Laval Micro Consignes d'installation, d'entretien et d'exploitation Présentation générale de Micro DPC Figure 2 Échangeur de chaleur et régulateur de Arrivée du réseau primaire de chauffage température pour l'eau chaude sanitaire Vanne de régulation pour l'eau chaude sanitaire Retour réseau primaire de chauffage Raccordement de la sonde de température,... -
Page 149: Présentation Générale De Micro Rtc
Alfa Laval Micro Consignes d'installation, d'entretien et d'exploitation Présentation générale de Micro RTC Figure 3 Échangeur de chaleur et régulateur de Sortie d'eau froide (EF) température pour l'eau chaude sanitaire Vanne de régulation pour l'eau chaude sanitaire Eau chaude sanitaire(ECS) Raccordement de la sonde de température,... -
Page 150: Présentation Générale De Micro Stc
Alfa Laval Micro Consignes d'installation, d'entretien et d'exploitation Présentation générale de Micro STC Figure 4 Échangeur de chaleur et régulateur de Régulateur de pression différentielle température pour l'eau chaude sanitaire Vanne de régulation pour l'eau chaude sanitaire Retour circuit de chauffage Raccordement de la sonde de température,... -
Page 151: Présentation Générale De Micro Stc2
Alfa Laval Micro Consignes d'installation, d'entretien et d'exploitation Présentation générale de Micro STC2 Figure 5 Échangeur de chaleur et régulateur de Retour circuit de chauffage température pour l'eau chaude sanitaire Vanne de régulation pour l'eau chaude sanitaire Départ circuit de chauffage Raccordement de la sonde de température,... -
Page 152: Présentation Générale De Micro Htc
Alfa Laval Micro Consignes d'installation, d'entretien et d'exploitation Présentation générale de Micro HTC Figure 6 Échangeur de chaleur et régulateur de Retour réseau primaire de chauffage température pour l'eau chaude sanitaire Vanne de régulation pour l'eau chaude sanitaire Eau froide (EF) Raccordement de la sonde de température,... -
Page 153: Installation
Alfa Laval Micro Consignes d'installation, d'entretien et d'exploitation 4 Installation Déballage Retirez l'emballage d'expédition et vérifiez que le produit n'a pas été endommagé pendant le transport et que la livraison est conforme aux spécifications. Lors du levage de l'appareil, veillez à ne pas appliquer de contraintes aux conduites ni à l'échangeur thermique afin de ne pas les fragiliser. -
Page 154: Options De Montage - Général
Options de montage pour Micro RTC Voir 6 Installation du système sans fil CM721. 4.4.2 Options de montage pour Micro STC Voir 5 Installation du thermostat de pièce CM737. Installez la sonde de température extérieure (en option) sur la face nord du bâtiment, à au moins 2 mètres du sol. -
Page 155: Ajustements Et Réglages Généraux
°C (environ) Alfa Laval recommande de régler au maximum la température de l’ECS à une température inférieure de 10 ºC à celle de l'entrée primaire. Avec un appareil HTC, la température doit être inférieure au maximum de 15 ºC à celle de l'entrée primaire. -
Page 156: Installation Du Thermostat De Pièce Cm737
5 Affichage de la température Touche Absence Micro STC et Micro STC2 avec CM737 sont fournis entièrement câblés. Le câblage est conforme aux règles en vigueur du marquage CE et a été soumis aux tests de sécurité électrique et aux tests de fonctionnement. -
Page 157: Installation Du Thermostat D'ambiance
Alfa Laval Micro Consignes d'installation, d'entretien et d'exploitation Appuyez sur la touche Info pour consulter : la température souhaitée de la pièce les codes d'erreur, si applicable le texte ext et la température extérieure mesurée (en cas de raccordement) ... - Page 158 Alfa Laval Micro Consignes d'installation, d'entretien et d'exploitation Photo 12...
-
Page 159: Installation De La Sonde De Température Extérieure (En Option)
Alfa Laval Micro Consignes d'installation, d'entretien et d'exploitation Installation de la sonde de température extérieure (en option) Raccordez la sonde de température extérieure à un bornier conformément au schéma électrique (si une résistance est présente, retirez-la). Si la sonde de température extérieure est raccordée ultérieurement (par exemple, en période de construction), le courant doit être coupé... -
Page 160: Réglage De L'heure
Alfa Laval Micro Consignes d'installation, d'entretien et d'exploitation b) Appuyez sur la touche pour régler le mois (par exemple, m 01 = janvier) puis confirmez en appuyant sur la touche verte de validation c) Appuyez sur la touche pour régler l'année (par... -
Page 161: Installation Du Système Sans Fil Cm721
Alfa Laval Micro Consignes d'installation, d'entretien et d'exploitation 6 Installation du système sans fil CM721 Généralités Remarque : Le thermostat d’ambiance (CM721) et la boîte-relais (BDR91) des packs systèmes sont préconfigurés en usine et DOIVENT être installés sur le même site. -
Page 162: Boîte-Relais Bdr91
Alfa Laval Micro Consignes d'installation, d'entretien et d'exploitation Touche Info (7) Fonctionnement avec compensation extérieure. La température de consigne s'affiche sur l'écran Appuyez sur la touche Info pour consulter : la température de consigne les codes d'erreur, si applicable ... -
Page 163: Préparation Du Thermostat D'ambiance
Alfa Laval Micro Consignes d'installation, d'entretien et d'exploitation Préparation du thermostat d’ambiance 6.5.1 Installation des piles Le thermostat contrôle en permanence le niveau des piles, qui doivent généralement être remplacées tous les 2 ans. Lorsque le niveau diminue, un symbole clignote sur l'écran. -
Page 164: Vérification De La Communication Rf (Mode Test)
Alfa Laval Micro Consignes d'installation, d'entretien et d'exploitation Vérification de la communication RF (mode test) Pour vérifier la communication RF : 1. Maintenez le thermostat d’ambiance à environ 2/3 mètres de la boîte-relais installée. Photo 16 2. Appuyez sur la touche OFF du thermostat puis sur en même temps avec la touche... -
Page 165: Vérification Du Système
8. Sélectionnez le mode de fonctionnement. Voir 8.1 Sélection du mode de fonctionnement. Alfa Laval conseille d'utiliser le mode MAN. 9. Le thermostat d’ambiance a été configuré en usine. Si une fonction doit être ajustée, les valeurs peuvent être modifiées. Voir 12.3 CM721–Tableau des paramètres... -
Page 166: Lier/Relier Le Cm721
Alfa Laval Micro Consignes d'installation, d'entretien et d'exploitation 7 Lier/relier le CM721 L'opération de liaison est nécessaire si : L'un des composants du système (thermostat ou boîte-relais) est remplacé. La boîte-relais a enregistré des données inappropriées ou n'a pas de données de liaison enregistrées (lorsque les composants du pack système pré-liés ont été... - Page 167 Alfa Laval Micro Consignes d'installation, d'entretien et d'exploitation Photo 22 Paramétrage du thermostat en mode de liaison Photo 23 Envoi du signal de liaison 6. Appuyez sur la touche verte pour envoyer le signal de liaison vers la boîte-relais. Le voyant rouge s'éteint pour confirmer la liaison.
-
Page 168: Fonctionnement Des Thermostats D'ambiance Cm737 Et Cm721
Pour régler le mode de fonctionnement, appuyez sur la touche AUTO, MAN ou OFF. L'écran indique le mode actif en affichant AUTO, MAN ou OFF. REMARQUE : Alfa Laval recommande le mode MAN. AUTO (automatique) le thermostat suit le programme de température intégré, par défaut ou modifié. -
Page 169: Affichage Du Programme De Chauffage
Alfa Laval Micro Consignes d'installation, d'entretien et d'exploitation Affichage du programme de chauffage Pour afficher ou modifier le programme de chauffage, utilisez la touche des PROGRAMMES pour naviguer parmi les quatre périodes de programme individuel. Thermostat d’ambiance CM737 : Utilisez le bouton DAY (JOUR) pour afficher les jours de la semaine. Vous pouvez ainsi consulter ou modifier le programme de chauffage complet sur 7 jours. -
Page 170: Modification Du Programme De Chauffage Du Cm721
Alfa Laval Micro Consignes d'installation, d'entretien et d'exploitation Modification du programme de chauffage du CM721 Pour modifier le programme de chauffage : a) Appuyez sur la touche des PROGRAMMES pour entrer en mode programmation. Les réglages de température/d'heure pour la période clignotent. -
Page 171: Fonctions Spéciales Du Cm737
Alfa Laval Micro Consignes d'installation, d'entretien et d'exploitation 9 Fonctions spéciales du CM737 Courbe de chauffage OTC Le CM737 régule la température intérieure en Courbe de chauffe 10, configurée en usine fonction de la température extérieure mesurée. La courbe de chauffage correspond au ratio entre la température de l'air extérieure mesurée et la... -
Page 172: Fonctionnement De Base Du Système Cm721
Alfa Laval Micro Consignes d'installation, d'entretien et d'exploitation 10 Fonctionnement de base du système CM721 10.1 Réglage d'une température pour la journée Pour faire fonctionner un thermostat simple avec une température de consigne unique pour la journée, sélectionnez le mode de fonctionnement manuel en appuyant sur la touche MAN. Ajustez la température en appuyant sur la touche . -
Page 173: Fonctions Spéciales Du Cm721
Alfa Laval Micro Consignes d'installation, d'entretien et d'exploitation 11 Fonctions spéciales du CM721 11.1 Indicateur de service REMARQUE : Cette fonction est disponible uniquement si elle a été activée lors de l'installation. L'indicateur SERVICE s'affiche à intervalles définis pour rappeler la nécessité... -
Page 174: Activation Des Paramètres D'installation
Alfa Laval Micro Consignes d'installation, d'entretien et d'exploitation 12 Activation des paramètres d'installation Le mode d'installation permet de modifier les paramètres d'applications spécifiques, d'utiliser des fonctions spéciales du thermostat d’ambiance d'une manière différente et changer les réglages d'usine. Les paramètres sont divisés en groupes :... -
Page 175: Cm737-Tableau Des Paramètres D'installation
Alfa Laval Micro Consignes d'installation, d'entretien et d'exploitation 12.2 CM737-Tableau des paramètres d'installation 12.2.1 CM737-Catégorie 1 : Paramètres du thermostat d’ambiance Réglage d’usine par défaut Paramètre N° de Réglage facultatif para mètre Écran Description Écran Description Affichage 12 / 24 h... -
Page 176: Cm737-Catégorie 2 : Paramètres Système
Alfa Laval Micro Consignes d'installation, d'entretien et d'exploitation 12.2.2 CM737-Catégorie 2 : Paramètres système Réglage d’usine par défaut Paramètre N° du Réglage facultatif para mètre Écran Description Écran Description Chauffage d'été en 1:SH Chauffage d'été 1 à 40 Point de consigne minimum mode OTC désactivé... -
Page 177: Cm737-Catégorie 4 : Paramètre Transparent Du Chauffage Collectif
Alfa Laval Micro Consignes d'installation, d'entretien et d'exploitation 12.2.4 CM737-Catégorie 4 : Paramètre transparent du chauffage collectif Réglage d’usine par défaut Paramètre N° du Réglage facultatif para mètre Écran Description Écran Description P_heat Bande proportionnelle I_heat Facteur intégral 0,1 / minute Temps de Temps nécessaire à... -
Page 178: Cm721-Tableau Des Paramètres D'installation
Alfa Laval Micro Consignes d'installation, d'entretien et d'exploitation 12.3 CM721–Tableau des paramètres d'installation 12.3.1 CM721-Catégorie 1 : Paramètres du thermostat d’ambiance Réglage d’usine par défaut Paramètre Paramètre Réglage facultatif N° Écran Description Écran Description Affichage 1:FH 12 heures Affichage Affichage de l'horloge... -
Page 179: Cm721-Catégorie 2 : Paramètres Système
Alfa Laval Micro Consignes d'installation, d'entretien et d'exploitation 12.3.2 CM721-Catégorie 2 : Paramètres système Réglage d’usine par défaut Paramètre Paramètre Réglage facultatif N° Écran Description Écran Description Temps de 1:tM Temps de marche 2 à 5 Sélection d'un temps marche minimum minimum égal à... -
Page 180: 13 Dépannage Du Cm737
Module Thermique a été Thermique est bien raccordé. interrompue pendant plus de 8 Au retour de l'alimentation, vous heures. devrez peut-être régler l'heure (sinon, contactez Alfa Laval). Le Module Thermique indique Appuyez sur la touche pour une erreur. Un symbole clignotant voir le code d'erreur. -
Page 181: Codes D'erreur Du Cm737
Alfa Laval Micro Consignes d'installation, d'entretien et d'exploitation 13.1 Codes d'erreur du CM737 Si une clé apparaît sur l'écran, une alarme constante est présente. Appuyez sur la touche Info pour voir le code d'erreur. Source de l'erreur Code d'erreur Pas de panne (mise sous tension) Sonde de température de départ hors plage... -
Page 182: 14 Dépannage Du Cm721
Enlevez et replacez les piles. de chauffage. Le symbole affiché. Si le symbole persiste après quelques minutes, contactez Alfa Laval. SERVICE s'affiche sur L'installateur a défini une période d'alerte Appelez votre installateur pour programmer l'écran. d'entretien planifié sur votre CM721 pour une visite d'entretien. -
Page 183: Mode Diagnostic, Cm721
Alfa Laval Micro Consignes d'installation, d'entretien et d'exploitation 14.1 Mode diagnostic, CM721 Le thermostat CM721 est doté d'un mode accessible aux utilisateurs fournissant des informations utiles à distance et permettant de vérifier le fonctionnement de la chaudière. Pour y accéder : Appuyez sur la touche OFF et maintenez la touche enfoncée pendant 5 secondes. -
Page 184: Vanne De Régulation De La Pression Différentielle, Vpd
Alfa Laval Micro Consignes d'installation, d'entretien et d'exploitation 15 Vanne de régulation de la pression différentielle, Le réglage de la vanne à pression différentielle VPD doit être effectué par un technicien agréé. 15.1 Réglage de la vanne VPD Réglez la vanne à pression différentielle à 25 kPa. -
Page 185: 16 Réglages Et Performances De La Pompe
Alfa Laval Micro Consignes d'installation, d'entretien et d'exploitation 16 Réglages et performances de la pompe La Micro STC est équipée d'une pompe Grundfos Alpha2L. 16.1 Paramètres de la pompe Grundfos Alpha2L Photo 35 Réglages Courbe de la Fonctionnement pompe Courbe de Le point de fonctionnement de la pompe se déplace vers le haut ou vers le... -
Page 186: Courbe De La Pompe
Alfa Laval Micro Consignes d'installation, d'entretien et d'exploitation 16.2 Courbe de la pompe Photo 36... -
Page 187: Schéma De Câblage Électrique
Alfa Laval Micro Consignes d'installation, d'entretien et d'exploitation 17 Schéma de câblage électrique 17.1 Micro RTC Photo 37... -
Page 188: Micro Stc Et Micro Stc2
Alfa Laval Micro Consignes d'installation, d'entretien et d'exploitation 17.2 Micro STC et Micro STC2 Photo 38... -
Page 189: Schéma, Composants Principaux
Alfa Laval Micro Consignes d'installation, d'entretien et d'exploitation 18 Schéma, composants principaux 18.1 AquaMicro Photo 39 18.2 Micro DPC Photo 40... -
Page 190: Micro Rtc
Alfa Laval Micro Consignes d'installation, d'entretien et d'exploitation 18.3 Micro RTC Photo 41 18.4 Micro STC Photo 42... -
Page 191: Micro Stc2
Alfa Laval Micro Consignes d'installation, d'entretien et d'exploitation 18.5 Micro STC2 Photo 43 18.6 Micro HTC Photo 44... -
Page 192: Consignes D'entretien
Alfa Laval Micro Consignes d'installation, d'entretien et d'exploitation 19 Consignes d'entretien Commencez toujours par les consignes d'entretien générales avant de consulter les consignes d'entretien spécifiques à chaque modèle. Afin d'éviter tout risque de brûlure, assurez-vous que personne ne tire de l'eau pendant l'entretien du Module Thermique. -
Page 193: Instructions D'entretien Stc
Alfa Laval Micro Consignes d'installation, d'entretien et d'exploitation Symptôme Raison Action Température du Filtre pour le fluide du chauffage Voir 19.5.2 Vérifiez si le filtre du fluide de système de chauffage est obstrué. obstrué chauffage trop Voir 15 Vanne de régulation de la pression Vanne de régulation de la pression... - Page 194 Alfa Laval Micro Consignes d'installation, d'entretien et d'exploitation Symptôme Raison Action Pas de chauffage La pompe de circulation ne Vérifiez que l'alimentation électrique est sous tension fonctionne pas Vérifiez la pompe de circulation Si la pompe ne parvient pas à redémarrer, essayez de la lancer avec le réglage le plus élevé.
-
Page 195: Instructions D'entretien Rtc
Alfa Laval Micro Consignes d'installation, d'entretien et d'exploitation 19.3 Instructions d'entretien RTC Symptôme Raison Action Température du Vérifiez et ajustez le programme de chauffage L'équipement de contrôle du système de du thermostat chauffage nécessite peut-être un chauffage trop Voir 8.6 Modification du programme de chauffage réglage... -
Page 196: Vérifiez Si Le Filtre Du Fluide De Chauffage Est Obstrué
Alfa Laval Micro Consignes d'installation, d'entretien et d'exploitation 19.5.2 Vérifiez si le filtre du fluide de chauffage est obstrué. Les actions d'entretien doivent être effectuées par un technicien agréé. Avant toute réparation, fermez les vannes d'arrivée primaire et les vannes d'arrêt du retour et vidangez le système via les vannes de vidange. -
Page 197: Contrôler Le Fonctionnement Du Servomoteur Et De La Vanne
Alfa Laval Micro Consignes d'installation, d'entretien et d'exploitation 19.5.4 Contrôler le fonctionnement du servomoteur et de la vanne Les actions d'entretien doivent être effectuées par un technicien agréé. Contrôler le fonctionnement du servomoteur et de la vanne Vérifiez le servomoteur en débranchant le câble électrique, puis en le rebranchant. -
Page 198: Entretien Et Réparation
Alfa Laval Micro Consignes d'installation, d'entretien et d'exploitation 20 Entretien et réparation Pour les opérations de réparation, veuillez contacter votre partenaire d'entretien local. 20.1 Remplacement du capteur et du servomoteur d'eau chaude sanitaire L'entretien doit être effectué par un technicien agréé. -
Page 199: Remplacement Du Servomoteur De Chauffage
Alfa Laval Micro Consignes d'installation, d'entretien et d'exploitation 20.3 Remplacement du servomoteur de chauffage L'entretien doit être effectué par un technicien agréé. 1. Débranchez l'alimentation électrique. 2. Dégagez le servomoteur de chauffage de la vanne. 3. Débranchez le servomoteur de chauffage du câble de la boîte de dérivation. -
Page 200: Remplacement De La Pompe
Alfa Laval Micro Consignes d'installation, d'entretien et d'exploitation 20.5 Remplacement de la pompe L'entretien doit être effectué par un technicien agréé. Avant toute réparation, fermez les vannes d'arrivée primaire et les vannes d'arrêt du retour et vidangez le système via les vannes de vidange. -
Page 201: Remplacement De La Vanne De Régulation De La Pression Différentielle
Alfa Laval Micro Consignes d'installation, d'entretien et d'exploitation 20.8 Remplacement de la vanne de régulation de la pression différentielle L'entretien doit être effectué par un technicien agréé. Avant toute réparation, fermez les vannes d'arrivée primaire et les vannes d'arrêt du retour et vidangez le système via les vannes de vidange. -
Page 202: Données De Fonctionnement Et Performances
0,42 70-25/10-58 0,19 0,18 65-25/10-50 0,33 0,33 21.1.2 Micro DPC, Micro RTC, Micro HTC, Micro STC, Micro STC2 Performances avec une pression différentielle disponible de 50 à 400 kPa Programme Puissance (kW) Débit primaire Temp. de retour Débit secondaire de température (l/s) réelle... -
Page 203: Caractéristiques Techniques
400x120x630 (mm, lxPxH) Sans couvercle Poids 12-15 kg, couvercle 2 kg Branchement électrique 230 V, 1-phase, 50 W Micro STC et Micro STC2 230 V, 1-phase, 25 W Micro RTC 230 V, phase unique, 2 W Micro HTC Transport Poids total 19-22 kg, 0,08 m³... -
Page 204: Schéma De Mesures
Alfa Laval Micro Consignes d'installation, d'entretien et d'exploitation 21.3 Schéma de mesures Photo 58... -
Page 205: Options
Alfa Laval Micro Consignes d'installation, d'entretien et d'exploitation 22 Options Les instructions de montage correspondent à une nouvelle installation. Si les kits sont destinés à être installés sur un sous-système déjà en place, vous devez évacuer la pression d'eau et débrancher l'alimentation électrique avant de commencer. -
Page 206: Barrette De Prémontage
Consignes d'installation, d'entretien et d'exploitation 22.2 Barrette de prémontage Pour gagner du temps et de l'efficacité lors de l'installation, Alfa Laval fournit une barrette de prémontage comprenant les vannes d'arrêt. La barrette de prémontage est disponible en trois modèles différents, avec cinq, six ou sept vannes d'arrêt. -
Page 207: 23 Déclaration De Conformité
Alfa Laval Micro Consignes d'installation, d'entretien et d'exploitation 23 Déclaration de conformité... - Page 209 Instructies voor installatie, onderhoud en bediening van de Alfa Laval Micro Substation voor warmwater voor verwarming en huishoudelijk gebruik in appartementen en eengezinswoningen DOC-1358, 1 December 2014...
- Page 211 4.4.2 Montageopties Micro STC ......................... 16 Aanpassingen en algemene instelling ....................17 Advies voor de inbedrijfstelling van Micro RTC en Micro STC .............. 17 Ontmanteling ............................17 Gebruiksinstructies HTC servomotor voor warm water................17 Installatie van de kamerthermostaat CM737 ..............18 Algemeen ...............................
- Page 212 Grundfos Alpha2L-instellingen ....................... 47 16.2 Pompcurve ............................. 48 Elektrisch schakelschema ....................49 17.1 Micro RTC .............................. 49 17.2 Micro STC en Micro STC2 ........................50 Schematisch diagram, hoofdonderdelen ................51 18.1 AquaMicro .............................. 51 18.2 Micro DPC .............................. 51 18.3 Micro RTC ..............................
- Page 213 De stromingschakelaar vervangen ......................63 Bedrijfsgegevens en prestaties ..................64 21.1 Bedrijfsgegevens ............................ 64 21.1.1 AquaMicro ............................64 21.1.2 Micro DPC, Micro RTC, Micro HTC, Micro STC, Micro STC2 ............64 21.2 Technische gegevens ..........................65 21.3 Maatschets ............................. 66 Opties ..........................67 22.1 Vloerverwarmingsthermostaat ........................
-
Page 214: Algemene Informatie
Instructies voor installatie, onderhoud en bediening 1 Algemene informatie Alfa Laval Micro is een kant en klaar substation voor verwarming en warm water met centraal verwarmingsnetwerk. Het is ontworpen voor gebouwen met een aansluiting op een verwarmingsnetwerk. Alfa Laval heeft jarenlange ervaring in de verwarmingsnetwerktechnologie en heeft de Alfa Laval Micro ontwikkeld met goed gepland leidingwerk zodanig dat alle onderdelen gemakkelijk toegankelijk zijn voor inspectie en mogelijk toekomstig onderhoud. -
Page 215: Algemene Waarschuwingen
Open de kleppen langzaam om drukpieken te vermijden. Waarschuwingen voor de Micro STC en Micro STC2 Zorg, voordat het substation op de netvoeding wordt aangesloten, dat het verwarmingssysteem met water is gevuld. Het systeem zonder water opstarten, zal de circulatiepomp beschadigen. -
Page 216: Bedieningsinstructies
Verwarmingswerking Alfa Laval Micro STC en Alfa Laval Micro STC2 Met een Alfa Laval Micro STC of een Alfa Laval STC 2 wordt het verwarmingscircuit in relatie tot buitentemperatuur (optie) en/of gewenste kamertemperatuur, via een kamerthermostaat en temperatuursensor geregeld. Als geen verwarming nodig is, stopt de circulatiepomp in het verwarmingscircuit automatisch, maar wordt regelmatig gestart om te verzekeren dat ze gedurende lange stilstandperioden niet vastloopt. -
Page 217: Productoverzicht
Alfa Laval Micro Instructies voor installatie, onderhoud en bediening 3 Productoverzicht Opmerking: De afbeeldingen in het productoverzicht worden getoond zonder isolatie. Productoverzicht AquaMicro Afbeelding 1 Warmtewisselaar en temperatuurregelaar voor Adapter voor warmwater-debietmeter warm water Regelklep voor warm water Verwarmingsnet, toevoer... -
Page 218: Productoverzicht Micro Dpc
Alfa Laval Micro Instructies voor installatie, onderhoud en bediening Productoverzicht Micro DPC Afbeelding 2 Warmtewisselaar en temperatuurregelaar voor Koud water (kw) warm water Regelklep voor warm water Warm water (ww) Temperatuursensoraansluiting, verwarmingsnet Besturing differentieeldruk toevoer Filter voor verwarmingsmedium Verwarmingscircuit, terugvoer... -
Page 219: Productoverzicht Micro Rtc
Alfa Laval Micro Instructies voor installatie, onderhoud en bediening Productoverzicht Micro RTC Afbeelding 3 Warmtewisselaar en temperatuurregelaar voor Besturing differentieeldruk warm water Regelklep voor warm water Verwarmingscircuit, terugvoer Temperatuursensoraansluiting, Verwarmingscircuit, toevoer verwarmingsnettoevoer Filter voor verwarmingsmedium Regelklep, verwarmingscircuit Adapter voor energiemeter... -
Page 220: Productoverzicht Micro Stc
Alfa Laval Micro Instructies voor installatie, onderhoud en bediening Productoverzicht Micro STC Afbeelding 4 Warmtewisselaar en temperatuurregelaar voor Besturing differentieeldruk warm water Regelklep voor warm water Verwarmingscircuit, terugvoer Temperatuursensoraansluiting, Verwarmingscircuit, toevoer verwarmingsnettoevoer Filter voor verwarmingsmedium Stromingschakelaar voor huishoudelijk warm water (optie) -
Page 221: Productoverzicht Micro Stc2
Alfa Laval Micro Instructies voor installatie, onderhoud en bediening Productoverzicht Micro STC2 Afbeelding 5 Warmtewisselaar en temperatuurregelaar voor 20 Servomotor, verwarmingscircuit warm water Regelklep voor warm water 21 Aansluitdoos voor netvoeding en sensors, verwarmingscircuit Temperatuursensoraansluiting, verwarmings- 22 Kamerthermostaat/bedieningspaneel nettoevoer Filter voor verwarmingsmedium... -
Page 222: Productoverzicht Micro Htc
Alfa Laval Micro Instructies voor installatie, onderhoud en bediening Productoverzicht Micro HTC Afbeelding 6 Warmtewisselaar en temperatuurregelaar voor Verwarmingsnet, retour warm water Regelklep voor warm water Koud water (kw) Temperatuursensoraansluiting, Uitlaat koud water (kw) verwarmingsnettoevoer Filter voor verwarmingsmedium Warm water (ww) -
Page 223: Installatie
Alfa Laval Micro Instructies voor installatie, onderhoud en bediening 4 Installatie Uitpakken Verwijder de transportverpakking en controleer of het product tijdens het vervoer niet is beschadigd en dat de zending overeenstemt met de specificaties. Let er bij het optillen van de eenheid op dat u geen kracht uitoefent op leidingen en de warmtewisselaar omdat dit ze kan verzwakken. -
Page 224: Montage
4.4.1 Montageopties Micro RTC 6 Installatie van het CM721 draadloze systeem. 4.4.2 Montageopties Micro STC Zie 5 Installatie van de kamerthermostaat CM737. Monteer de sensor voor buitentemperatuur (optie) op de noordzijde van het gebouw, 2 meter of hoger vanaf de grond. -
Page 225: Aanpassingen En Algemene Instelling
Instelpunt °C (ongeveer) Alfa Laval adviseert om de tapwatertemperatuur 10°C lager in te stellen dan de primaire inlaattemperatuur. In een HTC moet de temperatuur 15º lager zijn dan de primaire inlaattemperatuur. OPMERKING: Zorg dat tijdens het uitvoeren van deze aanpassing, het warme water niet met koud water wordt gemengd. -
Page 226: Installatie Van De Kamerthermostaat Cm737
Knop voor tijdwijziging 5 Temperatuurweergave 10 Knop voor vakantiefunctie Micro STC en Micro STC2 met CM737 worden volledig bedraad geleverd. De bedrading komt overeen met de van toepassing zijnde regels voor CE-markering en is getest op elektrische veiligheid en functionering. -
Page 227: Installatie Van De Kamerthermostaat
Alfa Laval Micro Instructies voor installatie, onderhoud en bediening Infoknop (7) Werkende met buitencompensatie wordt de gewenste kamertemperatuur op het display weergegeven Druk ter controle op de infoknop: Gewenste kamertemperatuur foutcode, indien van toepassing de tekst ext en gemeten buitentemperatuur (indien aangesloten) ... - Page 228 Alfa Laval Micro Instructies voor installatie, onderhoud en bediening Afbeelding 12...
-
Page 229: Installatie Van Buitentemperatuursensor (Optie)
Alfa Laval Micro Instructies voor installatie, onderhoud en bediening Installatie van buitentemperatuursensor (optie) Sluit de sensor voor de buitentemperatuur aan op een aansluitstrip volgens het elektrische diagram. Verwijder een eventuele weerstand. Als de buitentemperatuursensor later wordt aangesloten (bijvoorbeeld tijdens een constructieperiode), moet de stroom gedurende enkele minuten worden afgesloten. -
Page 230: De Tijd Instellen
Alfa Laval Micro Instructies voor installatie, onderhoud en bediening b) Druk op de knoppen om de maand van het jaar in te stellen (bijv. m 01 = januari) en druk op de groene knop om te bevestigen. c) Druk op de knoppen om het jaar in te stellen (bijv. -
Page 231: Installatie Van Het Cm721 Draadloze Systeem
Alfa Laval Micro Instructies voor installatie, onderhoud en bediening 6 Installatie van het CM721 draadloze systeem Algemeen Opmerking De individuele kamerthermostaat (CM721) en relaiskast (BDR91) in systeempakketten is voorgeconfigureerd in de fabriek en MOET daarom op dezelfde locatie worden geïnstalleerd. -
Page 232: Relaiskast Bdr91
Alfa Laval Micro Instructies voor installatie, onderhoud en bediening OK-knop (9) Als in CM737 de instellingen/waarden worden veranderd, knipperen de nummers op het display. Bevestig de nieuwe instellingen met de groene OK-knop (9) en de nieuwe instelling wordt bevestigd. Infoknop (7) -
Page 233: De Kamerthermostaat Voorbereiden
Alfa Laval Micro Instructies voor installatie, onderhoud en bediening De kamerthermostaat voorbereiden 6.5.1 De batterijen installeren De thermostaat controleert constant het niveau van de batterij die ongeveer 2 jaar meegaat voordat de batterij moet worden vervangen. Als het niveau afneemt, wordt een knipperend symbool weergegeven op het scherm. -
Page 234: Controle Rf-Communicatie (Testmodus)
Alfa Laval Micro Instructies voor installatie, onderhoud en bediening Controle RF-communicatie (testmodus) Het controleren van de RF-communicatie: 1. Houd de kamerthermostaat ongeveer 2-3 meter van de geïnstalleerde relaiskast. Afbeelding 16 2. Druk op de kamerthermostaat op de knop OFF button druk dan op de knoppen... -
Page 235: Systeemcontrole
7. De installatie is voltooid. 8. Kies de bedieningsmodus, zie 8.1 De bedrijfsmodus kiezen. Alfa Laval adviseert de MAN-modus. 9. De kamerthermostaat is af fabriek ingesteld. Als een functie moet worden afgestemd, kunnen de waarden worden veranderd met zie 12.3 CM721– Tabel installatieparameters. - Page 236 Alfa Laval Micro Instructies voor installatie, onderhoud en bediening 7 Koppelen/ontkoppelen van de CM721 De koppelhandeling is nodig indien: De systeemcomponenten (kamerthermostaat of relaiskast) worden vervangen. De relaiskast onjuiste of geen koppeldata heeft opgeslagen bijv. als voorgekoppelde systeempakketcomponenten verkeerd gecombineerd zijn.
- Page 237 Alfa Laval Micro Instructies voor installatie, onderhoud en bediening Afbeelding 22 De kamerunit in koppelmodus zetten Afbeelding 23 Het koppelsignaal versturen 6. Druk op de groene knop om het koppelsignaal naar de relaiskast te sturen. De rode LED gaat uit ter bevestiging van een succesvolle koppeling.
-
Page 238: De Kamerthermostaat Cm737 En Cm721 Gebruiken
Om de bedrijfsmodus in te stellen drukt u op de één van de knoppen AUTO, MAN of OFF. Het scherm geeft aan welke modus momenteel actief is door AUTO, MAN of OFF weer te geven. OPMERKING: Alfa Laval adviseert de modus MAN. ... -
Page 239: Het Verwarmingsprogramma Controleren
Alfa Laval Micro Instructies voor installatie, onderhoud en bediening Het verwarmingsprogramma controleren Om het verwarmingsprogramma te controleren of te bewerken, drukt u op de knoppen PROGRAM om tussen de 4 individuele programmeringsperioden te navigeren. Kamerthermostaat CM737: Gebruik de knop DAY om door elke weekdag te gaan zodat het gehele 7-daagse verwarmingsprogramma kan worden gecontroleerd of bewerkt. -
Page 240: Het Verwarmingsprogramma In De Kamerthermostaat Wijzigen
Alfa Laval Micro Instructies voor installatie, onderhoud en bediening Het verwarmingsprogramma in de kamerthermostaat wijzigen Om het verwarmingsprogramma te veranderen: a) Druk op de knoppen PROGRAM om de programmeringsmodus te openen. De tijd-/temperatuursinstellingen voor periode knipperen. De actieve periode wordt door een knipperend vierkant rond de nummers onder op het scherm gemarkeerd. -
Page 241: Speciale Functies Voor De Cm737
Alfa Laval Micro Instructies voor installatie, onderhoud en bediening 9 Speciale functies voor de CM737 OTC heating curve (OTC-verwarmingscurve) De CM737 regelt de binnentemperatuur als een Verwarmingscurve 10 (parameter 15:OC) is door de fabriek ingesteld. functie van de gemeten buitentemperatuur. -
Page 242: Basiswerking Van Het Systeem Cm721
Alfa Laval Micro Instructies voor installatie, onderhoud en bediening 10 Basiswerking van het systeem CM721 10.1 Eén temperatuur instellen voor de hele dag Selecteer de handmatige bedieningsmodus door op de knop MAN te drukken, voor de werking als een eenvoudige thermostaat met één temperatuur gedurende de dag. Stel de temperatuur in door op de knoppen te drukken. -
Page 243: Speciale Functies Voor Cm721
Alfa Laval Micro Instructies voor installatie, onderhoud en bediening 11 Speciale functies voor CM721 11.1 Service-indicator OPMERKING: Deze optie werkt alleen indien geactiveerd door de installateur. De melding 'SERVICE' wordt weergegeven bij vaste intervallen als een herinnering aan de routinecontrole van het verwarmingssysteem. -
Page 244: Activering Van Installatieparameters
Alfa Laval Micro Instructies voor installatie, onderhoud en bediening 12 Activering van installatieparameters De installatiemodus wordt gebruikt om de systeeminstellingen voor specifieke toepassingen te wijzigen, om speciale functies van de kamerthermostaat op een andere manier te gebruiken of om fabrieksparameters te wijzigen. -
Page 245: Cm737-Tabel Installatieparameters
Alfa Laval Micro Instructies voor installatie, onderhoud en bediening 12.2 CM737-Tabel installatieparameters 12.2.1 CM737-Categorie 1: Instellingen kamerthermostaat Parameter Para- Standaard fabrieksinstelling Optionele instelling meter Display Beschrijving Display Beschrijving AM-PM/ 24uurs 1:CL 24 uurs 12 uur - AM/PM weergave klokweergave klokweergave... -
Page 246: Cm737-Categorie 2: Systeeminstellingen
Alfa Laval Micro Instructies voor installatie, onderhoud en bediening 12.2.2 CM737-Categorie 2: Systeeminstellingen Parameter Para- Standaard fabrieksinstelling Optionele instelling meter Display Beschrijving Display Beschrijving Zomerverwarming 1:SH Zomerverwarming 1 to 40 Minimum instelpunt voor de in OTC-modus uitgeschakeld verwarming en de pomp blijft aan. -
Page 247: Cm737-Categorie 4: Transparante Boilerparameter
Alfa Laval Micro Instructies voor installatie, onderhoud en bediening 12.2.4 CM737-Categorie 4: Transparante boilerparameter Parameter Para- Standaard fabrieksinstelling Optionele instelling meter Display Beschrijving Display Beschrijving P_heat Proportionele band I_heat Integraalfactor 0,1 / minuut Bedrijfstijd klep Tijd nodig om klep 10 seconden... -
Page 248: Cm721- Tabel Installatieparameters
Alfa Laval Micro Instructies voor installatie, onderhoud en bediening 12.3 CM721– Tabel installatieparameters 12.3.1 CM721- Categorie 1: Instellingen kamerthermostaat Parameter Parameter Standaard fabrieksinstelling Optionele instelling Display Beschrijving Display Beschrijving AM-PM/ 24uurs 1:CL 12 uur - AM/PM 24 uurs klokweergave weergave... -
Page 249: Cm721- Categorie 2: Systeeminstellingen
Alfa Laval Micro Instructies voor installatie, onderhoud en bediening 12.3.2 CM721- Categorie 2: Systeeminstellingen Parameter Parameter Standaard fabrieksinstelling Optionele instelling Display Beschrijving Display Beschrijving Minimum boiler 1:Ot 1 minuut minimale ON- 2 tot 5 Selectie van 2, 3, 4 of... -
Page 250: Problemen Oplossen Bij De Cm737
- neem anders batterij wordt niet opgeladen contact op met Alfa Laval. (duurt max 1 uur om volledig te worden opgeladen). De netvoeding of de Controleer of de communicatieverbinding tussen... -
Page 251: Foutcodes Op Cm737
Alfa Laval Micro Instructies voor installatie, onderhoud en bediening 13.1 Foutcodes op CM737 Als op het display een steeksleutel verschijnt, is er een alarm. Druk op de Info-knop om de foutcode weer te geven. Foutbron Foutcode Geen fout (inschakelen) Temperatuursensor watertoevoer is buiten bereik... -
Page 252: Problemen Met De Cm721 Oplossen
Alfa Laval Micro Instructies voor installatie, onderhoud en bediening 14 Problemen met de CM721 oplossen Symptoom Oplossing Leeg display Geen stroom naar de thermostaat. Verwijder het batterijklepje en controleer of er batterijen geplaatst zijn. Controleer of de batterijen in de juiste richting geplaatst zijn. -
Page 253: Diagnose Modus, Cm721
Alfa Laval Micro Instructies voor installatie, onderhoud en bediening 14.1 Diagnose modus, CM721 De CM721 kamerthermostaat heeft een voor gebruikers toegankelijke modus die nuttige informatie biedt aan externe onderhoudsmonteurs en waarmee gecontroleerd kan worden of de boiler werkt. Om deze modus te activeren: Druk op de knop OFF en houd vervolgens de knop 5 seconden ingedrukt. -
Page 254: Regelklep Verschildruk , Dpc
Alfa Laval Micro Instructies voor installatie, onderhoud en bediening 15 Regelklep verschildruk , DPC Het afstellen van de verschildruk regelklep moet worden uitgevoerd door een erkende onderhoudsmonteur. 15.1 De verschildruk regelklep instellen Stel de klep af op een verschildruk van 25kPa. -
Page 255: Pompinstellingen En Pompprestaties
Alfa Laval Micro Instructies voor installatie, onderhoud en bediening 16 Pompinstellingen en pompprestaties De Micro STC is uitgeurst met een Grundfos Alpha 2L-pomp. 16.1 Grundfos Alpha2L-instellingen Afbeelding 35 Instellingen Pompcurve Functie Laagste Het werkpunt van de pomp gaat, afhankelijk van de warmte-eisen, proportionele omhoog of omlaag op de laagste proportionele drukcurve. -
Page 256: Pompcurve
Alfa Laval Micro Instructies voor installatie, onderhoud en bediening 16.2 Pompcurve Afbeelding 36... -
Page 257: Elektrisch Schakelschema
Alfa Laval Micro Instructies voor installatie, onderhoud en bediening 17 Elektrisch schakelschema 17.1 Micro RTC Afbeelding 37... -
Page 258: Micro Stc En Micro Stc2
Alfa Laval Micro Instructies voor installatie, onderhoud en bediening 17.2 Micro STC en Micro STC2 Afbeelding 38... -
Page 259: Schematisch Diagram, Hoofdonderdelen
Alfa Laval Micro Instructies voor installatie, onderhoud en bediening 18 Schematisch diagram, hoofdonderdelen 18.1 AquaMicro Afbeelding 39 18.2 Micro DPC Afbeelding 40... -
Page 260: Micro Rtc
Alfa Laval Micro Instructies voor installatie, onderhoud en bediening 18.3 Micro RTC Afbeelding 41 18.4 Micro STC Afbeelding 42... -
Page 261: Micro Stc2
Alfa Laval Micro Instructies voor installatie, onderhoud en bediening 18.5 Micro STC2 Afbeelding 43 18.6 Micro HTC Afbeelding 44... -
Page 262: Onderhoudsinstructies
Alfa Laval Micro Instructies voor installatie, onderhoud en bediening 19 Onderhoudsinstructies Begin altijd met de algemene onderhoudsinstructies voor de specifieke instructies van elk model. Zorg om verbranden te voorkomen dat niemand water gebruikt tijdens het onderhoud aan het substation. Grijs gemarkeerde onderhoudswerkzaamheden moeten worden uitgevoerd door een erkende onderhoudsmonteur. -
Page 263: Stc Onderhoudsinstructies
Alfa Laval Micro Instructies voor installatie, onderhoud en bediening Symptoom Oorzaak Wat te doen Temperatuur Filter voor verwarmingsmedia 19.5.2 Controleer of de filter voor de verwarmings- verwarmingsmedia niet is verstopt. verstopt systeem te hoog of 15 Regelklep verschildruk , DPC. - Page 264 Alfa Laval Micro Instructies voor installatie, onderhoud en bediening Symptoom Oorzaak Wat te doen Geen verwarming Circulatiepomp draait niet Controleer of de netvoeding is ingeschakeld Controleer de circulatiepomp Als de pomp na het stoppen niet start, probeer de pomp dan op de hoogste instelling te starten.
-
Page 265: Rtc Onderhoudsinstructies
Alfa Laval Micro Instructies voor installatie, onderhoud en bediening 19.3 RTC onderhoudsinstructies Symptoom Oorzaak Wat te doen Temperatuur Controleer het verwarmingsprogramma in de De verwarmingsregelapparatuur verwarmings- kamerthermostaat en stel het programma af. moet bijgesteld worden systeem te hoog of 8.6 Het verwarmingsprogramma in de... -
Page 266: Controleer Of De Filter Voor De Verwarmingsmedia Niet Is Verstopt
Alfa Laval Micro Instructies voor installatie, onderhoud en bediening 19.5.2 Controleer of de filter voor de verwarmingsmedia niet is verstopt Onderhoudswerkzaamheden moeten worden uitgevoerd door een erkende onderhoudsmonteur. Sluit voor het starten met reparatiewerkzaamheden altijd eerst de hoofdtoevoer en de retourafsluitkleppen en laat het systeem leeglopen met de aftapkleppen. -
Page 267: Controleer De Werking Van De Servomotor En Klep
Alfa Laval Micro Instructies voor installatie, onderhoud en bediening 19.5.4 Controleer de werking van de servomotor en klep Onderhoudswerkzaamheden moeten worden uitgevoerd door een erkende onderhoudsmonteur. Controleer de werking van de servomotor en klep Controleer de servomotor door het elektrische snoer uit te trekken en opnieuw te monteren;... -
Page 268: Onderhoud En Reparaties
Alfa Laval Micro Instructies voor installatie, onderhoud en bediening 20 Onderhoud en reparaties Neem bij het uitvoeren van reparaties contact op met uw plaatselijke onderhoudspartner. 20.1 De servomotor en de wisselaar vervangen Onderhoudswerkzaamheden en reparaties moeten worden uitgevoerd door een erkende onderhoudsmonteur. -
Page 269: De Servomotor Vervangen
Alfa Laval Micro Instructies voor installatie, onderhoud en bediening 20.3 De servomotor vervangen Onderhoudswerkzaamheden en reparaties moeten worden uitgevoerd door een erkende onderhoudsmonteur. 1. Sluit de voeding af. 2. Maak de servomotor los van de klep. 3. Maak de kabel van de servomotor los in de aansluitkast. -
Page 270: De Pomp Vervangen
Alfa Laval Micro Instructies voor installatie, onderhoud en bediening 20.5 De pomp vervangen Onderhoudswerkzaamheden en reparaties moeten worden uitgevoerd door een erkende onderhoudsmonteur. Sluit voor het starten met reparatiewerkzaamheden altijd eerst de hoofdtoevoer en de retour afsluitkleppen en laat het systeem leeglopen met de aftapkleppen. -
Page 271: De Differentieeldruk Klep Vervangen
Alfa Laval Micro Instructies voor installatie, onderhoud en bediening 20.8 De differentieeldruk klep vervangen Onderhoudswerkzaamheden en reparaties moeten worden uitgevoerd door een erkende onderhoudsmonteur. Sluit voor het starten met reparatiewerkzaamheden altijd eerst de hoofdtoevoer en de retour afsluitkleppen en laat het systeem leeglopen met de aftapkleppen. -
Page 272: Bedrijfsgegevens En Prestaties
(°C) (°C) Tapwatercircuit 80-25/10-55 0,34 0,42 70-25/10-58 0,19 0,18 65-25/10-50 0,33 0,33 21.1.2 Micro DPC, Micro RTC, Micro HTC, Micro STC, Micro STC2 Prestaties bij beschikbare differentieeldruk 50-400 kPa Ontworpen Capaciteit Primairdebiet Werkelijke Secundairdebiet temperatuur- (kW) (l/s) retourtemp. (l/s) programma (°C) -
Page 273: Technische Gegevens
400x120x630 (mm, BxDxH) Zonder kap Gewicht 12-15kg, kap 2 kg Elektrische aansluiting 230 V, 1-fase, 50 W Micro STC & Micro STC2 230 V, 1-fase, 25 W Micro RTC 230 V, enkele fase, 2 W Micro HTC Vervoer Totaal gewicht 19-22 kg, 0,08 m³... -
Page 274: Maatschets
Alfa Laval Micro Instructies voor installatie, onderhoud en bediening 21.3 Maatschets Detailaanzicht Afbeelding 58... -
Page 275: Opties
1°C verwarming 2) 22.2 Aansluitblok Om tijd te besparen en de installatie efficiënt uit te voeren, biedt Alfa Laval een aansluitblok inclusief afsluitkleppen. Het aansluitblok is verkrijgbaar in drie verschillende modellen met vijf, zes of zeven afsluitkleppen. Afbeelding 62... -
Page 276: Conformiteitsverklaring
Alfa Laval Micro Instructies voor installatie, onderhoud en bediening 23 Conformiteitsverklaring...
Need help?
Do you have a question about the Micro STC and is the answer not in the manual?
Questions and answers