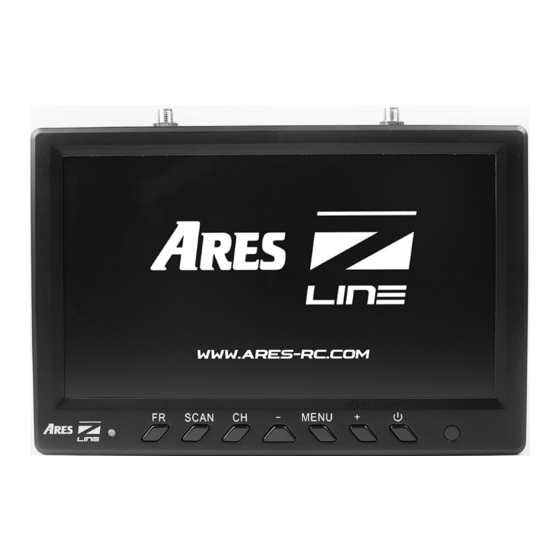
Summary of Contents for Ares Z Line AZSZ1020
-
Page 1: Instruction Manual
7’’ Standard Definition Monitor Instruction Manual Please read before use. This monitor uses the latest 5.8GHz technology and is ideal for use in conjunction with 2.4GHz/355MHz R/C systems. Made in China Part No. AZSZ1020... - Page 2 Ares Z Line FPV Monitor Enjoy the exciting photo and video opportunities that the Ares Z Line FPV monitor allows and transmit your recordings wirelessly, safely and live over a long distance. Bristling with the latest technology this cutting edge 7” 5.8GHz diversity screen is perfect for both the newcomer and regular FPV flyer.
-
Page 3: Table Of Contents
Index Contents ................Preparing your monitor ..........Charging the Li-Po battery ......... Fitting the sun shield ............Connection ports ............Display icons ..............Function buttons ............Menu structure ............... Specification ..............Accessories ..............Service and repair ............ -
Page 4: Contents
Contents of the box Please check that all parts are present and correct before using the monitor: • Ares Z Line 7” Standard Definition FPV monitor including Li-Po battery • Sunshield • 2 x 5.8GHz antenna • 12V DC cable with BEC plug •... -
Page 5: Preparing Your Monitor
Preparing your monitor WARNING: Do not power the monitor on before installing the antennas as damage may occur that is not covered by the warranty. 1. Begin by attaching the two 5.8GHz antennas to the appropriate threads and ensure they are screwed in firmly. Power for the unit is supplied by an internal Li-Po battery which must be fully charged before use. -
Page 6: Fitting The Sun Shield
Fitting the sun shield Fit the sunshield to use the screen in bright light, without limitations. Simply fix it around the screen. A standard 1/4-20 mounting thread is located on the base of the monitor. Use this to attach the screen to a regular quick-release tripod mounting plate. -
Page 7: Display Icons
Display icons Alterations to both the band and frequency will be shown on the display. If the battery indicator appears empty ( ), the internal Li-Po will need to be recharged. Operating Battery Band Channel Mode... -
Page 8: Function Buttons
Function buttons Receiver Scan Channel Menu Power Selection Mode Selection Receiver selection Choose between bands A, B and F Scan mode The screen automatically scans (Auto Scan Mode) all bands and channels Channel selection Switch between channels 1–8 Minus Reduces the brightness and the marked menu setting Menu Press once to make the icons visible. -
Page 9: Menu Structure
Menu structure Double press the MENU button to enter the Menu. By pressing the MENU button, you can scroll through the various menu steps. To adjust a setting, press the Minus - and Plus + buttons. NOTE: If no buttons are pressed within 5 seconds the menu will automatically close. -
Page 10: Specification
Specification Display size: 7”/178mm Total size: 178 x 118 x 25mm Resolution: 800 x 480 pixels Type: TFT LCD monitor; LED backlight Brightness: 400 - 450 cd/m2 Contrast: 500:1 Mounting type: 1/4-20 tripod mount Frequency: ISM 5.8GHz Ports: RF1 AV OUT (Video, mono audio output) RF2 AV OUT (Video, mono audio output) DIV AV OUT (Video, mono audio output) AV IN (Video) -
Page 11: Accessories
Monitor Battery 7.4V, 1800mA AZSZ1033 Transmitter to Monitor holder AZSZ1034 Monitor Battery Charge Adapter AZSZ1035 AC Monitor Charger AZSZ1035UK AC Monitor Charger: UK plug AZSZ1035AU AC Monitor Charger: AU plug Find more accessories on our homepage www.Ares-RC.com or check your nearest dealer. -
Page 12: Service And Repair
We at Ares RC have made every effort in component design, material selection and assembly to make our products as durable as possible. Ares Z Line products are covered under warranty only against manufacturer’s defect in materials, workmanship or assembly when it is new (before being used). - Page 13 Under no circumstances does Model Engines (Aust.) Pty. Ltd. warrant nor will the consumer be entitled to consequential or incidental damages. Model Engines (Aust.) Pty. Ltd. assumes no responsibility for any other damage, inconvenience or other claims whatsoever. Lodging a Claim To lodge a claim, present the goods to your place of purchase (retailer where you bought the product) with your original purchase receipt and a written explanation of the defect.
- Page 14 This product’s design fulfills the protective aims of the European Community relating to the safe operation of this equipment. For a copy of the Declaration of Conformity, please visit www.ares-rc.com/support Disposal Electrical equipment marked with the crossed out wheelie bin symbol must not be disposed of in household waste, but must be taken to a specialist disposal or recycling system.

Need help?
Do you have a question about the Z Line AZSZ1020 and is the answer not in the manual?
Questions and answers