Advertisement
Table of Contents
- 1 Table of Contents
- 2 Welcome Section
- 3 Information & Safety Instructions
- 4 Contents & Features
- 5 Controls
- 6 Setup
- 7 Saving a Dab/Fm Station
- 8 Selecting a Preset
- 9 Selecting DAB Station / Saving a Preset
- 10 DAB/FM Information
- 11 Reset
- 12 Manually Setting Time/Date
- 13 Setting the Alarm
- 14 Prune Function
- 15 Bluetooth
- Download this manual
Advertisement
Table of Contents

Subscribe to Our Youtube Channel
Related Manuals for MAXTEK 66992

Summary of Contents for MAXTEK 66992
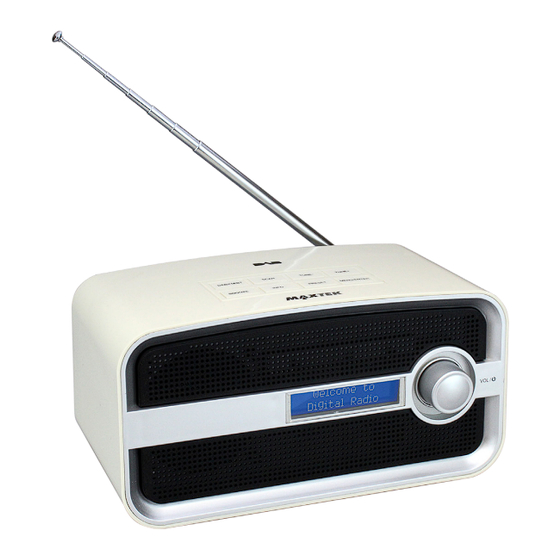
- Page 1 Ver 2.0 DAB & FM Bluetooth Radio Alarm Clock MODEL NUMBER: 66992 USER GUIDE After Sales Support UK/N.IRELAND HELPLINE N 01270 508538 REP.IRELAND HELPLINE N 1800 995 036 WEBSITE: www.quesh.co.uk EMAIL: enquiries@quesh.co.uk...
-
Page 2: Table Of Contents
Contents Welcome Section Information & Safety Instructions Contents & Features Controls Setup Selecting DAB Station / Saving a Preset Selecting a Preset Auto tuning DAB / Manually tuning DAB Auto tuning FM / Manually tuning FM DAB / FM Information Reset Manually Setting Time/Date Setting the Alarm... -
Page 3: Welcome Section
Welcome Section Congratulations! You have made an excellent choice with the purchase of this quality MAXTEK product. ® By doing so you now have the assurance and peace of mind which comes from purchasing a product that has been manufactured to the highest standards of performance and safety, supported by the high quality standards of Quesh Ltd. -
Page 4: Information & Safety Instructions
Information & Safety Instructions This radio is powered by 4 x ‘C’ size alkaline batteries (not included). Do not dispose of batteries in your household waste. Please contact your local authority for details on safe disposal. • Never throw batteries into a fire or expose to excessive heat sources. •... -
Page 5: Contents & Features
Contents & Features Contents 1 x DAB / FM & Bluetooth Radio 1 x 5V Mains Adaptor Features • DAB receiver (174MHz - 240MHz) • FM receiver (87.5MHz - 108.00MHz) • Stores 10 FM presets • Stores 10 DAB presets •... -
Page 6: Controls
Controls Volume & Standby Dial LCD Display Scan Tune - Tune + DAB / FM / BT Snooze Menu / Enter Info Preset Battery Cover 5V DC IN Headphone Port After Sales Support UK/N.IRELAND HELPLINE N 01270 508538 REP.IRELAND HELPLINE N 1800 995 036 WEBSITE: www.quesh.co.uk... -
Page 7: Setup
Setup First time use After removing the radio from the packaging, fully extend the telescopic aerial and connect the mains adaptor to the mains outlet and the power lead to the ‘DC in’ socket located on the back of the radio. -
Page 8: Saving A Dab/Fm Station
Instructions Selecting a DAB station Press the Tune +/- buttons to cycle through the available stations. All the stations are displayed in alphabetical order. Once you have found the required DAB/FM station to listen to, press the ‘Menu/Enter’ button to select it. The station will only change once it has been selected, so you can browse the available stations without disturbing the current selected station. -
Page 9: Selecting Dab Station / Saving A Preset
Instructions Selecting a preset DAB/FM station Press the ‘Preset’ button, cycle through the saved presets by pressing the Tune +/- buttons. To select a preset press the ‘Menu/ Enter’ button to select it. Auto Tune DAB To fully retune all of the available stations on DAB press the ‘Menu/ Enter’... - Page 10 Instructions Auto Tune FM To auto tune to the next available radio station press and hold the ‘Tune +’ button for 3 seconds. This will start the radio to auto scan. The scan will always stop and the next received signal. Repeat the storing preset procedure to save the current station.
-
Page 11: Dab/Fm Information
Instructions DAB/FM information When listening in DAB or FM mode you can cycle through the available information from the broadcasting service by pressing the ‘Info’ button. The information cycle: • Now Playing • Now Playing • Signal Strength • Station Name •... -
Page 12: Manually Setting Time/Date
Instructions Manually Setting the Time/Date Press ‘Menu/Enter’ and cycle through using the tune +/- buttons. Select ‘System’ by pressing the ‘‘Menu/Enter’ . Cycle through the next menu and select ‘Time’ . Select the ‘Set Time/Date’ time option. You will see the hours flashing first. -
Page 13: Setting The Alarm
Instructions Setting the Alarms There are 2 alarms that you can set on this radio. Both are set in the same way. To select the first alarm press the ‘Snooze’ button once. To select the second alarm press the ‘Snooze’ button twice. Once you have chosen the required alarm to set press the ‘Menu/Enter’... - Page 14 Instructions The next step is to choose and set the frequency of the alarm. Your options will be ‘Daily’ , ‘Once’ , ‘Weekends’ , or ‘Weekdays’ . press ‘Menu/Enter’ select and confirm the required option for your alarm. You will now be able to set the volume level for your alarm. Use the Tune +/- to set the volume level and press the ‘Menu/Enter’...
-
Page 15: Prune Function
Instructions Once saved you will see the main screen appear with the bell icon in the top right corner of the display. This indicates the alarm(s) is active. Instructions Prune You can remove DAB stations from the radio that are listed with a ‘?’ in front of their name by using the prune function. - Page 16 Instructions DRC or Dynamic Range Compression is a feature that some DAB stations use. This enables the audio to be evened out by raising the volume of the quieter audio levels and lowering the volume of the louder audio levels. To set this press the ‘Menu/Enter’...
-
Page 17: Bluetooth
Make sure your bluetooth device is active and in pairing mode. Search for “MAXTEK DAB” in your available bluetooth device list and select it. There is no security so the unit will pair automatically. A voice will confirm that the bluetooth device is connected and ‘Bluetooth’... - Page 18 Warranty Certificate Warranty This product is warranted to be free from defects in workmanship and parts for a period of 36 months from the date of purchase. Defects that occur within this warranty period, under normal use and care, will be repaired, replaced or refunded at our discretion, solely at our option with no charge for parts and labour.
- Page 19 Warranty Card DAB & FM Bluetooth Radio Alarm Clock Model Number: 66992 Please keep your purchase receipt together with your warranty card Name: Address: Date of purchase: Location of purchase: Fault Description: We recommend that you attach a photocopy of your receipt, showing the date of purchase, to this warranty card and keep it for your reference.
Need help?
Do you have a question about the 66992 and is the answer not in the manual?
Questions and answers