Table of Contents
Advertisement
Advertisement
Table of Contents

Related Manuals for Goclever Navio 520

Summary of Contents for Goclever Navio 520
- Page 1 OPERATION MANUAL...
-
Page 2: Table Of Contents
1.1.14. 1.1.15. FM Transmitter 1.1.16. Multimedia Calibration About the device 3.1.1. GPS signal 3.1.2. NAVIO 520 technical parameters table 3.1.3. Caring for Your Goclever Preparation for the start-up 3.1.4. Basic Information 3.2. 3.2.1. Navigating to a point 3.2.2. Navigation modes 3.2.3. -
Page 3: Welcome
The functionality of the receiver may be NOTE limited or inactive in your house and in the • GOCLEVER set is intended to help in majority of other buildings where the GPS navigation, not for precise measurement of signal is too weak. It is a normal phenomenon distance, height, position or time. -
Page 4: Safety And Proper Usage
WARNING! The lithium-ion battery, which is a part of this When you use the GOCLEVER while driving, it is device, has to be recycled and safely disposed. Do important to drive the vehicle with diligence and not dispose the waste in households or burn their attention. - Page 5 Hit or dented casing may result in serious, NOTE! irreversible damage to the device or battery. The media player, which is one of the device Charge the battery or connect the device features can only be used to play songs, to which car battery adapter, if: Battery indicator level shows you own the copyright or were purchased / significant battery exhaustion.
-
Page 6: Introduction
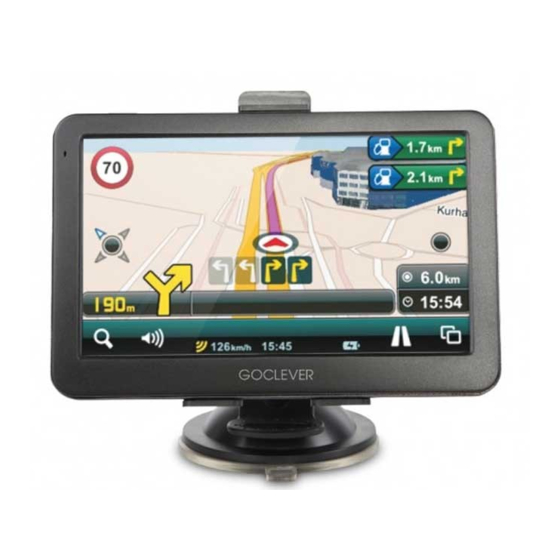
Strap (with stylus pen) Car charger Car holder (with suction cup) USB cable for PC connection Car holder User manual (with suction cup) Car charger USB cable for PC connection NAVIO 520 Navigation System... -
Page 7: Sockets
6. Sockets recommend connect GOCLEVER NAVIO 520 to car's power supply (12V cigarette lighter) whenever you use it to ensure an adequate level of battery charge. GOCLEVER NAVIO 520 navigation system can also be charged by means of computer USB port, but we do not recommend it, since it lengthens the charging time. -
Page 8: Mounting The Device In A Car
MOUNTING THE DEVICE IN A CAR Place the Goclever i n a place that provides Mounti ng is composed of two parts the best GPS signal reception. • GPS signal interference can be caused by... -
Page 9: Turning The Device On
SWITCHING 12. SETTINGS Firstly , the Goclever logo screen is displayed. Remember: You don't have to go into the settings menu before running the navigation program. Then, the start screen is shown By clicking the icons, you can customize, e.g. things, the wallpaper, of the navigation system with access to the basic language, brightness, volume, USB mode. -
Page 10: Fm Transmitter
FM TRANSMITTER • FM transmitter allows you to transfer music from your device to any FM radio receiver, e.g. car radio. The device has to be connected to the charger while you use it in the transmitter mode, because the charger cord serves as an antenna. -
Page 11: Calibration
CALIBRATION This feature calibrates the screen of the device for precise reading of clicks. You need it only if the touch screen responds imprecisely. This screen shows your current position in degrees of latitude longitude, and altitude. The compass shows the image of satellites whose signal is received by the device, and the bar graph next to it, the strength of their signal. -
Page 12: Navio 520 Technical Parameters Table
Your car may have the front athermic or heated windscreen and these material properties of the windscreen may also interfere the GPS signal. TECHNICAL PARAMETERS TABLE FEATURE: TECHNICAL SPECIFICATIONS Processor Mstar MSB2531, 800 MHz (Cortex A7) CPU 5.0” 480x272 Display Operating system Windows CE 6.0 Expansions slot... -
Page 13: Caring For Your Goclever
It is important to take care of your Goclever Navio 520 and clean it correctly. Use a soft cloth to wipe the screen of the Goclever NAVIO 520. Do not use any liquid cleaning agents or corrosive substances. ... -
Page 14: Preparation For The Start-Up
PREPARATION FOR THE START-UP In order to run GOCLEVER Maps turn on the device and select in the main menu the Navigation icon. 21.1 BASIC INFORMATION W hen you start the progra m you will see the map. You can move the map by holding and moving your... - Page 15 Search for the address: streets, POIs, longitude/latitude, all. Volume adjustment. Quality of the GPS signal current speed, time. Calls the menu. Navigation button, the corner marked with blue colour indicates the direction of north. When you touch its menu button Map moving button.
- Page 16 After touching the navigation button and selecting from menu point on the map: Select the point on the map. Enlarging buton, after touching the button once and after double touching its menu. Auto zoom – default view of the 3D map when navigating in cities, in undeveloped areas it automatically changes to 2D view.
- Page 17 There are three view modes available, includi ng three which can be modified. It is not possible to change the Auto zoom view. After setti ng the desired map view, to save it, it is necessary to: unfold the enlarge button menu ...
-
Page 18: Navigating To A Point
21.2 NAVIGATION TO A POINT The most common task of the navigation system is leading to a set point. In Goclever Maps this task is performed as follows : Clock and enter the name of the town in the right field, and the street and house num ber in... -
Page 19: Navigation Modes
21.3 NAVIGATION MODES SEARCHI NG CRITERI A Navigation window and its description : Select address search fro m searching results (by pressing the result ). Distance esti mated arrival time Then select: Traffic lane assistant fro m the menu to auto matically set the route and launch the navigation proce s. -
Page 20: Route Menu
Displaying the current GPS position on the map. The map automatically displays important POIs along the rouge, e. g. gas stations. to set the detour to this poi nt; after After pressing this field, you may select the option pressi ng the detour, it can be cancelled. IMPORTANT! The software will automatically calculate the route in the case of a wrong manoeuvre and adding a detour or intermediate points. - Page 21 By selecti ng you will display the console Current speed GPS signal quality and position accuracy in metres Co mpass Altitude above sea level Distance to the next manoeuvre Geographical coordinates of the current position...
- Page 22 By selecti ng you will display the manoeuvre By selecti ng will display console. list By selecti ng in the current route in „Opcje trasy [Route By selecti ng options” you can make changes. you can display the route on the map Select route type availabl e routes...
-
Page 23: Change The Destination And Add New Points To The Route
21.4.1 CHANGE THE DESTINATION AND ADD NEW POINTS TO A ROUTE Change of the route or addition of a new po int to a route is done as follows: Launches search window. Search the desired object like when Selection of location as a destination . selecting location in item 21.2 of the manual select... -
Page 24: Route Simulation
21.5 ROUTE SIMULATION To search for route poi nts, proceed accordi ng to item 18.2. After finding the starting point in the menu: then, after selecting the destination, select select Menu The device will automatically calculate the route. To launch the simulation, i n the Trasa [Route] Aktualna trasa [Current route] select... -
Page 25: Searching For Pois
21.6 SEARCHING FOR POIS Launches the searchi ng option, then change the upper left corner of the screen to Searchi ng for POIs is done without the need to specify the cat egories of searchi ng for an object. For instance, if you enter ‘Neste’, the search engine will call all POIs contai ning this phrase. - Page 26 W hen you enter ‘Neste’ additionally entering a city, e.g. ‘Poznań’, the search engi ne will call all POIs with this phrase in a given city. The application automatically displays the notification on the most important POIs when navigating, see poi nt 21.4 of the manual. After fi nding a location/address or i ndicati ng the poi nt on the map, you can fi nd the nearest POIs.
- Page 27 The map has automatic searchi ng activated By pressi ng and selecti ng we can choose from the list one category, several selected ones, or use to select all categories anew.
- Page 28 After selecting POI category, press to display POI search results.
-
Page 29: Routes Logs
21.7 ROUTES LOGS The application, after setti ng out the route during navigation, automatically saves the route trace. Route traces are saved for 30 days. Traces older than 30 days are automatically deleted. To view the route traces, select Menu, then Historia [History] i n Za pamiętane Trasy [Saved Routes] tab to select the presentation of the route of your choice, e.g . - Page 30 The saved route can be displayed on the map, usi ng It is also possible to lock the trace against deletion, by pressi ng the icon: will change to: The trace can be exported to kml file usi ng the icon.
-
Page 31: Display Mode
21.8 DISPLAY MODES The Goclever Maps navigation program may operate in two display modes, in daytime and nighttime mode. The user may independently determine the program display mode, by manually setting ‘DZIENNY [DAYTIME]’ or ‘NOCNY [NIGHTTIME]’, or set the AUTOMATIC mode, in which the software will switch the display mode itself by using the internal clock of the device (mode switching time depending on the astronomical time). -
Page 32: Free Map Update
21.9 FREE MAP UPDATE Every buyer of Goclever NAVIO 520 is provided with a possibility of free update of the map of Poland installed in the device (Goclever Maps) for 12 months upon purchase. Updates are usually released once a quarter. -
Page 33: Terms Of Warranty
Guarantor. 6. Guarantee for LCD displays and batteries installed in GOCLEVER devices is 6 months from the purchase date, but is not longer than 9 months from the production date, in TFT LCD screens 3.5” to 10” up to 3 wrong pixels are acceptable (white, black or ‘sub-pixels’). - Page 34 30 days. The complaining party is obliged to report a defect using a complaint form at rma.goclever.com. In the case of not reporting a defect and sending it to the Warrantor without obtaining a complaint number, the delivery will not be accepted for maintenance.
- Page 35 Warrant y a nd after-warra nty mai ntenance service : r ma.goclever.co m T echnical helpli ne , telephone no.: 61 848 87 67 ( Mon-Fri , 9:00 AM -4:30 PM) If you ha ve a ny questio ns, send t h e m via e-mail to: ser wis@goclever.co m...
- Page 36 Statement of Compliance and placing the CE mark on the product. The full document of the Statement of Compliance is available at our website : www.goclever.com, in the tab on a given product model. The file (pdf format) with a Statement of Compliance is placed among the tabs.
- Page 37 Importer GOCLEVER Sp. z o.o. ul. Skórzewska 35 Wysogotowo (Poznań) 62-081 Przeźmierowo, POLAND, EU. www.goclever.com Helpline/Technical assistance: phone no. +48 618488767, fax: +48 616417422 serwis@goclever.com...
Need help?
Do you have a question about the Navio 520 and is the answer not in the manual?
Questions and answers